
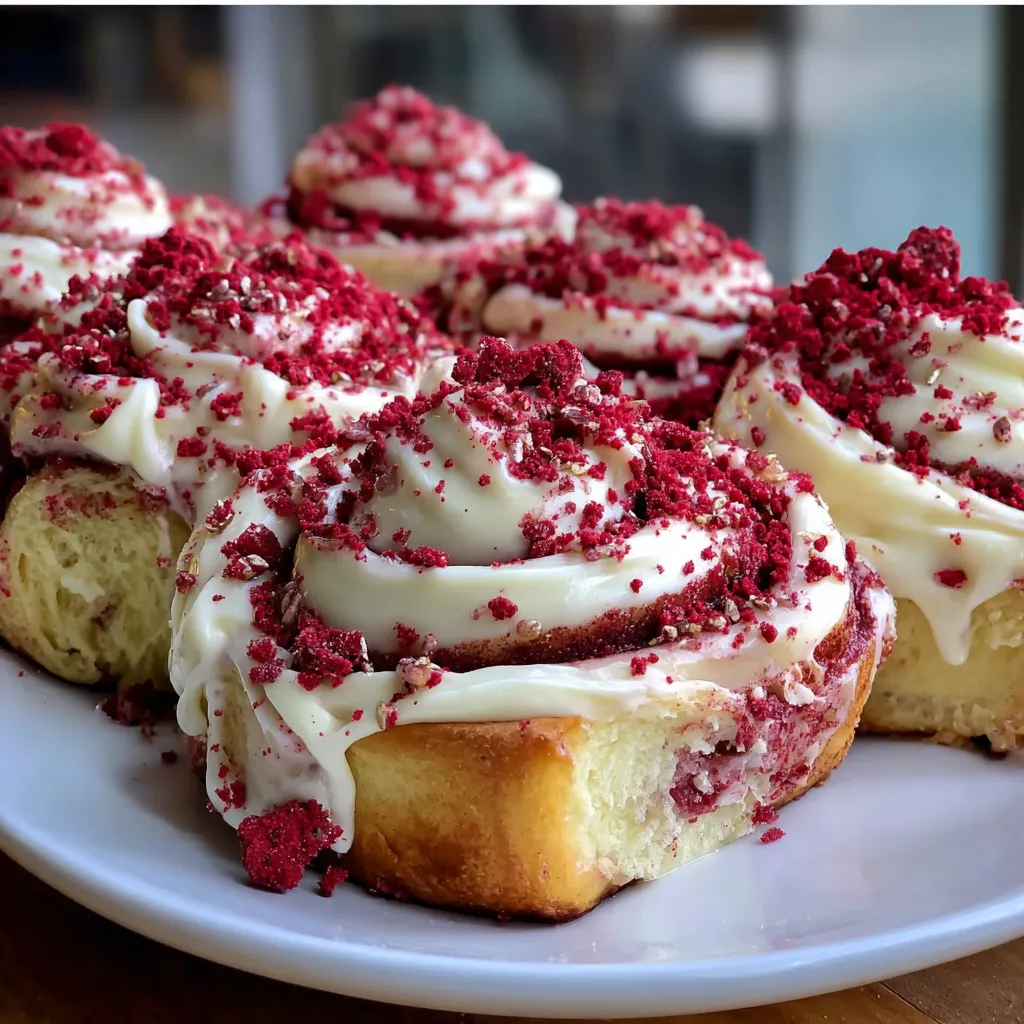
Okay, so someone looked at red velvet cake and cinnamon rolls—two already perfect things—and said “what if we just… smash them together?” And that’s how we got Red Velvet Cinnamon Rolls. These are soft, fluffy cinnamon rolls with cocoa and red food coloring in the dough, a cream cheese filling swirled through the middle, and cream cheese frosting piled on top like your life depends on it. They’re basically red velvet cake pretending to be breakfast, and honestly? We’re here for it. The dough is tender and slightly chocolatey, the filling is tangy and sweet, and the frosting situation is exactly as excessive as it should be. I made these for Valentine’s Day brunch once and my partner proposed again. Okay, that didn’t happen, but they DID say these were better than anything from a bakery. Another time I brought them to a potluck and someone tried to leave with the whole pan. These rolls inspire theft, marriage proposals, and questionable life decisions.
Why You’ll Love This Recipe
Two desserts in one. Red velvet cake meets cinnamon rolls. It’s a love story.
Stunning presentation. That red swirl when you cut them? Chef’s kiss. Instagram gold.
Perfect for special occasions. Valentine’s Day, Christmas, anniversaries, or “I want to feel fancy” Tuesday.
Cream cheese everything. In the filling AND the frosting. Double cream cheese is always the answer.
Soft and pillowy. These rolls are cloud-like. Tender, fluffy, absolutely perfect texture.
Make-ahead friendly. Prep the night before, bake fresh in the morning. Wake up to glory.
Crowd goes wild. People lose their minds over these. Guaranteed recipe requests.
The Good Stuff You’ll Need
For the Dough:
- 4 cups all-purpose flour (plus more for dusting)
- 1/4 cup granulated sugar
- 1/4 cup unsweetened cocoa powder
- 1 packet (2 1/4 tsp) instant yeast
- 1 tsp salt
- 1 cup whole milk, warmed (110°F)
- 1/4 cup unsalted butter, melted
- 2 large eggs, room temperature
- 1-2 tbsp red gel food coloring
- 1 tsp vanilla extract
For the Cream Cheese Filling:
- 8 oz cream cheese, softened
- 1/2 cup granulated sugar
- 1 tsp vanilla extract
- 1/4 cup unsalted butter, softened
- 2 tsp ground cinnamon
For the Cream Cheese Frosting:
- 8 oz cream cheese, softened
- 1/4 cup (1/2 stick) unsalted butter, softened
- 3 cups powdered sugar
- 2 tsp vanilla extract
- 2-3 tbsp milk or heavy cream
- Pinch of salt
For Topping:
- Red velvet cake crumbs or red sprinkles (optional but gorgeous)
Equipment:
- Stand mixer with dough hook (or strong arms)
- Rolling pin
- 9×13 inch baking pan
- Parchment paper
- Dental floss or sharp knife for cutting
Let’s Do This
Step 1: Make the Dough
In the bowl of a stand mixer (or large bowl if doing this by hand), combine 2 cups flour, sugar, cocoa powder, yeast, and salt. Whisk to combine.
In a measuring cup, combine warm milk, melted butter, eggs, red food coloring, and vanilla. Mix well. The milk should be warm but not hot—around 110°F. Too hot kills the yeast. Too cold won’t activate it.
Pour the wet ingredients into the flour mixture. Mix on low speed (or with a wooden spoon) until combined.
Add remaining flour, 1/2 cup at a time, mixing between additions. Once the dough starts to come together, switch to the dough hook (or turn it out onto a floured surface to knead by hand).
Knead for 6-8 minutes in the mixer (or 10 minutes by hand) until the dough is smooth, elastic, and slightly tacky but not sticky. If it’s too sticky, add flour 1 tablespoon at a time. If too dry, add milk 1 teaspoon at a time.
The dough should be deep red and feel soft. Form it into a ball.
Step 2: First Rise
Grease a large bowl with butter or oil. Place the dough in the bowl, turning once to coat all sides.
Cover with a damp towel or plastic wrap. Let rise in a warm place for 1-1.5 hours until doubled in size.
Pro tip: Turn your oven on to the lowest setting for 1 minute, then turn it off. Put the covered bowl in there—it’s the perfect warm environment for rising.
Step 3: Make the Cream Cheese Filling
While the dough rises, make your filling. In a medium bowl, beat together softened cream cheese, sugar, vanilla, butter, and cinnamon until smooth and creamy.
The mixture should be spreadable but not runny. If it’s too stiff, leave it at room temp to soften more. Set aside.
Step 4: Roll Out the Dough
Once the dough has doubled, punch it down to release the air. Turn it out onto a lightly floured surface.
Roll the dough into a large rectangle, about 16×12 inches. Try to keep the edges relatively straight—this makes cutting easier later.
The dough should be about 1/4 inch thick. Don’t roll it too thin or the filling will leak out.
Step 5: Add the Filling
Spread the cream cheese filling evenly over the entire surface of the dough, leaving a 1/2-inch border along one long edge (this helps it seal).
Make sure the filling goes all the way to the other three edges. Be generous. This is not the time for restraint.
Step 6: Roll It Up
Starting from the long edge WITHOUT the border, tightly roll the dough into a log. Keep it tight and even as you roll. Loose rolls = gaps and sadness.
When you get to the end, pinch the seam to seal it. Place the log seam-side down.
Step 7: Cut the Rolls
Here’s where dental floss comes in handy. Slide a piece of unflavored dental floss (or thread) under the log, cross the ends over the top, and pull to slice cleanly through. This prevents squishing.
If using a knife, use a sharp serrated knife and a gentle sawing motion. Don’t press down hard or you’ll squash them.
Cut the log into 12 equal pieces, each about 1.5 inches thick.
Step 8: Second Rise
Grease a 9×13 inch baking pan or line it with parchment paper. Arrange the rolls in the pan, cut-side up, spacing them slightly apart. They’ll expand and touch during rising/baking.
Cover with a towel and let rise for 30-45 minutes until puffy and nearly doubled. They should look soft and jiggly.
While they rise, preheat your oven to 350°F (175°C).
Step 9: Bake
Bake for 22-27 minutes until the rolls are set and lightly golden on top. The centers should be cooked through but still soft.
Don’t overbake or they’ll be dry. They should look slightly underdone when you pull them out—they continue cooking in the pan.
Let them cool in the pan for 10-15 minutes while you make the frosting.
Step 10: Make the Frosting
In a medium bowl, beat together softened cream cheese and butter until smooth and creamy.
Add powdered sugar, one cup at a time, beating on low after each addition. Add vanilla, salt, and 2 tablespoons milk.
Beat on medium-high for 2-3 minutes until light and fluffy. If too thick, add more milk 1 tablespoon at a time. If too thin, add more powdered sugar.
The frosting should be thick but spreadable, like thick pudding consistency.
Step 11: Frost and Devour
While the rolls are still warm (not hot), generously spread or pipe the cream cheese frosting over the top. Go heavy. This is not the time for portion control.
If using red velvet cake crumbs or red sprinkles, scatter them over the wet frosting now for that stunning red-on-white contrast.
Serve warm and watch people lose their minds. Try not to eat them all in one sitting. This is extremely difficult.
Serving Suggestions
These are basically perfect as-is, but here are some ideas:
- Serve warm with coffee or hot chocolate
- Pair with fresh strawberries or raspberries
- Drizzle with extra cream cheese frosting (there’s no such thing as too much)
- Warm individual rolls for 10 seconds in the microwave before eating
- Serve at brunch with champagne or mimosas
- Package individually for Valentine’s Day gifts
- Serve on a pretty platter with fresh flowers for presentation
Switch It Up
Blue Velvet: Use blue food coloring instead of red for a fun twist.
Double Chocolate: Add chocolate chips to the filling for extra chocolate chunks.
White Chocolate Drizzle: Melt white chocolate and drizzle over the frosted rolls.
Nutella Swirl: Add a layer of Nutella with the cream cheese filling.
Orange Cream: Add orange zest to the dough and frosting for red velvet-orange rolls.
Espresso: Add 1 tbsp instant espresso powder to the dough for mocha vibes.
Mini Rolls: Cut into 18 smaller rolls for bite-sized portions.
Pecans or Walnuts: Sprinkle chopped nuts over the filling before rolling.
Storage and Make-Ahead Tips
These are perfect for making ahead, which is clutch for holiday mornings.
Make-ahead method 1 (overnight): Prepare through step 7 (cut rolls). Place in greased pan, cover tightly with plastic wrap, and refrigerate overnight. In the morning, let sit at room temp for 30 minutes, then bake.
Make-ahead method 2 (freeze before baking): Prepare through step 7. Freeze rolls on a baking sheet, then transfer to freezer bags for up to 2 months. Thaw overnight in fridge, let come to room temp, then bake.
Room temperature: Store frosted rolls in an airtight container for up to 2 days. They’ll stay soft and delicious.
Refrigerate: Keep in the fridge for up to 5 days. Reheat individual rolls in the microwave for 15-20 seconds.
Freeze baked rolls: Freeze unfrosted baked rolls for up to 2 months. Thaw, warm, then frost before serving.
Frosting: Make frosting up to 3 days ahead and refrigerate. Bring to room temp and rewhip before using.
Why This Works So Damn Well
Red Velvet Cinnamon Rolls work because they combine the best elements of both desserts. The cocoa in the dough adds subtle chocolate flavor without making them taste like chocolate cinnamon rolls (which would be weird). The small amount of cocoa creates that distinctive red velvet taste—barely chocolate, mostly vanilla, absolutely delicious.
The red gel food coloring is essential for the dramatic visual impact. When you cut into these rolls, the red spiral against the white cream cheese filling and frosting is stunning. Liquid food coloring won’t give you the same vibrant color and adds too much liquid to the dough.
Using instant yeast makes this process faster and more reliable than active dry yeast. You can mix it directly into the flour without proofing it first, which saves time and reduces the chance of killing your yeast with water that’s too hot.
The cream cheese in both the filling and frosting is what makes these distinctly red velvet. Traditional cinnamon rolls use butter and cinnamon sugar. The tangy cream cheese balances the sweetness and creates that signature red velvet flavor profile.
Rolling the dough tightly is crucial for getting defined spirals. Loose rolls create gaps where filling leaks out and the swirl pattern is less dramatic. The dental floss cutting method prevents squashing the rolls and maintains that beautiful spiral shape.
Letting the rolls cool slightly before frosting prevents the frosting from melting completely, but they should still be warm enough that the frosting gets slightly melty and soaks into the crevices. This creates the perfect gooey, creamy situation.
When to Make These
Valentine’s Day: The red color and romantic vibe make these perfect for February 14th.
Christmas morning: Festive red color fits the holiday perfectly.
Birthday brunch: Better than birthday cake for breakfast.
Mother’s Day: Moms deserve fancy breakfast. Make these.
Anniversary celebration: Start the day right with impressive rolls.
Bridal or baby shower: Elegant enough for fancy occasions.
Sunday morning: Because you deserve something special. It’s self-care.
Questions People Actually Ask
Q: Can I make these without a stand mixer? A: Yes! Mix with a wooden spoon, then knead by hand for 10 minutes. Your arms will get a workout but it’s doable.
Q: My dough isn’t rising. What happened? A: Your yeast is dead (expired or killed by hot liquid), or your rising location is too cold. Make sure milk is 110°F and let dough rise somewhere warm.
Q: The rolls are dry. Why? A: You overbaked them, or the dough didn’t have enough moisture. They should look slightly underdone when you pull them out.
Q: Can I use liquid food coloring? A: Gel is way better. Liquid won’t give you vibrant color and adds too much moisture to the dough. Use gel.
Q: Do I have to use cocoa powder? A: For true red velvet flavor, yes. It’s a small amount and creates that distinctive taste.
Q: My filling is leaking out everywhere. Help! A: You overfilled them, didn’t seal the edge well, or rolled them too loosely. Use slightly less filling next time and roll tighter.
Q: Can I make these in a different pan? A: Sure. Use two 9-inch round pans (6 rolls each) or a 9×9 pan (9 rolls). Adjust spacing accordingly.
Q: The cream cheese frosting is too soft to spread. A: Refrigerate it for 15 minutes to firm up. If still too soft, add more powdered sugar.
Q: How do I know when the dough has risen enough? A: It should double in size. Poke it gently—if the indentation stays, it’s ready. If it springs back immediately, it needs more time.
Print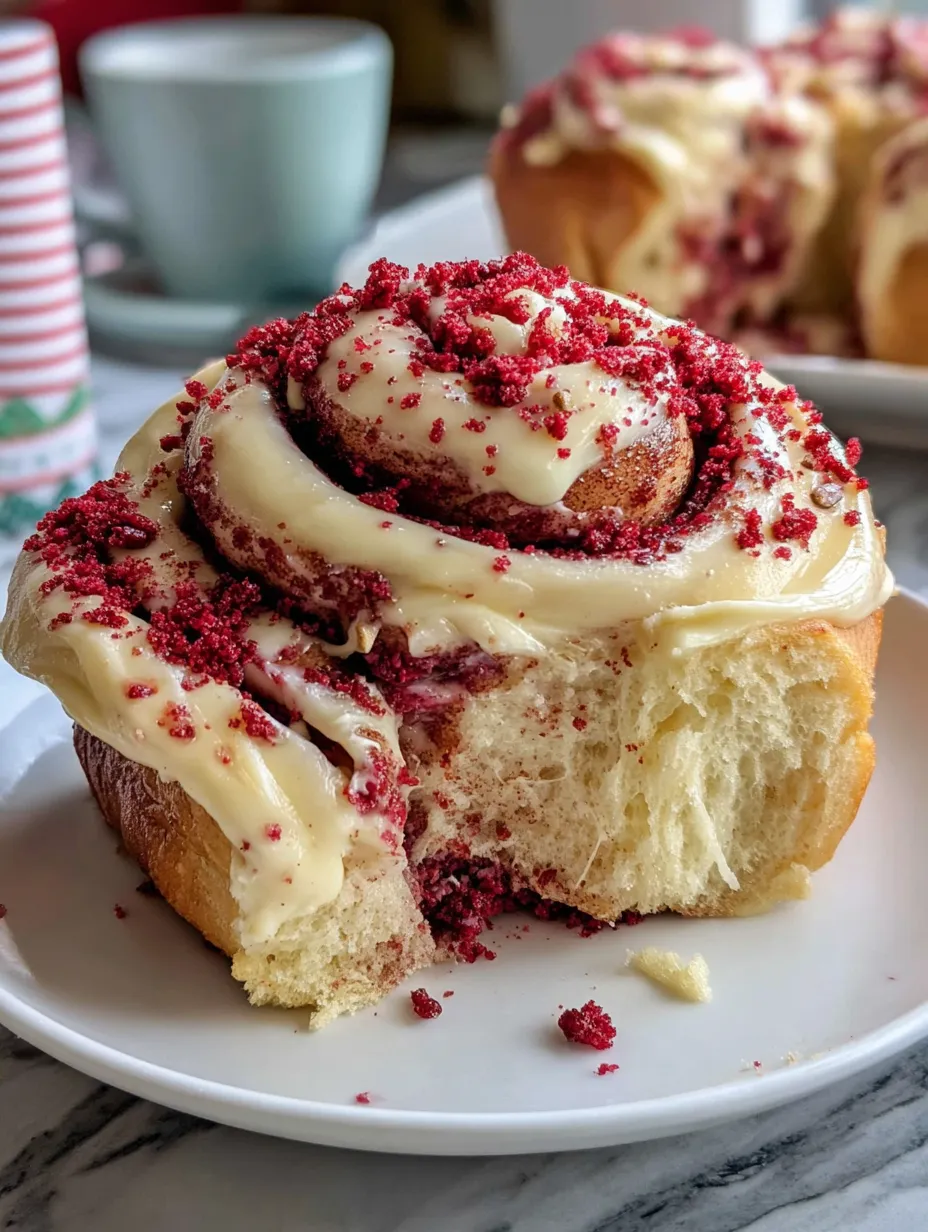
Red Velvet Cinnamon Rolls
- Total Time: 55 minutes
- Yield: 12 large rolls 1x
Description
Okay, so someone looked at red velvet cake and cinnamon rolls—two already perfect things—and said “what if we just… smash them together?” And that’s how we got Red Velvet Cinnamon Rolls. These are soft, fluffy cinnamon rolls with cocoa and red food coloring in the dough, a cream cheese filling swirled through the middle, and cream cheese frosting piled on top like your life depends on it. They’re basically red velvet cake pretending to be breakfast, and honestly? We’re here for it. The dough is tender and slightly chocolatey, the filling is tangy and sweet, and the frosting situation is exactly as excessive as it should be. I made these for Valentine’s Day brunch once and my partner proposed again. Okay, that didn’t happen, but they DID say these were better than anything from a bakery. Another time I brought them to a potluck and someone tried to leave with the whole pan. These rolls inspire theft, marriage proposals, and questionable life decisions.
Ingredients
For the Dough:
- 4 cups all-purpose flour (plus more for dusting)
- 1/4 cup granulated sugar
- 1/4 cup unsweetened cocoa powder
- 1 packet (2 1/4 tsp) instant yeast
- 1 tsp salt
- 1 cup whole milk, warmed (110°F)
- 1/4 cup unsalted butter, melted
- 2 large eggs, room temperature
- 1–2 tbsp red gel food coloring
- 1 tsp vanilla extract
For the Cream Cheese Filling:
- 8 oz cream cheese, softened
- 1/2 cup granulated sugar
- 1 tsp vanilla extract
- 1/4 cup unsalted butter, softened
- 2 tsp ground cinnamon
For the Cream Cheese Frosting:
- 8 oz cream cheese, softened
- 1/4 cup (1/2 stick) unsalted butter, softened
- 3 cups powdered sugar
- 2 tsp vanilla extract
- 2–3 tbsp milk or heavy cream
- Pinch of salt
For Topping:
- Red velvet cake crumbs or red sprinkles (optional but gorgeous)
Equipment:
- Stand mixer with dough hook (or strong arms)
- Rolling pin
- 9x13 inch baking pan
- Parchment paper
- Dental floss or sharp knife for cutting
Instructions
In the bowl of a stand mixer (or large bowl if doing this by hand), combine 2 cups flour, sugar, cocoa powder, yeast, and salt. Whisk to combine.
In a measuring cup, combine warm milk, melted butter, eggs, red food coloring, and vanilla. Mix well. The milk should be warm but not hot—around 110°F. Too hot kills the yeast. Too cold won’t activate it.
Pour the wet ingredients into the flour mixture. Mix on low speed (or with a wooden spoon) until combined.
Add remaining flour, 1/2 cup at a time, mixing between additions. Once the dough starts to come together, switch to the dough hook (or turn it out onto a floured surface to knead by hand).
Knead for 6-8 minutes in the mixer (or 10 minutes by hand) until the dough is smooth, elastic, and slightly tacky but not sticky. If it’s too sticky, add flour 1 tablespoon at a time. If too dry, add milk 1 teaspoon at a time.
The dough should be deep red and feel soft. Form it into a ball.
Grease a large bowl with butter or oil. Place the dough in the bowl, turning once to coat all sides.
Cover with a damp towel or plastic wrap. Let rise in a warm place for 1-1.5 hours until doubled in size.
Pro tip: Turn your oven on to the lowest setting for 1 minute, then turn it off. Put the covered bowl in there—it’s the perfect warm environment for rising.
While the dough rises, make your filling. In a medium bowl, beat together softened cream cheese, sugar, vanilla, butter, and cinnamon until smooth and creamy.
The mixture should be spreadable but not runny. If it’s too stiff, leave it at room temp to soften more. Set aside.
Once the dough has doubled, punch it down to release the air. Turn it out onto a lightly floured surface.
Roll the dough into a large rectangle, about 16×12 inches. Try to keep the edges relatively straight—this makes cutting easier later.
The dough should be about 1/4 inch thick. Don’t roll it too thin or the filling will leak out.
Spread the cream cheese filling evenly over the entire surface of the dough, leaving a 1/2-inch border along one long edge (this helps it seal).
Make sure the filling goes all the way to the other three edges. Be generous. This is not the time for restraint.
Starting from the long edge WITHOUT the border, tightly roll the dough into a log. Keep it tight and even as you roll. Loose rolls = gaps and sadness.
When you get to the end, pinch the seam to seal it. Place the log seam-side down.
Here’s where dental floss comes in handy. Slide a piece of unflavored dental floss (or thread) under the log, cross the ends over the top, and pull to slice cleanly through. This prevents squishing.
If using a knife, use a sharp serrated knife and a gentle sawing motion. Don’t press down hard or you’ll squash them.
Cut the log into 12 equal pieces, each about 1.5 inches thick.
Grease a 9×13 inch baking pan or line it with parchment paper. Arrange the rolls in the pan, cut-side up, spacing them slightly apart. They’ll expand and touch during rising/baking.
Cover with a towel and let rise for 30-45 minutes until puffy and nearly doubled. They should look soft and jiggly.
While they rise, preheat your oven to 350°F (175°C).
Bake for 22-27 minutes until the rolls are set and lightly golden on top. The centers should be cooked through but still soft.
Don’t overbake or they’ll be dry. They should look slightly underdone when you pull them out—they continue cooking in the pan.
Let them cool in the pan for 10-15 minutes while you make the frosting.
In a medium bowl, beat together softened cream cheese and butter until smooth and creamy.
Add powdered sugar, one cup at a time, beating on low after each addition. Add vanilla, salt, and 2 tablespoons milk.
Beat on medium-high for 2-3 minutes until light and fluffy. If too thick, add more milk 1 tablespoon at a time. If too thin, add more powdered sugar.
The frosting should be thick but spreadable, like thick pudding consistency.
While the rolls are still warm (not hot), generously spread or pipe the cream cheese frosting over the top. Go heavy. This is not the time for portion control.
If using red velvet cake crumbs or red sprinkles, scatter them over the wet frosting now for that stunning red-on-white contrast.
Serve warm and watch people lose their minds. Try not to eat them all in one sitting. This is extremely difficult.
Notes
These are basically perfect as-is, but here are some ideas:
- Serve warm with coffee or hot chocolate
- Pair with fresh strawberries or raspberries
- Drizzle with extra cream cheese frosting (there’s no such thing as too much)
- Warm individual rolls for 10 seconds in the microwave before eating
- Serve at brunch with champagne or mimosas
- Package individually for Valentine’s Day gifts
- Serve on a pretty platter with fresh flowers for presentation
- Prep Time: 30 minutes
- Cook Time: 25 minutes
Nutrition
- Calories: ~420 kcal
- Sugar: ~32g
- Sodium: ~280mg
- Fat: ~18g
- Carbohydrates: ~58g
- Protein: ~6g


