
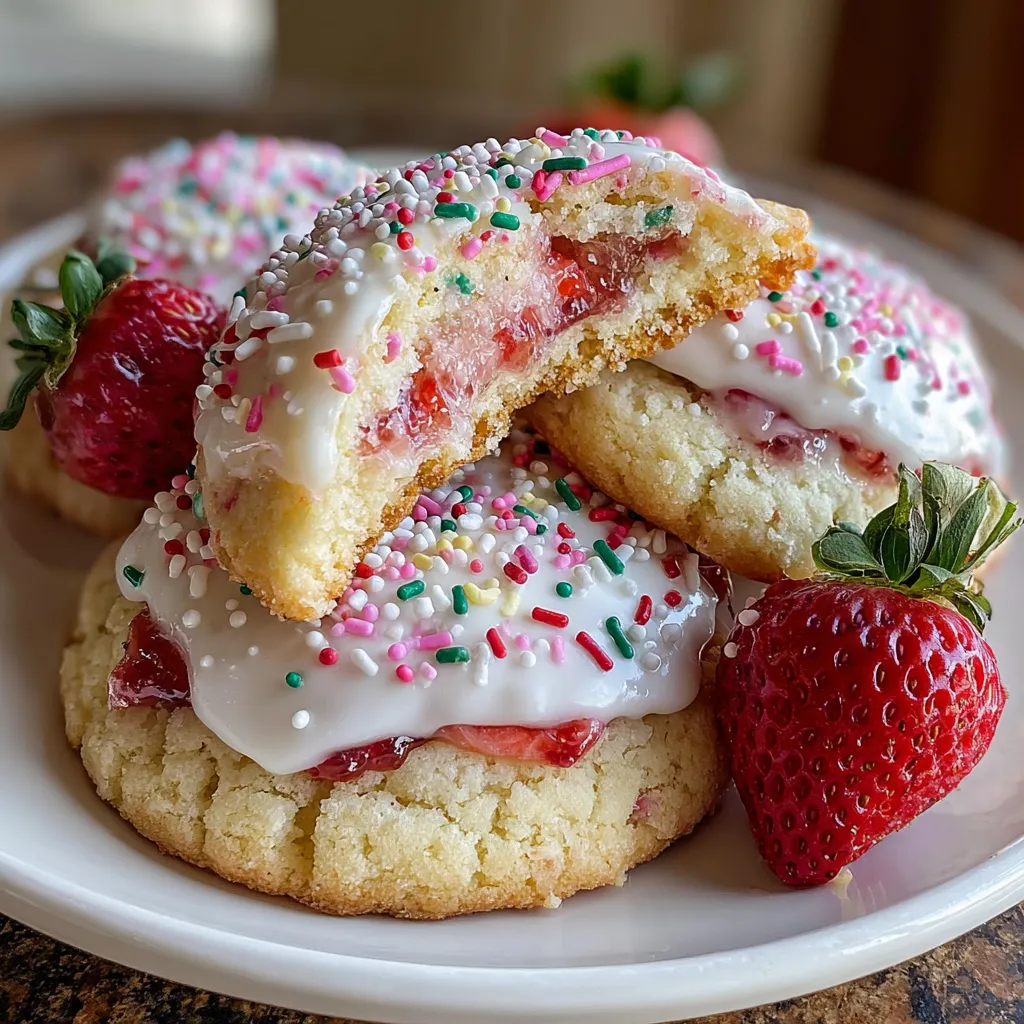
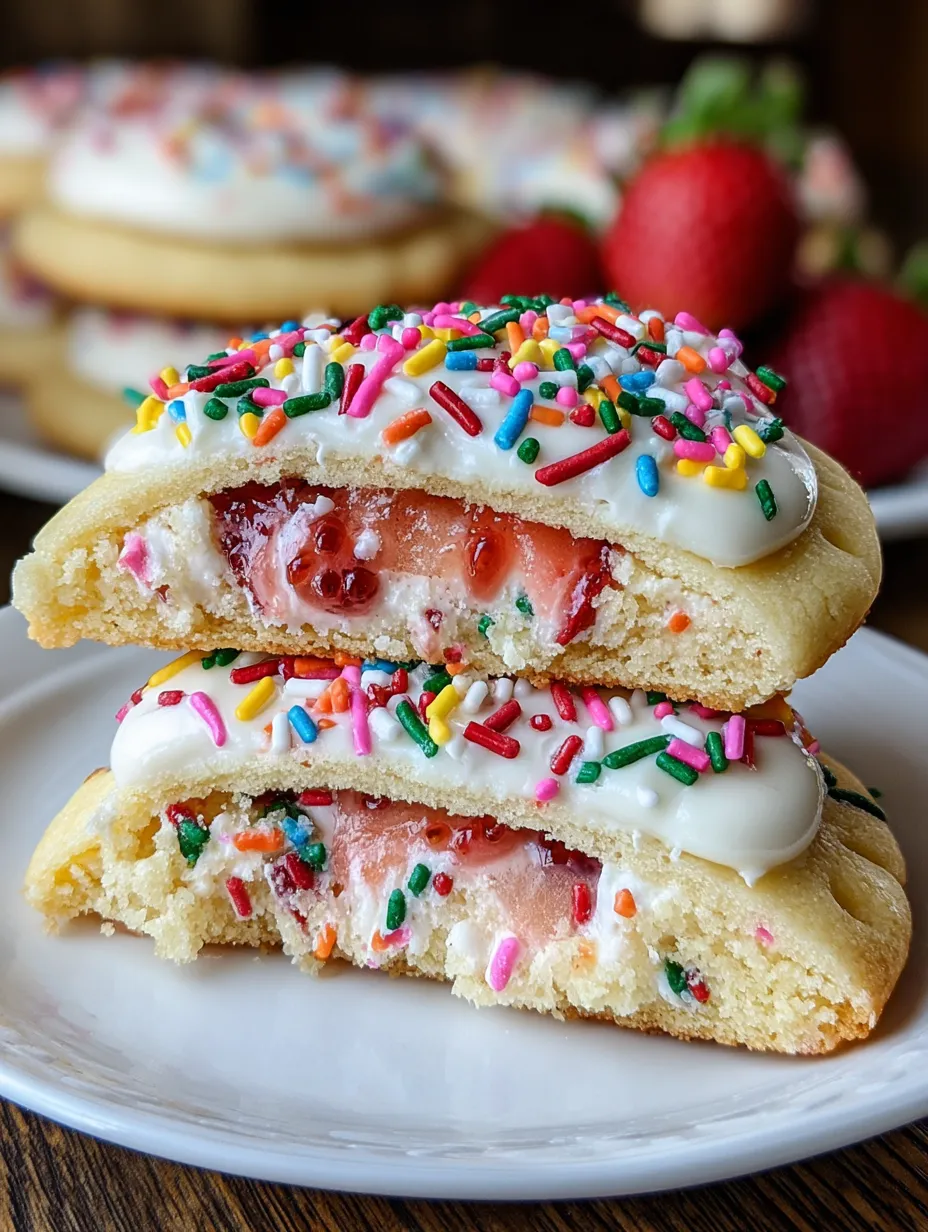
Okay, so remember eating Pop Tarts as a kid and thinking they were the pinnacle of breakfast technology? Well, someone said “what if we took that concept and made it BETTER, BIGGER, and from scratch?” These Strawberry Pop Tart Sugar Cookies are basically giant, homemade, stuffed sugar cookies that look like they came from a fancy bakery but taste like your childhood got a glow-up. We’re talking buttery sugar cookies sandwiched around real strawberry jam, topped with vanilla glaze and those iconic rainbow sprinkles that make everything better. They’re soft, sweet, jammy in the middle, and so pretty you’ll want to take 47 photos before eating them. I brought these to a potluck once and three people asked if I’d bought them from a specialty cookie shop. Another person ate four and then asked for the recipe while still chewing. No shame in that game.
Why You’ll Love This Recipe
Nostalgia in cookie form. All the Pop Tart vibes without the cardboard texture or mysterious ingredients.
Impressive AF. These look like you spent all day baking when really they’re pretty straightforward.
Customize the jam. Strawberry is classic, but you can use any flavor and create your own flavor empire.
Kid-approved. Children lose their minds over these. Adults do too, but with more dignity.
No special equipment. Just basic baking tools and your two hands. Maybe a rolling pin.
Sprinkle therapy. Decorating with rainbow sprinkles is scientifically proven to boost serotonin. Probably.
The Good Stuff You’ll Need
For the Sugar Cookie Dough:
- 2 3/4 cups all-purpose flour
- 1 tsp baking powder
- 1/2 tsp salt
- 1 cup (2 sticks) unsalted butter, softened
- 1 cup granulated sugar
- 1 large egg
- 2 tsp vanilla extract
- 1/2 tsp almond extract (optional but adds that Pop Tart authenticity)
For the Filling:
- 3/4 to 1 cup strawberry jam (NOT jelly—you need the thickness of jam)
- Use good quality jam with real fruit chunks for best results
- Pro tip: Strawberry preserves work even better because they’re thicker
For the Glaze:
- 2 cups powdered sugar
- 3-4 tbsp milk or heavy cream
- 1/2 tsp vanilla extract
- Pinch of salt
- Food coloring (optional—keep it white or make it pink)
For Decoration:
- Rainbow nonpareils (those tiny ball sprinkles)
- You can also use jimmies, sanding sugar, or any festive sprinkles your heart desires
Equipment:
- Rolling pin
- Cookie cutters (rectangular or oval work best, about 3-4 inches)
- Or just use a knife and cut rectangles freehand like a rebel
- Baking sheets
- Parchment paper
- Fork (for crimping edges)
Let’s Do This
Step 1: Make the Cookie Dough
In a medium bowl, whisk together flour, baking powder, and salt. Set aside.
In a large bowl (or stand mixer with paddle attachment), beat softened butter and sugar on medium-high speed for 3-4 minutes until light and fluffy. Like, really fluffy. This is where the tender texture comes from.
Beat in the egg, vanilla, and almond extract (if using) until fully combined and smooth.
Add the flour mixture in two additions, mixing on low speed until just combined. Don’t overmix or your cookies will be tough—and we’re not trying to make hockey pucks here.
Divide the dough in half, shape each half into a flat disc, wrap tightly in plastic wrap.
Refrigerate for at least 1 hour, or up to 3 days. Chilled dough is easier to roll and holds its shape better.
Step 2: Prep Your Jam Situation
If your jam is super runny, cook it in a small saucepan over medium heat for 5-7 minutes to reduce it slightly. You want it thick enough that it won’t leak everywhere.
Let it cool completely before using. Warm jam will make the dough soggy and your life difficult.
Transfer to a piping bag or zip-top bag for easier application. Or just use a spoon—we’re not here to judge.
Step 3: Roll and Cut
Preheat oven to 350°F (175°C). Line two baking sheets with parchment paper.
Remove one disc of dough from the fridge. Let it sit for about 5 minutes so it’s not rock-hard.
On a lightly floured surface, roll out the dough to about 1/4-inch thickness. Not too thin or they’ll break, not too thick or they won’t cook evenly.
Cut out rectangles (about 3×4 inches) or use an oval cookie cutter. You need an EVEN number of shapes because you’re making sandwiches.
Place half of the cutouts on your prepared baking sheets—these will be your bottoms.
Important: Keep the other half (your tops) on a separate plate in the fridge while the bottoms bake.
Step 4: Fill Those Bottoms (The Cookie Bottoms, People)
Add about 1-2 tablespoons of jam to the center of each bottom cookie, leaving a 1/4-inch border around the edges.
Don’t overfill or the jam will explode out the sides during baking and you’ll have a sticky mess. Less is more here.
Spread the jam slightly with the back of a spoon, keeping that border clear.
Step 5: Top and Seal
Take your chilled top cookie pieces and place them over the jam-covered bottoms.
Press the edges together gently but firmly. You’re sealing in that jammy goodness.
Use a fork to crimp around the edges, creating that classic Pop Tart pattern. Press down firmly to really seal—this is not just decorative, it’s structural.
Optional: Poke a few holes in the top with a toothpick or fork to allow steam to escape. This prevents jam explosions, though honestly, a little explosion never hurt anyone.
Step 6: Bake
Bake for 12-15 minutes until the edges are just barely starting to turn golden. The tops should still look pale—they won’t brown much.
Don’t overbake. These should be soft cookies, not crunchy crackers.
Let cool on the baking sheet for 5 minutes—they’re fragile when hot.
Transfer to a wire rack and let cool completely before glazing. If you glaze warm cookies, the glaze will melt and slide right off.
Step 7: Glaze and Decorate (The Fun Part)
In a medium bowl, whisk together powdered sugar, 3 tablespoons milk, vanilla, and salt. Add more milk a teaspoon at a time until you reach a thick but spreadable consistency. It should be like thick honey.
If you want pink glaze, add a tiny drop of pink or red food coloring.
Spread or pipe the glaze over the top of each cooled cookie, leaving a small border around the edges.
IMMEDIATELY add your rainbow sprinkles while the glaze is still wet. If you wait, they won’t stick.
Let the glaze set for about 30 minutes until it’s no longer tacky.
Try not to eat all of them. This is the hardest step.
Serving Suggestions
These are perfect as-is, but here are some ways to elevate the experience:
- Serve with a glass of cold milk (the only acceptable beverage pairing)
- Pack in lunch boxes for the coolest lunch ever
- Arrange on a colorful platter for birthday parties
- Warm slightly in the microwave for 10 seconds to make the jam gooey again
- Serve alongside ice cream for a cookie-jam sundae situation
- Package in clear cellophane bags tied with ribbon for gifts
- Stack them high on a cake stand for visual impact
Switch It Up
Different Jam Flavors: Try raspberry, blueberry, mixed berry, apricot, or even Nutella for chocolate-hazelnut versions.
Brown Sugar Cinnamon: Skip the jam, brush with butter, sprinkle with cinnamon-sugar, and use a cinnamon glaze.
S’mores Style: Fill with chocolate and mini marshmallows, use chocolate glaze, top with graham cracker crumbs.
Lemon Curd: Use lemon curd instead of jam and add lemon zest to the glaze for citrus cookies.
PB&J: Mix peanut butter with the jam filling for a lunch-box classic remix.
Apple Pie: Fill with apple butter or pie filling, add cinnamon to the dough, use brown butter glaze.
Cookies and Cream: Fill with white chocolate ganache, crush Oreos on top instead of sprinkles.
Storage and Make-Ahead Tips
These store beautifully, which makes them perfect for gifting or making ahead.
Room temperature: Store in an airtight container for up to 5 days. Put parchment between layers if stacking.
Freeze the dough: Wrap tightly and freeze for up to 3 months. Thaw overnight in the fridge before rolling.
Freeze assembled unbaked cookies: Freeze on a baking sheet, then transfer to freezer bags for up to 2 months. Bake from frozen, adding 2-3 extra minutes.
Freeze baked cookies: Freeze unglazed baked cookies for up to 2 months. Thaw and glaze before serving.
The glaze softens over time as it absorbs into the cookie, so these look best within 1-2 days of glazing.
Don’t refrigerate: The texture gets weird and the cookies get hard. Room temp storage is best.
Why This Works So Damn Well
The success of these cookies is all about ratios and technique.
Butter-to-sugar ratio creates a tender, melt-in-your-mouth sugar cookie that’s sturdy enough to hold filling but soft enough to bite through easily.
Chilling the dough is crucial. Cold dough holds its shape during baking, prevents excessive spreading, and makes rolling so much easier.
Thick jam is essential because runny jam will leak out during baking and create a sticky nightmare. Preserves with actual fruit pieces work best because they’re naturally thicker.
Crimping the edges isn’t just cute—it actually seals the cookies together so the jam stays inside where it belongs.
Not overbaking keeps these soft and chewy rather than crispy and hard. They should barely have any color when you pull them out.
The almond extract (if you use it) adds that subtle bakery flavor that makes people think you used some secret professional ingredient. It’s the Pop Tart pastry taste.
Glazing when completely cool ensures the glaze sets properly instead of melting and sliding off into a puddle.
When to Make These
Birthday Parties: Kids go INSANE for these. So do adults who refuse to grow up.
Bake Sales: These sell out faster than anything else. Price them accordingly.
After School Snacks: Way better than actual Pop Tarts and you know what’s in them.
Cookie Exchanges: Bring these and prepare for immediate popularity.
Valentine’s Day: Make them heart-shaped with pink glaze. Instant romance.
Teacher Appreciation: Teachers deserve homemade Pop Tart cookies, not apples.
Any Day Ending in ‘Y’: These don’t need a special occasion. Tuesday works fine.
Questions People Actually Ask
Q: Can I use store-bought cookie dough to make this easier? A: Technically yes, but you’ll need refrigerated sugar cookie dough (not the break-apart kind) and the texture won’t be quite as good. Homemade is really worth it here.
Q: My jam leaked out everywhere. What happened? A: Either your jam was too thin, you overfilled them, or you didn’t seal the edges well enough. Make sure to use thick jam, don’t overfill, and really press those edges together.
Q: The cookies puffed up and separated. Why? A: You needed to seal the edges better with that fork crimping. Also, poking a few steam holes in the top helps prevent separation.
Q: Can I make these without a cookie cutter? A: Absolutely! Use a knife or pizza cutter to cut rectangles freehand. They don’t need to be perfect—rustic is charming.
Q: The dough is too sticky to roll out. Help! A: Your dough might not be cold enough, or you need more flour on your surface. Chill the dough longer, flour your surface generously, and flour your rolling pin too.
Q: Can I use jelly instead of jam? A: Jelly is too thin and will leak everywhere. You really need jam or preserves for the right consistency.
Q: My glaze is too thick/too thin. A: Too thick? Add milk a teaspoon at a time. Too thin? Add more powdered sugar. The right consistency should be like thick honey—spreadable but not runny.
Q: Can I skip the glaze? A: You CAN, but then they’re just filled sugar cookies, not Pop Tart cookies. The glaze and sprinkles are what make them special. Don’t skip it.
PrintStrawberry Pop Tart Sugar Cookies
- Total Time: 2hours
- Yield: 12–15 sandwich cookies 1x
Description
Okay, so remember eating Pop Tarts as a kid and thinking they were the pinnacle of breakfast technology? Well, someone said “what if we took that concept and made it BETTER, BIGGER, and from scratch?” These Strawberry Pop Tart Sugar Cookies are basically giant, homemade, stuffed sugar cookies that look like they came from a fancy bakery but taste like your childhood got a glow-up. We’re talking buttery sugar cookies sandwiched around real strawberry jam, topped with vanilla glaze and those iconic rainbow sprinkles that make everything better. They’re soft, sweet, jammy in the middle, and so pretty you’ll want to take 47 photos before eating them. I brought these to a potluck once and three people asked if I’d bought them from a specialty cookie shop. Another person ate four and then asked for the recipe while still chewing. No shame in that game.
Ingredients
For the Sugar Cookie Dough:
- 2 3/4 cups all-purpose flour
- 1 tsp baking powder
- 1/2 tsp salt
- 1 cup (2 sticks) unsalted butter, softened
- 1 cup granulated sugar
- 1 large egg
- 2 tsp vanilla extract
- 1/2 tsp almond extract (optional but adds that Pop Tart authenticity)
For the Filling:
- 3/4 to 1 cup strawberry jam (NOT jelly—you need the thickness of jam)
- Use good quality jam with real fruit chunks for best results
- Pro tip: Strawberry preserves work even better because they’re thicker
For the Glaze:
- 2 cups powdered sugar
- 3–4 tbsp milk or heavy cream
- 1/2 tsp vanilla extract
- Pinch of salt
- Food coloring (optional—keep it white or make it pink)
For Decoration:
- Rainbow nonpareils (those tiny ball sprinkles)
- You can also use jimmies, sanding sugar, or any festive sprinkles your heart desires
Equipment:
- Rolling pin
- Cookie cutters (rectangular or oval work best, about 3-4 inches)
- Or just use a knife and cut rectangles freehand like a rebel
- Baking sheets
- Parchment paper
- Fork (for crimping edges)
Instructions
In a medium bowl, whisk together flour, baking powder, and salt. Set aside.
In a large bowl (or stand mixer with paddle attachment), beat softened butter and sugar on medium-high speed for 3-4 minutes until light and fluffy. Like, really fluffy. This is where the tender texture comes from.
Beat in the egg, vanilla, and almond extract (if using) until fully combined and smooth.
Add the flour mixture in two additions, mixing on low speed until just combined. Don’t overmix or your cookies will be tough—and we’re not trying to make hockey pucks here.
Divide the dough in half, shape each half into a flat disc, wrap tightly in plastic wrap.
Refrigerate for at least 1 hour, or up to 3 days. Chilled dough is easier to roll and holds its shape better.
If your jam is super runny, cook it in a small saucepan over medium heat for 5-7 minutes to reduce it slightly. You want it thick enough that it won’t leak everywhere.
Let it cool completely before using. Warm jam will make the dough soggy and your life difficult.
Transfer to a piping bag or zip-top bag for easier application. Or just use a spoon—we’re not here to judge.
Preheat oven to 350°F (175°C). Line two baking sheets with parchment paper.
Remove one disc of dough from the fridge. Let it sit for about 5 minutes so it’s not rock-hard.
On a lightly floured surface, roll out the dough to about 1/4-inch thickness. Not too thin or they’ll break, not too thick or they won’t cook evenly.
Cut out rectangles (about 3×4 inches) or use an oval cookie cutter. You need an EVEN number of shapes because you’re making sandwiches.
Place half of the cutouts on your prepared baking sheets—these will be your bottoms.
Important: Keep the other half (your tops) on a separate plate in the fridge while the bottoms bake.
Add about 1-2 tablespoons of jam to the center of each bottom cookie, leaving a 1/4-inch border around the edges.
Don’t overfill or the jam will explode out the sides during baking and you’ll have a sticky mess. Less is more here.
Spread the jam slightly with the back of a spoon, keeping that border clear.
Take your chilled top cookie pieces and place them over the jam-covered bottoms.
Press the edges together gently but firmly. You’re sealing in that jammy goodness.
Use a fork to crimp around the edges, creating that classic Pop Tart pattern. Press down firmly to really seal—this is not just decorative, it’s structural.
Optional: Poke a few holes in the top with a toothpick or fork to allow steam to escape. This prevents jam explosions, though honestly, a little explosion never hurt anyone.
Bake for 12-15 minutes until the edges are just barely starting to turn golden. The tops should still look pale—they won’t brown much.
Don’t overbake. These should be soft cookies, not crunchy crackers.
Let cool on the baking sheet for 5 minutes—they’re fragile when hot.
Transfer to a wire rack and let cool completely before glazing. If you glaze warm cookies, the glaze will melt and slide right off.
In a medium bowl, whisk together powdered sugar, 3 tablespoons milk, vanilla, and salt. Add more milk a teaspoon at a time until you reach a thick but spreadable consistency. It should be like thick honey.
If you want pink glaze, add a tiny drop of pink or red food coloring.
Spread or pipe the glaze over the top of each cooled cookie, leaving a small border around the edges.
IMMEDIATELY add your rainbow sprinkles while the glaze is still wet. If you wait, they won’t stick.
Let the glaze set for about 30 minutes until it’s no longer tacky.
Try not to eat all of them. This is the hardest step.
Notes
These are perfect as-is, but here are some ways to elevate the experience:
- Serve with a glass of cold milk (the only acceptable beverage pairing)
- Pack in lunch boxes for the coolest lunch ever
- Arrange on a colorful platter for birthday parties
- Warm slightly in the microwave for 10 seconds to make the jam gooey again
- Serve alongside ice cream for a cookie-jam sundae situation
- Package in clear cellophane bags tied with ribbon for gifts
- Stack them high on a cake stand for visual impact
- Prep Time: 30 minutes
- Cook Time: 15 minutes
Nutrition
- Calories: ~280 kcal
- Sugar: ~26g
- Sodium: ~180mg
- Fat: ~12g
- Carbohydrates: ~42g
- Protein: ~3g


