
Someone looked at those neon pink Hostess Sno Balls – you know, the ones that are basically marshmallow-covered chocolate cake rolled in coconut – and thought “what if we made this but BETTER?” And that’s how we ended up with these brownies that are fudgy, topped with fluffy marshmallow, coated in coconut, and honestly way more fun than they have any right to be.
These are brownies that refuse to be boring. We’re starting with a rich, fudgy brownie base because anything less would be a disappointment. Then we’re covering them in a layer of marshmallow that’s soft and sweet and makes you feel like a kid again. Finally, we’re rolling the whole situation in shredded coconut and adding a drizzle of chocolate because apparently we’re not done yet. They’re nostalgic, they’re playful, and they’re the kind of dessert that makes people smile before they even take a bite.
This isn’t refined dessert for sophisticated palates. This is “remember when you used to eat Sno Balls for breakfast and call it living?” energy in brownie form. It’s fun. It’s excessive. It’s exactly what dessert should be when you stop taking yourself too seriously.
Why These Brownies Are About to Make You Everyone’s Favorite Person
- Nostalgic but elevated — All the childhood vibes, none of the artificial aftertaste
- Fudgy brownie base — The foundation of all good decisions
- Marshmallow topping — Soft, sweet, and cloudlike
- Coconut coating — Texture and tropical vibes
- Pink or keep it classic — Food coloring is optional but fun
- Actually tastes good — Unlike the original, these are legitimately delicious
The Stuff You Need
For the Brownies:
- ¾ cup unsalted butter (1½ sticks)
- 1½ cups granulated sugar
- ¾ cup cocoa powder (Dutch-process if you’re fancy, regular if you’re not)
- ½ teaspoon salt
- 2 teaspoons vanilla extract
- 3 large eggs, room temperature
- ¾ cup all-purpose flour
- Optional: ½ cup chocolate chips for extra chocolatey-ness
For the Marshmallow Layer:
- 1 jar (7 oz) marshmallow fluff (or make homemade if you’re feeling ambitious)
- 2 tablespoons butter, softened
- 1 cup powdered sugar
- 1-2 teaspoons milk (to thin if needed)
- Pink gel food coloring (optional but very on-brand)
For the Coconut Coating:
- 2 cups sweetened shredded coconut
- Pink gel food coloring (if you want pink coconut)
- 2-3 drops water
For the Chocolate Drizzle:
- ½ cup chocolate chips
- 1 tablespoon coconut oil or butter
Special Equipment:
- 9×9 inch baking pan
- Parchment paper
- Mixing bowls
- Offset spatula for spreading marshmallow
- Microwave-safe bowl
Let’s Make These Brownies That’ll Transport You Back to Childhood
Step 1: The Oven and Pan Prep
Preheat your oven to 350°F. Line a 9×9 inch pan with parchment paper, leaving some overhang on the sides so you can lift the brownies out later. This is not optional. Trying to cut brownies in the pan is a special kind of frustration.
Step 2: The Brownie Base Magic
Melt butter in a medium saucepan over medium heat. Once melted, remove from heat and stir in sugar, cocoa powder, and salt until combined. It’ll look grainy and kind of weird – that’s normal. Let it cool for about 5 minutes so the eggs don’t scramble when you add them.
Step 3: The Eggs and Flour Situation
Add vanilla extract to the chocolate mixture and stir. Add eggs one at a time, stirring well after each addition. The mixture should become smooth and glossy. Add the flour and stir until JUST combined. You should still see a few flour streaks. Fold in chocolate chips if using. Don’t overmix or your brownies will be cakey instead of fudgy.
Step 4: Bake Those Brownies
Pour the batter into your prepared pan and spread it evenly. Bake for 25-30 minutes. A toothpick inserted in the center should come out with a few moist crumbs, NOT clean. These are fudgy brownies, not cake. They’ll continue cooking as they cool. Let them cool COMPLETELY in the pan. This is crucial. Warm brownies and marshmallow topping don’t mix well.
Step 5: The Marshmallow Fluff Upgrade
While brownies cool, make your marshmallow topping. In a medium bowl, beat together marshmallow fluff, softened butter, and powdered sugar until smooth and spreadable. If it’s too thick, add milk one teaspoon at a time. If you want pink marshmallow (and you do, for authenticity), add a few drops of pink gel food coloring and mix until evenly colored.
Step 6: The Pink Coconut (Optional But Fun)
If you’re making pink coconut, put the shredded coconut in a bowl or Ziploc bag. Add 2-3 drops of pink food coloring and a couple drops of water. Mix or shake vigorously until the coconut is evenly colored. It should be light pink, not hot pink, unless you’re going for that aggressive Sno Ball look. Spread it on a plate to dry slightly while you work on the rest.
Step 7: The Marshmallow Application
Once your brownies are completely cool, spread the marshmallow mixture evenly over the top. Use an offset spatula or the back of a spoon dipped in water to smooth it out. You want a generous layer – about ½ inch thick. Don’t be shy. This is the defining characteristic of a Sno Ball.
Step 8: The Coconut Coating
Sprinkle the coconut generously over the marshmallow layer. Press it down gently so it sticks. You want full coverage – the entire top should be coated in coconut. Use all of it if you need to. This is not the time for restraint.
Step 9: The Chocolate Drizzle Drama
Melt chocolate chips with coconut oil in the microwave in 20-second bursts, stirring between each burst. Once smooth, drizzle it over the coconut-covered brownies in whatever pattern makes you happy. Zigzags, swirls, or just random drizzles – you’re the artist here.
Step 10: The Setting and Cutting
Refrigerate the brownies for at least 30 minutes to let everything set up. This makes them easier to cut and helps the marshmallow firm up slightly. When ready to serve, lift the whole thing out using the parchment paper overhang. Cut into squares with a sharp knife, wiping it clean between cuts. The marshmallow is sticky, so the knife-wiping is important for clean edges.
Step 11: The Experience
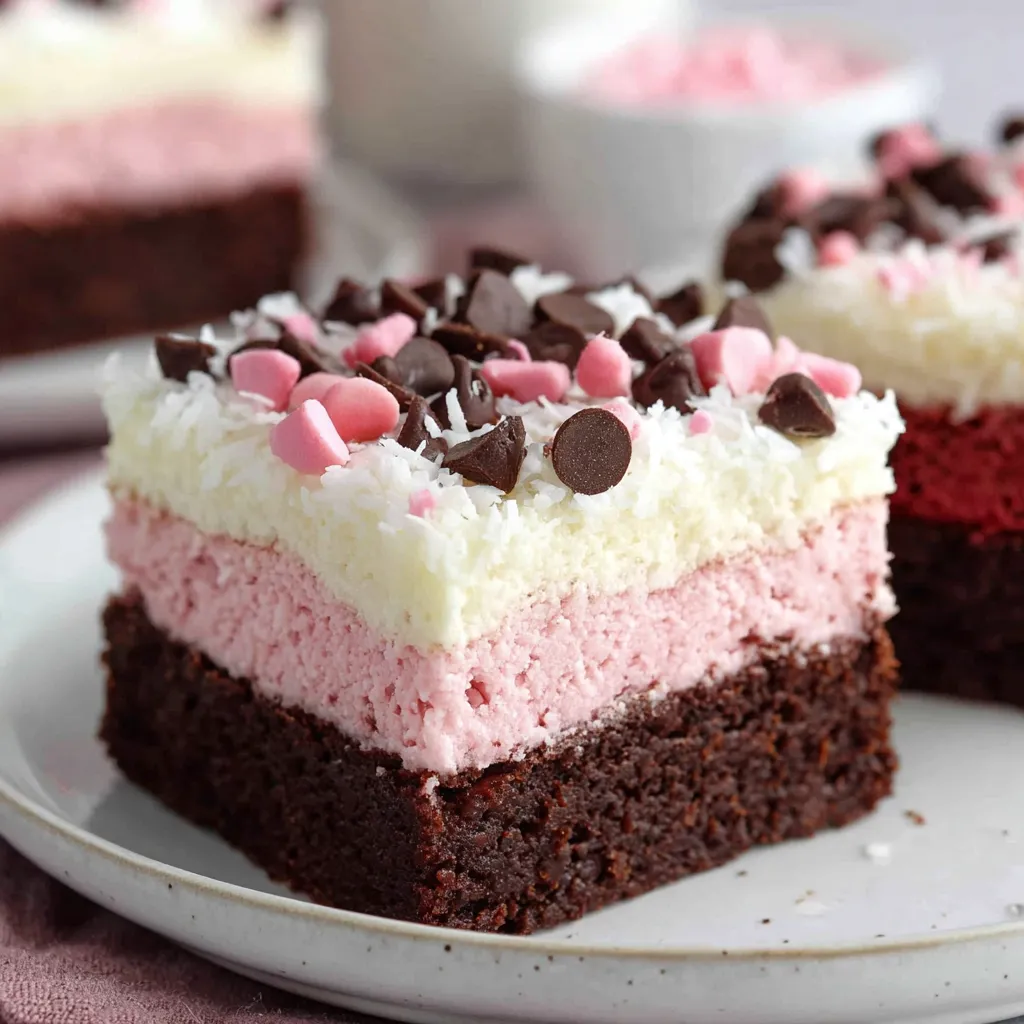
Pick up a brownie. Notice the layers – fudgy chocolate base, fluffy marshmallow middle, coconut-covered top with chocolate drizzle. Take a bite and experience all those textures and flavors at once. Feel like you’re eating a fancy version of those gas station snack cakes. Feel zero regret about it.
Pro Tips From Someone Who’s Made Too Many Nostalgic Desserts
Don’t Overbake the Brownies: Fudgy is the goal. Slight underbaking is better than overbaking. They firm up as they cool.
Cool Completely: Cannot stress this enough. Warm brownies + marshmallow = a melted mess that slides off when you try to cut them.
Gel Food Coloring: Liquid food coloring adds too much moisture. Gel is more concentrated and won’t affect texture.
Coconut Coverage: Press the coconut into the marshmallow so it actually sticks. Just sprinkling it on top means it’ll fall off when you eat them.
Sharp Knife, Hot Water: Dip your knife in hot water and wipe it clean between cuts for the cleanest squares.
Skip the Pink: If the pink is too much for you, leave the marshmallow and coconut white. They’ll taste the same and look more sophisticated.
Switch It Up (Because We’re Not One-Trick Ponies)
Double Chocolate: Use chocolate marshmallow instead of regular. Chocolate on chocolate on chocolate.
Mint Sno Balls: Add ½ teaspoon peppermint extract to the marshmallow layer. Top with green coconut. Very festive.
Peanut Butter Version: Swirl peanut butter into the brownie batter. Use regular marshmallow and coconut.
White Chocolate Drizzle: Use white chocolate instead of dark. Very pretty, very sweet.
Toasted Coconut: Toast the coconut before adding it for a nuttier flavor. Less sweet, more sophisticated.
Raspberry Sno Balls: Add a layer of raspberry jam between the brownie and marshmallow. Tart and delicious.
Mini Sno Ball Brownies: Cut into small squares and serve as bite-sized treats. Perfect for parties.
Make-Ahead Magic
The Brownies: Bake up to 2 days ahead. Wrap tightly and store at room temp until ready to top.
Fully Assembled: Make the whole thing 1-2 days ahead. Store covered in the fridge. They actually get better as they sit.
Freezing: Freeze unfrosted brownies for up to 3 months. Thaw and add toppings when ready.
The Marshmallow Layer: Make the marshmallow mixture a day ahead. Store in the fridge, then bring to room temp and re-whip before spreading.
Questions People Always Ask
Q: Can I use homemade marshmallow instead of fluff? A: Yes, but you’ll need to adjust the consistency. Homemade marshmallow is firmer, so add more butter and powdered sugar to make it spreadable.
Q: My marshmallow layer is too sticky to cut through. Help? A: Chill them longer, and use a hot, wet knife. Wipe it clean between every cut.
Q: Can I skip the coconut? A: You can, but then they’re just marshmallow brownies, not Sno Ball brownies. The coconut is kind of the point.
Q: How do I get the coconut evenly pink? A: Use gel food coloring and shake it in a sealed bag with a tiny bit of water. Less is more – you can always add more color.
Q: Can I make these in a different pan size? A: Yes, but adjust baking time. A 9×13 pan will make thinner brownies that bake faster (18-22 minutes). An 8×8 will be thicker and need longer (35-40 minutes).
Q: Do these need to be refrigerated? A: After the first day, yes. The marshmallow layer can get too soft at room temperature after 24 hours.
Storage Real Talk
Room Temperature: First day only, covered loosely. After that, they need refrigeration.
Refrigerated: Up to 5 days in an airtight container. Bring to room temp for 30 minutes before serving for best texture.
Frozen: Freeze for up to 3 months. Thaw in the fridge overnight. The marshmallow texture might be slightly different but still good.
Individual Wrapping: Wrap each square in plastic wrap for easy grab-and-go snacks or lunch boxes.
Perfect Pairings
Milk: Cold milk is mandatory. These are sweet and the milk balances it.
Coffee: Hot, black coffee cuts through the sweetness perfectly.
Ice Cream: Vanilla ice cream on the side because why not double down on dessert.
Nothing: These are a complete dessert experience. No accompaniment needed.
More Brownies: Just eat two. We’re not judging.
The Science of Fudgy Brownies
The ratio of fat to flour determines whether brownies are fudgy or cakey. These use more butter and less flour, which creates a denser, fudgier texture. The cocoa powder adds chocolate flavor without adding structure. Not overmixing the batter prevents gluten development, which keeps them tender.
The marshmallow layer adds sweetness and a textural contrast to the dense brownie. The coconut provides crunch and visual interest. The chocolate drizzle ties everything together and adds another layer of chocolate flavor.
It’s basically textural engineering – soft brownie base, fluffy marshmallow middle, crunchy coconut top, with chocolate connecting all the layers.
When to Make These Brownies
Bake Sale: These will sell out first. They’re different and eye-catching.
Birthday Parties: Kids and adults both love these for different reasons.
Potluck: Bring these and watch them disappear first.
Nostalgia Night: When you want to relive your childhood but with better ingredients.
Valentine’s Day: Pink, sweet, and fun. Very on-theme.
Anytime You Want Fun Dessert: These brownies don’t take themselves seriously and neither should you.
Why These Work So Well
Sno Balls are one of those divisive childhood snacks – people either loved them or thought they were weird. These brownies take the concept and make it actually delicious. The brownie base is legitimately good, not dry packaged cake. The marshmallow is fluffy and sweet without being overwhelming. The coconut adds texture and visual appeal. The chocolate drizzle brings it all together.
They’re also just fun to make and eat. The pink coconut is playful and nostalgic. The layers are satisfying to cut through. They look impressive but are actually pretty simple to assemble. They make people smile, which is what good dessert should do.
These brownies prove that you can take inspiration from gas station snack cakes and turn it into something actually worth making from scratch. That nostalgia is a legitimate source of culinary inspiration. That sometimes the best desserts are the ones that don’t take themselves too seriously.
This is what happens when you combine childhood memories with actual baking skills. And honestly? It tastes way better than the original ever did.
Print
Sno Ball Brownies
- Total Time: 1 hour
- Yield: 16 brownies 1x
Description
Someone looked at those neon pink Hostess Sno Balls – you know, the ones that are basically marshmallow-covered chocolate cake rolled in coconut – and thought “what if we made this but BETTER?” And that’s how we ended up with these brownies that are fudgy, topped with fluffy marshmallow, coated in coconut, and honestly way more fun than they have any right to be.
These are brownies that refuse to be boring. We’re starting with a rich, fudgy brownie base because anything less would be a disappointment. Then we’re covering them in a layer of marshmallow that’s soft and sweet and makes you feel like a kid again. Finally, we’re rolling the whole situation in shredded coconut and adding a drizzle of chocolate because apparently we’re not done yet. They’re nostalgic, they’re playful, and they’re the kind of dessert that makes people smile before they even take a bite.
This isn’t refined dessert for sophisticated palates. This is “remember when you used to eat Sno Balls for breakfast and call it living?” energy in brownie form. It’s fun. It’s excessive. It’s exactly what dessert should be when you stop taking yourself too seriously.
Ingredients
For the Brownies:
- ¾ cup unsalted butter (1½ sticks)
- 1½ cups granulated sugar
- ¾ cup cocoa powder (Dutch-process if you’re fancy, regular if you’re not)
- ½ teaspoon salt
- 2 teaspoons vanilla extract
- 3 large eggs, room temperature
- ¾ cup all-purpose flour
- Optional: ½ cup chocolate chips for extra chocolatey-ness
For the Marshmallow Layer:
- 1 jar (7 oz) marshmallow fluff (or make homemade if you’re feeling ambitious)
- 2 tablespoons butter, softened
- 1 cup powdered sugar
- 1–2 teaspoons milk (to thin if needed)
- Pink gel food coloring (optional but very on-brand)
For the Coconut Coating:
- 2 cups sweetened shredded coconut
- Pink gel food coloring (if you want pink coconut)
- 2–3 drops water
For the Chocolate Drizzle:
- ½ cup chocolate chips
- 1 tablespoon coconut oil or butter
Special Equipment:
- 9x9 inch baking pan
- Parchment paper
- Mixing bowls
- Offset spatula for spreading marshmallow
- Microwave-safe bowl
Instructions
Preheat your oven to 350°F. Line a 9×9 inch pan with parchment paper, leaving some overhang on the sides so you can lift the brownies out later. This is not optional. Trying to cut brownies in the pan is a special kind of frustration.
Melt butter in a medium saucepan over medium heat. Once melted, remove from heat and stir in sugar, cocoa powder, and salt until combined. It’ll look grainy and kind of weird – that’s normal. Let it cool for about 5 minutes so the eggs don’t scramble when you add them.
Add vanilla extract to the chocolate mixture and stir. Add eggs one at a time, stirring well after each addition. The mixture should become smooth and glossy. Add the flour and stir until JUST combined. You should still see a few flour streaks. Fold in chocolate chips if using. Don’t overmix or your brownies will be cakey instead of fudgy.
Pour the batter into your prepared pan and spread it evenly. Bake for 25-30 minutes. A toothpick inserted in the center should come out with a few moist crumbs, NOT clean. These are fudgy brownies, not cake. They’ll continue cooking as they cool. Let them cool COMPLETELY in the pan. This is crucial. Warm brownies and marshmallow topping don’t mix well.
While brownies cool, make your marshmallow topping. In a medium bowl, beat together marshmallow fluff, softened butter, and powdered sugar until smooth and spreadable. If it’s too thick, add milk one teaspoon at a time. If you want pink marshmallow (and you do, for authenticity), add a few drops of pink gel food coloring and mix until evenly colored.
If you’re making pink coconut, put the shredded coconut in a bowl or Ziploc bag. Add 2-3 drops of pink food coloring and a couple drops of water. Mix or shake vigorously until the coconut is evenly colored. It should be light pink, not hot pink, unless you’re going for that aggressive Sno Ball look. Spread it on a plate to dry slightly while you work on the rest.
Once your brownies are completely cool, spread the marshmallow mixture evenly over the top. Use an offset spatula or the back of a spoon dipped in water to smooth it out. You want a generous layer – about ½ inch thick. Don’t be shy. This is the defining characteristic of a Sno Ball.
Sprinkle the coconut generously over the marshmallow layer. Press it down gently so it sticks. You want full coverage – the entire top should be coated in coconut. Use all of it if you need to. This is not the time for restraint.
Melt chocolate chips with coconut oil in the microwave in 20-second bursts, stirring between each burst. Once smooth, drizzle it over the coconut-covered brownies in whatever pattern makes you happy. Zigzags, swirls, or just random drizzles – you’re the artist here.
Refrigerate the brownies for at least 30 minutes to let everything set up. This makes them easier to cut and helps the marshmallow firm up slightly. When ready to serve, lift the whole thing out using the parchment paper overhang. Cut into squares with a sharp knife, wiping it clean between cuts. The marshmallow is sticky, so the knife-wiping is important for clean edges.
Pick up a brownie. Notice the layers – fudgy chocolate base, fluffy marshmallow middle, coconut-covered top with chocolate drizzle. Take a bite and experience all those textures and flavors at once. Feel like you’re eating a fancy version of those gas station snack cakes. Feel zero regret about it.
Notes
Don’t Overbake the Brownies: Fudgy is the goal. Slight underbaking is better than overbaking. They firm up as they cool.
Cool Completely: Cannot stress this enough. Warm brownies + marshmallow = a melted mess that slides off when you try to cut them.
Gel Food Coloring: Liquid food coloring adds too much moisture. Gel is more concentrated and won’t affect texture.
Coconut Coverage: Press the coconut into the marshmallow so it actually sticks. Just sprinkling it on top means it’ll fall off when you eat them.
Sharp Knife, Hot Water: Dip your knife in hot water and wipe it clean between cuts for the cleanest squares.
Skip the Pink: If the pink is too much for you, leave the marshmallow and coconut white. They’ll taste the same and look more sophisticated.
- Prep Time: 20 minutes
- Cook Time: 25-30 minutes
Nutrition
- Calories: ~285 kcal
- Fat: ~14g
- Carbohydrates: ~39g
- Protein: ~3g


