Quick Overview
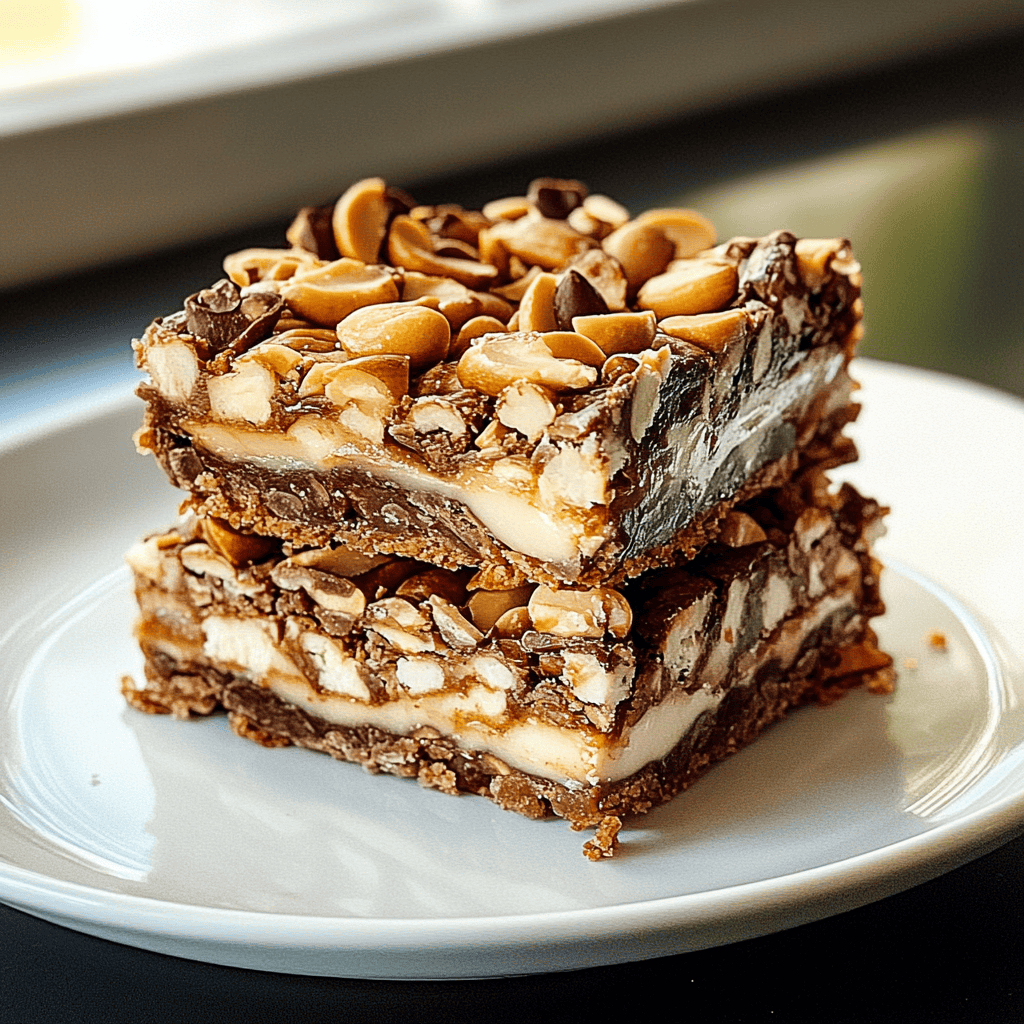
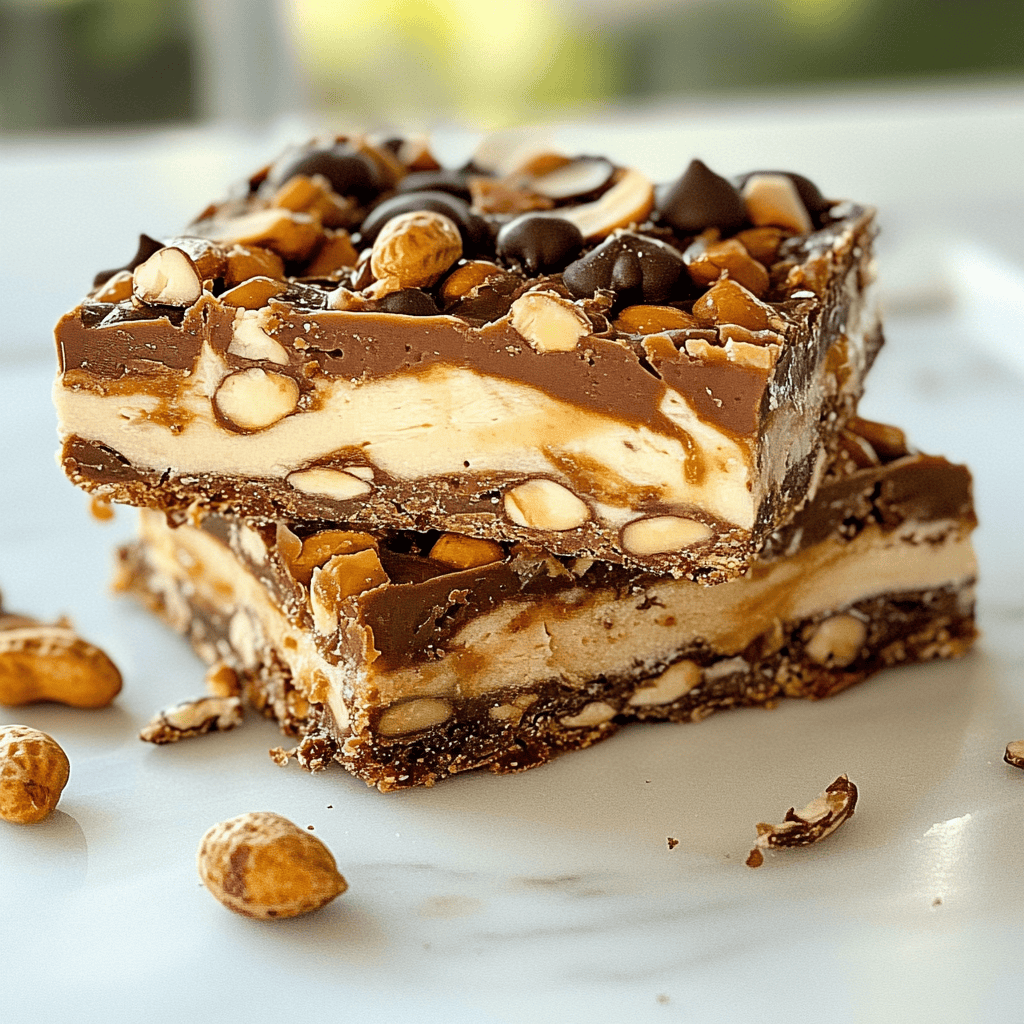
If you are a fan of sweet treats filled with rich flavors, then this Peanut Buster Bars recipe is just for you. These bars combine the delightful taste of creamy peanut butter with a layer of chocolate that melts in your mouth. They are not only easy to make but also offer the perfect balance of sweetness and nuttiness. Whether for a party or a cozy night in, these bars will surely impress friends and family alike.
Ingredient Breakdown
Peanut Butter
To create the base of these delicious Peanut Buster Bars, you’ll need 1 cup of creamy peanut butter. This ingredient provides the rich flavor and smooth texture that defines the bars. Choose a natural or processed variety based on your preference.
Powdered Sugar
You will require 2 cups of powdered sugar to add sweetness and help bind the mixture together. The fine texture allows it to blend smoothly with the peanut butter without creating any graininess.
Graham Cracker Crumbs
Using 1 cup of graham cracker crumbs adds a delightful crunch while serving as the foundation for the bars. They provide structure and complement the creamy texture perfectly.
Semi-Sweet Chocolate Chips
For the topping, grab 1 cup of semi-sweet chocolate chips. They melt beautifully and create a rich layer that contrasts perfectly with the peanut butter base.
Butter
You’ll need ½ cup of unsalted butter for melting with the chocolate chips. This ingredient helps achieve a smooth consistency for the chocolate topping while adding richness to the flavor.
Step By Step Recipe: Peanut Buster Bars –
Prepare the Base
Start by combining 1 cup of creamy peanut butter, 2 cups of powdered sugar, and 1 cup of graham cracker crumbs in a mixing bowl. Use an electric mixer on low speed until all ingredients are well blended and form a dough-like mixture. Press this mixture evenly into the bottom of an ungreased 8×8 inch baking pan to create a solid base.
Melt Chocolate and Butter
In a microwave-safe bowl, combine 1 cup of semi-sweet chocolate chips with ½ cup of unsalted butter. Heat in increments of 30 seconds in the microwave until melted completely, stirring after each interval. The mixture should be smooth without any lumps; ensure you don’t overheat it as this can cause burning.
Pour Chocolate Over Base
Once melted, pour the chocolate and butter mixture evenly over your pressed peanut butter base in the baking pan. Use a spatula to spread it evenly across all edges for full coverage. This step is crucial as it creates that irresistible top layer that binds beautifully with the bottom layer.
Chill Until Firm
Place your baking pan into the refrigerator for about 2 hours or until set firmly. Chilling allows both layers to bond together well and makes slicing easier later on. Ensure they are completely firm before attempting to cut them into squares.
Slice Into Bars
After chilling, remove from the refrigerator and use a sharp knife to cut into squares or rectangles as desired. Aim for uniform pieces so everyone gets an equal share of this delicious treat! You can dust them lightly with cocoa powder if you like extra flair on presentation.
Serving and Storing Tips
Serving Suggestions
These Peanut Buster Bars are best served chilled but can also be enjoyed at room temperature. Pair them with a glass of cold milk or coffee for an indulgent snack experience that complements their rich flavors perfectly.
Storage Guidelines
Store any leftovers in an airtight container in the refrigerator for up to one week. This keeps them fresh while maintaining their delightful texture and flavor. If you want to store them longer, consider freezing them wrapped tightly in plastic wrap followed by foil for up to three months.
Enjoy making these tasty Peanut Buster Bars at home! They are sure to become a favorite among friends and family alike!
Mistakes to avoid:
One common mistake when making Peanut Buster Bars is not allowing the layers to cool properly before assembling. Each layer needs to be at room temperature to ensure that they adhere well and provide a perfect texture. If you rush this step, the layers may slide apart when you cut them, ruining their presentation.
Another mistake is using low-quality chocolate. The chocolate coating on Peanut Buster Bars plays a crucial role in flavor. Opt for high-quality chocolate chips or bars to achieve a rich taste. Cheap chocolate can lead to a waxy texture and compromised flavor, impacting the overall enjoyment of the dessert.
Overmixing the peanut butter layer is another issue that can arise. When mixing, use just enough strength to combine ingredients without overworking them. Overmixing introduces air bubbles, which can create a less dense and chewy texture in your Peanut Buster Bars.
Not measuring ingredients accurately can lead to disappointing results. Baking is a science, so precision matters here as well as in cooking. Use proper measuring cups and spoons for both dry and wet ingredients to ensure consistency in every batch of Peanut Buster Bars.
Lastly, failing to line your baking dish with parchment paper can cause sticking issues. This step ensures easy removal of the bars once they have set properly. Without parchment, you might find it difficult to cut them into neat squares or rectangles later on.
Tips and tricks:
To achieve perfect Peanut Buster Bars, start by chilling each layer separately before adding the next one. This simple method ensures that each layer sets well without merging into one another. By chilling the base layer for about 15-20 minutes before adding the peanut butter mixture, you create distinct layers that enhance both flavor and presentation.
Choose creamy peanut butter over chunky for a smoother texture when making bars. Creamy peanut butter blends seamlessly into the other ingredients, providing that classic rich taste without unwanted crunchiness from peanuts. If you prefer a bit of texture, consider adding crushed peanuts on top after applying the chocolate coating for an extra crunch.
Use room temperature ingredients wherever possible. Ingredients like butter and eggs incorporate more smoothly into mixtures when they are at room temperature. This practice not only helps achieve better consistency but also improves the overall texture of your Peanut Buster Bars.
For an added layer of flavor, consider sprinkling sea salt on top of your melted chocolate before it sets. The contrast between sweet chocolate and salty flavors enhances taste significantly. Just a pinch will elevate your dessert without being overpowering.
Finally, let your bars set for several hours or overnight before cutting them into squares or rectangles. Patience pays off here; giving them ample time allows all layers to bond together perfectly while achieving that desired chewy texture throughout.
Suggestions for Peanut Buster Bars:
For an exciting twist on traditional Peanut Buster Bars, try incorporating different nut butters like almond or cashew butter in place of peanut butter. These alternatives offer unique flavors while maintaining a similar creamy consistency that blends well with other ingredients.
If you’re looking for a healthier version, consider replacing some sugar with natural sweeteners like honey or maple syrup. These options add sweetness while providing additional nutrients, making your treat slightly more wholesome without sacrificing taste.
Adding chopped dried fruits such as cranberries or raisins can introduce new textures and flavors to your Peanut Buster Bars. This addition offers a delightful chewiness that balances nicely with creamy layers while enhancing nutritional value too.
For those who enjoy extra crunch, sprinkle some crushed pretzels into the peanut butter layer before adding the top chocolate coating. The salty crispness will contrast beautifully against sweet elements and make each bite more exciting.
Lastly, experiment with flavored extracts like vanilla or almond in your peanut butter mixture for added depth of flavor in your bars. A teaspoon can significantly change how each bite tastes—allowing you to customize your Peanut Buster Bars according to personal preferences.
FAQs:
What are Peanut Buster Bars?
Peanut Buster Bars are delicious layered desserts made primarily from peanut butter and chocolate. They typically consist of a cookie base topped with a creamy peanut butter mixture and finished with a chocolate coating. These bars are known for their rich flavors and satisfying texture, making them a popular treat among dessert lovers.
Can I use crunchy peanut butter instead of creamy?
You can certainly use crunchy peanut butter if you prefer added texture in your Peanut Buster Bars! However, keep in mind that it may alter the overall creaminess of the bars slightly. For those who enjoy mixed textures in their desserts, crunchy peanut butter can provide an interesting twist!
How long do these bars last?
When stored properly in an airtight container at room temperature or refrigerated, Peanut Buster Bars can last up to one week. However, if you want them to maintain optimal freshness longer than this period, consider freezing them! Wrapped tightly in plastic wrap or foil will help preserve their quality.
Can I make these bars gluten-free?
Yes! To create gluten-free Peanut Buster Bars, simply substitute regular flour with gluten-free options such as almond flour or oat flour depending on preference and dietary needs. Additionally, always check labels on all other ingredients used to ensure they are certified gluten-free as well.
Is there a vegan version of these bars?
Absolutely! To make vegan Peanut Buster Bars, replace dairy-based ingredients like butter with coconut oil or vegan margarine and opt for dairy-free chocolate chips as well as maple syrup instead of regular sugar if desired for sweetness enhancement while keeping it plant-based friendly!
What toppings go well with Peanut Buster Bars?
A variety of toppings pair wonderfully with Peanut Buster Bars! For instance, chopped nuts such as almonds or walnuts add crunchiness; shredded coconut gives tropical flair; drizzles of caramel sauce bring extra sweetness; while fresh fruit slices may lend freshness—choose according to personal preference!
Summary:
In conclusion, crafting perfect Peanut Buster Bars hinges on avoiding common mistakes while applying helpful tips throughout preparation stages like chilling layers properly and using quality ingredients consistently across recipes too! Experimenting with alternative nut butters or incorporating fun toppings also adds excitement—ensuring these treats remain crowd-pleasers at any gathering or occasion!