
Someone discovered that if you poke holes in a cake and pour stuff into those holes, the cake absorbs it and becomes exponentially better. Then someone else thought “what if we did that with chocolate cake and Oreos?” and honestly, that person deserves a medal. This is a chocolate cake that’s been stabbed repeatedly (in a good way), soaked with sweetened condensed milk, topped with whipped cream, and absolutely buried in crushed Oreos. It’s ridiculous. It’s excessive. It’s exactly what dessert should be.
This isn’t some delicate layer cake that requires architectural precision. This is a “dump, poke, pour, spread, crush, eat” situation that somehow results in one of the most crowd-pleasing desserts you’ll ever make. The cake stays incredibly moist because of all that condensed milk seeping into every pore. The whipped cream adds lightness. The Oreos add crunch and that distinctive cookies-and-cream flavor everyone secretly loves. It’s the kind of cake that makes people go back for seconds before they’ve even finished their first piece.
This is cookies-and-cream energy in cake form. It’s what happens when you stop pretending you’re too sophisticated for Oreos and just lean into the joy. It’s a party in a 9×13 pan.
Why This Cake Is About to Become Your Go-To Dessert
- Stupidly easy — No mixer required, minimal skill needed
- Insanely moist — That condensed milk soak is life-changing
- Oreo overload — In the cake, on the cake, everywhere
- Crowd-pleaser — Never met anyone who didn’t love this
- Make-ahead friendly — Actually better the next day
- One-pan wonder — Everything happens in a 9×13, minimal cleanup
The Stuff You Need
For the Chocolate Cake:
- 1 box (15.25 oz) chocolate cake mix (or your favorite chocolate cake recipe)
- Ingredients listed on the box (usually oil, eggs, water)
- 1 cup crushed Oreos (about 10 cookies), divided
For the Poke Filling:
- 1 can (14 oz) sweetened condensed milk
- 1/2 cup heavy cream or milk
- 1 cup crushed Oreos (about 10 cookies)
For the Topping:
- 1 container (8 oz) Cool Whip, thawed (or 2 cups homemade whipped cream)
- 2 cups crushed Oreos (about 20 cookies)
- Whole Oreos for garnish (optional but pretty)
Special Equipment:
- 9×13 inch baking pan
- Wooden spoon handle or chopstick for poking
- Large mixing bowl
- Measuring cups
Let’s Make This Cake That’ll Disappear in 24 Hours
Step 1: The Cake Base Situation
Preheat your oven to 350°F. Grease your 9×13 pan like your life depends on it. Or use cooking spray. Either way, make sure it’s well-greased because a stuck poke cake is a tragedy.
Step 2: Mix That Cake
Prepare your chocolate cake batter according to the box directions. Before you pour it into the pan, fold in 1 cup of crushed Oreos. Don’t overmix – you want chunks of Oreo throughout, not Oreo dust. Pour the batter into your prepared pan and spread it evenly.
Step 3: Bake and Cool (The Hardest Part)
Bake for the time specified on the box, usually 30-35 minutes. A toothpick inserted in the center should come out with just a few moist crumbs. Let the cake cool in the pan for about 15 minutes. Not completely cool – you want it still warm for the poking and soaking.
Step 4: The Poking (Most Satisfying Part)
This is where it gets fun. Take a wooden spoon handle, chopstick, or thick straw and poke holes all over the cake. And I mean ALL over. Every inch should have a hole. Don’t be shy – you want tons of holes for that filling to seep into. Space them about 1/2 inch to 1 inch apart. It should look like Swiss cheese had a baby with a cake.
Step 5: The Magic Milk Mixture
In a bowl, whisk together the sweetened condensed milk and heavy cream until smooth. Stir in 1 cup of crushed Oreos. This mixture should be pourable but thick enough that the Oreos are suspended in it.
Step 6: The Soaking
Slowly pour the milk mixture over the entire cake, making sure it gets into all those holes you just made. Use a spoon to push some of the mixture into the holes if needed. You want every poke filled with that sweet, creamy, Oreo-studded liquid. Let the cake sit for about 10 minutes so the mixture can really absorb, then refrigerate for at least 2 hours. Overnight is even better. The cake needs time to fully absorb all that goodness.
Step 7: The Whipped Cream Layer
Once the cake is completely chilled and the filling has set, spread the Cool Whip (or homemade whipped cream) evenly over the entire top. Use an offset spatula or the back of a spoon to create swirls if you’re feeling fancy. But honestly, just getting it spread evenly is enough.
Step 8: The Oreo Avalanche
Sprinkle those 2 cups of crushed Oreos generously over the whipped cream layer. Cover every visible bit of white. This is not the time for minimalism. You want Oreo coverage that makes people say “that’s a lot of Oreos” because that’s exactly the point.
Step 9: The Final Touch
If you want to get fancy (and why not), arrange some whole Oreos on top in a pattern. Or just place them randomly. Or skip this entirely. The cake will taste the same regardless, but it does look nice for photos.
Step 10: The Patience Game
Refrigerate for at least another hour before serving. This cake needs to be cold. Room temperature poke cake is sad and sloppy. Cold poke cake is perfect and holds together when you cut it.
Step 11: The Eating
Cut yourself a generous square. Notice how the layers all work together – moist chocolate cake with pockets of sweet cream and Oreo chunks, fluffy whipped cream, crunchy Oreo topping. Take a bite and understand why this cake has been making the rounds at potlucks for years. Feel zero guilt about going back for seconds.
Pro Tips From Someone Who Makes This Way Too Often
Don’t Skip the Cooling Time: The cake needs to be slightly warm when you poke and pour, then cold when you serve. Both temperatures matter.
Poke Deep: Your holes should go almost to the bottom of the cake. Shallow pokes mean shallow flavor.
Pour Slowly: Give the mixture time to seep into the holes. If you dump it all at once, it’ll just pool on top.
Crush Oreos Properly: Put them in a Ziploc bag and smash with a rolling pin. You want chunks, not powder. Some bigger pieces are good for texture.
Use Full-Fat Everything: This is not the dessert for low-fat Cool Whip or skim milk. Commit to the indulgence.
Make It Ahead: This cake is BETTER the next day. The flavors meld and the texture improves. Make it the night before your event.
Switch It Up (Because Variety Is the Spice of Life)
Mint Oreo Version: Use mint Oreos instead of regular. Add a few drops of peppermint extract to the milk mixture. Very refreshing.
Peanut Butter Oreo: Use peanut butter Oreos and add 1/4 cup peanut butter to the milk mixture. Chocolate-peanut butter-cookie heaven.
Birthday Cake Oreo: Use Golden Oreos and add rainbow sprinkles to the whipped cream. Swap chocolate cake for white or yellow cake mix.
Chocolate Overload: Use double chocolate cake mix and drizzle chocolate syrup over the whipped cream before adding the Oreos.
Coffee Oreo: Add 2 tablespoons instant espresso powder to the cake batter. Coffee and cookies is a superior combination.
Cookies and Cream Extreme: Mix some Oreos into the whipped cream layer too. More is more.
Individual Servings: Make this in mason jars – layer cake, filling, whipped cream, and Oreos. Perfect for parties.
Make-Ahead Magic
The Cake: Bake and poke the cake up to 2 days ahead. Cover and refrigerate until ready to add filling.
Fully Assembled: Make the entire cake 1-3 days before serving. It genuinely improves with time. The flavors develop and the texture gets even better.
Freezing: Freeze the baked cake (before poking) for up to 3 months. Thaw, then proceed with poking and filling.
The Filling Mixture: Make the condensed milk mixture a day ahead. Store in the fridge and stir before pouring.
Storage Real Talk
Refrigerated: This cake MUST be refrigerated. It’ll keep for 4-5 days covered in the fridge, though it rarely lasts that long.
Covered Tightly: Use plastic wrap or aluminum foil to prevent the cake from drying out or absorbing fridge odors.
Individual Pieces: Cut and wrap individual pieces for easy grab-and-go desserts all week.
Don’t Freeze Assembled: The whipped cream doesn’t freeze well. Only freeze the cake portion before adding toppings.
Perfect Pairings
Cold Milk: The classic. Oreo cake demands milk.
Hot Coffee: The temperature contrast is perfect. The bitterness of coffee balances the sweetness.
Vanilla Ice Cream: Because you can never have too much dairy with your dessert.
Nothing: This is a complete dessert experience. It needs no accompaniment.
More Oreos: Just eat some Oreos on the side. We’re not here to judge your life choices.
The Science of Poke Cakes
The holes you poke create channels for the liquid to penetrate deep into the cake. As the condensed milk mixture seeps in, it gets absorbed by the cake’s crumb structure. This adds moisture, sweetness, and flavor throughout, not just on the surface. The result is a cake that’s uniformly moist and flavorful in every bite.
The cold temperature is important because it helps everything set properly. The condensed milk mixture firms up slightly, the whipped cream stays fluffy and stable, and the cake holds its structure when cut. A warm or room-temperature poke cake would be a structural disaster.
The Oreo pieces in the filling layer add texture and pockets of intense cookie flavor. The crushed Oreos on top provide crunch. It’s all about creating layers of texture and flavor that work together.
When to Make This Cake
Potlucks: This is a potluck champion. Easy to transport, feeds a crowd, universally loved.
Birthday Parties: Kids and adults both go crazy for this. It’s basically cookies and cake in one.
BBQs and Cookouts: Make it the day before and keep it cold. Perfect summer dessert.
Office Parties: Bring this and become everyone’s favorite coworker.
Movie Nights: Make it for your next movie marathon. It’s the perfect couch dessert.
When You Need Comfort Food: This is pure, unapologetic comfort in cake form.
Why This Cake Works So Damn Well
Poke cakes are genius because they’re nearly impossible to mess up. The poking-and-soaking process guarantees a moist cake, even if you slightly overbake it. The sweetened condensed milk adds richness and sweetness throughout. The Oreos provide that familiar, craveable flavor that people love.
It’s also just fun to make. Stabbing a cake with a wooden spoon is surprisingly satisfying. Watching the milk mixture seep into all those holes is mesmerizing. Crushing Oreos is therapeutic. And eating the result is pure joy.
This cake doesn’t pretend to be sophisticated or refined. It knows exactly what it is – a crowd-pleasing, Oreo-loaded, impossibly moist chocolate cake that makes people happy. And sometimes that’s exactly what you need.
This is what happens when you embrace the fact that Oreos are perfect and cake is perfect and combining them in the most indulgent way possible is a good life choice. No regrets. Just Oreos and happiness.
Questions People Always Ask
Q: Can I use homemade chocolate cake instead of a box mix? A: Absolutely. Any chocolate cake recipe that fits a 9×13 pan will work. Just bake according to your recipe’s instructions.
Q: Do I have to use Cool Whip or can I use real whipped cream? A: Real whipped cream works great. Just stabilize it with a bit of powdered sugar and vanilla so it doesn’t deflate. Cool Whip is more foolproof though.
Q: Can I make this without the Oreos in the cake batter? A: Yes, but you’re missing out. The Oreos in the batter add extra texture and flavor pockets.
Q: My condensed milk mixture is too thick to pour. Help? A: Add a bit more cream or milk to thin it out. It should be pourable but not watery.
Q: How many holes should I actually poke? A: Aim for 40-50 holes for a 9×13 pan. More is better than fewer. You want maximum milk absorption.
Q: Can I use a different cake flavor? A: Sure. White cake, vanilla, or even red velvet would work. But chocolate and Oreos is the classic combo for a reason.
Q: This seems really sweet. Is it? A: Yes. It’s very sweet. That’s the point. If you want less sweet, use unsweetened whipped cream and dark chocolate cake.
Print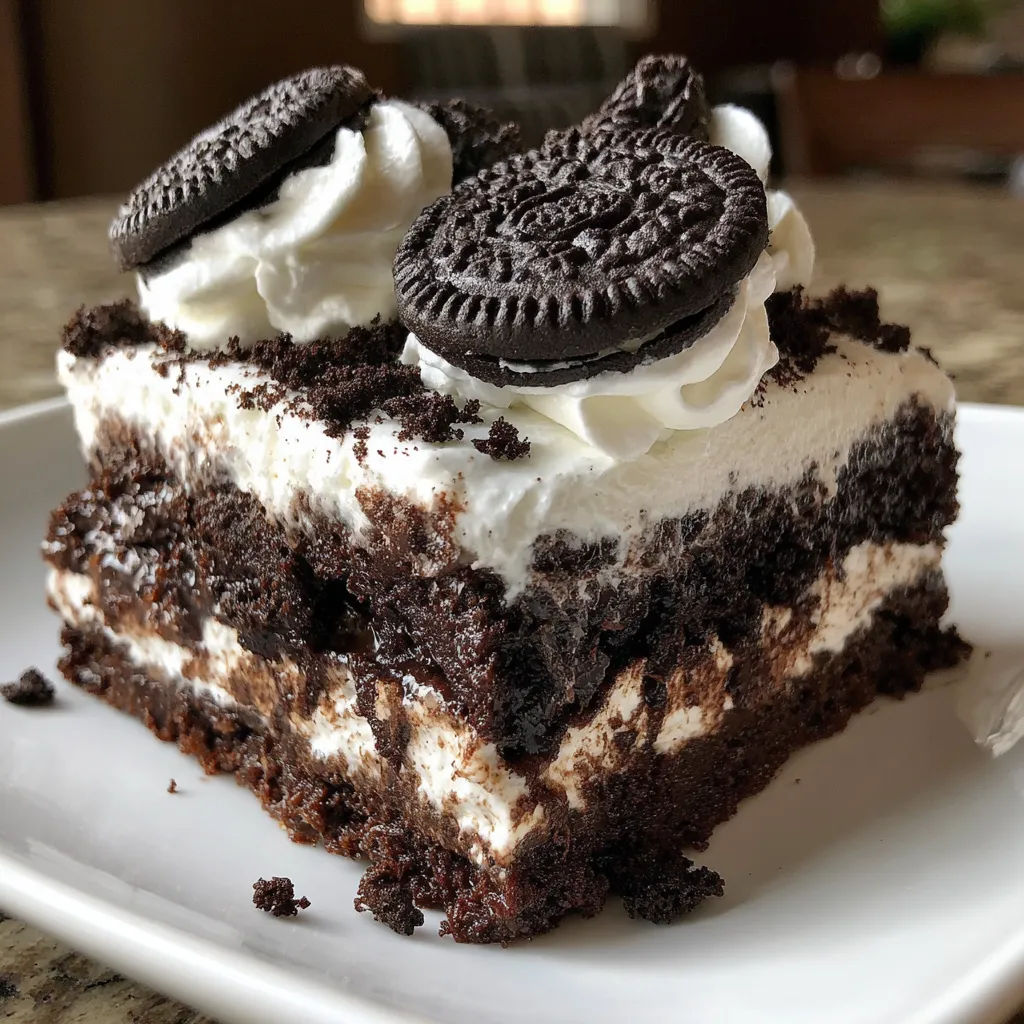
Oreo Poke Chocolate Cake
- Total Time: 30 minute
- Yield: 15 servings 1x
Description
Someone discovered that if you poke holes in a cake and pour stuff into those holes, the cake absorbs it and becomes exponentially better. Then someone else thought “what if we did that with chocolate cake and Oreos?” and honestly, that person deserves a medal. This is a chocolate cake that’s been stabbed repeatedly (in a good way), soaked with sweetened condensed milk, topped with whipped cream, and absolutely buried in crushed Oreos. It’s ridiculous. It’s excessive. It’s exactly what dessert should be.
This isn’t some delicate layer cake that requires architectural precision. This is a “dump, poke, pour, spread, crush, eat” situation that somehow results in one of the most crowd-pleasing desserts you’ll ever make. The cake stays incredibly moist because of all that condensed milk seeping into every pore. The whipped cream adds lightness. The Oreos add crunch and that distinctive cookies-and-cream flavor everyone secretly loves. It’s the kind of cake that makes people go back for seconds before they’ve even finished their first piece.
This is cookies-and-cream energy in cake form. It’s what happens when you stop pretending you’re too sophisticated for Oreos and just lean into the joy. It’s a party in a 9×13 pan.
Ingredients
For the Chocolate Cake:
- 1 box (15.25 oz) chocolate cake mix (or your favorite chocolate cake recipe)
- Ingredients listed on the box (usually oil, eggs, water)
- 1 cup crushed Oreos (about 10 cookies), divided
For the Poke Filling:
- 1 can (14 oz) sweetened condensed milk
- 1/2 cup heavy cream or milk
- 1 cup crushed Oreos (about 10 cookies)
For the Topping:
- 1 container (8 oz) Cool Whip, thawed (or 2 cups homemade whipped cream)
- 2 cups crushed Oreos (about 20 cookies)
- Whole Oreos for garnish (optional but pretty)
Special Equipment:
- 9x13 inch baking pan
- Wooden spoon handle or chopstick for poking
- Large mixing bowl
- Measuring cups
Instructions
Preheat your oven to 350°F. Grease your 9×13 pan like your life depends on it. Or use cooking spray. Either way, make sure it’s well-greased because a stuck poke cake is a tragedy.
Prepare your chocolate cake batter according to the box directions. Before you pour it into the pan, fold in 1 cup of crushed Oreos. Don’t overmix – you want chunks of Oreo throughout, not Oreo dust. Pour the batter into your prepared pan and spread it evenly.
Bake for the time specified on the box, usually 30-35 minutes. A toothpick inserted in the center should come out with just a few moist crumbs. Let the cake cool in the pan for about 15 minutes. Not completely cool – you want it still warm for the poking and soaking.
This is where it gets fun. Take a wooden spoon handle, chopstick, or thick straw and poke holes all over the cake. And I mean ALL over. Every inch should have a hole. Don’t be shy – you want tons of holes for that filling to seep into. Space them about 1/2 inch to 1 inch apart. It should look like Swiss cheese had a baby with a cake.
In a bowl, whisk together the sweetened condensed milk and heavy cream until smooth. Stir in 1 cup of crushed Oreos. This mixture should be pourable but thick enough that the Oreos are suspended in it.
Slowly pour the milk mixture over the entire cake, making sure it gets into all those holes you just made. Use a spoon to push some of the mixture into the holes if needed. You want every poke filled with that sweet, creamy, Oreo-studded liquid. Let the cake sit for about 10 minutes so the mixture can really absorb, then refrigerate for at least 2 hours. Overnight is even better. The cake needs time to fully absorb all that goodness.
Once the cake is completely chilled and the filling has set, spread the Cool Whip (or homemade whipped cream) evenly over the entire top. Use an offset spatula or the back of a spoon to create swirls if you’re feeling fancy. But honestly, just getting it spread evenly is enough.
Sprinkle those 2 cups of crushed Oreos generously over the whipped cream layer. Cover every visible bit of white. This is not the time for minimalism. You want Oreo coverage that makes people say “that’s a lot of Oreos” because that’s exactly the point.
If you want to get fancy (and why not), arrange some whole Oreos on top in a pattern. Or just place them randomly. Or skip this entirely. The cake will taste the same regardless, but it does look nice for photos.
Refrigerate for at least another hour before serving. This cake needs to be cold. Room temperature poke cake is sad and sloppy. Cold poke cake is perfect and holds together when you cut it.
Cut yourself a generous square. Notice how the layers all work together – moist chocolate cake with pockets of sweet cream and Oreo chunks, fluffy whipped cream, crunchy Oreo topping. Take a bite and understand why this cake has been making the rounds at potlucks for years. Feel zero guilt about going back for seconds.
Notes
Don’t Skip the Cooling Time: The cake needs to be slightly warm when you poke and pour, then cold when you serve. Both temperatures matter.
Poke Deep: Your holes should go almost to the bottom of the cake. Shallow pokes mean shallow flavor.
Pour Slowly: Give the mixture time to seep into the holes. If you dump it all at once, it’ll just pool on top.
Crush Oreos Properly: Put them in a Ziploc bag and smash with a rolling pin. You want chunks, not powder. Some bigger pieces are good for texture.
Use Full-Fat Everything: This is not the dessert for low-fat Cool Whip or skim milk. Commit to the indulgence.
Make It Ahead: This cake is BETTER the next day. The flavors meld and the texture improves. Make it the night before your event.
- Prep Time: 20 minutes
- Cook Time: 30-35 minutes
Nutrition
- Calories: ~385 kcal
- Fat: ~16g
- Carbohydrates: ~56g
- Protein: ~5g


