Quick Overview
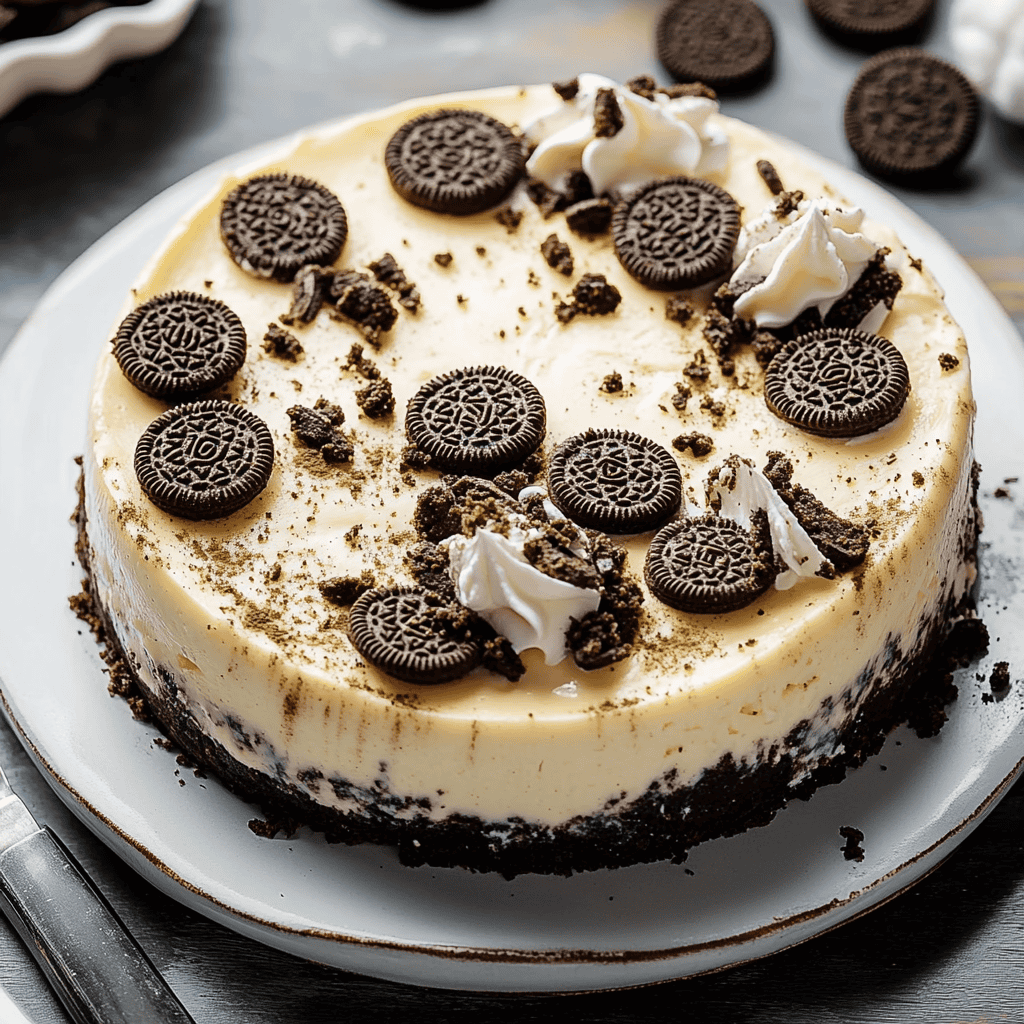
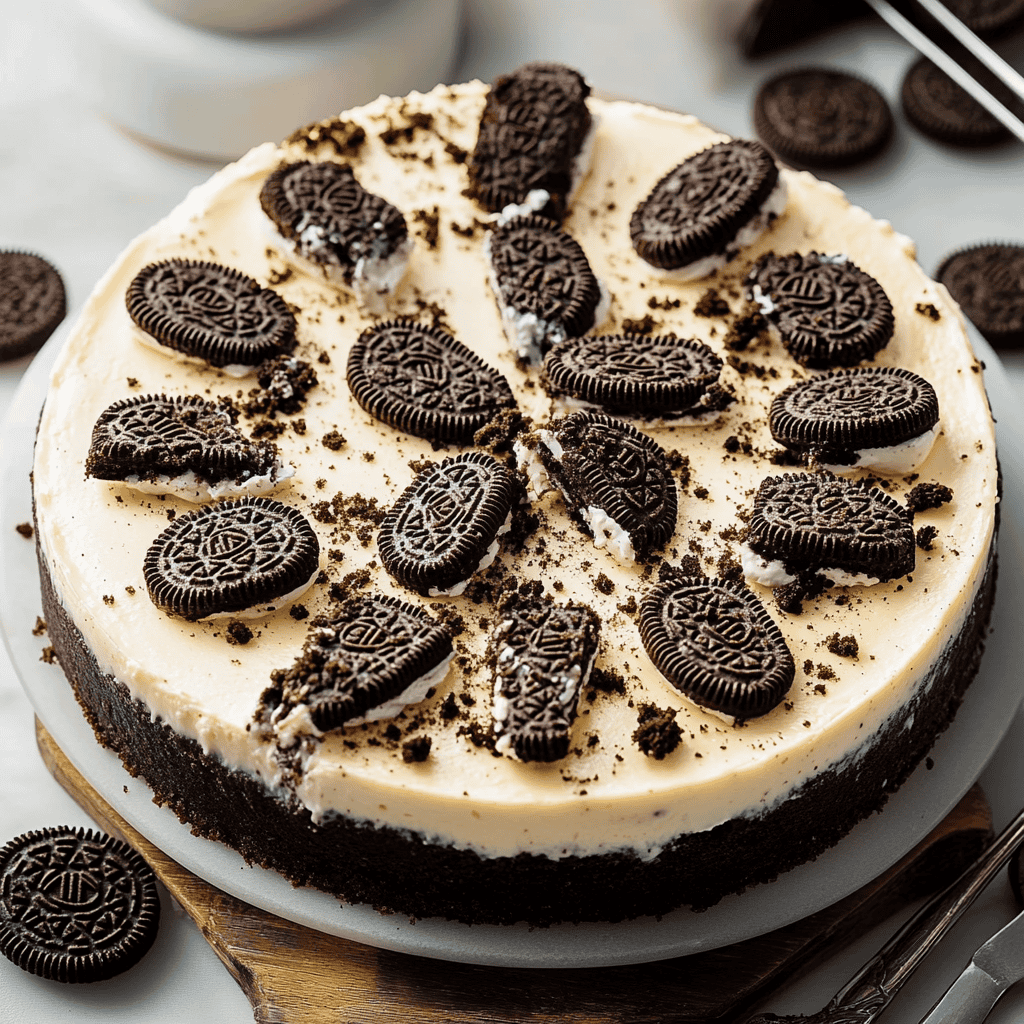
If you’re searching for a delightful dessert to impress your family and friends, look no further than this Oreo cheesecake. This rich and creamy treat combines the beloved flavors of classic Oreos with a smooth cheesecake filling. Perfect for any occasion, whether it’s a birthday party or a cozy dinner at home, this Oreo cheesecake will satisfy your sweet tooth. With just the right balance of sweetness and crunch, this recipe makes it easy to enjoy a slice of heaven.
Ingredient Breakdown
Cream Cheese
You will need 16 ounces of cream cheese at room temperature. This ingredient gives the cheesecake its signature creamy texture and rich flavor. Softening it beforehand ensures a smooth batter without lumps.
Granulated Sugar
Use 1 cup of granulated sugar to sweeten the cheesecake filling. This sugar balances the cream cheese’s richness while adding sweetness that complements the cookie crust.
Heavy Whipping Cream
For an ultra-smooth texture, incorporate 1 cup of heavy whipping cream into your mixture. Whipping it adds airiness to the filling and helps achieve that light consistency everyone loves.
Vanilla Extract
Add 2 teaspoons of pure vanilla extract to enhance the flavor profile. It brings depth to your cheesecake and pairs beautifully with the chocolatey notes from the Oreos.
Oreos
You’ll need about 24 regular-sized Oreos for both the crust and topping. These iconic cookies provide a crunchy base for your cheesecake and add delightful chocolatey goodness throughout.
Unsalted Butter
Melt ½ cup (1 stick) of unsalted butter for binding your crust together. The butter adds richness while helping to hold the crushed Oreos firmly in place.
Step By Step Recipe: Oreo Cheesecake
Prepare the Crust
To begin, preheat your oven to 350°F (175°C). In a food processor, crush 24 Oreos until they resemble fine crumbs. In a separate bowl, melt ½ cup of unsalted butter in the microwave until completely liquid. Mix together the crushed Oreos with melted butter until combined evenly. Press this mixture firmly into the bottom of a springform pan to form an even layer.
Bake the Crust
Once you have pressed your Oreo mixture into place, bake it in the preheated oven for about 10 minutes. This step helps set the crust so it holds up well when you add the filling later on. After baking, remove it from the oven and allow it to cool completely at room temperature.
Make the Filling
In a large mixing bowl, beat 16 ounces of softened cream cheese along with 1 cup of granulated sugar until smooth and creamy. Add in 2 teaspoons of vanilla extract and mix again until fully incorporated. Gradually fold in 1 cup of heavy whipping cream until you achieve a light and fluffy texture without over-mixing.
Incorporate Crushed Oreos
To give your filling that signature Oreo flavor, roughly chop another 8-10 Oreos into small pieces and gently fold them into your cream cheese mixture. This ensures each bite has delicious bits of cookie throughout while maintaining that smooth overall texture.
Assemble Your Cheesecake
Pour the filling over your cooled crust evenly using a spatula for precision. Spread it out gently so that it’s level across the top. To create an elegant finish, crumble some additional crushed Oreos on top before placing it in the refrigerator.
Chill Your Cheesecake
Cover your springform pan tightly with plastic wrap or aluminum foil before placing it in the refrigerator to chill for at least four hours or overnight if possible. Chilling allows all flavors to meld beautifully while firming up your cheesecake so that it slices perfectly later on.
Serving and Storing Tips
Serve Cold
For optimal taste, serve your Oreo cheesecake cold straight from the refrigerator. This enhances its refreshing qualities while ensuring each slice maintains its shape as you cut through layers of creamy goodness.
Garnish Before Serving
Consider garnishing each slice with whipped cream or additional crumbled Oreos right before serving for an attractive presentation that invites guests to dig in immediately!
Store Properly
If you have leftovers (which is rare), store them in an airtight container in your refrigerator for up to five days. Make sure they are covered well to prevent moisture loss or absorption of other odors from foods nearby.
Freeze for Later Use
You can freeze leftover slices by wrapping them tightly in plastic wrap followed by aluminum foil or placing them in freezer-safe bags. They will keep well for up to three months; just thaw them overnight in the fridge before enjoying!
Mistakes to avoid
One common mistake when making Oreo cheesecake is not properly softening the cream cheese. Cold cream cheese can lead to lumps in your mixture, resulting in an uneven texture. Always allow it to come to room temperature before mixing.
Another frequent error is overmixing the batter. While you want a smooth consistency, excessive mixing incorporates too much air, which can cause cracks during baking. Mix just until combined for the best results.
Not using a water bath is another issue that many bakers overlook. This method helps maintain even temperature during baking, preventing your cheesecake from drying out or cracking. Always use a water bath for a creamy finish.
Failing to let the cheesecake cool gradually is also a common mistake. Rapid cooling can create cracks and affect the texture. Allow it to cool at room temperature before refrigerating for optimal results.
Lastly, cutting into the cheesecake too soon can ruin its structure. Patience is key; letting it chill for at least four hours ensures it sets properly and maintains its shape when sliced.
Tips and tricks
To achieve a perfect Oreo cheesecake, ensure you crush your cookies evenly for the crust. Use a food processor for a fine crumb that binds well with melted butter. A well-mixed crust provides an excellent base and enhances the overall flavor of your dessert.
For the filling, consider adding sour cream or Greek yogurt. These ingredients enhance the tanginess of your cheesecake while keeping it creamy and rich. Incorporating them balances the sweetness of Oreos, creating a delightful contrast.
Baking at a lower temperature is crucial for achieving that velvety texture. Keeping the oven at 325°F (163°C) prevents overcooking while ensuring even baking throughout. This technique helps maintain moisture and prevents cracks from forming on top.
After baking, let your cheesecake cool gradually in the oven with the door slightly ajar for about an hour. This gradual cooling process reduces temperature shock, which can cause cracks in the surface of your cheesecake.
Lastly, consider topping your Oreo cheesecake with whipped cream and crushed Oreos before serving. This not only adds visual appeal but also enhances flavor and texture, making every slice irresistible.
Suggestions for Oreo Cheesecake
When preparing Oreo cheesecake, consider using different flavored Oreos for unique twists on the classic recipe. For example, peanut butter or mint-flavored Oreos can offer exciting variations that surprise your guests while maintaining that beloved Oreo taste.
Pairing your cheesecake with fresh fruit like strawberries or raspberries provides a refreshing contrast to its richness. The natural acidity of berries cuts through the creamy filling and complements the chocolate flavor beautifully.
If you’re looking to make this dessert ahead of time, frozen slices work wonderfully! Just wrap individual slices tightly in plastic wrap and foil before freezing them. Thaw overnight in the refrigerator when you’re ready to serve.
Another suggestion is to add chocolate ganache on top for an extra indulgent layer. Simply melt chocolate with heavy cream and let it cool slightly before pouring over your cheesecake for added richness and depth of flavor.
Finally, consider serving your Oreo cheesecake alongside coffee or espresso to balance its sweetness and enhance flavors. The bitterness of coffee complements desserts beautifully, making each bite even more enjoyable.
FAQs
What makes Oreo cheesecake different from traditional cheesecake?
Oreo cheesecake stands out because it incorporates crushed Oreos into both the crust and filling. This adds a unique chocolatey flavor along with crunchy bits that enhance texture compared to standard cheesecakes which typically use graham crackers as their base.
Can I make Oreo cheesecake without baking?
Yes! No-bake Oreo cheesecakes are quite popular for their simplicity and deliciousness. By using whipped cream or whipped topping alongside softened cream cheese, you can create a light yet rich dessert without turning on your oven.
How long should I chill my Oreo cheesecake?
It’s best to chill your Oreo cheesecake for at least four hours before serving; however, overnight chilling yields better results as it allows flavors to meld together fully while ensuring a firmer texture that’s easier to slice.
Can I use reduced-fat cream cheese in my recipe?
Reduced-fat cream cheese can be used as a substitute; however, keep in mind that it may alter both texture and flavor slightly compared to full-fat versions which provide richer taste and creaminess essential for classic cheesecakes.
How do I prevent my cheesecake from cracking?
Preventing cracks involves several key steps: bake at low temperatures, avoid overmixing batter, allow gradual cooling post-baking, and ensure proper water bath usage throughout cooking—these methods help achieve that smooth surface everyone loves!
What toppings pair well with Oreo cheesecake?
Great toppings include whipped cream sprinkled with crushed Oreos or fresh fruits like strawberries or raspberries which add color and brightness! Chocolate syrup drizzles also complement this dessert nicely while enhancing its overall presentation!
Summary
In summary, creating an outstanding Oreo cheesecake requires attention to detail regarding mixing techniques, baking temperatures, cooling procedures, and toppings. Avoid common mistakes such as overmixing or rushing cooling times for best results. Use tips like incorporating sour cream or flavored Oreos for variety while considering ideal serving suggestions paired with fruits or coffee enhances enjoyment even further!