
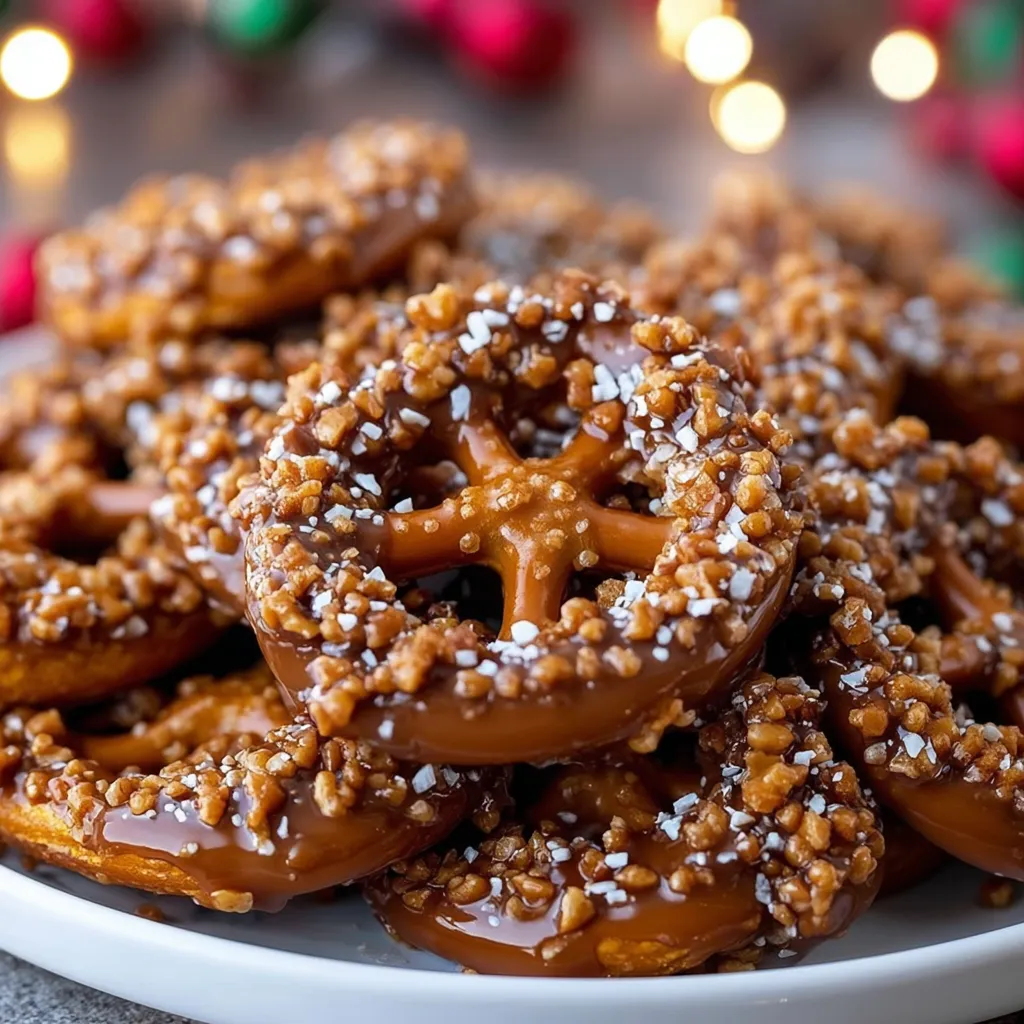
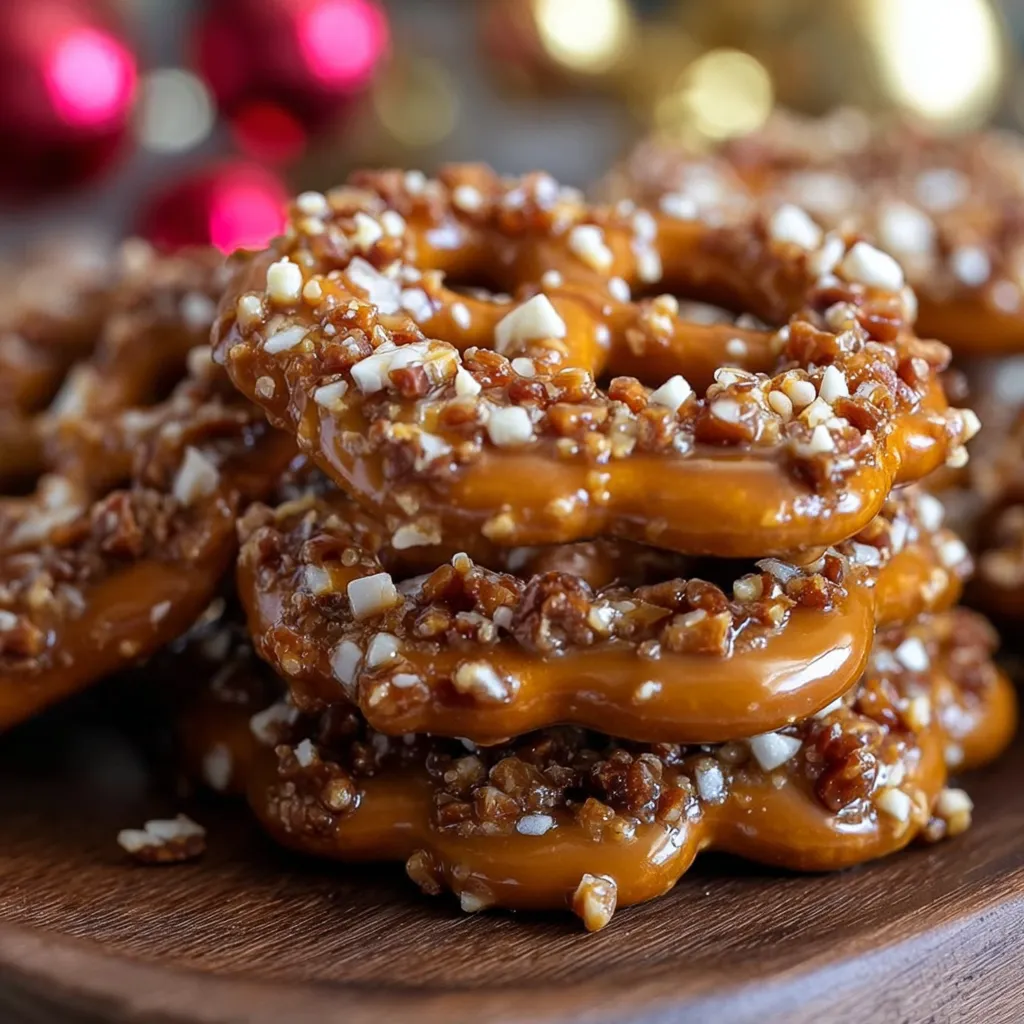
Okay, so imagine if someone took regular pretzels—which are already pretty great—and said “let’s cover these bad boys in buttery toffee, dip them in chocolate, and sprinkle them with crunchy stuff until they become the ultimate sweet-and-salty crack.” That’s exactly what happened here. Christmas Butter Toffee Pretzels are basically pretzel rods or twists that get bathed in homemade butter toffee, coated in chocolate, and topped with whatever festive crunch you can find (crushed pretzels, toffee bits, sea salt, your hopes and dreams). They’re crunchy, buttery, sweet, salty, and so addictive they should come with a warning label. I made these for a holiday party once and people were hoarding them in their pockets. THEIR POCKETS. Another friend ate seven before dinner and regretted nothing. These are the kind of treats that inspire hoarding behavior and zero shame.
Why You’ll Love This Recipe
Sweet and salty perfection. The combo of buttery toffee, chocolate, and salty pretzels hits every craving at once.
Looks fancy, stupid easy. These look like you spent hours at a candy shop. Actually takes like 30 minutes.
Perfect holiday gift. Package these in cellophane bags and you’re officially everyone’s favorite person.
Endlessly customizable. Use any toppings, any chocolate, any pretzels. Make them YOUR signature treat.
No candy thermometer needed. Unlike traditional toffee, this recipe is super forgiving and doesn’t require precision.
Make-ahead friendly. These keep for weeks, so you can prep your entire holiday gift list in advance.
The Good Stuff You’ll Need
For the Base:
- 1 bag (about 8-10 oz) pretzel rods or pretzel twists
- Use the thick pretzel rods for dipping, or pretzel twists for full coverage
- Mini pretzels work too if you want bite-sized treats
For the Butter Toffee:
- 1 cup (2 sticks) unsalted butter
- 1 cup packed light brown sugar
- 1/4 tsp salt
- 1 tsp vanilla extract (added at the end)
- Optional: 1/4 tsp cinnamon for holiday warmth
For the Chocolate Coating:
- 12 oz chocolate (semi-sweet, milk, or dark—your choice)
- Use chocolate chips, melting wafers, or chopped chocolate bars
- 1 tbsp coconut oil or shortening (helps chocolate stay smooth and glossy)
For the Toppings (Choose Your Adventure):
- Crushed pretzels (for extra crunch)
- Toffee bits (Heath bar pieces work great)
- Crushed candy canes (for minty Christmas vibes)
- Flaky sea salt (for that gourmet touch)
- Festive sprinkles (red, green, gold, silver—go wild)
- Chopped nuts (pecans or almonds)
- Mini chocolate chips
- White chocolate drizzle
Equipment:
- Large rimmed baking sheet
- Parchment paper or silicone mat
- Heavy-bottomed saucepan (for the toffee)
- Wooden spoon
- Fork or dipping tool (for chocolate coating)
Let’s Do This
Step 1: Prep Your Station
Line a large baking sheet with parchment paper or a silicone mat. Set aside.
Arrange your pretzels on the counter so they’re ready to dip. Work in batches if needed.
Prepare your toppings in small bowls so they’re ready to sprinkle immediately after dipping.
Get organized NOW because once the toffee and chocolate are ready, you need to move FAST.
Step 2: Make the Butter Toffee
In a heavy-bottomed saucepan over medium heat, combine butter, brown sugar, and salt.
Stir constantly with a wooden spoon until the butter melts and everything combines.
Bring the mixture to a boil, still stirring constantly. You’ll see it bubble and foam up—that’s normal.
Let it boil for 4-5 minutes, stirring the entire time. The mixture will thicken and turn a deeper amber color. It should reach about 290°F if you have a thermometer, but honestly, it’s ready when it looks thick and caramel-colored.
Remove from heat and stir in vanilla extract. It’ll bubble up, so be careful.
Let it cool for about 2-3 minutes so it thickens slightly and becomes more dippable. Too hot and it’ll just run right off the pretzels.
Step 3: Coat the Pretzels in Toffee
Working quickly (the toffee will start to harden), dip each pretzel into the toffee mixture.
For pretzel rods: Dip about 2/3 of the rod, leaving the bottom as a handle.
For pretzel twists: Use a fork to submerge them completely, then lift and let excess toffee drip off.
Place coated pretzels on the prepared baking sheet, leaving space between each one.
Work in batches if needed. If the toffee gets too thick, warm it gently over low heat for 30 seconds.
Let the toffee-coated pretzels cool and harden for about 10-15 minutes. They should be firm to the touch.
Step 4: Add the Chocolate Layer
In a microwave-safe bowl, combine chocolate and coconut oil.
Microwave in 30-second intervals, stirring between each, until completely smooth and melted. Don’t overheat or it’ll seize.
For pretzel rods: Dip the toffee-covered portion into the chocolate, or drizzle chocolate over the toffee with a spoon.
For pretzel twists: Use a fork to dip completely, tap gently to remove excess chocolate, then place on parchment.
Work quickly before the chocolate sets.
Step 5: Add the Toppings
IMMEDIATELY after coating with chocolate (while it’s still wet), sprinkle your chosen toppings over each pretzel.
This is where you get creative. Go heavy on the toppings—more is more.
If using flaky sea salt, just a light sprinkle on each one adds that gourmet touch.
For a candy cane look, use crushed candy canes generously.
If doing a drizzle of contrasting chocolate (like white chocolate over dark), wait until the base chocolate sets, then drizzle and add more toppings if desired.
Step 6: Let Everything Set
Let the pretzels sit at room temperature for about 30 minutes until the chocolate is completely hardened.
Speed it up by putting the baking sheet in the fridge for 10-15 minutes.
Once set, they’re ready to eat, package, or stash away (good luck with that last one).
Try not to eat the entire batch before they’re even fully hardened. This is the biggest challenge of the whole recipe.
Serving Suggestions
These are grab-and-go perfect, but here are some presentation ideas:
- Arrange in a festive tin lined with tissue paper for gifting
- Stand pretzel rods in a tall glass or mason jar for a centerpiece
- Package in clear cellophane bags tied with holiday ribbon
- Arrange on a platter with other holiday treats
- Serve alongside hot chocolate or coffee as a dessert bar item
- Break into pieces and sprinkle over ice cream
- Package individually in treat bags for party favors
Switch It Up
Peppermint Bark Style: Use white chocolate and crushed candy canes for a full peppermint situation.
Turtle Pretzels: Top with chopped pecans and drizzle with caramel after the chocolate sets.
S’mores Pretzels: Add mini marshmallows and graham cracker crumbs to the chocolate coating.
Salted Caramel: Skip the chocolate entirely, double the toffee coating, and finish with flaky sea salt.
Cookies and Cream: Use crushed Oreos as your topping over milk or white chocolate.
Peanut Butter Cup: Drizzle melted peanut butter over the chocolate layer and add chopped peanut butter cups.
Gingerbread Spice: Add 1/2 tsp ginger and 1/4 tsp nutmeg to the toffee mixture for holiday spice vibes.
Rainbow Sprinkle: Use colorful sprinkles and white chocolate for birthday or celebration versions.
Storage and Make-Ahead Tips
The beauty of these is they last forever (theoretically—they never last that long in reality).
Room temperature: Store in an airtight container with parchment between layers for up to 2 weeks.
Keep them dry: Humidity is the enemy. Store with a silica packet if you live somewhere humid.
Freezer: These freeze beautifully for up to 2 months. Layer between parchment in an airtight container.
Gift packaging: Package these up to a week in advance. They stay fresh and crunchy.
Don’t refrigerate: The chocolate can “bloom” (get white spots) in the fridge. Room temp storage is best.
Make-ahead strategy: Make these on a lazy Sunday, package them up, and you’ve got holiday gifts sorted for weeks.
Why This Works So Damn Well
These pretzels are basically scientifically engineered to be irresistible.
The sweet-salty combo hits all your taste receptors at once. Your brain literally can’t decide if it wants sweet or salty, so it just keeps eating.
Butter toffee is more forgiving than regular toffee. You don’t need perfect temperature control or a candy thermometer. The butter keeps it smooth and prevents crystallization.
The pretzel provides structure and crunch that contrasts with the smooth chocolate and sticky toffee. Multiple textures = more interesting eating experience.
Brown sugar creates deeper flavor than white sugar would. That molasses note makes the toffee taste more complex and caramel-like.
Cooling the toffee slightly before dipping ensures it’s thick enough to actually coat the pretzel instead of just running off.
Coconut oil in the chocolate keeps it smooth and prevents that thick, waxy texture you get from straight chocolate chips. It also helps the chocolate stay glossy after it sets.
Layering flavors and textures (salty pretzel + buttery toffee + chocolate + crunchy toppings) creates complexity that keeps you coming back for more.
When to Make These
Holiday Cookie Plates: These add variety and that crucial sweet-salty element to any cookie assortment.
Teacher Gifts: Affordable to make in bulk, looks expensive, universally loved. The trifecta.
Office Parties: Make a huge batch and watch them disappear faster than free donuts.
Neighbor Gifts: Package these with a bow and you’re the neighborhood hero.
Cookie Exchange: These stand out because they’re NOT a cookie. Instant conversation starter.
Movie Night Snack: Better than movie theater candy and way cheaper.
Game Day Treats: Sweet, salty, handheld, and feeds a crowd. Perfect.
Questions People Actually Ask
Q: My toffee crystallized and got grainy. What happened? A: You either stirred it too much after it started boiling, or sugar crystals from the side of the pan fell into the mixture. Next time, brush down the sides with a wet pastry brush while cooking.
Q: The toffee is too runny and won’t stick to the pretzels. A: You didn’t cook it long enough. It needs to reach that thick, caramel stage. Let it boil a bit longer next time.
Q: My chocolate seized up and got chunky. Why? A: Water got into the chocolate, or you overheated it. Chocolate is finicky. Use clean, dry tools and heat gently in short bursts.
Q: Can I use salted butter instead of unsalted? A: Yes, but skip the added 1/4 tsp salt in the recipe or your toffee might be too salty.
Q: The toppings are falling off. Help! A: You waited too long to add them after the chocolate coating. You need to sprinkle toppings while the chocolate is still wet and tacky.
Q: Can I use white chocolate? A: Absolutely! White chocolate with crushed candy canes is a Christmas classic.
Q: My pretzels got soggy. What did I do wrong? A: They were exposed to humidity or moisture. Store in an airtight container with a silica packet, especially in humid climates.
Q: Can I skip the toffee and just do chocolate-covered pretzels? A: Sure, but then they’re just chocolate-covered pretzels, not butter toffee pretzels. The toffee is what makes these special!
Q: Do I HAVE to use pretzel rods? Can I use regular pretzels? A: Use whatever pretzels you want! Twists, sticks, minis—they all work. Adjust your dipping technique accordingly.
PrintChristmas Butter Toffee Pretzels
- Total Time: 1 hour
- Yield: 20–24 pretzel rods 1x
Description
Okay, so imagine if someone took regular pretzels—which are already pretty great—and said “let’s cover these bad boys in buttery toffee, dip them in chocolate, and sprinkle them with crunchy stuff until they become the ultimate sweet-and-salty crack.” That’s exactly what happened here. Christmas Butter Toffee Pretzels are basically pretzel rods or twists that get bathed in homemade butter toffee, coated in chocolate, and topped with whatever festive crunch you can find (crushed pretzels, toffee bits, sea salt, your hopes and dreams). They’re crunchy, buttery, sweet, salty, and so addictive they should come with a warning label. I made these for a holiday party once and people were hoarding them in their pockets. THEIR POCKETS. Another friend ate seven before dinner and regretted nothing. These are the kind of treats that inspire hoarding behavior and zero shame.
Ingredients
For the Base:
- 1 bag (about 8–10 oz) pretzel rods or pretzel twists
- Use the thick pretzel rods for dipping, or pretzel twists for full coverage
- Mini pretzels work too if you want bite-sized treats
For the Butter Toffee:
- 1 cup (2 sticks) unsalted butter
- 1 cup packed light brown sugar
- 1/4 tsp salt
- 1 tsp vanilla extract (added at the end)
- Optional: 1/4 tsp cinnamon for holiday warmth
For the Chocolate Coating:
- 12 oz chocolate (semi-sweet, milk, or dark—your choice)
- Use chocolate chips, melting wafers, or chopped chocolate bars
- 1 tbsp coconut oil or shortening (helps chocolate stay smooth and glossy)
For the Toppings (Choose Your Adventure):
- Crushed pretzels (for extra crunch)
- Toffee bits (Heath bar pieces work great)
- Crushed candy canes (for minty Christmas vibes)
- Flaky sea salt (for that gourmet touch)
- Festive sprinkles (red, green, gold, silver—go wild)
- Chopped nuts (pecans or almonds)
- Mini chocolate chips
- White chocolate drizzle
Equipment:
- Large rimmed baking sheet
- Parchment paper or silicone mat
- Heavy-bottomed saucepan (for the toffee)
- Wooden spoon
- Fork or dipping tool (for chocolate coating)
Instructions
Line a large baking sheet with parchment paper or a silicone mat. Set aside.
Arrange your pretzels on the counter so they’re ready to dip. Work in batches if needed.
Prepare your toppings in small bowls so they’re ready to sprinkle immediately after dipping.
Get organized NOW because once the toffee and chocolate are ready, you need to move FAST.
In a heavy-bottomed saucepan over medium heat, combine butter, brown sugar, and salt.
Stir constantly with a wooden spoon until the butter melts and everything combines.
Bring the mixture to a boil, still stirring constantly. You’ll see it bubble and foam up—that’s normal.
Let it boil for 4-5 minutes, stirring the entire time. The mixture will thicken and turn a deeper amber color. It should reach about 290°F if you have a thermometer, but honestly, it’s ready when it looks thick and caramel-colored.
Remove from heat and stir in vanilla extract. It’ll bubble up, so be careful.
Let it cool for about 2-3 minutes so it thickens slightly and becomes more dippable. Too hot and it’ll just run right off the pretzels.
Working quickly (the toffee will start to harden), dip each pretzel into the toffee mixture.
For pretzel rods: Dip about 2/3 of the rod, leaving the bottom as a handle.
For pretzel twists: Use a fork to submerge them completely, then lift and let excess toffee drip off.
Place coated pretzels on the prepared baking sheet, leaving space between each one.
Work in batches if needed. If the toffee gets too thick, warm it gently over low heat for 30 seconds.
Let the toffee-coated pretzels cool and harden for about 10-15 minutes. They should be firm to the touch.
In a microwave-safe bowl, combine chocolate and coconut oil.
Microwave in 30-second intervals, stirring between each, until completely smooth and melted. Don’t overheat or it’ll seize.
For pretzel rods: Dip the toffee-covered portion into the chocolate, or drizzle chocolate over the toffee with a spoon.
For pretzel twists: Use a fork to dip completely, tap gently to remove excess chocolate, then place on parchment.
Work quickly before the chocolate sets.
IMMEDIATELY after coating with chocolate (while it’s still wet), sprinkle your chosen toppings over each pretzel.
This is where you get creative. Go heavy on the toppings—more is more.
If using flaky sea salt, just a light sprinkle on each one adds that gourmet touch.
For a candy cane look, use crushed candy canes generously.
If doing a drizzle of contrasting chocolate (like white chocolate over dark), wait until the base chocolate sets, then drizzle and add more toppings if desired.
Let the pretzels sit at room temperature for about 30 minutes until the chocolate is completely hardened.
Speed it up by putting the baking sheet in the fridge for 10-15 minutes.
Once set, they’re ready to eat, package, or stash away (good luck with that last one).
Try not to eat the entire batch before they’re even fully hardened. This is the biggest challenge of the whole recipe.
Notes
These are grab-and-go perfect, but here are some presentation ideas:
- Arrange in a festive tin lined with tissue paper for gifting
- Stand pretzel rods in a tall glass or mason jar for a centerpiece
- Package in clear cellophane bags tied with holiday ribbon
- Arrange on a platter with other holiday treats
- Serve alongside hot chocolate or coffee as a dessert bar item
- Break into pieces and sprinkle over ice cream
- Package individually in treat bags for party favors
- Prep Time: 15 minutes
- Cook Time: 15 minutes
Nutrition
- Calories: ~120 kcal
- Sugar: ~10g
- Sodium: ~140mg
- Fat: ~7g
- Carbohydrates: ~15g
- Protein: ~2g


