Quick Overview
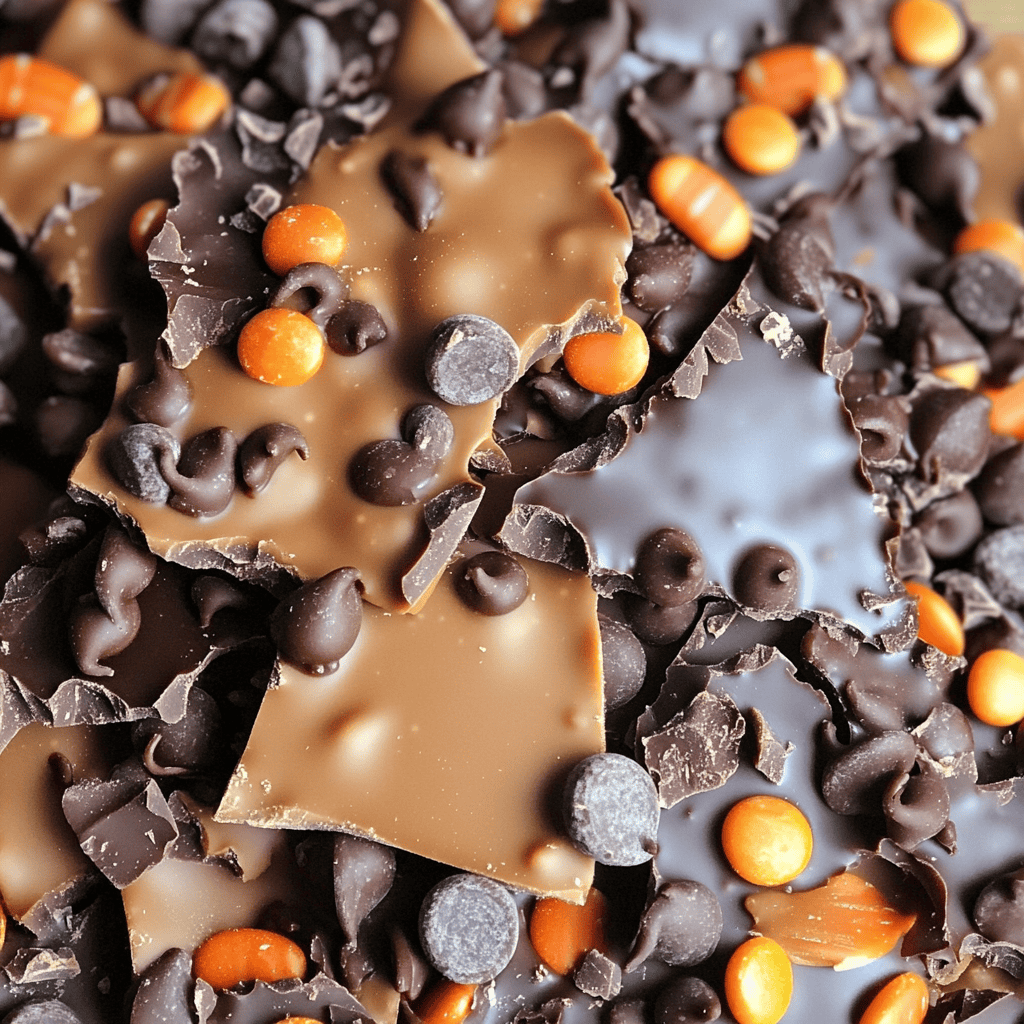
Get ready for a spooky and sweet celebration with this delightful Chocolate Halloween Bark. This easy-to-make treat combines rich chocolate with colorful toppings that bring the spirit of Halloween right to your kitchen. Perfect for parties or as a fun family activity, this recipe ensures you can whip up a batch in no time. With its crunchy texture and vibrant colors, this dessert is sure to be a hit among kids and adults alike.
Ingredient Breakdown
Dark Chocolate
For this recipe, you’ll need 12 ounces of dark chocolate chips. The dark chocolate provides a rich flavor that balances perfectly with the toppings. Use high-quality chocolate for the best results.
Milk Chocolate
You will need 6 ounces of milk chocolate chips. The creamy sweetness of milk chocolate complements the bitterness of dark chocolate and adds a nice contrast in flavors.
Candy Corn
Measure out 1 cup of candy corn. This classic Halloween candy adds vibrant colors and a chewy texture to the bark. It’s an essential ingredient for achieving that festive look.
Orange Sprinkles
Use about 1/4 cup of orange sprinkles. These sprinkles not only add color but also enhance the overall presentation of your bark. They are perfect for celebrating the Halloween theme.
Mini Marshmallows
Grab 1/2 cup of mini marshmallows. Their fluffy texture adds an interesting bite and sweetness that pairs well with the rich chocolates in this bark recipe.
Step By Step Recipe: Chocolate Halloween Bark
Melt the Chocolates
Begin by melting the dark chocolate chips in a microwave-safe bowl. Heat them in 30-second intervals, stirring after each session until smooth and fully melted. This process prevents burning and ensures a silky texture.
Prepare the Baking Sheet
Line a baking sheet with parchment paper or a silicone baking mat. Ensure it’s large enough to spread out the melted chocolate evenly. This step makes it easy to remove the finished bark without sticking.
Spread Dark Chocolate
Pour the melted dark chocolate onto the prepared baking sheet. Use a spatula to spread it into an even layer about 1/4-inch thick across the entire surface of the sheet. Make sure it covers all corners for uniformity.
Melt Milk Chocolate
Next, melt the milk chocolate chips using the same method as before—30-second intervals until smooth. Stir well between each heating session to achieve a creamy consistency without lumps.
Drizzle Milk Chocolate
Once melted, drizzle the milk chocolate over the layer of dark chocolate on your baking sheet using a spoon or piping bag. Create random patterns for an artistic touch that enhances visual appeal.
Add Toppings
Now it’s time to sprinkle on your toppings! Generously add candy corn, orange sprinkles, and mini marshmallows over the chocolaty base while it’s still warm. Press them gently into the surface so they adhere well once cooled.
Chill Until Firm
Place your baking sheet in the refrigerator for about 30 minutes or until completely firm. This cooling process helps solidify both layers of chocolate and keeps your toppings intact until serving time.
Break Into Pieces
Once chilled and firm, remove from refrigerator and lift off the parchment paper carefully. Use your hands or a sharp knife to break it into irregular pieces according to your preference—this gives rustic charm to your treats!
Serving and Storing Tips
Serve Fresh
Chocolate Halloween Bark is best served fresh within one week of making it for optimal taste and texture. Offer it in festive bowls during parties or gatherings for an inviting display.
Store Properly
To store any leftovers, place them in an airtight container at room temperature away from direct sunlight. Keep them cool to maintain their freshness while preventing melting or softening.
Avoid Humidity
If you live in a humid area, consider refrigerating any leftover bark after serving if it starts to feel sticky or soft due to moisture exposure—this will help maintain its crunchy texture longer.
By following these guidelines and instructions closely, you can create delightful Chocolate Halloween Bark that everyone will enjoy during your festive celebrations!
Mistakes to Avoid
One common mistake when making Chocolate Halloween Bark is not tempering the chocolate properly. Tempering helps achieve a shiny finish and ensures that the bark breaks cleanly. Failing to do this can result in dull, unattractive chocolate. Always melt your chocolate slowly and allow it to cool slightly before pouring.
Another mistake is overcrowding the toppings. While it might be tempting to add numerous ingredients, too many can make the bark difficult to break apart and eat. Stick to a few complementary toppings like nuts, candies, or sprinkles for a balanced look and flavor.
Not using parchment paper is also a common error. This crucial step prevents the bark from sticking to surfaces, making it easier to remove once set. Always line your baking sheet with parchment paper before spreading on the melted chocolate for hassle-free removal later.
Lastly, skipping cooling time can ruin your Chocolate Halloween Bark. Allow it enough time in the fridge or at room temperature to set completely. Rushing this process leads to messy, uneven pieces that lack structure.
Tips and Tricks
To create beautiful Chocolate Halloween Bark, start by choosing high-quality chocolate. The better the chocolate, the richer and deeper the flavor will be in your final product. Look for couverture chocolate or premium brands that have a higher cocoa content for an indulgent treat.
When melting chocolate, consider using a double boiler or microwave in short intervals for even heating. Stir frequently to prevent scorching. If you’re using a microwave, heat in 30-second increments and stir in between until smooth. This method helps maintain the integrity of the chocolate while preventing burning.
For decorative toppings, try mixing textures and colors for visual appeal. Combine crunchy elements like pretzels and nuts with soft candies such as gummy worms or marshmallows. This combination creates an exciting contrast that makes each bite interesting while keeping with the festive theme of Halloween.
After pouring the melted chocolate onto your prepared surface, use an offset spatula to spread it evenly. Aim for about half an inch thickness for optimal texture—too thin may break easily while too thick might not set properly. Once spread out, sprinkle toppings generously but avoid pushing them into the chocolate; they should rest on top for best visual impact.
Suggestions for Chocolate Halloween Bark
Consider incorporating seasonal flavors like pumpkin spice or cinnamon into your Chocolate Halloween Bark. A dash of these spices can elevate the taste profile and align nicely with autumn festivities, creating a cozy atmosphere during Halloween gatherings.
You can also customize your bark based on dietary restrictions by opting for dairy-free or vegan chocolates. Many brands offer alternatives that don’t compromise on taste while meeting specific dietary needs. Make sure to read labels carefully to choose suitable options if you’re catering to guests with dietary preferences.
Presentation plays a significant role in impressing guests during Halloween parties. Cut your bark into fun shapes using cookie cutters after it sets completely. You can even package smaller pieces in decorative bags tied with colorful ribbons as thoughtful party favors that guests will appreciate.
FAQs
What is Chocolate Halloween Bark?
Chocolate Halloween Bark is a festive treat made by melting chocolate and spreading it out on a baking sheet before adding various toppings such as candies, nuts, and sprinkles. It’s easy to make and perfect for sharing during Halloween celebrations.
How long does Chocolate Halloween Bark last?
When stored properly in an airtight container at room temperature, Chocolate Halloween Bark can last up to two weeks. However, exposure to air may cause it to lose its freshness sooner, so it’s best enjoyed within a week of preparation.
Can I use any type of chocolate for this recipe?
Yes! You can use dark, milk, or white chocolate based on personal preference. Each type brings its own unique flavor profile; however, ensure you melt them carefully as different chocolates may have varying melting points.
What are some topping ideas for Chocolate Halloween Bark?
Popular topping ideas include crushed candy corn, mini marshmallows, pretzel pieces, chopped nuts, and colorful sprinkles. Feel free to get creative by incorporating seasonal treats like caramel apples or themed candies that fit well with Halloween vibes.
Can I make Chocolate Halloween Bark ahead of time?
Absolutely! You can prepare Chocolate Halloween Bark several days in advance of an event or celebration. Just store it in an airtight container at room temperature until you’re ready to serve it.
How do I cut my Chocolate Halloween Bark without making a mess?
First, allow your bark to set completely before cutting it into pieces; this ensures clean edges. Use a sharp knife or break it apart gently by hand along natural cracks if you prefer rustic-looking pieces instead of uniform squares.
Summary
In summary, creating delightful Chocolate Halloween Bark requires attention to detail regarding ingredients and techniques while avoiding common mistakes like improper cooling or overloading toppings. By following helpful tips such as ideal melting methods and presentation suggestions tailored for seasonal themes—your homemade bark will impress all who indulge! Enjoy sharing this treat during festive gatherings!