
Quick Overview
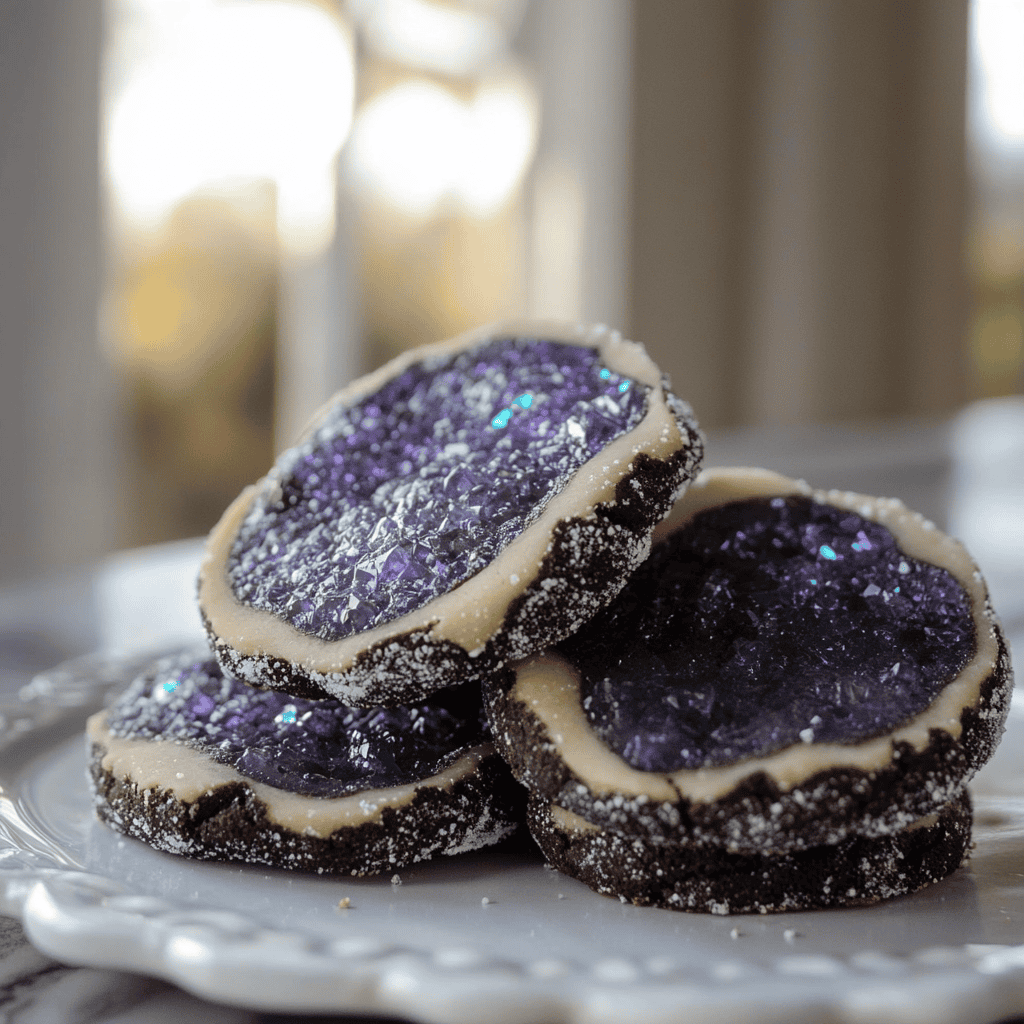
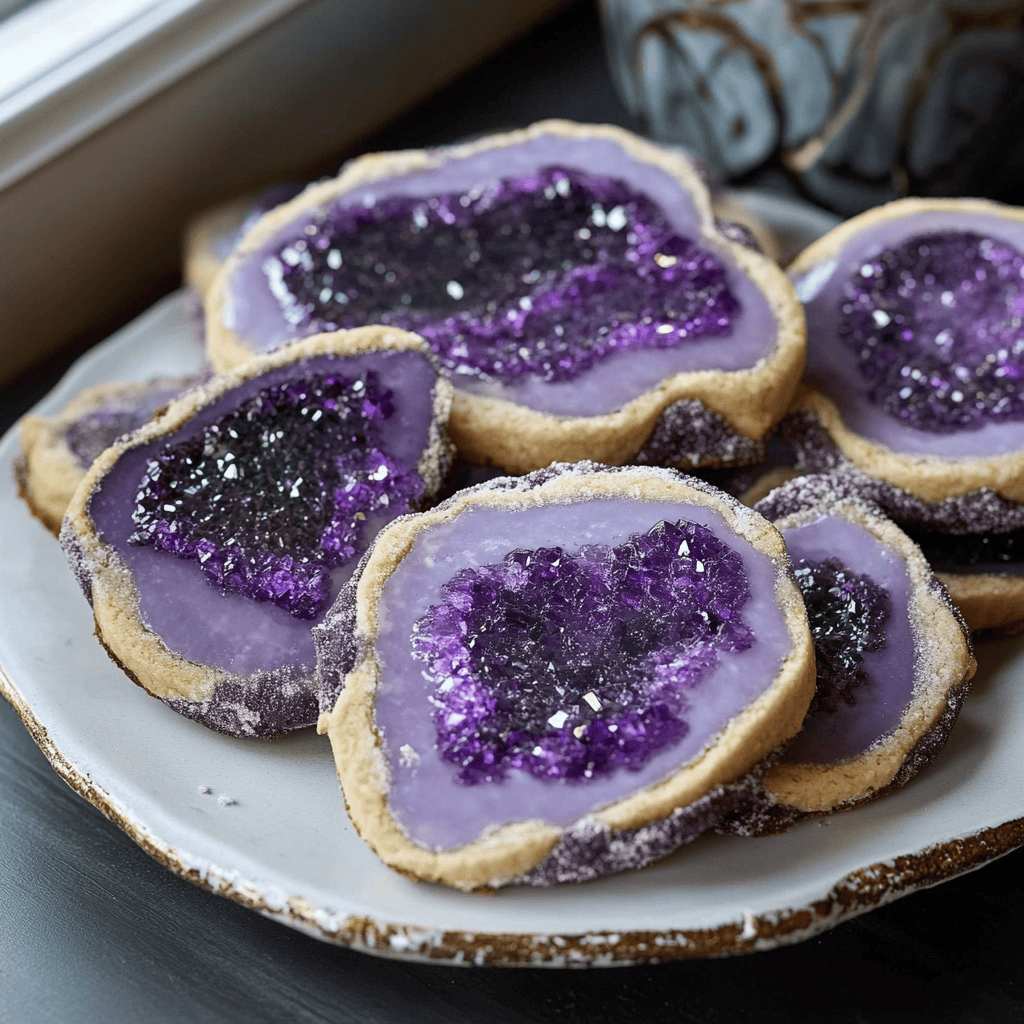
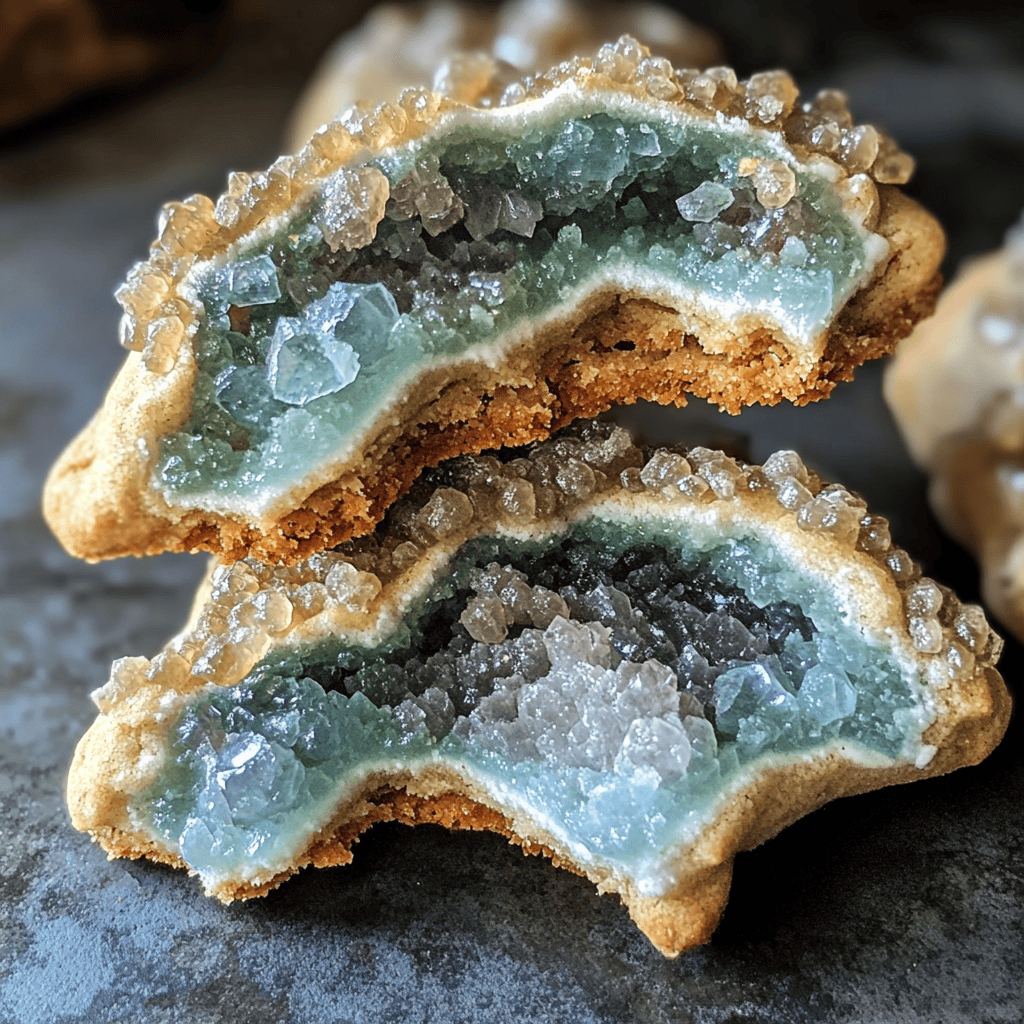
Geode cookies are a stunning treat that will impress everyone at your next gathering. These delightful cookies resemble sparkling gems and are surprisingly simple to make. With vibrant colors and a unique design, geode cookies add flair to any dessert table. In this article, we will guide you through the process of creating these artistic delights from start to finish.
Ingredient Breakdown
Flour
For the base of your geode cookies, you need 2 cups of all-purpose flour. This provides the structure necessary for the cookies while allowing them to spread evenly during baking.
Butter
You will need 1 cup (2 sticks) of unsalted butter, softened at room temperature. Butter adds richness and flavor to the cookies and helps achieve a soft texture once baked.
Sugar
Use 1 cup of granulated sugar to sweeten the cookie dough. Sugar also aids in creating a beautiful golden color on the exterior while keeping the inside tender.
Eggs
In this recipe, 2 large eggs are required. Eggs act as a binding agent and contribute moisture, ensuring your cookies have a chewy center.
Baking Powder
Add 1 teaspoon of baking powder to help your cookies rise. This leavening agent creates a fluffy texture by producing carbon dioxide during baking.
Food Coloring
Select various gel food colors for a vibrant appearance. You will use different shades to create the colorful crystal-like effect on your geode cookies.
Edible Glitter
For extra sparkle, include edible glitter as a finishing touch. This enhances the visual appeal and makes your geode cookies resemble real gemstones.
Step By Step Recipe : Geode Cookies
Step 1: Prepare Your Oven
Preheat your oven to 350°F (175°C). Ensuring your oven is at the correct temperature before baking is crucial for even cooking and achieving that perfect cookie texture.
Step 2: Cream Butter and Sugar
In a large mixing bowl, cream together the softened butter and granulated sugar until light and fluffy. This process incorporates air into the mixture, which helps create a soft cookie texture.
Step 3: Add Eggs
Beat in each egg one at a time into the creamed mixture. Make sure each egg is fully incorporated before adding the next. This step ensures uniform mixing and helps bind all ingredients together effectively.
Step 4: Mix in Dry Ingredients
In another bowl, whisk together flour and baking powder. Gradually add this dry mixture into the wet ingredients while mixing until just combined. Be cautious not to overmix; you want your dough to remain tender.
Step 5: Divide Dough
Divide your cookie dough into several portions based on how many colors you plan to use. Each portion should be about equal so that your cookies have consistent sizes once baked.
Step 6: Color Your Dough
Add gel food coloring to each portion of dough according to your desired shades. Knead each portion until the color is evenly distributed throughout the dough for beautiful marbling effects once baked.
Step 7: Shape Your Cookies
Roll small pieces of colored dough together in various shapes resembling crystals or geodes. Place them on a lined baking sheet with enough space between each cookie for even spreading during baking.
Step 8: Bake Cookies
Bake in your preheated oven for about 10-12 minutes or until edges are lightly golden brown. Keep an eye on them; every oven is different so adjust cooking time if needed based on their appearance.
Step 9: Cool Cookies
Remove from oven and allow cookies to cool for five minutes on the baking sheet before transferring them to wire racks. Cooling slightly on the sheet helps maintain their shape yet allows them to firm up properly as they cool down completely.
Step 10: Decorate with Edible Glitter
Once cooled completely, brush edible glitter onto specific areas of each cookie where you want extra sparkle reflective of real geodes! Allow decorations some time to set before serving!
Serving and Storing Tips
Serving Suggestions
Serve these beautiful geode cookies at parties or gatherings as eye-catching treats that will delight guests of all ages! Arrange them on decorative platters alongside other desserts for an impressive display that showcases their unique design!
Storage Instructions
Store leftover geode cookies in an airtight container at room temperature for up to one week! To keep them fresh longer, consider refrigerating them for added longevity while maintaining flavor integrity over time!
Mistakes to avoid
One common mistake when making Geode Cookies is not chilling the dough. Chilling helps the cookies maintain their shape and prevents them from spreading too much when baking. If you skip this step, you might end up with flat cookies that lack the desired texture. Aim to chill your dough for at least 30 minutes before baking for the best results.
Another mistake is using low-quality food coloring. The vibrant colors of Geode Cookies come from food coloring or gel colors. Using inferior products can result in dull or uneven shades. Invest in high-quality food coloring to achieve those stunning, gem-like effects that make these cookies visually appealing.
Overbaking is a frequent error as well. Monitoring your cookies closely towards the end of baking time is essential. Overbaked cookies can become hard and lose their chewy texture. Aim for a light golden color on the edges while keeping the center slightly soft for the perfect balance.
Not following the recipe proportions can lead to disastrous results in your cookie-making process. Measuring ingredients accurately is crucial, especially when working with baking soda and flour. Using too much or too little can drastically affect the taste and texture of your Geode Cookies.
Lastly, neglecting to let the cookies cool completely before decorating is a mistake you want to avoid. Warm cookies can cause frosting and decorations to melt or slide off, ruining the appearance of your creations. Allow them to cool on a wire rack before applying any toppings or decorations.
Tips and tricks
To achieve stunning Geode Cookies, start by preparing your dough properly. Use room temperature butter for a creamier consistency, which ultimately helps in achieving that perfect texture. Creaming together sugar and butter until fluffy ensures that air incorporates into the dough, leading to lighter cookies. Additionally, consider using cake flour instead of all-purpose flour; this will yield a softer cookie base that’s ideal for geode-like formations.
Next, focus on layering colors effectively with your royal icing or fondant decorations. This technique requires patience but results in impressive visual effects that mimic real geodes beautifully. Start by outlining shapes using piping bags filled with different colors of icing, allowing each layer to dry slightly before adding more details on top.
Another great tip is experimenting with edible glitter and luster dust when decorating your Geode Cookies. These little sparkles add depth and realism to your cookie designs. Apply them carefully after your icing has set but while it remains slightly tacky so they adhere well.
For those looking for texture, consider incorporating crushed candy crystals or rock candy pieces into your decorations. Not only do they add an extra crunch to each bite, but they also resemble actual gemstones found within geodes. Mix various colors and sizes for a more authentic appearance.
Finally, practice makes perfect! Don’t be discouraged if your first batch doesn’t turn out exactly as planned. Baking is an art form that improves with time and experience. Keep experimenting with different techniques and adjustments based on what works best for you personally!
Suggestions for Geode Cookies
When preparing Geode Cookies, consider using a variety of flavors in addition to vanilla or chocolate chips for added depth. Almond extract complements vanilla beautifully and adds an elegant touch that enhances the overall taste experience of these creative treats.
Think about themed occasions when making these cookies as well! They are perfect for birthday parties, baby showers, or even bridal events due to their eye-catching designs. Tailoring colors according to specific themes allows you to impress your guests further while maintaining a cohesive look throughout your dessert table.
If you’re feeling adventurous, try incorporating unique textures into your cookie dough itself by adding finely chopped nuts or colorful sprinkles mixed within! This step not only surprises those who bite into them but also adds delightful crunchiness alongside sweetness.
Consider packaging these cookies beautifully if you’re giving them away as gifts or party favors! Using clear bags tied with ribbons showcases their artistic designs while offering recipients an exciting treat they won’t forget anytime soon.
Lastly, save some decorated Geode Cookies as part of your holiday traditions! Creating festive variations by changing colors according to seasons keeps things fresh year after year while allowing everyone involved to join in on creating memories together.
FAQs
What are Geode Cookies?
Geode Cookies are visually striking treats designed to resemble natural geodes found in nature. These cookies typically feature intricate icing designs and colorful decorations that mimic gemstones embedded within rocks. Made from traditional cookie bases like sugar or butter cookies, they often incorporate vibrant food coloring and edible glitter for added sparkle.
How do I store Geode Cookies?
To keep your Geode Cookies fresh longer, store them in an airtight container at room temperature away from direct sunlight. If you have decorated them with royal icing or fondant, allow these elements to harden fully before stacking them in layers separated by parchment paper—this prevents smudging or damage during storage.
Can I freeze Geode Cookies?
Yes! You can freeze both unbaked cookie dough and baked Geode Cookies successfully without impacting flavor significantly when done correctly. For unbaked dough, wrap it tightly in plastic wrap before placing it in an airtight bag; just thaw it overnight before baking again! Baked cookies should cool entirely before being placed into freezer-safe containers lined with wax paper between layers.
What type of frosting works best for Geode Cookie decoration?
Royal icing is often preferred due to its smooth finish and ability to hold intricate designs well while drying hard enough not get ruined easily upon transporting! You may also use buttercream frosting if you’re looking for something softer—just be cautious about potential melting during warmer weather events when serving outdoors!
Are there gluten-free options available for Geode Cookies?
Absolutely! You can substitute all-purpose flour with gluten-free alternatives such as almond flour or gluten-free blends available at many grocery stores today without sacrificing flavor! Just make sure other ingredients used (like extracts) are also gluten-free certified if necessary!
How can I make my own edible crystals for decoration?
Creating edible crystals involves dissolving sugar in water over low heat until it reaches saturation point; then pour this mixture onto parchment paper allowing it cool completely before breaking apart into crystal-like shapes suitable for adorning your tasty masterpieces! Adding food coloring beforehand may enhance their visual appeal even more!
Summary
In summary, creating delightful Geode Cookies requires attention to detail and careful preparation throughout every step of the process—from mixing dough accurately down through decorating techniques employed later on! Avoid common mistakes such as neglecting proper chilling times or overbaking while following provided tips ensures success right away! With creativity applied toward flavor combinations plus thoughtful suggestions regarding presentation methods shared above—these treats will surely impress all who encounter them!


