

Quick Overview
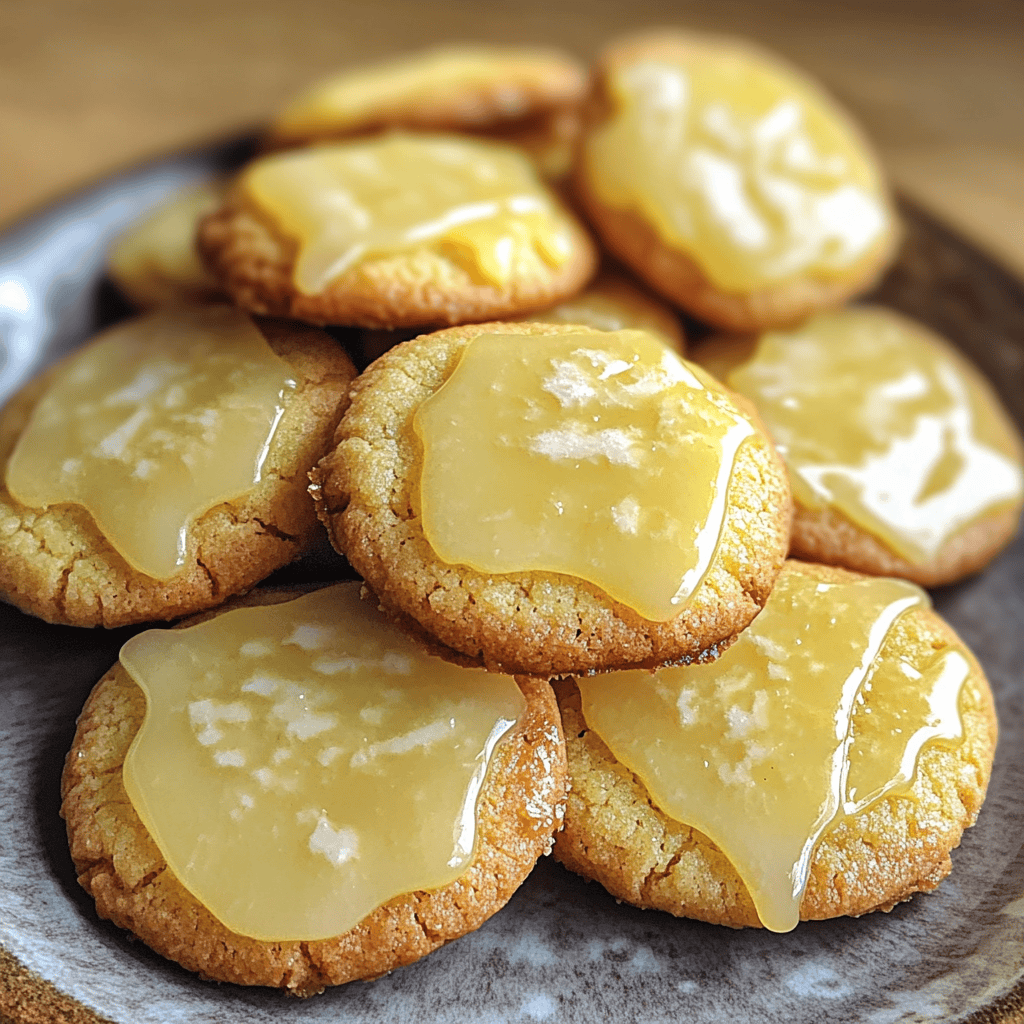
Spring is the perfect time to bake something sweet and refreshing. These lemon curd Easter cookies are a delightful addition to any holiday celebration. Bursting with zesty flavors and a soft texture, they will brighten up your table and impress your guests. Not only are they delicious, but they are also simple to make. Let’s dive into this delicious recipe for lemon curd Easter cookies!
Ingredient Breakdown
Flour
All-purpose flour serves as the base for these cookies. It gives them structure while allowing them to maintain a soft and chewy texture. For this recipe, you will need 2 cups of all-purpose flour.
Sugar
Granulated sugar adds sweetness to the cookie dough and helps create a nice balance with the tartness of the lemon curd. You will need 1 cup of granulated sugar for this recipe.
Butter
Unsalted butter provides richness and flavor in these cookies. Ensure your butter is at room temperature for easy mixing. Use 1/2 cup of unsalted butter for this recipe.
Eggs
Eggs act as a binding agent in the cookie dough, helping it hold together while providing moisture. You’ll need one large egg for this recipe.
Lemon Curd
The star ingredient! Lemon curd adds that refreshing citrus flavor that makes these cookies special. Use about 1 cup of lemon curd to provide rich flavor and moisture.
Baking Powder
Baking powder helps the cookies rise and become light and fluffy. For this recipe, you will need 1 teaspoon of baking powder.
Vanilla Extract
Vanilla extract enhances the overall flavor profile of the cookies, adding a warm sweetness that complements the lemon tang. Use 1 teaspoon of pure vanilla extract.
Salt
A pinch of salt balances the sweetness in these cookies and enhances their flavor profile overall. Just 1/4 teaspoon of salt is needed.
Step By Step Recipe: Lemon Curd Easter Cookies
Step 1: Preheat Your Oven
Start by preheating your oven to 350°F (175°C). This ensures that your cookies bake evenly once you put them in the oven. While preheating, prepare your baking sheet by lining it with parchment paper or greasing it lightly to prevent sticking.
Step 2: Mix Dry Ingredients
In a medium bowl, whisk together the flour, baking powder, and salt until well combined. This step ensures that the baking powder is evenly distributed throughout the dry ingredients, which helps achieve uniform rising during baking.
Step 3: Cream Butter and Sugar
In a large mixing bowl, beat together the room temperature butter and granulated sugar using an electric mixer on medium speed until the mixture becomes light and fluffy. This process usually takes about 2-3 minutes and helps incorporate air into your dough for better texture.
Step 4: Add Egg and Vanilla
Add in one large egg and vanilla extract to your creamed butter mixture. Continue mixing until fully combined; you want everything incorporated without overmixing it to maintain a tender cookie texture.
Step 5: Combine Wet and Dry Ingredients
Gradually add your dry ingredient mixture to the wet ingredients while mixing on low speed or stirring by hand until just combined. Be careful not to overmix; stop as soon as there are no visible flour streaks left in your dough.
Step 6: Fold in Lemon Curd
Gently fold in one cup of lemon curd using a spatula until evenly distributed throughout the cookie dough. The goal is to keep some swirls of lemon curd visible in your mixture for added bursts of flavor when baked.
Step 7: Scoop Dough onto Baking Sheet
Using a tablespoon or cookie scoop, drop rounded tablespoons of dough onto your prepared baking sheet about two inches apart from each other. This spacing allows room for spreading while baking without merging into each other.
Step 8: Bake Cookies
Place the baking sheet into your preheated oven and bake for about 10-12 minutes or until edges start turning golden brown while centers still look slightly soft but set. Keep an eye on them as every oven can vary slightly!
Step 9: Cool on Wire Rack
Once baked, remove from oven and let cool on sheet for about five minutes before transferring them onto wire racks completely cool down before serving or decorating with additional toppings like icing if desired!
Serving and Storing Tips
Serving Suggestion
These lemon curd Easter cookies make an excellent treat at spring gatherings or holiday celebrations! Serve them alongside tea or coffee for an enjoyable afternoon snack that everyone will love.
Storage Guidelines
Store leftover cookies in an airtight container at room temperature for up to five days to maintain freshness; otherwise refrigerate to extend shelf life by another week if necessary!
By following these steps closely, you can create delightful lemon curd Easter cookies that will surely impress family and friends alike! Enjoy baking!
Mistakes to avoid
One common mistake when making lemon curd Easter cookies is overmixing the dough. Overmixing can lead to tough cookies instead of a light, tender texture. Mix just until the ingredients are combined for best results.
Another mistake is using cold butter straight from the fridge. Room temperature butter is essential for creaming with sugar effectively, which helps incorporate air into the dough. This step ensures your cookies have a nice rise and soft texture.
Using store-bought lemon curd instead of homemade can also dilute the flavor. While convenience is tempting, homemade lemon curd adds freshness and vibrant flavor that elevates your cookies.
Don’t forget to chill your cookie dough before baking. Skipping this step can lead to spreading during baking, resulting in flat cookies. Chilling firms up the fat in the dough and helps maintain shape.
Finally, neglecting to check your oven temperature can ruin your baking efforts. An oven that’s too hot or too cold affects cooking time and texture. Always use an oven thermometer for accurate readings.
Tips and tricks
For perfect lemon curd Easter cookies, measure ingredients accurately. Use a kitchen scale for dry ingredients like flour and sugar, as this provides precision that cups can’t always deliver. Accurately measuring ensures consistent results every time you bake.
Using fresh lemons for zest and juice makes a significant difference in flavor. Freshly squeezed juice provides a bright acidity that bottled versions can’t replicate. When zesting, only take the outer yellow part of the peel; avoid any white pith as it can introduce bitterness.
Consider experimenting with different types of icing or glaze to complement your cookies. A simple lemon glaze made from powdered sugar and lemon juice enhances sweetness while adding a citrus punch. You could also mix in some food coloring for a festive touch during Easter celebrations.
When decorating your lemon curd Easter cookies, use edible decorations like sprinkles or colored sugar. This not only adds visual appeal but also a delightful crunch that contrasts with the soft cookie texture.
Lastly, if you’re making these cookies ahead of time, freeze them after baking but before icing. Wrap each cookie individually in plastic wrap and store them in an airtight container. When you’re ready to serve, simply thaw and ice them fresh!
Suggestions for Lemon curd easter cookies
If you want to add variety to your lemon curd Easter cookies, consider incorporating different flavors into the dough. A hint of almond extract can complement the lemon beautifully without overpowering it.
You could also add dried fruits like cranberries or blueberries to give additional texture and unexpected bursts of flavor in each bite. These fruits pair well with the tartness of lemon curd.
For a more decadent treat, sandwich two cookies together with lemon curd filling or whipped cream cheese frosting for added richness. This not only makes them look appealing but also enhances their taste profile.
Don’t hesitate to personalize your cookie shapes! Instead of traditional rounds, use Easter-themed cookie cutters like bunnies or eggs for festive fun that kids will love helping with during baking sessions.
Lastly, consider pairing these cookies with a refreshing drink like iced tea or lemonade when serving at gatherings—this will enhance the overall experience of enjoying these delightful treats!
FAQs
What ingredients do I need for lemon curd Easter cookies?
To make lemon curd Easter cookies, you’ll need flour, sugar, butter, eggs, baking powder, salt, vanilla extract, fresh lemons for zest and juice, and homemade or store-bought lemon curd. Using high-quality ingredients will yield better flavor and texture in your final product.
How long do I bake these cookies?
Bake lemon curd Easter cookies at 350°F (175°C) for about 10-12 minutes or until they turn lightly golden around the edges. Keep an eye on them; ovens vary significantly in temperature accuracy so checking at 10 minutes helps prevent overbaking.
Can I make these cookies ahead of time?
Yes! You can prepare these cookies ahead of time by baking them one day prior to serving or even freezing them after they’ve cooled completely without frosting or glazing them first. This makes it easy to serve fresh-tasting treats later on!
How should I store leftover cookies?
Store leftover lemon curd Easter cookies in an airtight container at room temperature for up to five days. If you want them to last longer without drying out, consider refrigerating them; just remember that refrigeration may change their texture slightly.
What’s the best way to decorate these cookies?
The best way to decorate your lemon curd Easter cookies is with a simple glaze made from powdered sugar and freshly squeezed lemon juice mixed until smooth. Drizzling this on top adds sweetness and tanginess while enhancing their visual appeal!
Can I substitute lime juice for lemon juice?
Yes! If you’d like a different citrus twist on your recipe, feel free to substitute lime juice for lemon juice in both the dough and filling components. Lime adds its own unique flavor that pairs wonderfully with sweet elements in baked goods.
Summary
In summary, making delicious lemon curd Easter cookies involves avoiding common mistakes such as overmixing dough or skipping chilling steps while incorporating helpful tips like measuring accurately and using fresh ingredients for optimal flavor enhancement. By storing properly and exploring various ways to decorate these treats creatively alongside answering frequently asked questions on preparation methods keeps everything organized! Enjoy baking!


