
The Korean Beef Bowl brings the irresistible flavors of bulgogi right to your dinner table in just 15 minutes. This quick and savory dish combines tender ground beef with a perfect blend of sweet and spicy seasonings, making it ideal for busy weeknights or whenever you crave a comforting Asian-inspired meal.
With minimal prep and cooking time, this recipe balances savory soy, toasted sesame, and a hint of heat from red pepper flakes. It’s a delightful way to enjoy the rich taste of Korean barbecue without the fuss of marinading or grilling.
- Ready in only 15 minutes, perfect for busy schedules.
- Captures authentic bulgogi flavors with easy-to-find ingredients.
- Ground beef makes it budget-friendly and family-approved.
- Versatile as a bowl, wrap, or rice topping.
Ingredients
- Brown sugar: Adds a rich, caramel-like sweetness to balance the savory soy sauce perfectly.
- Reduced sodium soy sauce: Provides a deep umami kick while controlling saltiness for a balanced flavor profile.
- Sesame oil: Brings a nutty aroma and authentic Korean taste to enrich the beef mixture.
- Crushed red-pepper flakes: Adds mild heat and a subtle kick; adjust amount to your spice preference.
- Ground ginger: Offers a warm, fragrant spice that complements the beef and other seasonings.
- Vegetable oil: Used for cooking garlic and beef evenly with a neutral flavor.
- Garlic cloves: Freshly minced garlic enhances aroma and delivers robust savory notes.
- Ground beef: Lean or regular, this is the hearty protein base that soaks up all the flavorful sauce.
- Green onions: Thinly sliced for freshness, mild onion flavor, and a vibrant garnish.
- Sesame seeds: Adds a subtle crunch and nuttiness as a finishing touch.
Instructions
- Whisk together the sauce ingredients
- In a small bowl, combine brown sugar, soy sauce, sesame oil, crushed red pepper flakes, and ground ginger. Mixing these ingredients early ensures the flavors meld together evenly during cooking.
- Cook the garlic until fragrant
- Heat vegetable oil in a large skillet over medium-high heat. Add minced garlic and stir constantly for about 1 minute until aromatic. This step releases garlic’s flavor without burning, which would turn it bitter.
- Brown the ground beef
- Add ground beef to the skillet, breaking it up with a spatula. Cook for 3–5 minutes until browned and no pink remains, then drain any excess fat. Browning builds rich flavor while preventing greasiness.
- Combine beef with sauce and green onions
- Pour in the prepared sauce and add sliced green onions. Stir well to coat the beef evenly and let it simmer for 2 minutes. Simmering allows the beef to absorb the sauce, creating a tender, flavorful filling.
- Garnish and serve immediately
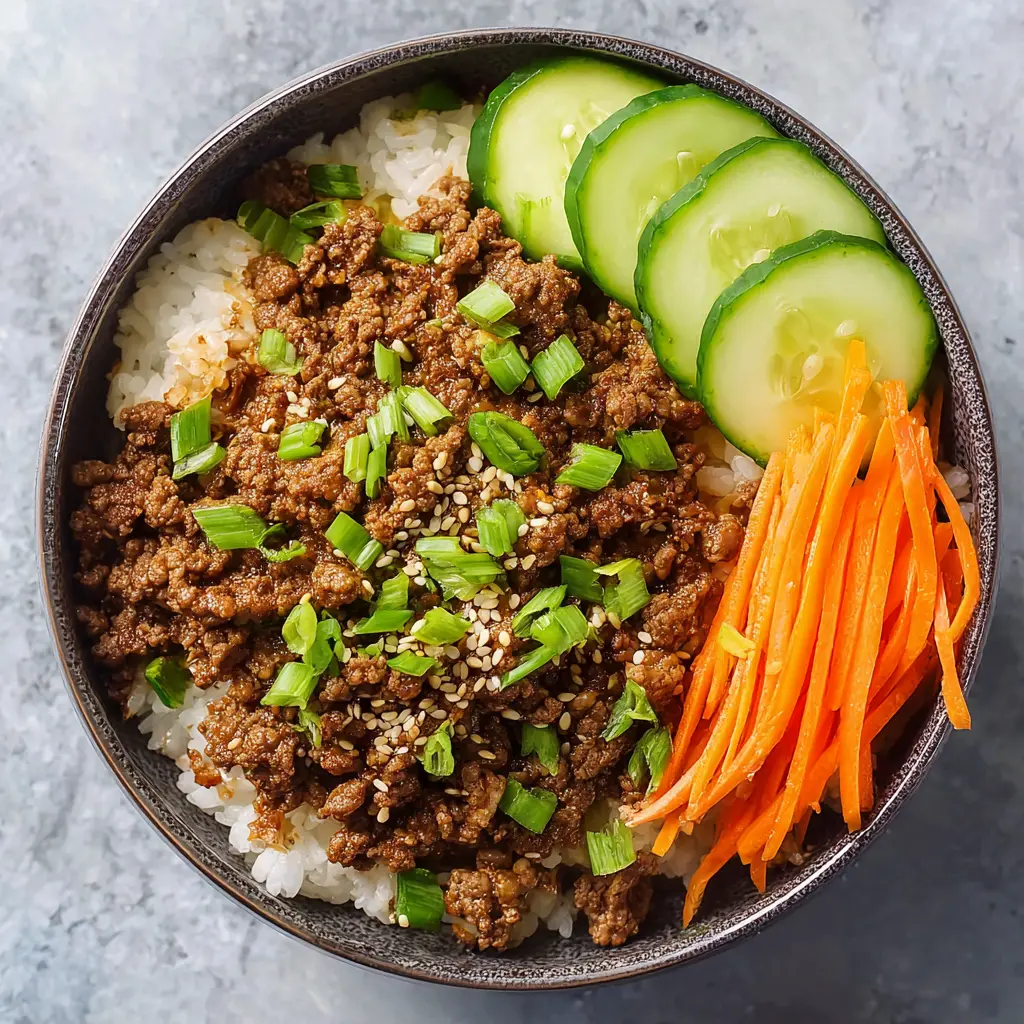
- Transfer the beef bowl to plates and sprinkle sesame seeds and extra green onions on top if desired. Serve hot over steamed rice or greens for a complete meal.
- Use lean ground beef to reduce fat, or regular for richer flavor; both work well.
- Adjust crushed red pepper flakes to control heat level according to preference.
- This dish pairs wonderfully with steamed jasmine rice or cauliflower rice for a lower-carb option.
- Leftover beef keeps well and can be reheated quickly for lunches or wraps.
Storage Tips
Store leftover Korean beef bowl in an airtight container in the refrigerator for up to 3 days. Reheat gently in a skillet or microwave, adding a splash of water if too dry to maintain moisture.
Serving Suggestions
Serve this Korean Beef Bowl over fluffy white rice with steamed vegetables for a balanced meal. Alternatively, use it as a filling for lettuce wraps or top with a fried egg for added richness.
- For best flavor, use fresh garlic and green onions rather than dried or powdered versions.
- Let the sauce simmer briefly after adding to beef to deepen the umami taste.
- Add a splash of rice vinegar or a drizzle of honey to tweak balance of sweet and tangy.
- For added texture, garnish with toasted sesame seeds and chopped peanuts.
FAQs
- how to make korean beef bowl?
Brown ground beef, drain fat. Add soy sauce, brown sugar, sesame oil, garlic, ginger, and red pepper flakes. Simmer 5 min. Serve over steamed white rice.
- what to serve with korean beef bowls?
Steamed broccoli, cucumber salad, pickled daikon, kimchi, or fried egg on top.
- What can I serve this with?
- It pairs well with steamed rice, mixed greens, kimchi, or in lettuce wraps for a low-carb alternative.
- a sweet pea chef korean beef bowls
Uses lean ground beef with a savory-sweet sauce, topped with green onions and sesame seeds — simple 20-minute weeknight meal.
- Is this dish gluten-free?
- If you use gluten-free soy sauce, this recipe can be adapted to gluten-free diets.
- How do I store leftovers?
- Keep leftovers in an airtight container refrigerated up to 3 days and reheat thoroughly before serving.
- Can I add vegetables to this dish?
- Absolutely! Adding shredded carrots, bell peppers, or spinach can increase nutrition and texture.
Korean Beef Bowl
Equipment
- 1 cast iron skillet
Ingredients
- 1/4 cup packed brown sugar
- 1/4 cup reduced sodium soy sauce
- 2 teaspoons sesame oil
- 1/2 teaspoon crushed red pepper flakes or to taste
- 1/4 teaspoon ground ginger
- 1 tablespoon vegetable oil
- 3 cloves garlic minced
- 1 pound ground beef
- 2 green onions thinly sliced
- 1/4 teaspoon sesame seeds
Instructions
- In a small bowl, whisk together brown sugar, soy sauce, sesame oil, crushed red pepper flakes, and ground ginger.
- Heat vegetable oil in a large cast iron skillet over medium-high heat.
- Add minced garlic and cook, stirring constantly, until fragrant, about 1 minute.
- Add ground beef to the skillet and cook until browned, about 3 to 5 minutes, crumbling the beef as it cooks. Drain excess fat.
- Stir in the soy sauce mixture and green onions, combining well, then simmer until heated through, about 2 minutes.
- Serve immediately, garnished with green onions and sesame seeds if desired.
Notes
- Use lean ground beef for a healthier option.
- Serve over steamed rice for a complete meal.
- Adjust red pepper flakes for desired spice level.
- Store leftovers in an airtight container for up to 3 days.


