
Okay, so imagine if a fudgy brownie and a classic tiramisu went on a date, fell in love, and had the most beautiful hybrid baby imaginable. That’s what we’re dealing with here. Tiramisu Brownies are basically dense, chocolatey brownie bottoms soaked with espresso (or strong coffee), topped with a cloud-like mascarpone cream layer, then dusted with cocoa powder like the Italian dessert gods intended. It’s got all the sophistication of tiramisu with the comfort-food energy of brownies. You get that coffee kick, that creamy mascarpone situation, and that rich chocolate base all in one ridiculously decadent square. I made these for a dinner party once and a guest literally said “I think I just fell in love” after the first bite. Another person asked if I’d studied in Italy. Reader, I learned this recipe from the internet while sitting in my pajamas. These brownies create delusions of grandeur.
Why You’ll Love This Recipe
Two desserts in one. Why choose between brownies and tiramisu when you can have BOTH at the same time?
Coffee + chocolate. The ultimate flavor pairing. If this doesn’t excite you, check your pulse.
Looks fancy as hell. Those distinct layers, that cocoa dust on top. Very impressive, very European.
No-bake topping. The mascarpone layer doesn’t need baking. Just whip and spread. Easy win.
Make-ahead champion. Actually needs to chill for hours, so making it ahead is required. Procrastination validated.
Sophisticated but accessible. Tastes like you went to culinary school but uses ingredients from a regular grocery store.
The Good Stuff You’ll Need
For the Brownie Base:
- 1/2 cup (1 stick) unsalted butter
- 8 oz semi-sweet or dark chocolate, chopped (or 1 1/3 cups chocolate chips)
- 3/4 cup granulated sugar
- 3 large eggs
- 1 tsp vanilla extract
- 3/4 cup all-purpose flour
- 1/4 cup unsweetened cocoa powder
- 1/4 tsp salt
For the Coffee Soak:
- 1/2 cup strong brewed espresso or coffee, cooled
- 2 tbsp coffee liqueur like Kahlúa (optional but recommended)
- 1 tbsp granulated sugar
For the Mascarpone Cream Layer:
- 16 oz (2 cups) mascarpone cheese, room temperature (this is crucial)
- 1 cup heavy whipping cream, cold
- 1/2 cup powdered sugar
- 1 tsp vanilla extract
- Pinch of salt
For Topping:
- Unsweetened cocoa powder for dusting (be generous)
- Chocolate shavings (optional but pretty)
- Espresso powder (optional, for extra coffee vibes)
Let’s Do This
Step 1: Make the Brownies
Preheat oven to 350°F (175°C). Line a 9×9-inch baking pan with parchment paper, leaving overhang on the sides (this is your escape hatch later).
Melt butter and chopped chocolate together in a double boiler or microwave (30-second bursts, stirring between). Let cool slightly.
Whisk in sugar until combined, then add eggs one at a time, whisking after each addition. Add vanilla.
In a separate bowl, whisk together flour, cocoa powder, and salt.
Fold the flour mixture into the chocolate mixture until just combined. Don’t overmix or your brownies will be cakey instead of fudgy.
Pour batter into prepared pan and spread evenly.
Bake for 25-30 minutes. A toothpick inserted should come out with a few moist crumbs, not clean. Underbake slightly—they’ll firm up as they cool.
Let cool in the pan for 10 minutes.
Step 2: Soak in Coffee Goodness
While brownies are still warm, mix together cooled espresso, coffee liqueur (if using), and sugar until sugar dissolves.
Using a fork or skewer, poke holes ALL OVER the warm brownies. Go crazy. The more holes, the more coffee soaks in.
Slowly pour or brush the coffee mixture over the brownies, making sure it gets into all those holes. Let it absorb.
Let the brownies cool completely at room temperature. The coffee needs time to soak in and the brownies need to be cool before you add the cream layer.
Step 3: Make the Mascarpone Cream
In a large bowl, beat mascarpone cheese on medium speed for about 1 minute until smooth and creamy. Make sure it’s at room temp or it’ll be lumpy.
In a separate bowl, whip cold heavy cream with powdered sugar and vanilla on medium-high speed until stiff peaks form. Don’t overbeat or you’ll have butter.
Gently fold the whipped cream into the mascarpone in three additions. Be gentle—you want to keep all that airiness. The mixture should be light, fluffy, and cloud-like.
Add a pinch of salt and fold once more.
Step 4: Assemble the Layers
Spread the mascarpone cream evenly over the cooled, coffee-soaked brownies. Make it thick, make it luxurious. This is the star of the show.
Smooth the top with an offset spatula or the back of a spoon.
Cover loosely with plastic wrap and refrigerate for at least 4 hours, preferably overnight. This is CRUCIAL. The layers need time to set and the flavors need to meld.
Step 5: Finish and Serve
Right before serving, dust the top GENEROUSLY with cocoa powder using a fine-mesh sieve. Don’t be shy—it should look like a cocoa snowstorm happened.
If using, add chocolate shavings or a sprinkle of espresso powder on top.
Use the parchment overhang to lift the whole thing out of the pan.
Cut into squares with a sharp knife, wiping it clean between cuts for perfect edges.
Serve cold and prepare for people to propose marriage.
Serving Suggestions
These are basically a complete dessert experience, but if you want to gild the lily:
- Serve with espresso or cappuccino on the side
- Add a dollop of extra whipped cream on top of each square
- Drizzle with chocolate sauce for extra decadence
- Top with a chocolate-covered espresso bean for presentation
- Pair with a glass of sweet dessert wine or coffee liqueur
- Serve alongside fresh berries for a pop of color and tartness
Switch It Up
Chocolate Ganache Layer: Add a thin layer of chocolate ganache between the brownie and mascarpone for triple chocolate action.
Baileys Version: Use Baileys Irish Cream instead of coffee liqueur for a boozy twist.
Hazelnut Tiramisu: Add Nutella to the mascarpone layer and top with chopped hazelnuts.
Mocha Brownies: Add 2 tbsp instant espresso powder to the brownie batter for more intense coffee flavor.
White Chocolate: Add white chocolate chips to the brownie batter for pockets of sweetness.
Amaretto Style: Use amaretto liqueur instead of coffee liqueur and add almond extract to the cream.
Extra Boozy: Increase the coffee liqueur to 1/4 cup if you’re making these for adults only.
Storage and Make-Ahead Tips
This is literally a make-ahead dessert. It NEEDS to chill for hours to reach its full potential.
Make the entire dessert up to 2 days ahead. Store covered in the refrigerator.
Don’t dust with cocoa powder until right before serving—it can get absorbed or look wet if it sits too long.
The brownies can be baked and coffee-soaked up to 2 days ahead. Cover tightly and refrigerate, then add the mascarpone layer when ready.
Store leftovers covered in the fridge for up to 4 days. The brownies will soften over time from the coffee soak, which is actually delicious.
These don’t freeze well—the mascarpone layer gets weird when thawed. Just make them fresh and eat them within a few days.
Why This Works So Damn Well
Tiramisu Brownies work because they take the best elements of both desserts and combine them strategically. The fudgy brownie provides a sturdy, chocolatey base that can handle being soaked without falling apart. The coffee soak adds moisture and that signature tiramisu flavor—the bitter coffee cuts through the sweetness and adds complexity.
The mascarpone cream layer is essentially the same filling used in traditional tiramisu, just stabilized with whipped cream so it holds its shape when sliced. Mascarpone is richer and less tangy than cream cheese, giving you that authentic Italian flavor. The whipped cream lightens it and makes it fluffy rather than dense.
Letting it chill overnight is crucial. The coffee continues to soak into the brownie, the mascarpone layer firms up, and all the flavors meld together. The cocoa powder on top isn’t just traditional—it adds a slightly bitter note that balances all the sweetness and signals “this is tiramisu, not just brownies with frosting.”
The combination of textures is what makes this special: dense, fudgy brownie; creamy, light mascarpone; powdery cocoa on top. And the flavor progression—chocolate, coffee, cream—is perfectly balanced. This is sophisticated comfort food at its finest.
When to Make This
Dinner Party Finale: This is THE showstopper dessert that makes people think you’re a professional baker.
Italian-Themed Dinner: Serve this after pasta and everyone will think they’re in Rome.
Birthday Cake Alternative: For coffee lovers who want something different than traditional cake.
Potluck Winner: Bring these in the pan and watch them disappear first.
Holiday Dessert Table: Stands out among all the cookies and pies. Very sophisticated energy.
Date Night Dessert: Nothing says “I’m trying to impress you” like homemade tiramisu brownies.
Questions People Actually Ask
Q: Can I use cream cheese instead of mascarpone? A: You can, but it won’t taste the same. Mascarpone is less tangy and richer. If you must substitute, use full-fat cream cheese and add 2 tbsp of heavy cream to help match the texture.
Q: My mascarpone layer is runny. What happened? A: Your mascarpone wasn’t at room temperature (lumpy then watery when beaten), or you didn’t whip the cream to stiff peaks before folding. It needs to chill longer—give it overnight.
Q: Can I skip the coffee liqueur? A: Absolutely! Just use all coffee/espresso. The liqueur adds depth but isn’t essential.
Q: The brownies are too dry. A: You overbaked them, or you didn’t use enough coffee soak. Brownies should be slightly underbaked, and don’t be shy with the coffee mixture.
Q: Can I make these without coffee? A: Technically yes, but then they’re just brownies with mascarpone frosting, not tiramisu brownies. The coffee is kind of the whole point.
Q: My brownies are falling apart. Help! A: Let them cool completely before adding the cream layer. Also, make sure you’re using the parchment overhang to lift them out—don’t try to flip the pan.
Q: How strong should the coffee be? A: Strong espresso is ideal, but you can use very strong brewed coffee. It should taste almost too strong on its own—it mellows when combined with the brownie.
Print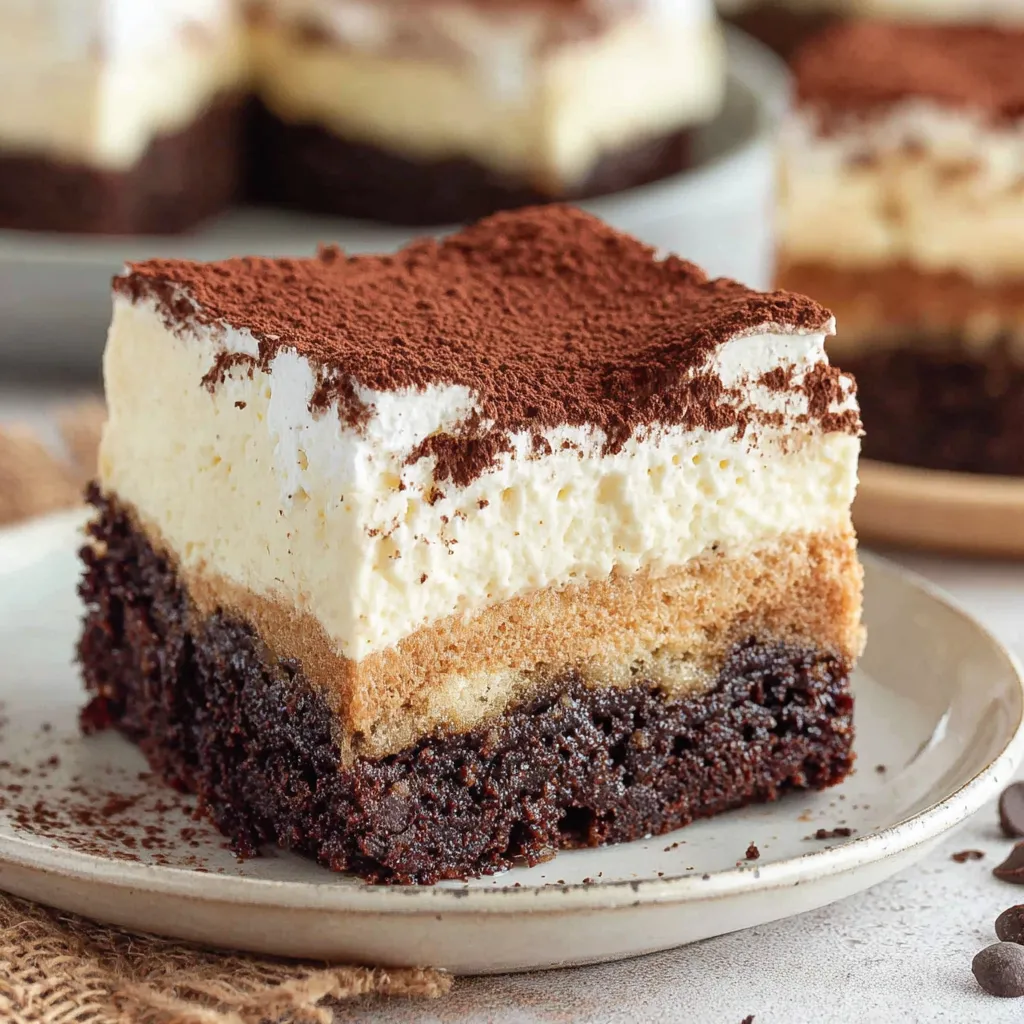
Tiramisu Brownies Recipes
- Total Time: 1 hour
- Yield: 12–16 squares 1x
Description
Okay, so imagine if a fudgy brownie and a classic tiramisu went on a date, fell in love, and had the most beautiful hybrid baby imaginable. That’s what we’re dealing with here. Tiramisu Brownies are basically dense, chocolatey brownie bottoms soaked with espresso (or strong coffee), topped with a cloud-like mascarpone cream layer, then dusted with cocoa powder like the Italian dessert gods intended. It’s got all the sophistication of tiramisu with the comfort-food energy of brownies. You get that coffee kick, that creamy mascarpone situation, and that rich chocolate base all in one ridiculously decadent square. I made these for a dinner party once and a guest literally said “I think I just fell in love” after the first bite. Another person asked if I’d studied in Italy. Reader, I learned this recipe from the internet while sitting in my pajamas. These brownies create delusions of grandeur.
Ingredients
For the Brownie Base:
- 1/2 cup (1 stick) unsalted butter
- 8 oz semi-sweet or dark chocolate, chopped (or 1 1/3 cups chocolate chips)
- 3/4 cup granulated sugar
- 3 large eggs
- 1 tsp vanilla extract
- 3/4 cup all-purpose flour
- 1/4 cup unsweetened cocoa powder
- 1/4 tsp salt
For the Coffee Soak:
- 1/2 cup strong brewed espresso or coffee, cooled
- 2 tbsp coffee liqueur like Kahlúa (optional but recommended)
- 1 tbsp granulated sugar
For the Mascarpone Cream Layer:
- 16 oz (2 cups) mascarpone cheese, room temperature (this is crucial)
- 1 cup heavy whipping cream, cold
- 1/2 cup powdered sugar
- 1 tsp vanilla extract
- Pinch of salt
For Topping:
- Unsweetened cocoa powder for dusting (be generous)
- Chocolate shavings (optional but pretty)
- Espresso powder (optional, for extra coffee vibes)
Instructions
Step 1: Make the Brownies
Preheat oven to 350°F (175°C). Line a 9×9-inch baking pan with parchment paper, leaving overhang on the sides (this is your escape hatch later).
Melt butter and chopped chocolate together in a double boiler or microwave (30-second bursts, stirring between). Let cool slightly.
Whisk in sugar until combined, then add eggs one at a time, whisking after each addition. Add vanilla.
In a separate bowl, whisk together flour, cocoa powder, and salt.
Fold the flour mixture into the chocolate mixture until just combined. Don’t overmix or your brownies will be cakey instead of fudgy.
Pour batter into prepared pan and spread evenly.
Bake for 25-30 minutes. A toothpick inserted should come out with a few moist crumbs, not clean. Underbake slightly—they’ll firm up as they cool.
Let cool in the pan for 10 minutes.
Step 2: Soak in Coffee Goodness
While brownies are still warm, mix together cooled espresso, coffee liqueur (if using), and sugar until sugar dissolves.
Using a fork or skewer, poke holes ALL OVER the warm brownies. Go crazy. The more holes, the more coffee soaks in.
Slowly pour or brush the coffee mixture over the brownies, making sure it gets into all those holes. Let it absorb.
Let the brownies cool completely at room temperature. The coffee needs time to soak in and the brownies need to be cool before you add the cream layer.
Step 3: Make the Mascarpone Cream
In a large bowl, beat mascarpone cheese on medium speed for about 1 minute until smooth and creamy. Make sure it’s at room temp or it’ll be lumpy.
In a separate bowl, whip cold heavy cream with powdered sugar and vanilla on medium-high speed until stiff peaks form. Don’t overbeat or you’ll have butter.
Gently fold the whipped cream into the mascarpone in three additions. Be gentle—you want to keep all that airiness. The mixture should be light, fluffy, and cloud-like.
Add a pinch of salt and fold once more.
Step 4: Assemble the Layers
Spread the mascarpone cream evenly over the cooled, coffee-soaked brownies. Make it thick, make it luxurious. This is the star of the show.
Smooth the top with an offset spatula or the back of a spoon.
Cover loosely with plastic wrap and refrigerate for at least 4 hours, preferably overnight. This is CRUCIAL. The layers need time to set and the flavors need to meld.
Step 5: Finish and Serve
Right before serving, dust the top GENEROUSLY with cocoa powder using a fine-mesh sieve. Don’t be shy—it should look like a cocoa snowstorm happened.
If using, add chocolate shavings or a sprinkle of espresso powder on top.
Use the parchment overhang to lift the whole thing out of the pan.
Cut into squares with a sharp knife, wiping it clean between cuts for perfect edges.
Serve cold and prepare for people to propose marriage.
Notes
These are basically a complete dessert experience, but if you want to gild the lily:
- Serve with espresso or cappuccino on the side
- Add a dollop of extra whipped cream on top of each square
- Drizzle with chocolate sauce for extra decadence
- Top with a chocolate-covered espresso bean for presentation
- Pair with a glass of sweet dessert wine or coffee liqueur
- Serve alongside fresh berries for a pop of color and tartness
- Prep Time: 30 minutes
- Cook Time: 30 minutes
Nutrition
- Calories: ~385 kcal
- Fat: ~26g
- Carbohydrates: ~35g
- Protein: ~6g


