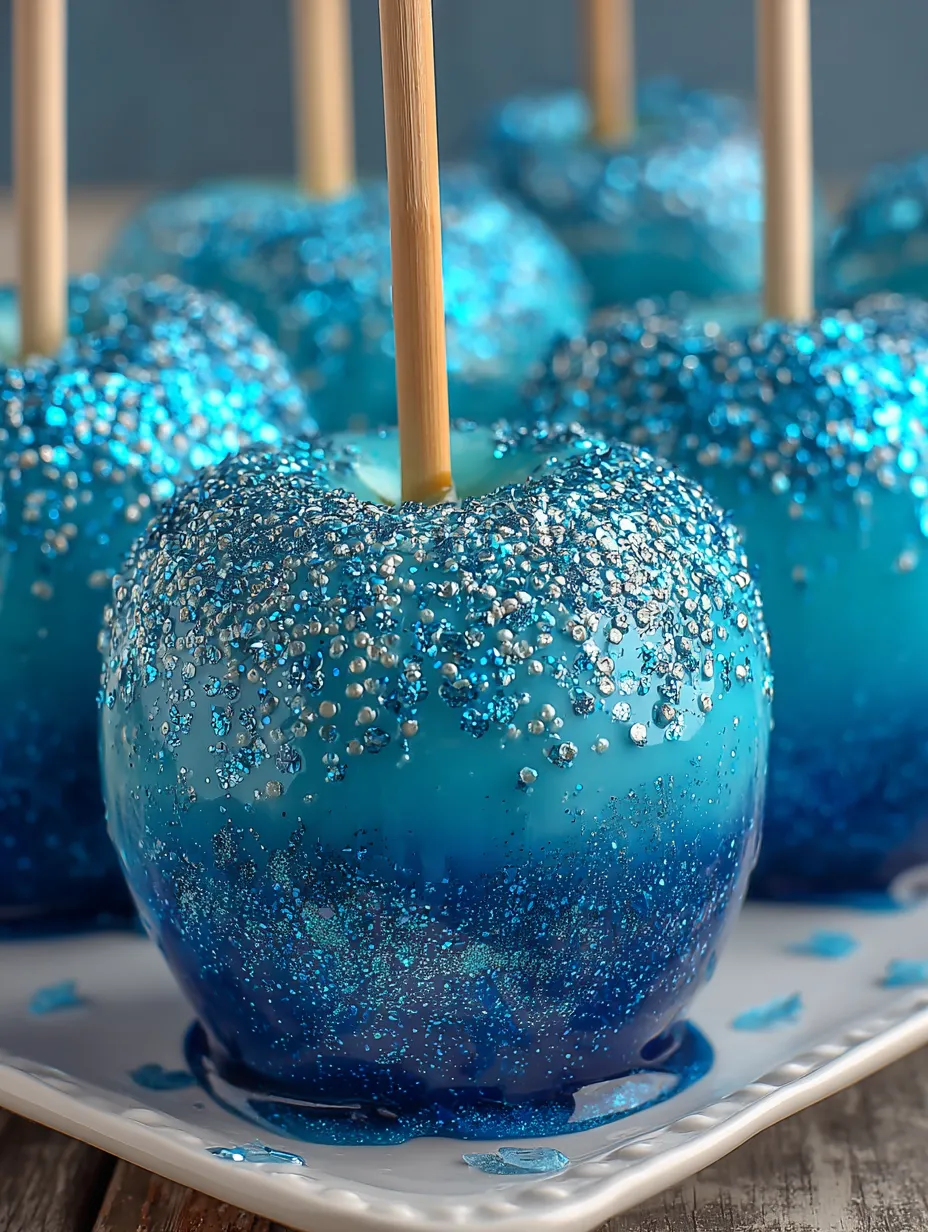
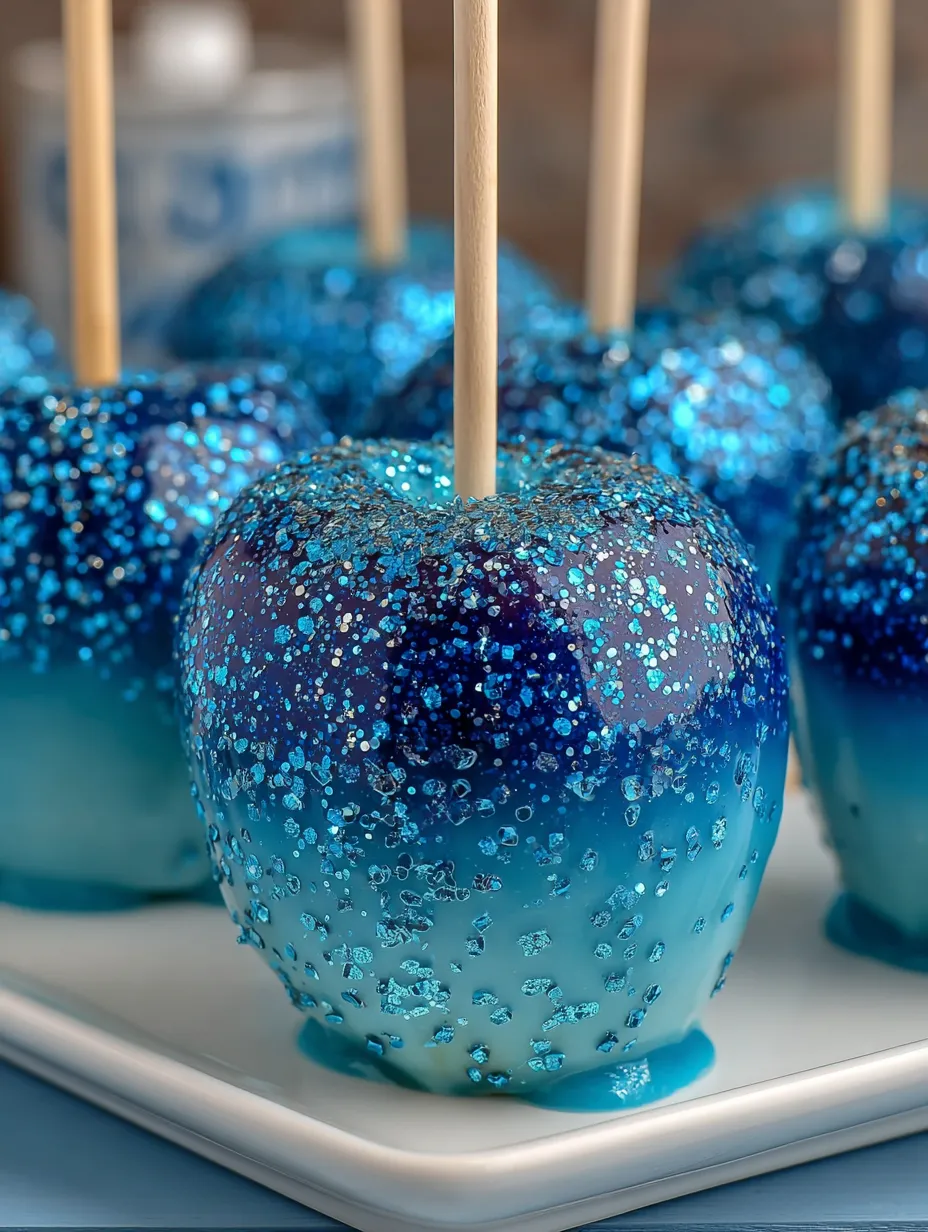
These are candy apples that got a major glow-up at the beach. We’re talking crisp Granny Smith apples dipped in gorgeous blue candy coating that looks like ocean waves, then decorated with edible pearls, white chocolate drizzles, and maybe some sparkly sanding sugar to give them that underwater mermaid vibe. They’re basically little edible works of art that taste like childhood nostalgia met Instagram aesthetics and had the prettiest baby ever. I made these for my niece’s mermaid birthday party and the kids literally gasped when they saw them. Adults were secretly jealous. That’s the power of ocean candy apples, folks.
Why You’ll Love This Recipe
They’re stunning — like seriously, prepare for compliments and photo requests.
Perfect for beach parties, mermaid themes, or summer celebrations.
Way easier to make than they look (shh, don’t tell anyone).
The candy coating is perfectly crunchy and sweet.
Customizable with different shades of blue and decorations.
Kids and adults both lose their minds over these.
The Good Stuff You’ll Need
For the Apples:
- 6 medium Granny Smith apples (or any crisp, tart apple)
- 6 wooden candy apple sticks or sturdy lollipop sticks
- Cooking spray or butter for the pan
For the Ocean Candy Coating:
- 3 cups granulated sugar
- 1 cup light corn syrup
- 1 cup water
- Royal blue gel food coloring (NOT liquid — this is important!)
- 1/2 tsp vanilla extract (optional)
- 1/4 tsp coconut extract (for that beachy vibe)
For the Decorations:
- White chocolate chips or candy melts
- Edible pearls in white, silver, or iridescent
- Blue sanding sugar or edible glitter
- White nonpareils or sprinkles
- Edible gold leaf (if you’re feeling extra fancy)
- Blue rock candy pieces (optional but gorgeous)
Equipment You’ll Need:
- Candy thermometer (non-negotiable!)
- Parchment paper
- Small piping bag or ziplock bag
Let’s Do This
Step 1: Apple Prep
Wash and thoroughly dry your apples — any moisture will make the coating slide off. Use a towel and really get them dry.
Remove stems and insert sticks firmly into the top center of each apple, about halfway down.
Line a baking sheet with parchment paper and spray lightly with cooking spray. Set aside.
Step 2: Candy Coating Magic
Combine sugar, corn syrup, and water in a heavy-bottomed saucepan. Stir over medium heat until sugar dissolves completely.
Stop stirring! Clip your candy thermometer to the pan and let it cook undisturbed until it reaches 300°F (hard crack stage). This takes about 15-20 minutes — be patient!
Once it hits 300°F, remove from heat immediately. Let bubbles settle for 30 seconds, then add gel food coloring. Start with a small amount and add more for deeper color. Add extracts and swirl gently (don’t stir too much or it’ll crystallize).
Step 3: Dip Like a Pro
Working quickly (the candy hardens fast!), tilt the pan and dip each apple, rotating to coat evenly. Let excess drip off for a few seconds.
Place on prepared parchment and let cool completely (about 10-15 minutes). The coating should be hard and glossy.
Pro tip: If the candy gets too thick, reheat gently over low heat. If it gets too thin, it wasn’t hot enough — use a candy thermometer!
Step 4: Decoration Station
Melt white chocolate chips in 30-second bursts in the microwave, stirring between each burst until smooth.
Transfer to a piping bag or ziplock bag with a tiny corner cut off. Drizzle over the apples in wavy lines to look like ocean foam.
While chocolate is still wet, sprinkle with edible pearls, sanding sugar, and any other decorations you’re using. Get creative!
Step 5: Final Touches
For extra ocean vibes, you can create an ombre effect by dipping the bottom third of the apple in darker blue candy coating, or dust with edible glitter for that sparkly water effect.
Add crushed blue rock candy at the base for that crystallized sea glass look.
Let everything set completely before wrapping or serving.
Serving Suggestions
Display on a cake stand for maximum wow factor.
Wrap in clear cellophane bags tied with ribbon for party favors.
Serve at room temperature — the candy coating is perfect when fully set.
Store in a cool, dry place (not the fridge!) for up to 3 days.
Switch It Up
Different Colors: Try purple for deep ocean, turquoise for tropical, or green for sea glass vibes.
Flavor Variations: Add different extracts like peppermint or almond.
Caramel Base: Dip in caramel first, then candy coating for extra decadence.
Galaxy Theme: Use dark blue and purple with edible stars.
Tropical Ocean: Add coconut flakes to the decorations.
Pro Tips
Thermometer is Key: Don’t guess the temperature — candy making is science!
Work Fast: The candy coating hardens quickly, so have everything ready.
Humidity is the Enemy: Don’t make these on rainy or humid days — the coating will get sticky.
Apple Choice: Granny Smith apples work best because they’re firm and tart (balances the sweetness).
Color Intensity: Gel food coloring is a must — liquid will mess up the consistency.
Troubleshooting
Coating Won’t Stick: Apples weren’t dry enough. Wipe them down with rubbing alcohol and let dry completely.
Coating is Grainy: You stirred too much after adding color, or sugar crystallized. Start over with fresh ingredients.
Too Thin: Didn’t reach 300°F. Use a thermometer and be patient.
Too Thick: Overcooked past 310°F. Reheat gently with a splash of water.
Questions People Actually Ask
Q: Can I use other types of apples? A: Yes! Honeycrisp, Fuji, or Pink Lady work great. Just make sure they’re firm and crisp.
Q: Why can’t I use liquid food coloring? A: It adds too much moisture and will ruin the candy coating texture. Gel is the way to go.
Q: How far ahead can I make these? A: Make them the same day or the night before for best results. They don’t keep well beyond 2-3 days.
Q: Can I freeze candy apples? A: Nope! The coating will crack and get sticky when thawed.
Q: What if I don’t have a candy thermometer? A: Get one! But in a pinch, drop a bit of the syrup into ice water — it should form hard, brittle threads.
Q: My coating cracked — what happened? A: The apples might have been too cold, or there was temperature shock. Room temp apples work best.
Print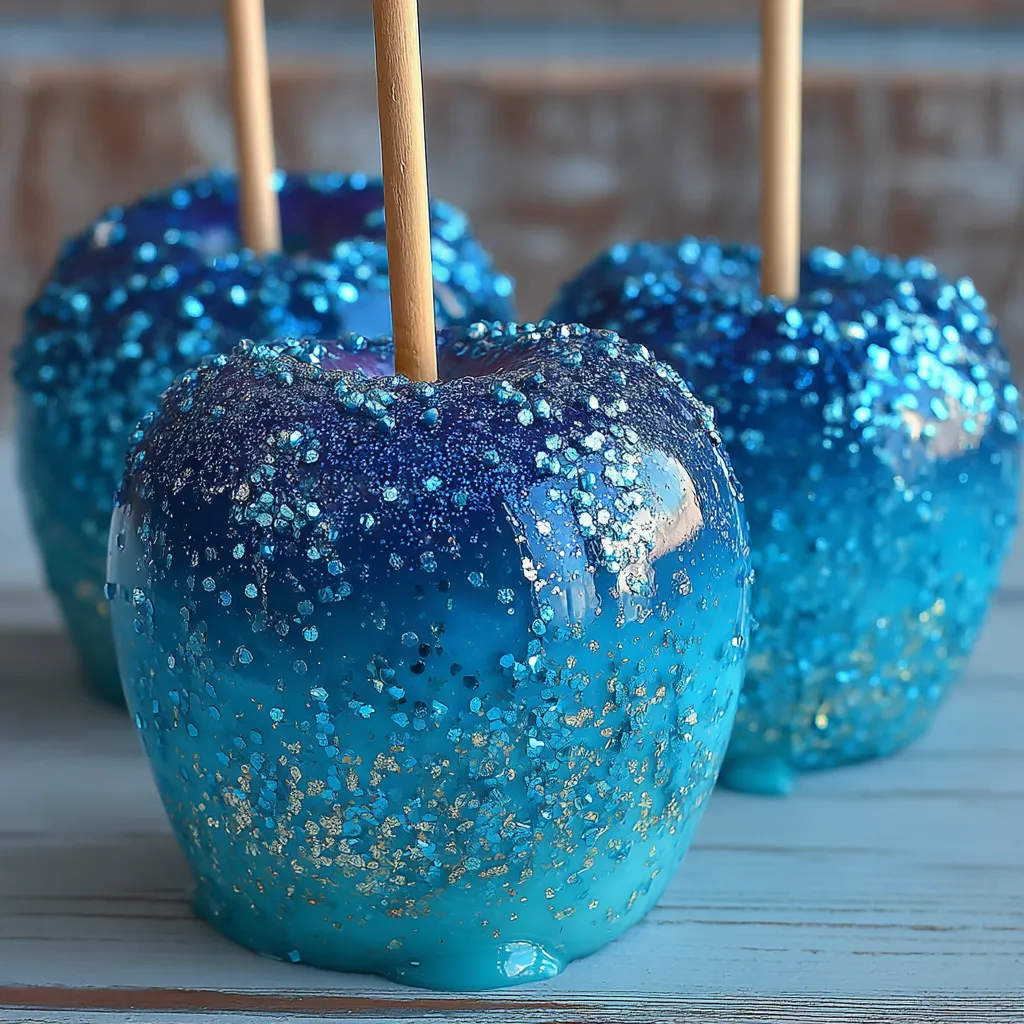
Sweet Ocean Candy Apples
- Total Time: 50 minutes
- Yield: 6 candy apples 1x
Description
These are candy apples that got a major glow-up at the beach. We’re talking crisp Granny Smith apples dipped in gorgeous blue candy coating that looks like ocean waves, then decorated with edible pearls, white chocolate drizzles, and maybe some sparkly sanding sugar to give them that underwater mermaid vibe. They’re basically little edible works of art that taste like childhood nostalgia met Instagram aesthetics and had the prettiest baby ever. I made these for my niece’s mermaid birthday party and the kids literally gasped when they saw them. Adults were secretly jealous. That’s the power of ocean candy apples, folks.
Ingredients
For the Apples:
- 6 medium Granny Smith apples (or any crisp, tart apple)
- 6 wooden candy apple sticks or sturdy lollipop sticks
- Cooking spray or butter for the pan
For the Ocean Candy Coating:
- 3 cups granulated sugar
- 1 cup light corn syrup
- 1 cup water
- Royal blue gel food coloring (NOT liquid — this is important!)
- 1/2 tsp vanilla extract (optional)
- 1/4 tsp coconut extract (for that beachy vibe)
For the Decorations:
- White chocolate chips or candy melts
- Edible pearls in white, silver, or iridescent
- Blue sanding sugar or edible glitter
- White nonpareils or sprinkles
- Edible gold leaf (if you’re feeling extra fancy)
- Blue rock candy pieces (optional but gorgeous)
Equipment You’ll Need:
- Candy thermometer (non-negotiable!)
- Parchment paper
- Small piping bag or ziplock bag
Instructions
Wash and thoroughly dry your apples — any moisture will make the coating slide off. Use a towel and really get them dry.
Remove stems and insert sticks firmly into the top center of each apple, about halfway down.
Line a baking sheet with parchment paper and spray lightly with cooking spray. Set aside.
Combine sugar, corn syrup, and water in a heavy-bottomed saucepan. Stir over medium heat until sugar dissolves completely.
Stop stirring! Clip your candy thermometer to the pan and let it cook undisturbed until it reaches 300°F (hard crack stage). This takes about 15-20 minutes — be patient!
Once it hits 300°F, remove from heat immediately. Let bubbles settle for 30 seconds, then add gel food coloring. Start with a small amount and add more for deeper color. Add extracts and swirl gently (don’t stir too much or it’ll crystallize).
Working quickly (the candy hardens fast!), tilt the pan and dip each apple, rotating to coat evenly. Let excess drip off for a few seconds.
Place on prepared parchment and let cool completely (about 10-15 minutes). The coating should be hard and glossy.
Pro tip: If the candy gets too thick, reheat gently over low heat. If it gets too thin, it wasn’t hot enough — use a candy thermometer!
Melt white chocolate chips in 30-second bursts in the microwave, stirring between each burst until smooth.
Transfer to a piping bag or ziplock bag with a tiny corner cut off. Drizzle over the apples in wavy lines to look like ocean foam.
While chocolate is still wet, sprinkle with edible pearls, sanding sugar, and any other decorations you’re using. Get creative!
For extra ocean vibes, you can create an ombre effect by dipping the bottom third of the apple in darker blue candy coating, or dust with edible glitter for that sparkly water effect.
Add crushed blue rock candy at the base for that crystallized sea glass look.
Let everything set completely before wrapping or serving.
Notes
Display on a cake stand for maximum wow factor.
Wrap in clear cellophane bags tied with ribbon for party favors.
Serve at room temperature — the candy coating is perfect when fully set.
Store in a cool, dry place (not the fridge!) for up to 3 days.
- Prep Time: 30 minutes
- Cook Time: 20 minutes
Nutrition
- Calories: ~350 kcal
- Carbohydrates: ~90g