Description
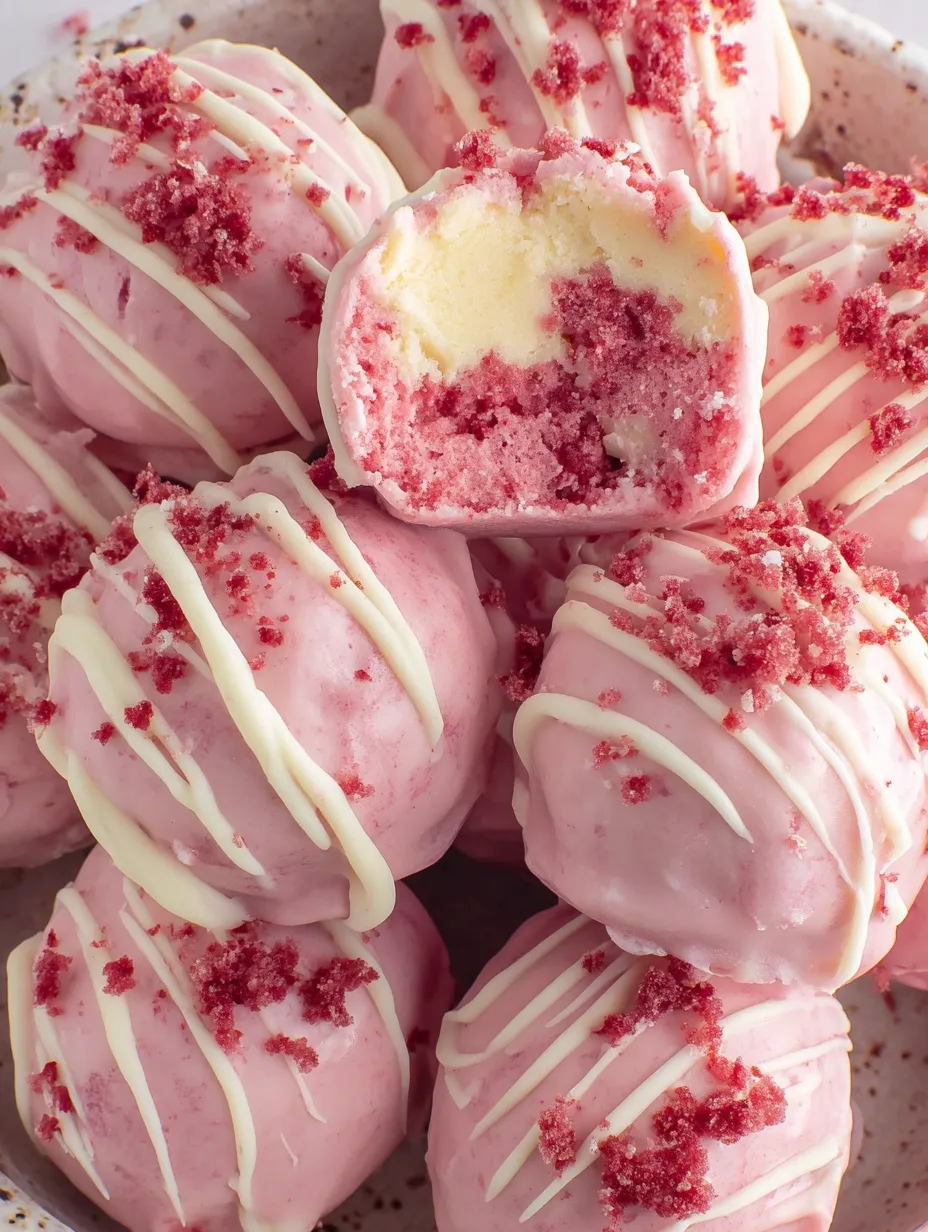
Okay, so imagine if strawberry shortcake got shrunk down into bite-sized balls, coated in pink chocolate, and drizzled with white chocolate like tiny works of edible art. That’s exactly what’s happening here. Strawberry Shortcake Truffles are basically crushed vanilla cake mixed with strawberry frosting, rolled into balls, dipped in pink candy melts, then decorated to look like they belong in a fancy bakery display case. They’re sweet, fruity, melt-in-your-mouth delicious, and so pretty you’ll want to photograph them from every angle before eating them. I made these for a baby shower once and people literally GASPED when they saw them. Another time I brought them to a potluck and three people asked if I had a catering business. I do not. I just have a recipe and the audacity to make things look fancy.
Ingredients
For the Truffle Base:
- 1 box (15.25 oz) vanilla or white cake mix, plus ingredients listed on box (usually eggs, oil, water)
- OR use a homemade vanilla cake if you’re feeling ambitious
- 1 cup strawberry frosting (store-bought or homemade)
- Canned frosting actually works better here—it’s stickier and binds better
- 1/2 cup crushed vanilla wafer cookies or graham crackers (optional but adds texture)
- 1/4 cup freeze-dried strawberries, finely crushed (optional for extra strawberry punch)
For the Coating:
- 16 oz pink candy melts or pink chocolate coating
- Ghirardelli pink melting wafers work great
- 2 tbsp coconut oil or shortening (helps thin the chocolate for smoother coating)
For the Decoration:
- 4–6 oz white chocolate or white candy melts (for drizzling)
- Crushed freeze-dried strawberries (for sprinkling)
- Pink sanding sugar or sprinkles
- Optional: edible gold leaf, gold stars, or pearl dust for extra fancy vibes
Equipment:
- 9x13 baking pan
- Large mixing bowl
- Cookie scoop or spoon
- Baking sheet
- Parchment paper or wax paper
- Fork or dipping tool for chocolate coating
- Piping bag or zip-top bag for drizzling
Instructions
Preheat oven according to cake mix package directions (usually 350°F).
Prepare and bake the cake according to package instructions in a 9×13 pan.
Let cool COMPLETELY in the pan. Like, actually cool. Warm cake will make your truffles a melty mess.
Once cool, use your hands or a fork to crumble the entire cake into fine crumbs in a large bowl. It should look like cake breadcrumbs.
This is strangely therapeutic. Destroy that cake. Let out your stress.
Add the strawberry frosting to the cake crumbs. Start with 3/4 cup and add more if needed.
Mix with your hands (the best tool for this job) until the mixture comes together like play-dough. It should be moldable and hold its shape when squeezed.
If using crushed vanilla wafers or freeze-dried strawberries, fold them in now for extra texture and flavor.
The mixture should be moist enough to hold together but not so wet that it’s sticky. If too dry, add more frosting a tablespoon at a time. Too wet? Add more cake crumbs or crushed cookies.
Taste the mixture. Does it taste good? It better, because that’s what the inside of your truffles will taste like.
Line a baking sheet with parchment or wax paper.
Using a cookie scoop or spoon, portion out about 1-2 tablespoons of mixture per truffle.
Roll between your palms to create smooth balls. Wet hands slightly if the mixture is sticking.
Place each ball on the prepared baking sheet, leaving space between them.
You should get about 24-30 truffles depending on size.
Refrigerate for at least 30 minutes, or freeze for 15 minutes, until firm. This is CRUCIAL—soft truffles will fall apart when dipping.
In a microwave-safe bowl, combine pink candy melts and 2 tbsp coconut oil or shortening.
Microwave in 30-second bursts, stirring between each, until completely smooth and melted. Don’t overheat or it’ll seize.
The consistency should be thin enough to easily coat the truffles. If too thick, add more coconut oil a teaspoon at a time.
Transfer to a deep, narrow bowl or cup—this makes dipping easier than a shallow bowl.
Remove truffles from fridge/freezer. Work with 6-8 at a time, keeping the rest cold.
Using a fork or dipping tool, place one truffle in the melted chocolate. Spoon chocolate over the top to cover completely.
Lift the truffle with the fork, letting excess chocolate drip back into the bowl. Gently tap the fork on the edge of the bowl to remove more excess.
Carefully slide the truffle off the fork onto the parchment-lined baking sheet using a toothpick or another fork to help.
Repeat with remaining truffles, reheating chocolate as needed if it starts to thicken.
Work quickly—the chocolate sets fast. If truffles start warming up, pop them back in the fridge and do another batch.
While the pink coating is still slightly wet (within 1-2 minutes of dipping), sprinkle with crushed freeze-dried strawberries, pink sugar, or sprinkles. Press gently so they stick.
Let the pink coating set completely—about 10-15 minutes at room temp or 5 minutes in the fridge.
Melt white chocolate or white candy melts in the microwave the same way you did the pink chocolate.
Transfer to a piping bag or zip-top bag with a tiny corner snipped off.
Drizzle white chocolate over the truffles in a back-and-forth pattern or circular motion. Go as wild or as minimal as you want.
Immediately add any final toppings (more crushed strawberries, gold dust, etc.) while the white chocolate is still wet.
Let everything set completely before packaging or serving.
Stand back and appreciate how GORGEOUS these look.
Take 47 photos for Instagram. You’ve earned it.
Try not to eat them all in one sitting. This is genuinely impossible but you can try.
Notes
These are perfect as-is but here are some presentation ideas:
- Arrange in mini cupcake liners on a tiered stand
- Package in clear boxes tied with ribbon for gifts
- Serve on a fancy platter at parties
- Display in vintage teacups for afternoon tea vibes
- Package individually in cellophane bags for party favors
- Arrange with fresh strawberries for a dessert table
- Serve alongside champagne or prosecco for celebrations
- Prep Time: 30 minutes
- Cook Time: 25-30 minutes
Nutrition
- Calories: ~140 kcal
- Sugar: ~15g
- Sodium: ~95mg
- Fat: ~7g
- Carbohydrates: ~20g
- Protein: ~1g