
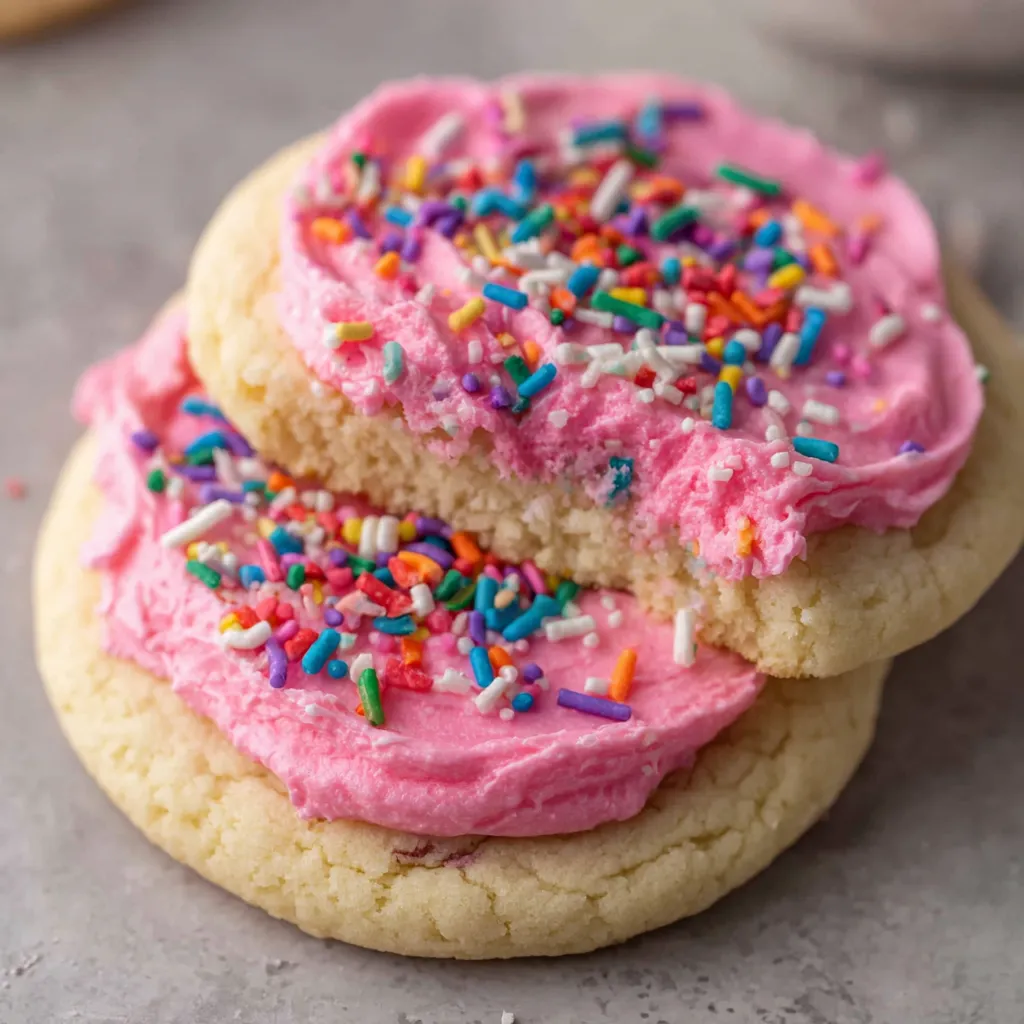
Okay, so forget everything you know about regular sugar cookies. Sour Cream Sugar Cookies are like if a sugar cookie and a cake had a baby that was raised by clouds. These are SOFT—like pillow-soft, melt-in-your-mouth, almost cake-like soft. The secret weapon? Sour cream. It makes them incredibly tender, gives them a subtle tang that balances the sweetness, and keeps them soft for days. Top them with fluffy buttercream frosting and rainbow sprinkles, and you’ve got cookies that look like they came from a fancy bakery but taste way better. The cookies themselves are thick and puffy with slightly crisp edges, and that pink frosting situation with sprinkles? Pure nostalgia. I made these for a birthday party once and kids AND adults were hoarding them. Someone asked if I’d opened my own bakery. Another person tried to commission me to make them weekly. These cookies inspire business proposals and questionable cookie-hoarding behavior.
Why You’ll Love This Recipe
Soft forever. These stay soft for days, not hours. The sour cream is basically moisture insurance.
No chilling required. Room temp dough that’s ready to scoop immediately. Instant gratification.
Thick and puffy. These aren’t flat, crispy cookies. They’re fat, soft, and substantial.
Perfect frosting canvas. Flat tops are ideal for piling on frosting and sprinkles.
Nostalgic vibes. These taste like childhood birthday parties and grocery store bakery cookies (but better).
Easy as hell. No rolling, no cutting shapes, no complicated techniques. Just scoop and bake.
Crowd pleaser. Everyone loves a soft sugar cookie. This is universal appeal.
The Good Stuff You’ll Need
For the Cookies:
- 3 3/4 cups all-purpose flour
- 1 tsp baking powder
- 1 tsp baking soda
- 1/2 tsp salt
- 1 cup (2 sticks) unsalted butter, softened
- 1 1/2 cups granulated sugar
- 2 large eggs, room temperature
- 1 cup sour cream, room temperature
- 2 tsp vanilla extract
For the Buttercream Frosting:
- 1 cup (2 sticks) unsalted butter, softened
- 4-5 cups powdered sugar
- 1/4 cup heavy cream or milk
- 2 tsp vanilla extract
- Pinch of salt
- Pink gel food coloring (or any color you want)
For Decoration:
- Rainbow sprinkles (lots of them)
Equipment:
- Cookie scoop (3 tablespoon size for big cookies)
- Baking sheets lined with parchment
- Stand mixer or hand mixer
- Offset spatula or butter knife for frosting
- Piping bag (optional but nice for pretty frosting)
Let’s Do This
Step 1: Prep Your Oven and Pans
Preheat your oven to 350°F (175°C). Line two baking sheets with parchment paper. Don’t skip the parchment—these cookies are soft and can stick.
Step 2: Mix the Dry Ingredients
In a medium bowl, whisk together flour, baking powder, baking soda, and salt. Set aside and resist the urge to taste raw flour (please don’t).
Step 3: Cream the Butter and Sugar
In a large bowl (or stand mixer with paddle attachment), beat the softened butter and sugar together on medium-high speed for 3-4 minutes until light, fluffy, and pale. This step matters—don’t rush it. The cookies won’t be as soft if you skimp here.
Step 4: Add the Wet Ingredients
Add eggs one at a time, beating well after each addition. The mixture should look smooth and cohesive.
Add the sour cream and vanilla extract. Beat on medium speed until combined. The mixture might look slightly curdled—that’s normal. Don’t panic.
Step 5: Add the Flour
With the mixer on low speed, gradually add the flour mixture. Mix until just combined. Don’t overmix or your cookies will be tough.
The dough will be soft, thick, and slightly sticky—like thick cake batter. This is exactly right.
Step 6: Scoop and Bake
Using a large cookie scoop (about 3 tablespoons), drop dough onto prepared baking sheets, spacing them about 3 inches apart. These spread slightly and puff up, so give them room.
Don’t flatten them. Leave them as rounded mounds. They’ll spread and flatten slightly during baking.
Bake for 12-14 minutes, until the edges are just set and very lightly golden. The centers should still look slightly underdone and pale. DO NOT OVERBAKE. These should be barely golden on the edges and still pale on top.
Let cool on the baking sheet for 5 minutes—they’re very soft when hot. Then transfer to a wire rack to cool completely before frosting.
Step 7: Make the Buttercream
While the cookies cool, make your frosting. In a large bowl (or stand mixer), beat the softened butter on medium speed for 2-3 minutes until creamy and pale.
Add 3 cups of powdered sugar, one cup at a time, beating on low after each addition.
Add heavy cream, vanilla extract, and a pinch of salt. Beat on medium until combined.
Add remaining powdered sugar, 1/2 cup at a time, until you reach your desired consistency. The frosting should be thick enough to hold its shape but spreadable. If too thick, add more cream (1 tablespoon at a time). Too thin? Add more powdered sugar.
Add pink gel food coloring (start with 1/4 tsp and add more for deeper color). Mix until the color is even.
Beat on medium-high for 2-3 minutes until light and fluffy.
Step 8: Frost and Sprinkle
Once cookies are completely cool (warm cookies = melted frosting disaster), it’s time to decorate.
Spreading method: Use an offset spatula or butter knife to spread a generous amount of frosting on each cookie. Swirl it around for that bakery-style look.
Piping method: Put frosting in a piping bag fitted with a large round tip. Pipe a spiral starting from the outside and working your way to the center, or pipe a big dollop in the middle and spread it with a spoon.
Immediately top with rainbow sprinkles while the frosting is still wet. Go heavy—this is not the time for restraint.
Let the frosting set for about 20 minutes before stacking or storing.
Step 9: Devour
Serve with cold milk, coffee, or just eat them standing over the sink. No judgment.
Try not to eat six in one sitting. This is extremely difficult and you will probably fail.
Serving Suggestions
These are already perfect, but here are some ideas:
- Serve at birthday parties (kids go absolutely feral for these)
- Make an ice cream sandwich with two cookies and vanilla ice cream
- Pack in lunch boxes (they stay soft all day)
- Serve at baby showers or bridal showers (change the frosting color to match)
- Make a cookie platter with different colored frosting
- Warm for 10 seconds in the microwave for fresh-baked vibes
- Serve with a glass of cold milk (mandatory)
Switch It Up
Different Colors: Use any gel food coloring—blue, purple, yellow, or leave it white.
Chocolate Frosting: Use 1/4 cup cocoa powder in the frosting for chocolate buttercream.
Lemon Cookies: Add 2 tbsp lemon zest to the dough and use lemon extract instead of vanilla.
Almond Cookies: Use almond extract instead of vanilla for an almond sugar cookie.
Funfetti: Add 1/2 cup rainbow sprinkles to the cookie dough itself.
Cream Cheese Frosting: Replace half the butter with cream cheese for tangier frosting.
Mini Cookies: Use a smaller scoop (1 tablespoon) and bake for 10-12 minutes.
Sandwich Cookies: Frost the bottom of one cookie, top with another cookie for sandwich cookies.
Storage and Make-Ahead Tips
These keep beautifully, which is good because you’ll want to make them in bulk.
Room temperature: Store in an airtight container at room temperature for up to 5 days. They stay soft the whole time.
Refrigerate: If your kitchen is hot or humid, refrigerate for up to 1 week. Let come to room temp before eating for best texture.
Freeze unfrosted cookies: Freeze in a single layer, then transfer to freezer bags for up to 3 months. Thaw and frost when ready.
Freeze frosted cookies: Freeze on a baking sheet until solid, then transfer to freezer bags for up to 2 months. Thaw at room temp.
Cookie dough: Scoop dough into balls, freeze on a baking sheet, then store in freezer bags for up to 3 months. Bake from frozen, adding 2 minutes to bake time.
Frosting: Make frosting up to 1 week ahead and refrigerate. Bring to room temp and rewhip before using.
Why This Works So Damn Well
Sour Cream Sugar Cookies work because sour cream is basically a miracle ingredient for baked goods. It adds moisture, tenderness, and a subtle tang that balances the sweetness. The fat in sour cream creates a tender crumb, while the acidity reacts with the baking soda to help the cookies rise and stay soft.
Using both baking powder and baking soda creates the perfect texture. Baking powder makes them rise and puff up. Baking soda reacts with the sour cream’s acidity and helps them spread slightly. Together, they create cookies that are thick but not cakey, soft but not dense.
Room temperature ingredients are crucial. Cold butter won’t cream properly with sugar, creating dense cookies. Cold eggs can cause the batter to curdle. Cold sour cream doesn’t incorporate smoothly. Everything needs to be at room temp for the best texture.
Not overbaking is THE most important step. These cookies look underdone when you pull them out—pale on top with just barely golden edges. They continue to bake on the hot pan after you remove them from the oven. If you wait until they look “done,” they’ll be overdone once cooled.
The soft, thick dough creates cookies that bake up puffy and cake-like rather than thin and crispy. The dough doesn’t need chilling because we WANT it soft—that’s what creates the texture. Chilled dough would spread less and create different cookies.
Frosting them after they’re completely cool prevents the frosting from melting and sliding off. The flat tops are perfect for piling frosting high, and the soft texture contrasts beautifully with the creamy buttercream.
When to Make These
Birthday parties: These ARE birthday party cookies. The sprinkles, the frosting, the nostalgia.
Bake sales: These sell out instantly. Price them high—they’re worth it.
After school snacks: Pack these in lunch boxes and be the favorite parent.
Cookie exchanges: Bring these and win. Everyone will want the recipe.
Baby showers: Make them in pastel colors to match the theme.
Just because: It’s Tuesday and you want soft cookies? Make them.
Holiday cookie platters: These add color and variety to any cookie spread.
Questions People Actually Ask
Q: My cookies spread too much. What happened? A: Your butter was too soft/melted, or your oven temp is too low. Use properly softened butter (should indent easily when pressed but not be melty).
Q: The cookies are dense and heavy. Why? A: You overmixed the dough after adding flour, or didn’t cream the butter and sugar enough. Mix just until combined.
Q: Can I use Greek yogurt instead of sour cream? A: Full-fat plain Greek yogurt works, but sour cream is better. The higher fat content creates softer cookies.
Q: My frosting is grainy. Help! A: Your butter wasn’t softened enough, or your powdered sugar has lumps. Make sure butter is room temp and sift the powdered sugar if needed.
Q: The cookies are hard, not soft. What did I do wrong? A: You overbaked them. They should look slightly underdone when you pull them out. Also check your oven temp with a thermometer.
Q: Can I make these without a mixer? A: Yes, but it’ll be an arm workout. Use a wooden spoon and lots of elbow grease to cream the butter and sugar.
Q: Do I have to use sour cream? A: That’s literally what makes these special and keeps them soft. Don’t skip it.
Q: My cookies are flat, not puffy. Why? A: Old baking powder/baking soda, overmixing, or dough was too warm. Make sure your leaveners are fresh.
Q: How do I get that smooth frosting look? A: Use an offset spatula and dip it in hot water, dry it, then smooth the frosting in swirling motions.
Print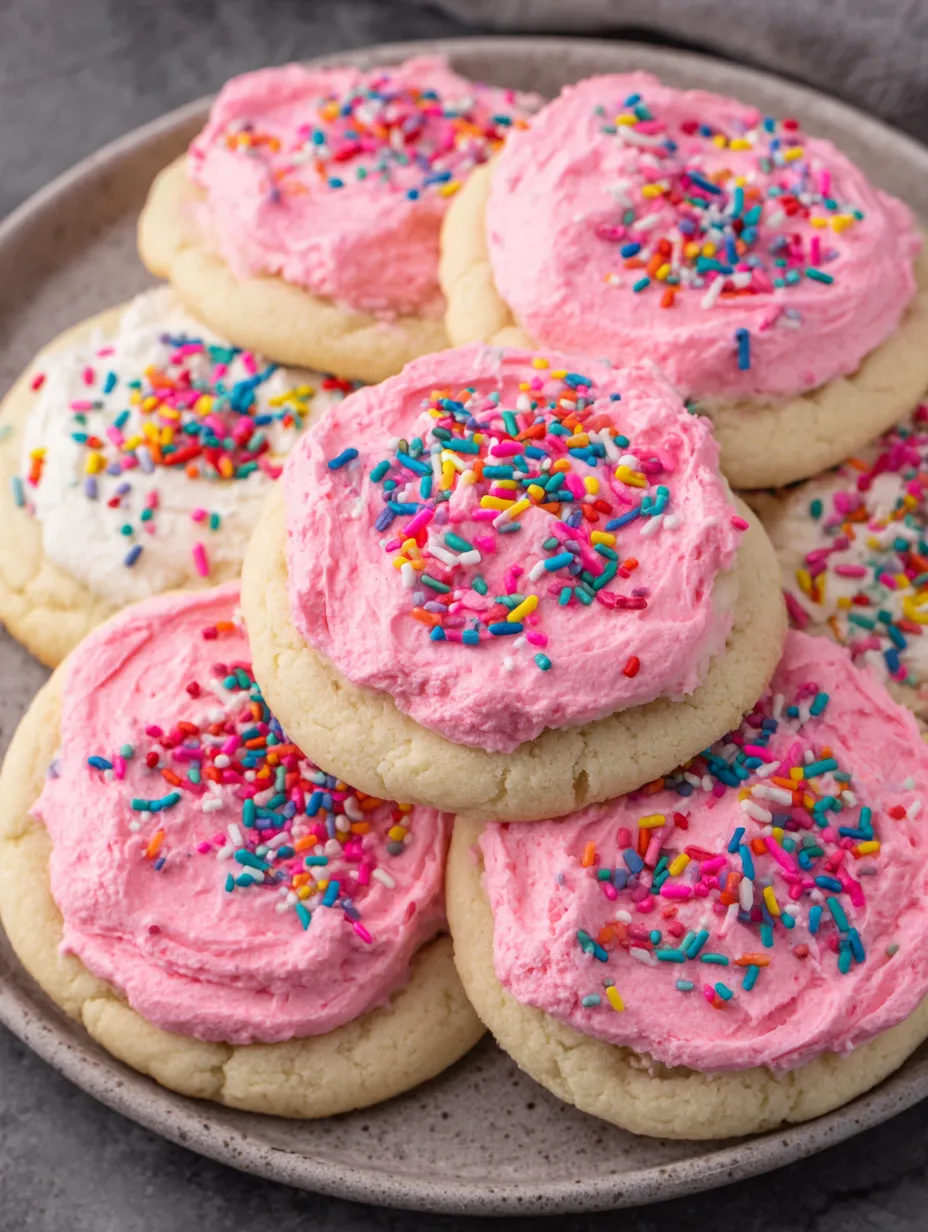
Sour Cream Sugar Cookies with Frosting
- Total Time: 1 hour
- Yield: 24 large cookies 1x
Description
Okay, so forget everything you know about regular sugar cookies. Sour Cream Sugar Cookies are like if a sugar cookie and a cake had a baby that was raised by clouds. These are SOFT—like pillow-soft, melt-in-your-mouth, almost cake-like soft. The secret weapon? Sour cream. It makes them incredibly tender, gives them a subtle tang that balances the sweetness, and keeps them soft for days. Top them with fluffy buttercream frosting and rainbow sprinkles, and you’ve got cookies that look like they came from a fancy bakery but taste way better. The cookies themselves are thick and puffy with slightly crisp edges, and that pink frosting situation with sprinkles? Pure nostalgia. I made these for a birthday party once and kids AND adults were hoarding them. Someone asked if I’d opened my own bakery. Another person tried to commission me to make them weekly. These cookies inspire business proposals and questionable cookie-hoarding behavior.
Ingredients
For the Cookies:
- 3 3/4 cups all-purpose flour
- 1 tsp baking powder
- 1 tsp baking soda
- 1/2 tsp salt
- 1 cup (2 sticks) unsalted butter, softened
- 1 1/2 cups granulated sugar
- 2 large eggs, room temperature
- 1 cup sour cream, room temperature
- 2 tsp vanilla extract
For the Buttercream Frosting:
- 1 cup (2 sticks) unsalted butter, softened
- 4–5 cups powdered sugar
- 1/4 cup heavy cream or milk
- 2 tsp vanilla extract
- Pinch of salt
- Pink gel food coloring (or any color you want)
For Decoration:
- Rainbow sprinkles (lots of them)
Equipment:
- Cookie scoop (3 tablespoon size for big cookies)
- Baking sheets lined with parchment
- Stand mixer or hand mixer
- Offset spatula or butter knife for frosting
- Piping bag (optional but nice for pretty frosting)
Instructions
Preheat your oven to 350°F (175°C). Line two baking sheets with parchment paper. Don’t skip the parchment—these cookies are soft and can stick.
In a medium bowl, whisk together flour, baking powder, baking soda, and salt. Set aside and resist the urge to taste raw flour (please don’t).
In a large bowl (or stand mixer with paddle attachment), beat the softened butter and sugar together on medium-high speed for 3-4 minutes until light, fluffy, and pale. This step matters—don’t rush it. The cookies won’t be as soft if you skimp here.
Add eggs one at a time, beating well after each addition. The mixture should look smooth and cohesive.
Add the sour cream and vanilla extract. Beat on medium speed until combined. The mixture might look slightly curdled—that’s normal. Don’t panic.
With the mixer on low speed, gradually add the flour mixture. Mix until just combined. Don’t overmix or your cookies will be tough.
The dough will be soft, thick, and slightly sticky—like thick cake batter. This is exactly right.
Using a large cookie scoop (about 3 tablespoons), drop dough onto prepared baking sheets, spacing them about 3 inches apart. These spread slightly and puff up, so give them room.
Don’t flatten them. Leave them as rounded mounds. They’ll spread and flatten slightly during baking.
Bake for 12-14 minutes, until the edges are just set and very lightly golden. The centers should still look slightly underdone and pale. DO NOT OVERBAKE. These should be barely golden on the edges and still pale on top.
Let cool on the baking sheet for 5 minutes—they’re very soft when hot. Then transfer to a wire rack to cool completely before frosting.
While the cookies cool, make your frosting. In a large bowl (or stand mixer), beat the softened butter on medium speed for 2-3 minutes until creamy and pale.
Add 3 cups of powdered sugar, one cup at a time, beating on low after each addition.
Add heavy cream, vanilla extract, and a pinch of salt. Beat on medium until combined.
Add remaining powdered sugar, 1/2 cup at a time, until you reach your desired consistency. The frosting should be thick enough to hold its shape but spreadable. If too thick, add more cream (1 tablespoon at a time). Too thin? Add more powdered sugar.
Add pink gel food coloring (start with 1/4 tsp and add more for deeper color). Mix until the color is even.
Beat on medium-high for 2-3 minutes until light and fluffy.
Once cookies are completely cool (warm cookies = melted frosting disaster), it’s time to decorate.
Spreading method: Use an offset spatula or butter knife to spread a generous amount of frosting on each cookie. Swirl it around for that bakery-style look.
Piping method: Put frosting in a piping bag fitted with a large round tip. Pipe a spiral starting from the outside and working your way to the center, or pipe a big dollop in the middle and spread it with a spoon.
Immediately top with rainbow sprinkles while the frosting is still wet. Go heavy—this is not the time for restraint.
Let the frosting set for about 20 minutes before stacking or storing.
Serve with cold milk, coffee, or just eat them standing over the sink. No judgment.
Try not to eat six in one sitting. This is extremely difficult and you will probably fail.
Notes
These are already perfect, but here are some ideas:
- Serve at birthday parties (kids go absolutely feral for these)
- Make an ice cream sandwich with two cookies and vanilla ice cream
- Pack in lunch boxes (they stay soft all day)
- Serve at baby showers or bridal showers (change the frosting color to match)
- Make a cookie platter with different colored frosting
- Warm for 10 seconds in the microwave for fresh-baked vibes
- Serve with a glass of cold milk (mandatory)
- Prep Time: 20 minutes
- Cook Time: 14 minutes per batch
Nutrition
- Calories: ~280 kcal
- Sugar: ~24g
- Sodium: ~140mg
- Fat: ~13g
- Carbohydrates: ~38g
- Protein: ~3g


