
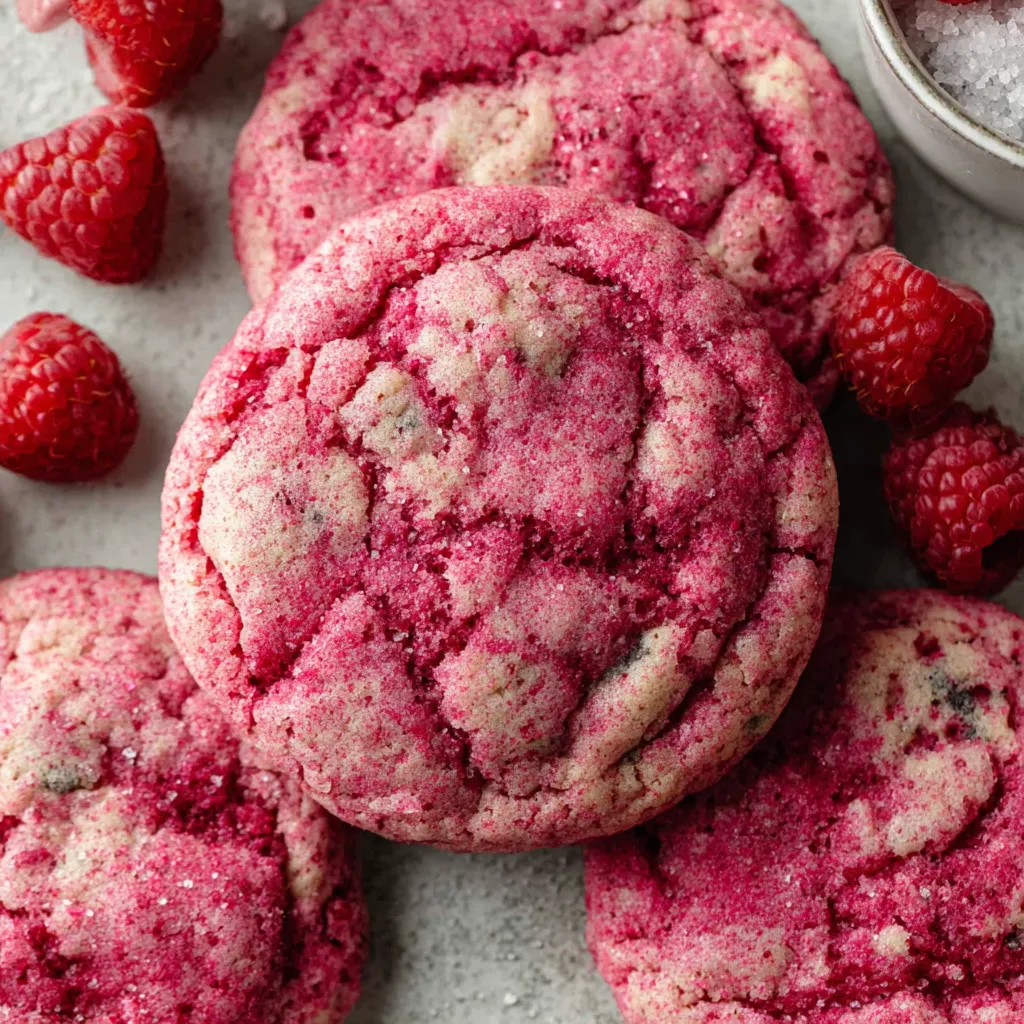
Okay, imagine taking a classic sugar cookie—you know, that soft, buttery, perfect cookie that doesn’t need anything else to be amazing—and infusing it with real raspberry flavor and a gorgeous natural pink color. That’s what we’re dealing with here. These Raspberry Sugar Cookies are basically vanilla sugar cookies that got a major glow-up with freeze-dried raspberries, a hint of almond extract, and the prettiest pink hue you’ve ever seen. They’re soft, chewy, slightly tangy from the berries, and rolled in sparkly pink sugar that makes them look like they belong in a fancy bakery window. I made these for Valentine’s Day last year and my boyfriend proposed three days later. Coincidence? Probably, but I’m taking credit. My best friend ordered two dozen for her bridal shower and people kept asking which bakery made them. These cookies make people think you’re way fancier than you actually are.
Why You’ll Love This Recipe
Naturally pink. No artificial dyes here—the color comes from real raspberries. It’s the kind of pink that makes people say “how did you DO that?”
Real fruit flavor. Freeze-dried raspberries give you intense berry taste without making the dough wet. It’s like magic powder that tastes like summer.
Soft and chewy perfection. These stay soft for days thanks to the right ratio of butter, sugar, and a secret ingredient (cream of tartar).
Sparkle factor. Rolling them in coarse pink sugar makes them look like edible jewelry. Very Instagram-worthy.
No chilling required. The dough is ready to roll immediately. No waiting around for hours.
Valentine’s Day champion. These scream romance without being overly cutesy. Perfect for any love-themed occasion.
Elegant but easy. They look like you spent all day, but they’re actually pretty straightforward. Maximum impressive points, minimum stress.
The Good Stuff You’ll Need
For the Cookies:
- 2 3/4 cups all-purpose flour
- 1 tsp baking soda
- 1 tsp cream of tartar (this is KEY—don’t skip it)
- 1/2 tsp salt
- 1 cup (2 sticks) unsalted butter, softened
- 1 1/2 cups granulated sugar
- 1 large egg
- 1 egg yolk (save the white for later)
- 1 tbsp vanilla extract
- 1/2 tsp almond extract (this makes them taste expensive)
- 1/2 cup freeze-dried raspberries, ground into powder
- 2-3 drops pink food coloring (optional—the raspberries give color but you can boost it)
For Rolling:
- 1/2 cup coarse sanding sugar (pink or white)
- 2 tbsp granulated sugar
- 2 tbsp ground freeze-dried raspberries (for extra pink sparkle)
Equipment:
- Food processor or spice grinder (for powdering raspberries)
- Stand mixer or hand mixer
- Cookie scoop (1.5 tablespoon size)
- Baking sheets
- Parchment paper or silicone mats
- Small bowls for rolling sugar
- Wire cooling racks
Let’s Do This
Step 1: Make Raspberry Powder Like a Wizard
Take your freeze-dried raspberries and put them in a food processor, spice grinder, or even a ziplock bag. You want to pulverize them into a fine powder.
Food processor method: Pulse 15-20 times until you have a fine, bright pink powder. Some tiny seed bits are fine—they add texture.
Spice grinder method: Work in batches. Grind until powdery. This gives you the finest powder.
Ziplock method: Seal the bag and crush with a rolling pin or the bottom of a measuring cup. This works but takes more effort and won’t be as fine.
You need about 1/2 cup of whole freeze-dried berries to make roughly 1/3 cup of powder. Measure AFTER grinding.
Set aside about 2 tablespoons of the raspberry powder for your rolling sugar. The rest goes in the dough.
Pro tip: You can find freeze-dried raspberries at Target, Trader Joe’s, Whole Foods, or online. They’re usually near the dried fruit or in the snack aisle. Don’t use fresh or regular dried raspberries—they have too much moisture and will ruin your dough.
Step 2: Mix the Dry Stuff
Preheat your oven to 350°F (175°C). Line your baking sheets with parchment paper.
In a medium bowl, whisk together flour, baking soda, cream of tartar, and salt.
Add your ground raspberry powder (except the 2 tbsp you saved for rolling) to the flour mixture and whisk until it’s evenly distributed and turns slightly pink. It’ll look like pink snow. Beautiful.
Set this aside.
Step 3: Cream That Butter and Sugar
In your stand mixer bowl (or large bowl with hand mixer), beat the softened butter and sugar together on medium-high speed for 3-4 minutes. You want it light, fluffy, and pale. This is what makes sugar cookies soft and tender. Don’t rush this step.
The butter MUST be room temperature. If you can press your finger into it easily but it’s not greasy or melted, you’re good. Cold butter = lumpy disaster. Melted butter = flat cookies.
Add the whole egg and egg yolk. Beat until fully incorporated, about 1 minute. Scrape down the sides of the bowl.
Mix in vanilla extract and almond extract. The almond extract is subtle but makes people wonder what that amazing flavor is. Don’t skip it.
If you want a more vibrant pink color, add 2-3 drops of pink food coloring now. The raspberries give a natural pinkish hue, but food coloring makes it POP. This is optional—natural is beautiful too.
Step 4: Bring It All Together
With the mixer on low speed, gradually add the pink flour mixture. Mix until JUST combined—you should barely see any flour streaks. Don’t overmix or your cookies will be tough.
The dough will be soft, slightly pink, and smell AMAZING. It should be scoopable but not sticky. If it’s sticky, add 1-2 tablespoons more flour.
If you want, you can chill the dough for 20-30 minutes to make it easier to roll, but it’s not necessary. These cookies don’t spread much thanks to the cream of tartar magic.
Step 5: Make Your Rolling Sugar
In a shallow bowl, mix together the coarse sanding sugar, granulated sugar, and the 2 tablespoons of raspberry powder you set aside.
Stir it together until you have a sparkly pink sugar mixture. This is what makes these cookies GORGEOUS.
If you don’t have coarse sanding sugar, regular granulated sugar works fine—it just won’t be as sparkly. You can also use just white sanding sugar if you want a more subtle look.
Step 6: Roll and Bake
Using a cookie scoop (about 1.5 tablespoons), scoop out portions of dough. Roll each portion between your palms to form a smooth ball.
Roll each ball in your pink sugar mixture, coating it completely. The sugar should stick to the dough nicely. If it’s not sticking, slightly dampen your hands before rolling the dough balls.
Place the sugar-coated balls on your prepared baking sheets, spacing them about 2 inches apart. They’ll spread a little but not much.
Optional but cute: Gently press each ball down slightly with the bottom of a glass or measuring cup. This gives them a flatter, more even shape. Or leave them round for a puffier cookie. Both are great.
Bake for 10-12 minutes. They should look barely set in the center and slightly crackled on top. The edges will be very lightly golden, but the centers should still look a tiny bit underdone.
DO NOT OVERBAKE. These need to come out when they look slightly underdone. They’ll continue to cook on the hot pan and will firm up as they cool. Overbaked sugar cookies are a crime against humanity.
Let them cool on the baking sheet for 5 minutes, then transfer to a wire rack to cool completely. They’ll be soft and delicate when warm, so be gentle.
Step 7: Admire Your Work
Look at those gorgeous pink cookies. Take pictures from multiple angles.
Try one while it’s still slightly warm. Experience soft, chewy, raspberry-flavored bliss.
Arrange the rest on a pretty plate or in a gift box. Feel like a professional baker.
Try not to eat the entire batch in one sitting. Fail at that. Make another batch.
Serving Suggestions
These cookies are perfect on their own, but here are ways to make them even more special:
- Tea party perfection: Serve with hot tea or lemonade for an elegant afternoon treat
- Ice cream sandwiches: Use vanilla or strawberry ice cream between two cookies for instant fancy dessert
- Valentine’s gift: Pack in a cellophane bag tied with ribbon. Add a cute tag. Melt hearts.
- Bridal/baby showers: These are THE cookies for pink-themed celebrations
- Birthday treats: Way prettier than regular sugar cookies
- Cookie platters: Pair with vanilla or chocolate cookies for color variety
- Crumbled over yogurt: Break them up and sprinkle over Greek yogurt and fresh berries for breakfast dessert
Switch It Up
Lemon Raspberry: Add 2 tsp lemon zest to the dough for a tart citrus kick
White Chocolate Drizzle: Once cooled, drizzle with melted white chocolate for extra fancy
Cream Cheese Frosting: Top with a swirl of cream cheese frosting and a fresh raspberry
Strawberry Version: Use freeze-dried strawberries instead of raspberries for a different berry flavor
Mixed Berry: Use half raspberry, half strawberry powder for a complex berry taste
Chocolate Dipped: Dip half of each cookie in melted dark chocolate after they cool
Lavender Raspberry: Add 1 tsp dried culinary lavender to the dough for a floral note
Thumbprint Style: Press your thumb in the center before baking and fill with raspberry jam after
Sandwich Cookies: Make them smaller and sandwich two together with buttercream or jam
Storage and Make-Ahead Tips
These cookies stay soft for days if you store them right, which makes them perfect for gifting and make-ahead baking.
Room temperature: Store in an airtight container for up to 1 week. Put a slice of bread in the container to keep them extra soft—the cookies absorb moisture from the bread.
Refrigerated: They’ll keep for up to 2 weeks in an airtight container in the fridge, but they’re best at room temperature.
Freezing dough: Scoop the dough into balls, freeze on a baking sheet until solid, then transfer to a freezer bag. They’ll keep for 3 months. Roll in sugar and bake from frozen—just add 1-2 minutes to the bake time.
Freezing baked cookies: Once completely cool, layer them in an airtight container with parchment between layers. Freeze for up to 3 months. Thaw at room temperature for 30 minutes.
Make-ahead timeline:
- 3 months ahead: Make and freeze dough balls (don’t roll in sugar yet)
- 1 week ahead: Bake and store at room temperature
- 2-3 days ahead: Perfect timing—they’ll be at peak softness
- Day of: They’ll be freshest but honestly they’re good for days
Gift-giving tip: These are sturdy enough to ship! Pack them in a tin with parchment between layers. They travel beautifully and look expensive.
Why This Works So Damn Well
The science here is what makes sugar cookies so reliably perfect.
Cream of tartar is the secret weapon. It’s an acid that reacts with the baking soda to create lift and also prevents sugar crystals from bonding together, which keeps the cookies soft and tender. It’s what gives these that signature sugar cookie texture—soft and slightly chewy with a tiny bit of tang.
The combination of a whole egg (for structure and moisture) and an extra yolk (for richness and tenderness) creates the perfect texture. Egg whites can make cookies cakey; the extra yolk keeps them soft and rich.
Freeze-dried fruit is genius for baking because all the moisture has been removed but the flavor is concentrated. Regular berries would add too much liquid and make the dough wet and sticky. Freeze-dried berries give you intense flavor and natural color without messing up the dough chemistry.
The butter-to-flour ratio is carefully balanced to create a soft cookie that holds its shape. Too much butter and they’d spread like pancakes. Too little and they’d be cakey and dry.
Rolling in coarse sugar before baking creates a sparkly, slightly crunchy exterior that contrasts beautifully with the soft interior. The sugar also helps prevent spreading by creating a barrier.
Slight underbaking is crucial—sugar cookies continue to cook on the hot pan after you remove them from the oven. Pulling them when they look barely done ensures they stay soft and chewy instead of hard and crunchy.
When to Make These
Valentine’s Day: Obviously. These are basically love in cookie form.
Galentine’s Day: Celebrate your girlfriends with pretty pink cookies and mimosas.
Bridal Showers: Elegant, pink, and perfect for pre-wedding celebrations.
Baby Showers: If it’s a girl, these are the move. Even if it’s not, pink cookies are gender-neutral joy.
Mother’s Day: Moms deserve beautiful, homemade cookies. Make her these.
Spring Parties: These scream springtime with their fresh berry flavor and pretty color.
Birthday Celebrations: Way more special than regular sugar cookies.
Just Because: Sometimes you need to make something pretty and delicious for no reason. That’s valid.
Questions People Actually Ask
Q: Can I use raspberry extract instead of freeze-dried raspberries?
A: You CAN, but you’ll lose the natural color and some of the authentic flavor. If you do, use 1-2 tsp raspberry extract and add pink food coloring for color. The freeze-dried berries are really worth seeking out though.
Q: My dough is too sticky. What do I do?
A: Add flour 1 tablespoon at a time until it’s scoopable. Your butter might have been too soft, or you measured the flour incorrectly. The dough should be soft but not stick to your hands.
Q: My cookies spread too much and became flat.
A: Your butter was too warm, or your oven temperature is off. Make sure your butter is room temp, not melted. You can also chill the dough for 30 minutes before baking.
Q: I can’t find freeze-dried raspberries. Can I use the freeze-dried strawberries from the cereal aisle?
A: YES! Those work great. Just make sure they’re unsweetened if possible. The ones from Trader Joe’s or Target work perfectly.
Q: What’s cream of tartar and why do I need it?
A: It’s an acidic powder (potassium bitartrate) that’s a byproduct of winemaking. It prevents sugar crystallization and makes cookies soft and tender. You can find it in the spice aisle. Don’t skip it—it’s what makes sugar cookies different from regular cookies.
Q: Can I make these without almond extract?
A: Sure, just use 2 tsp vanilla extract total. The almond adds a subtle bakery flavor but it’s not essential.
Q: My cookies are too cakey. What happened?
A: You either overmixed the dough, added too much flour, or overbaked them. Sugar cookies should be soft and slightly dense, not fluffy and cake-like.
Q: Can I make these into cut-out shapes?
A: You CAN, but you’d need to chill the dough for at least 2 hours and roll it out. These are really optimized for rolled balls, not cut-outs. For cut-outs, you’d want a stiffer dough recipe.
Q: The raspberry seeds are visible in my cookies. Is that okay?
A: Totally fine! That’s part of the charm of using real fruit. The tiny seeds add texture and prove these are made with real berries, not artificial flavoring.
Q: These seem really pretty. Are they hard to make?
A: They LOOK fancy but they’re actually pretty simple. If you can make basic cookies, you can make these. The freeze-dried raspberry powder does most of the work for you. Don’t let the prettiness intimidate you.
Print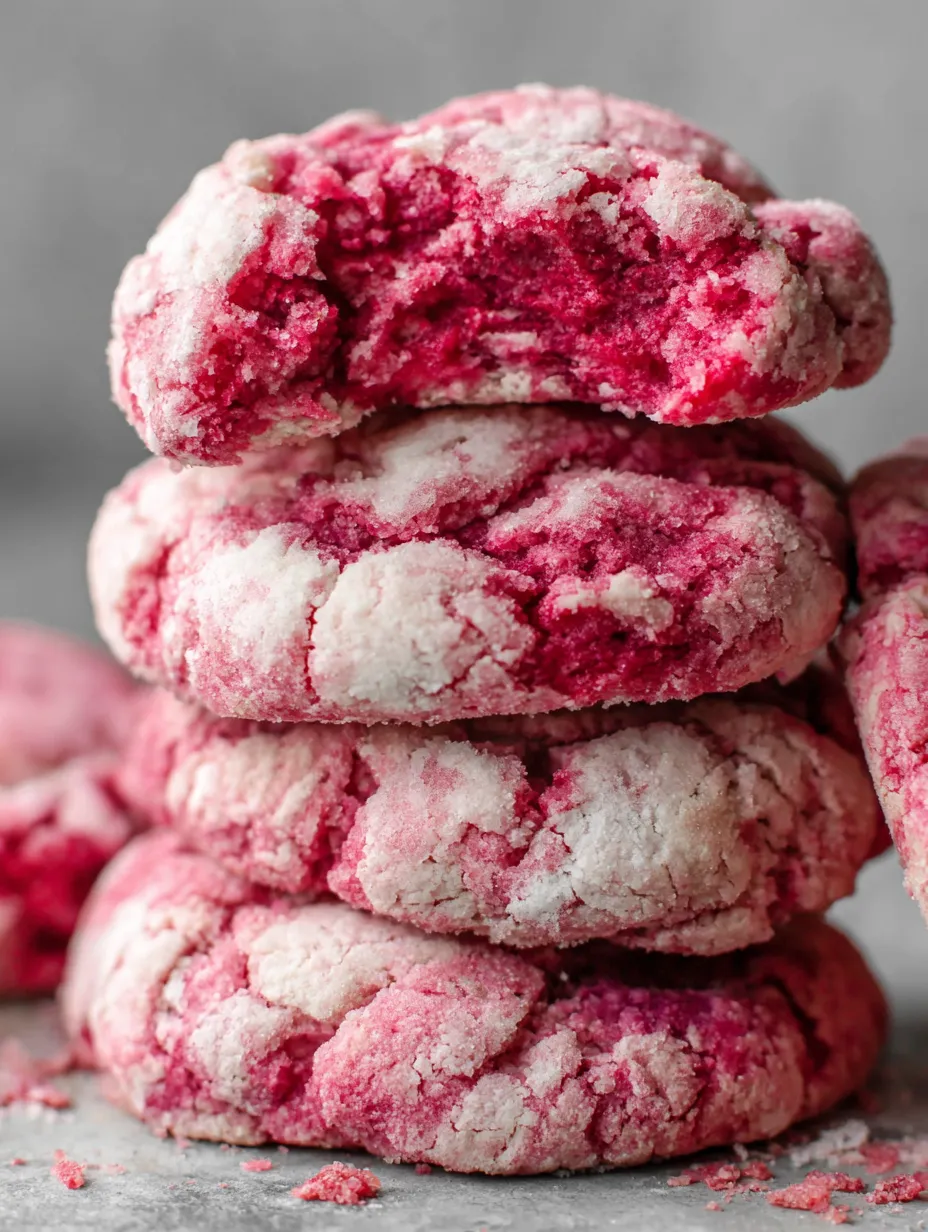
Raspberry Sugar Cookies – Berry Sweet & Gluten-Free
- Total Time: 31 minutes
- Yield: 36 cookies 1x
Description
Okay, imagine taking a classic sugar cookie—you know, that soft, buttery, perfect cookie that doesn’t need anything else to be amazing—and infusing it with real raspberry flavor and a gorgeous natural pink color. That’s what we’re dealing with here. These Raspberry Sugar Cookies are basically vanilla sugar cookies that got a major glow-up with freeze-dried raspberries, a hint of almond extract, and the prettiest pink hue you’ve ever seen. They’re soft, chewy, slightly tangy from the berries, and rolled in sparkly pink sugar that makes them look like they belong in a fancy bakery window. I made these for Valentine’s Day last year and my boyfriend proposed three days later. Coincidence? Probably, but I’m taking credit. My best friend ordered two dozen for her bridal shower and people kept asking which bakery made them. These cookies make people think you’re way fancier than you actually are.
Ingredients
For the Cookies:
- 2 3/4 cups all-purpose flour
- 1 tsp baking soda
- 1 tsp cream of tartar (this is KEY—don’t skip it)
- 1/2 tsp salt
- 1 cup (2 sticks) unsalted butter, softened
- 1 1/2 cups granulated sugar
- 1 large egg
- 1 egg yolk (save the white for later)
- 1 tbsp vanilla extract
- 1/2 tsp almond extract (this makes them taste expensive)
- 1/2 cup freeze-dried raspberries, ground into powder
- 2–3 drops pink food coloring (optional—the raspberries give color but you can boost it)
For Rolling:
- 1/2 cup coarse sanding sugar (pink or white)
- 2 tbsp granulated sugar
- 2 tbsp ground freeze-dried raspberries (for extra pink sparkle)
Equipment:
- Food processor or spice grinder (for powdering raspberries)
- Stand mixer or hand mixer
- Cookie scoop (1.5 tablespoon size)
- Baking sheets
- Parchment paper or silicone mats
- Small bowls for rolling sugar
- Wire cooling racks
Instructions
Take your freeze-dried raspberries and put them in a food processor, spice grinder, or even a ziplock bag. You want to pulverize them into a fine powder.
Food processor method: Pulse 15-20 times until you have a fine, bright pink powder. Some tiny seed bits are fine—they add texture.
Spice grinder method: Work in batches. Grind until powdery. This gives you the finest powder.
Ziplock method: Seal the bag and crush with a rolling pin or the bottom of a measuring cup. This works but takes more effort and won’t be as fine.
You need about 1/2 cup of whole freeze-dried berries to make roughly 1/3 cup of powder. Measure AFTER grinding.
Set aside about 2 tablespoons of the raspberry powder for your rolling sugar. The rest goes in the dough.
Pro tip: You can find freeze-dried raspberries at Target, Trader Joe’s, Whole Foods, or online. They’re usually near the dried fruit or in the snack aisle. Don’t use fresh or regular dried raspberries—they have too much moisture and will ruin your dough.
Preheat your oven to 350°F (175°C). Line your baking sheets with parchment paper.
In a medium bowl, whisk together flour, baking soda, cream of tartar, and salt.
Add your ground raspberry powder (except the 2 tbsp you saved for rolling) to the flour mixture and whisk until it’s evenly distributed and turns slightly pink. It’ll look like pink snow. Beautiful.
Set this aside.
In your stand mixer bowl (or large bowl with hand mixer), beat the softened butter and sugar together on medium-high speed for 3-4 minutes. You want it light, fluffy, and pale. This is what makes sugar cookies soft and tender. Don’t rush this step.
The butter MUST be room temperature. If you can press your finger into it easily but it’s not greasy or melted, you’re good. Cold butter = lumpy disaster. Melted butter = flat cookies.
Add the whole egg and egg yolk. Beat until fully incorporated, about 1 minute. Scrape down the sides of the bowl.
Mix in vanilla extract and almond extract. The almond extract is subtle but makes people wonder what that amazing flavor is. Don’t skip it.
If you want a more vibrant pink color, add 2-3 drops of pink food coloring now. The raspberries give a natural pinkish hue, but food coloring makes it POP. This is optional—natural is beautiful too.
With the mixer on low speed, gradually add the pink flour mixture. Mix until JUST combined—you should barely see any flour streaks. Don’t overmix or your cookies will be tough.
The dough will be soft, slightly pink, and smell AMAZING. It should be scoopable but not sticky. If it’s sticky, add 1-2 tablespoons more flour.
If you want, you can chill the dough for 20-30 minutes to make it easier to roll, but it’s not necessary. These cookies don’t spread much thanks to the cream of tartar magic.
In a shallow bowl, mix together the coarse sanding sugar, granulated sugar, and the 2 tablespoons of raspberry powder you set aside.
Stir it together until you have a sparkly pink sugar mixture. This is what makes these cookies GORGEOUS.
If you don’t have coarse sanding sugar, regular granulated sugar works fine—it just won’t be as sparkly. You can also use just white sanding sugar if you want a more subtle look.
Using a cookie scoop (about 1.5 tablespoons), scoop out portions of dough. Roll each portion between your palms to form a smooth ball.
Roll each ball in your pink sugar mixture, coating it completely. The sugar should stick to the dough nicely. If it’s not sticking, slightly dampen your hands before rolling the dough balls.
Place the sugar-coated balls on your prepared baking sheets, spacing them about 2 inches apart. They’ll spread a little but not much.
Optional but cute: Gently press each ball down slightly with the bottom of a glass or measuring cup. This gives them a flatter, more even shape. Or leave them round for a puffier cookie. Both are great.
Bake for 10-12 minutes. They should look barely set in the center and slightly crackled on top. The edges will be very lightly golden, but the centers should still look a tiny bit underdone.
DO NOT OVERBAKE. These need to come out when they look slightly underdone. They’ll continue to cook on the hot pan and will firm up as they cool. Overbaked sugar cookies are a crime against humanity.
Let them cool on the baking sheet for 5 minutes, then transfer to a wire rack to cool completely. They’ll be soft and delicate when warm, so be gentle.
Look at those gorgeous pink cookies. Take pictures from multiple angles.
Try one while it’s still slightly warm. Experience soft, chewy, raspberry-flavored bliss.
Arrange the rest on a pretty plate or in a gift box. Feel like a professional baker.
Try not to eat the entire batch in one sitting. Fail at that. Make another batch.
Notes
These cookies are perfect on their own, but here are ways to make them even more special:
- Tea party perfection: Serve with hot tea or lemonade for an elegant afternoon treat
- Ice cream sandwiches: Use vanilla or strawberry ice cream between two cookies for instant fancy dessert
- Valentine’s gift: Pack in a cellophane bag tied with ribbon. Add a cute tag. Melt hearts.
- Bridal/baby showers: These are THE cookies for pink-themed celebrations
- Birthday treats: Way prettier than regular sugar cookies
- Cookie platters: Pair with vanilla or chocolate cookies for color variety
- Crumbled over yogurt: Break them up and sprinkle over Greek yogurt and fresh berries for breakfast dessert
- Prep Time: 20 minutes
- Cook Time: 11 minutes
Nutrition
- Calories: ~95 kcal
- Sugar: ~8g
- Sodium: ~75mg
- Carbohydrates: ~13g
- Protein: ~1g


