Quick Overview
If you’re looking for a delightful treat that combines the rich flavors of peanut butter and chocolate, then look no further than these Peanut Butter Chocolate Kiss Cookies. These soft and chewy cookies are perfect for any occasion, whether it’s a family gathering or just a cozy night in. With their delectable taste and easy preparation, they will surely become a favorite among your loved ones. Let’s dive into this delicious recipe and get baking!
Ingredient Breakdown
Peanut Butter
You will need 1 cup of creamy peanut butter for this recipe. It provides the rich flavor and moist texture that makes these cookies irresistibly good. Make sure to use smooth peanut butter to achieve the best consistency.
Granulated Sugar
For sweetness, use 1 cup of granulated sugar. This ingredient balances the flavors and helps create a lovely crust on the outside of the cookies while keeping them soft inside.
Brown Sugar
Adding 1/2 cup of packed brown sugar enhances the cookie’s flavor profile with its subtle molasses notes. Brown sugar also contributes to the chewiness of each cookie.
Egg
One large egg is required to bind all ingredients together. Eggs also add moisture and help achieve that nice rise during baking.
All-Purpose Flour
You’ll need 1 cup of all-purpose flour to provide structure to your cookies. Avoid over-measuring as this can lead to dry cookies; gently spoon it into your measuring cup.
Baking Soda
A teaspoon of baking soda will give your cookies a light texture by helping them rise while baking. Ensure it’s fresh for optimal results.
Salt
Add a pinch of salt (about 1/4 teaspoon) to enhance all the flavors in the cookies. Salt balances sweetness and brings out richer flavors.
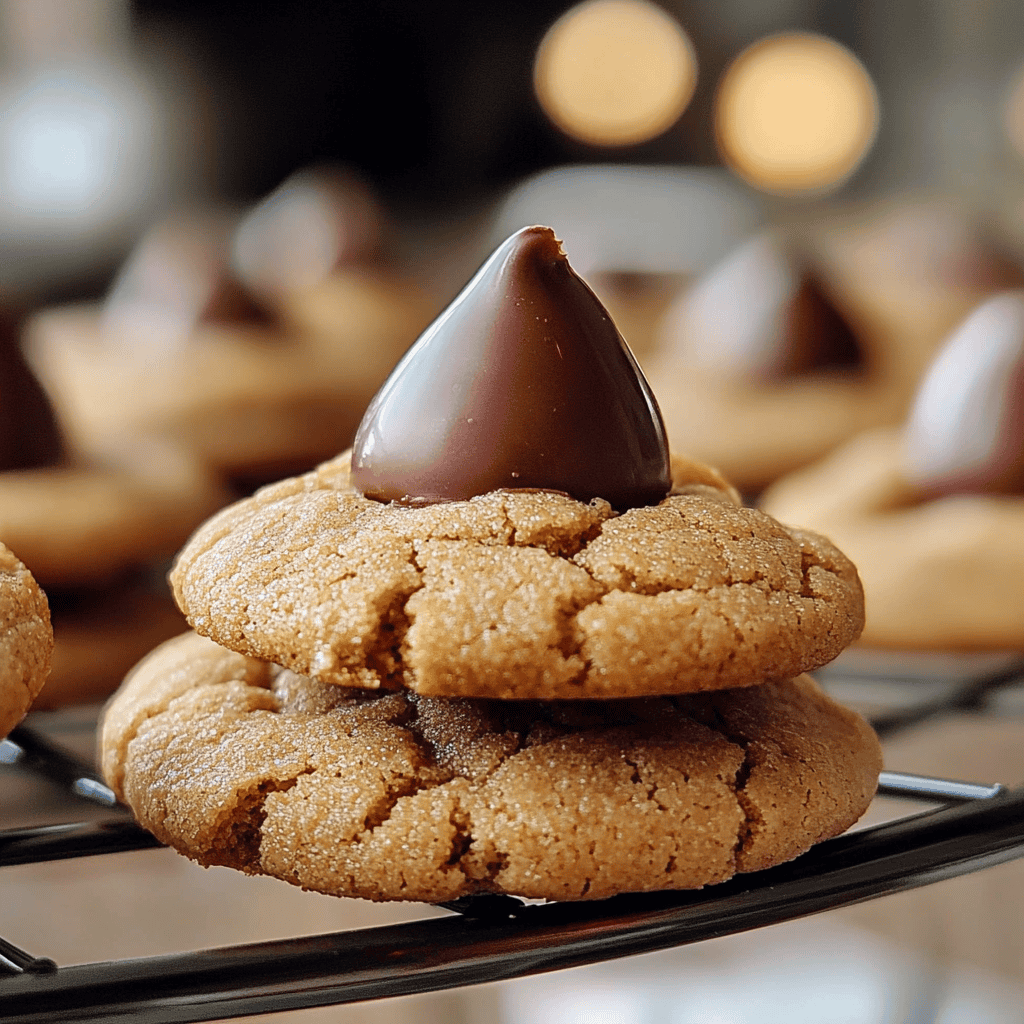
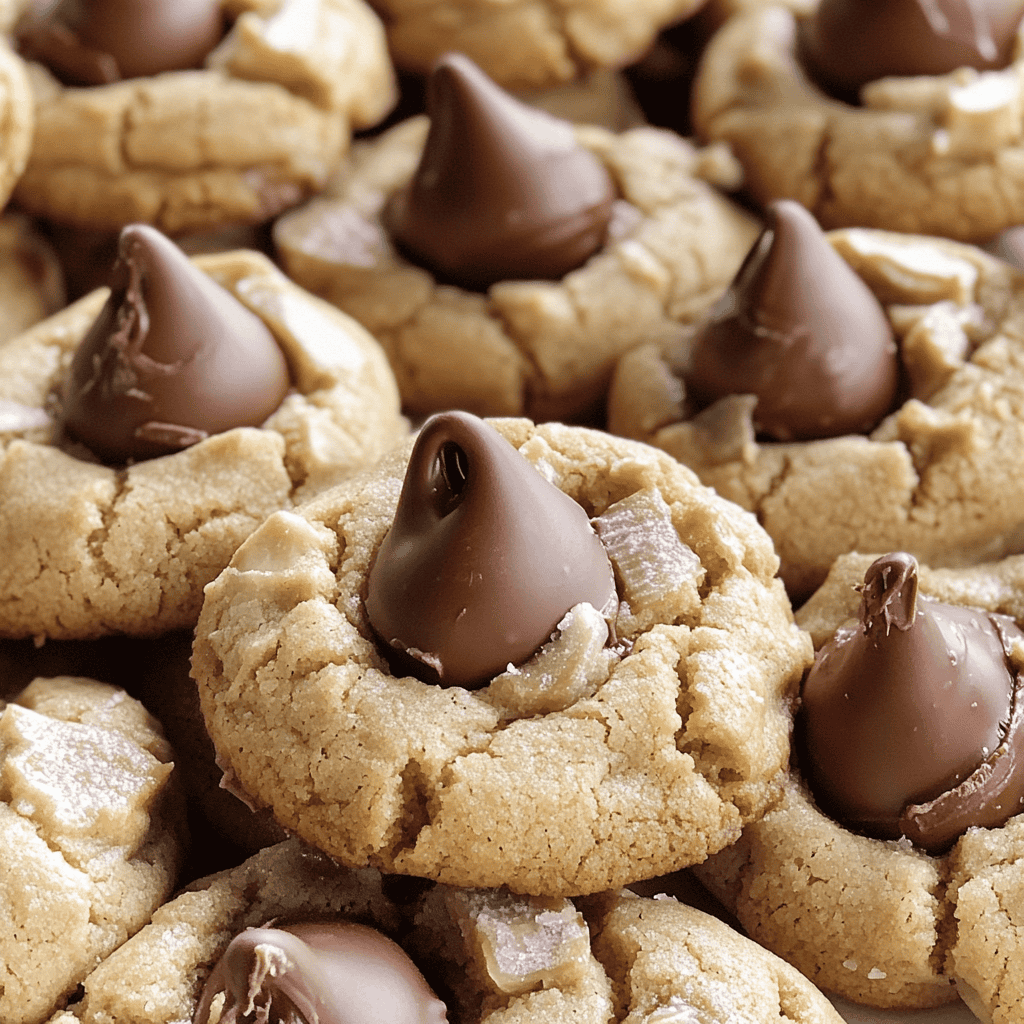
Chocolate Kisses
The star of these cookies is 24 unwrapped chocolate kisses, which you’ll place on top right after baking. Their melty goodness gives each cookie a delicious finishing touch.
Step By Step Recipe: Peanut Butter Chocolate Kiss Cookies
Preheat Your Oven
Start by preheating your oven to 350°F (175°C). This step is crucial as it ensures even baking throughout your cookies. Preheating also helps achieve that golden-brown exterior we all love.
Prepare Your Baking Sheet
Line a baking sheet with parchment paper or a silicone mat. This prevents sticking and makes cleanup easier later on. Spacing out your cookies will also ensure they don’t spread into each other while baking.
Mix Dry Ingredients
In a bowl, whisk together the flour, baking soda, and salt until well combined. This helps distribute the leavening agent evenly throughout your mixture so that each cookie rises perfectly during baking.
Cream Together Sugars and Peanut Butter
In another bowl, combine both granulated sugar and brown sugar with the peanut butter using an electric mixer on medium speed until fluffy. This process usually takes about 2-3 minutes and incorporates air into the mixture for lighter cookies.
Add Egg
Add one large egg into your sugar-peanut butter mixture. Beat until fully incorporated as this adds moisture and binds all ingredients together seamlessly.
Combine Mixtures
Gradually add the dry ingredients into the creamy mixture while mixing on low speed until just combined. Avoid over-mixing as this can lead to tough cookies; you want everything well combined but still tender.
Shape Cookie Dough
Using a tablespoon or cookie scoop, portion out dough balls onto your prepared baking sheet, spacing them about 2 inches apart for adequate spreading during baking.
Bake Your Cookies
Place the baking sheet in preheated oven and bake for 10-12 minutes or until edges are lightly golden but centers remain soft—this ensures that chewy texture we desire in each bite!
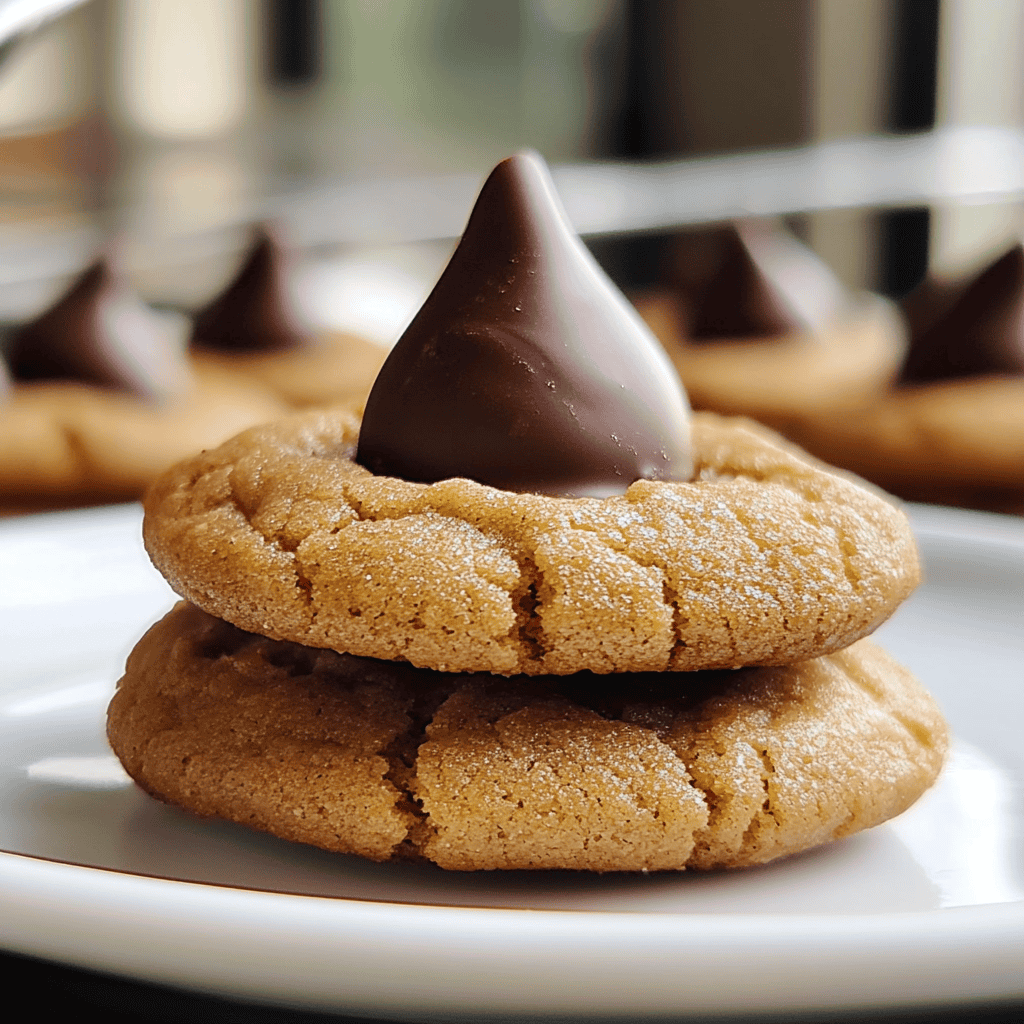
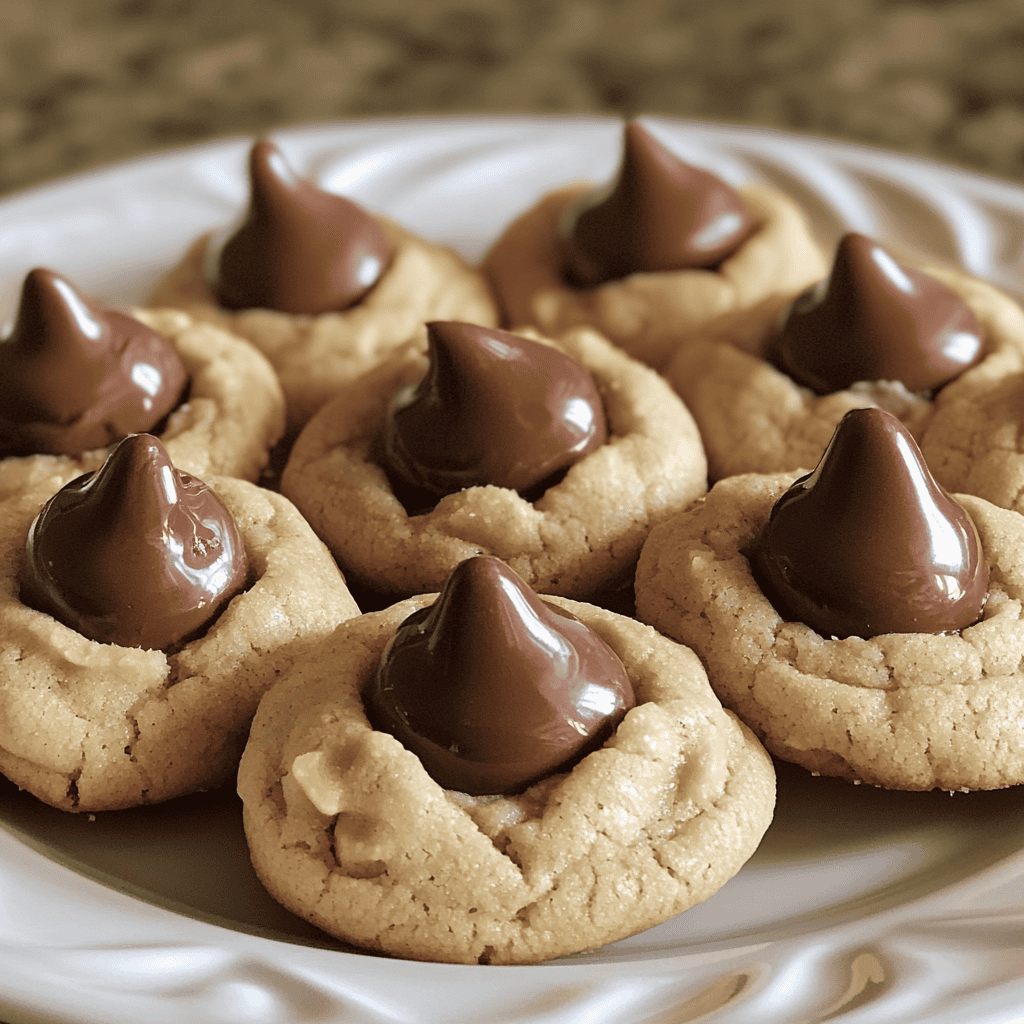
Add Chocolate Kisses
Once out of the oven, immediately press an unwrapped chocolate kiss into the center of each warm cookie gently—this allows them to melt slightly without losing their shape as they cool down.
Serving and Storing Tips
Serving Suggestions
These Peanut Butter Chocolate Kiss Cookies are best served warm or at room temperature alongside a glass of cold milk or your favorite hot beverage like coffee or tea!
Storing Leftovers
Store leftover cookies in an airtight container at room temperature for up to one week to maintain freshness; if you prefer softer textures, placing them in the fridge can help extend their life slightly longer!
Freezing Options
For long-term storage, freeze baked cookies in single layers separated by parchment paper inside freezer bags. They can last up to three months frozen—simply thaw before enjoying again!
These easy-to-make Peanut Butter Chocolate Kiss Cookies are sure to satisfy your sweet tooth cravings any day! Happy baking!
Mistakes to avoid
One common mistake when making Peanut Butter Chocolate Kiss Cookies is overmixing the dough. Mixing too much can lead to tough cookies instead of soft and chewy ones. Aim for just enough mixing until the ingredients are combined.
Another mistake is not chilling the dough before baking. Chilling helps the cookies maintain their shape during baking and results in a more pleasant texture. Aim to chill your cookie dough for at least 30 minutes.
Using stale or expired ingredients can dramatically affect the flavor of your cookies. Always check that your peanut butter and chocolate kisses are fresh for the best taste.
Skipping the parchment paper can lead to sticking, making it hard to remove your cookies from the baking sheet. Use parchment paper or a silicone mat for easy removal and cleanup.
Finally, overcrowding the baking sheet is a mistake that can result in unevenly baked cookies. Leave enough space between each cookie so they can spread properly without merging into each other.
Tips and tricks
To make perfect Peanut Butter Chocolate Kiss Cookies, start by measuring your ingredients accurately. Use a kitchen scale or measuring cups to ensure you have the right amounts of flour, sugar, and peanut butter. This precision will impact the texture and flavor of your cookies.
Consider using room temperature ingredients for better mixing. If you use cold eggs or butter, it may be harder to blend them smoothly into the dough. Allow these ingredients to sit out for about 30 minutes before starting.
When adding chocolate kisses on top, press them gently into each cookie as soon as they come out of the oven. This method ensures that they melt slightly and adhere better while cooling, enhancing both presentation and flavor.
Experiment with different types of peanut butter, whether creamy or crunchy, to find your preference. Each type brings a unique texture and flavor profile to your cookies.
Lastly, be sure to keep an eye on baking times. Ovens can vary significantly in temperature; therefore, check your cookies a couple of minutes earlier than suggested in the recipe for optimal doneness.
Suggestions for Peanut Butter Chocolate Kiss Cookies
Consider adding a pinch of sea salt on top before baking to enhance flavors in your Peanut Butter Chocolate Kiss Cookies. The salt contrasts beautifully with sweetness and elevates the overall taste profile.
For added texture, mix in chopped nuts like walnuts or pecans into the cookie dough. Nuts provide a delightful crunch that complements the softness of the cookie while enriching its flavor.
You might also try using dark chocolate kisses instead of regular milk chocolate ones for a richer taste experience. Dark chocolate pairs well with peanut butter and adds depth to each bite.
If you’re looking to reduce sugar intake, consider substituting half of the granulated sugar with a natural sweetener like honey or maple syrup. This change will slightly alter the texture but still yield delicious cookies.
Lastly, store any leftover cookies in an airtight container at room temperature for up to five days or freeze them for longer freshness. When you’re ready to enjoy them again, simply warm them briefly in the oven or microwave.
FAQs
What makes Peanut Butter Chocolate Kiss Cookies chewy?
The chewiness of Peanut Butter Chocolate Kiss Cookies comes from using brown sugar instead of white sugar, which retains moisture during baking. Additionally, not overbaking allows them to stay soft inside while developing a slight crisp on the edges.
Can I use natural peanut butter in this recipe?
Yes, you can use natural peanut butter; however, ensure that it is well-stirred before measuring since natural varieties can separate over time. Just remember that they may create a slightly different texture compared to processed peanut butters due to their oil content.
How do I prevent my cookies from spreading too much?
To prevent spreading while baking Peanut Butter Chocolate Kiss Cookies, chill your dough before placing it on the baking sheet. Additionally, make sure you’re using enough flour in proportion to other wet ingredients like peanut butter and eggs.
What should I do if my dough is too sticky?
If your cookie dough feels too sticky when preparing Peanut Butter Chocolate Kiss Cookies, add small amounts of flour gradually until it reaches a workable consistency. Be cautious not to add too much flour as this could lead to dry cookies.
Can I freeze these cookies after baking?
Yes! Once baked and cooled completely, store Peanut Butter Chocolate Kiss Cookies in an airtight container between layers of parchment paper or freeze them individually wrapped in plastic wrap for up to three months without losing quality.
How do I know when my cookies are done?
Your Peanut Butter Chocolate Kiss Cookies are done when they appear set around the edges but still look soft in the center. The edges should have a light golden color while maintaining some softness inside; they will firm up as they cool down on the baking sheet.
Summary
In summary, making delightful Peanut Butter Chocolate Kiss Cookies involves avoiding common mistakes like overmixing and not chilling dough. Utilize tips such as accurate ingredient measurement and experimenting with different peanut butter types for enhanced flavors. Consider suggestions like adding sea salt or nuts for extra texture and taste. Lastly, address common questions regarding preparation techniques and storage options for optimal results every time you bake these beloved treats.