
Someone looked at regular Rice Krispie treats and thought “these are fine, but what if we made them AGGRESSIVELY minty and added crushed Oreos?” Then they added green food coloring because apparently we’re not subtle people, and somehow this chaotic combination became one of those desserts that disappears from the pan before it’s even fully set.
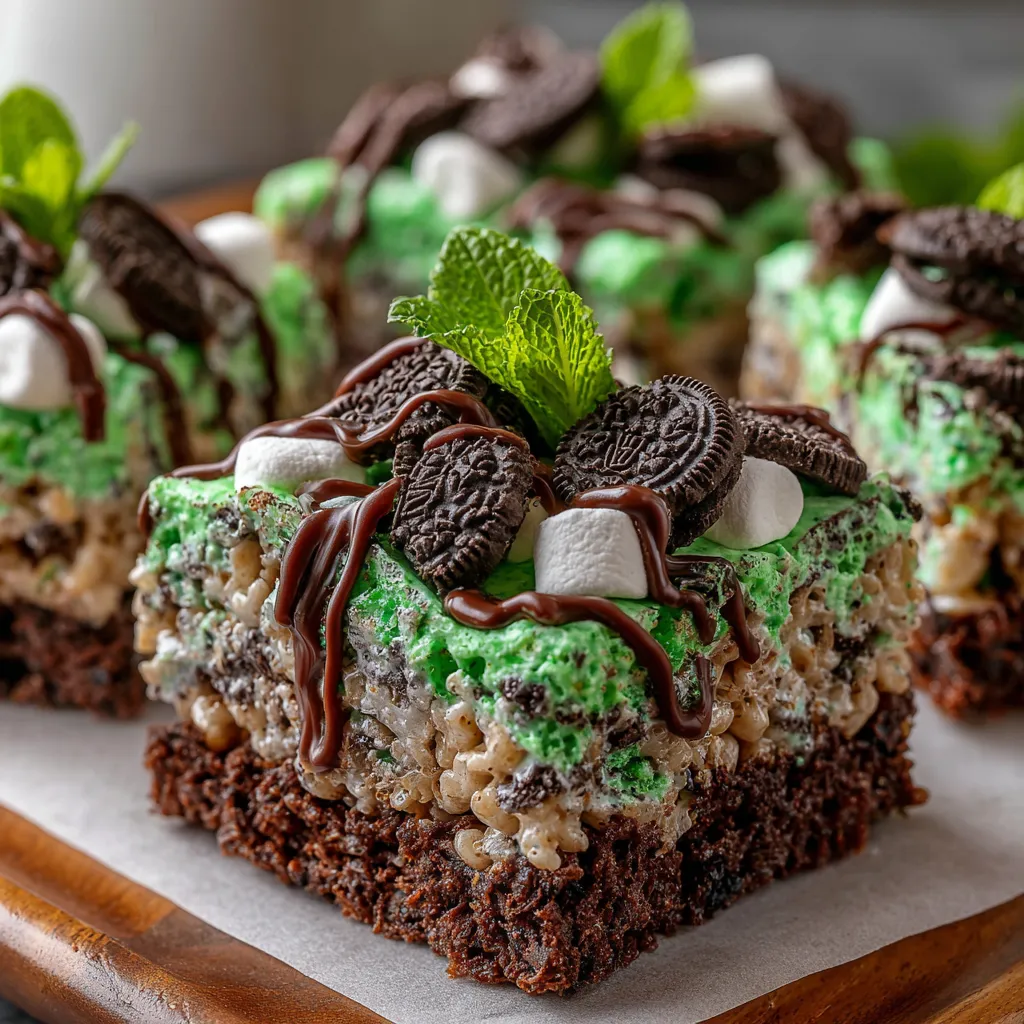
These are Rice Krispie treats that went to a mint chocolate spa and came back transformed. We’re taking that classic crispy, marshmallowy situation and loading it up with crushed Oreos, peppermint extract, and enough green coloring to make you wonder if you’re eating dessert or celebrating St. Patrick’s Day. The result is crunchy, chewy, minty, chocolatey chaos that somehow works perfectly.
This isn’t a refined dessert you serve on china. This is a “cut them into squares and watch people eat three while standing at the counter” kind of situation. They’re festive without requiring any actual baking skills. They’re impressive without being complicated. They’re exactly what happens when you stop overthinking dessert and just combine things that make you happy.
Why These Treats Are About to Become Your Party MVP
- No oven required — Your stovetop does all the work
- 15 minutes start to finish — Faster than ordering takeout
- Mint chocolate everything — Like a Girl Scout cookie had a baby with a Rice Krispie treat
- Crushed Oreos for texture — Because we’re fancy like that
- That green color — Unnatural but undeniably fun
- Crowd pleaser status — Everyone from kids to adults loses their minds
The Goods You Need
For the Treats:
- 6 cups Rice Krispies cereal
- 15-20 Oreo cookies, crushed (about 2 cups crushed)
- 4 tablespoons unsalted butter (½ stick)
- 1 bag (10 oz) marshmallows (or 4 cups mini marshmallows)
- 1 teaspoon peppermint extract (start with ½ if you’re scared of mint)
- Green gel food coloring (the gel kind, not liquid)
- Pinch of salt
For the Chocolate Drizzle:
- ½ cup chocolate chips (semi-sweet or dark)
- 1 teaspoon coconut oil or butter
- Optional: more crushed Oreos for topping
- Optional: Andes mints, chopped
Special Equipment:
- 9×13 inch baking pan
- Large pot or Dutch oven
- Wooden spoon or heat-resistant spatula
- Parchment paper or cooking spray
- Ziploc bag and rolling pin (for crushing Oreos)
Let’s Make These Treats That’ll Cause a Feeding Frenzy
Step 1: The Prep That Saves You Later
Line your 9×13 pan with parchment paper or spray it aggressively with cooking spray. Don’t skip this. Marshmallow is basically edible glue and you’ll be sad if you have to chisel these out of the pan. Set it aside and feel prepared.
Step 2: The Oreo Massacre
Put your Oreos in a Ziploc bag and seal it. Now take out all your frustrations with a rolling pin. You want them crushed but not pulverized into dust. Think chunky crumbs, not Oreo powder. Some big pieces are good – they add texture and make people ask “wait, are there Oreos in this?” Set aside about ¼ cup of the crushed Oreos for topping later if you’re feeling extra.
Step 3: Measure Everything Now
This is important. Once you start melting marshmallows, things move FAST. Measure out your cereal into a large bowl. Have your crushed Oreos ready. Have your peppermint extract open. Have your food coloring nearby. Be ready because melted marshmallow waits for no one.
Step 4: The Melt
In a large pot over low heat, melt the butter. Once it’s melted, add the marshmallows. Stir constantly with a wooden spoon or spatula. The marshmallows will slowly deflate and become a smooth, gooey mess. This takes about 3-5 minutes. Don’t rush it on high heat or you’ll burn the marshmallows and they’ll taste bitter. Patience, grasshopper.
Step 5: The Mint Situation
Once your marshmallows are completely melted and smooth, remove from heat. Immediately stir in the peppermint extract and a pinch of salt. Now add food coloring. Start with 3-4 drops of gel coloring and stir. Want it brighter? Add more. The color will lighten slightly when you add the cereal, so go a shade darker than you want the final product. This is your chance to make them radioactive green or subtle mint. Choose your chaos level.
Step 6: The Big Mix
Working quickly because this mixture starts setting up fast, add the Rice Krispies cereal and about ¾ of your crushed Oreos to the marshmallow mixture. Stir and fold until everything is evenly coated. Your arms will get a workout. This is not a gentle mixing situation. You need to be thorough but also quick before it hardens in the pot.
Step 7: The Press
Dump the mixture into your prepared pan. Here’s the trick: spray your hands with cooking spray or butter them lightly, then press the mixture firmly and evenly into the pan. If you don’t press hard enough, they’ll be crumbly and fall apart. Too hard and they’ll be dense as rocks. Find the sweet spot. Use a piece of parchment paper on top to help press without it sticking to your hands.
Step 8: The Chocolate Drizzle Drama
Melt your chocolate chips with coconut oil or butter in the microwave in 20-second bursts, stirring between each burst. Once smooth, drizzle it over the top of your treats in whatever pattern makes you happy. Zigzags, swirls, complete coverage – you’re the artist here. Immediately sprinkle with remaining crushed Oreos and any chopped Andes mints if using. The chocolate needs to be tacky so the toppings stick.
Step 9: The Waiting Game
Let the treats sit at room temperature for at least 30 minutes to set up. Or cheat and put them in the fridge for 15 minutes. Once they’re set, lift them out using the parchment paper and cut into squares. Wipe your knife between cuts for clean edges. Or don’t and embrace the messy, homemade chaos.
Step 10: The Consumption
Grab one. Notice how the mint hits you first, then the chocolate from the Oreos, then that classic Rice Krispie crunch. Notice how you immediately reach for another one. This is normal. Everyone does this. These treats have that effect.
Pro Tips From Someone Who’s Made These For Every Holiday
Marshmallow Freshness: Fresh marshmallows melt better than old, stale ones. If your bag has been open for months, get a fresh one.
Butter Your Hands: Seriously. Marshmallow mixture is sticky beyond belief. Buttered or oiled hands are your only defense.
Don’t Overcook: Once marshmallows are melted, take them off heat immediately. Overcooked marshmallow gets hard and makes tough treats.
Peppermint Extract Quality: A little goes a long way. Start with less, taste, and add more if needed. Too much and it tastes like toothpaste.
Food Coloring Type: Gel food coloring is more concentrated than liquid and won’t add extra moisture. Use gel if possible.
The Press Test: Press firmly but not aggressively. You want them compact enough to hold together but not so dense they’re hard to bite.
Switch It Up (Because We’re Not One-Dimensional)
Double Mint: Use mint Oreos instead of regular. Mint on mint on mint.
Chocolate Grasshopper: Add 2 tablespoons cocoa powder to the melted marshmallow. Dark and minty.
White Chocolate Drizzle: Use white chocolate instead of dark. Very festive, very pretty.
Candy Cane Version: Use crushed candy canes instead of peppermint extract for Christmas vibes.
Birthday Cake Grasshopper: Use Birthday Cake Oreos and add sprinkles. Confusing but delicious.
Peanut Butter Addition: Swirl in ¼ cup peanut butter with the marshmallow. Mint and peanut butter is underrated.
Brownie Bottom: Press a layer of brownie batter in the pan, bake, then add the Rice Krispie layer on top. Maximum chaos.
Make-Ahead Strategy
The Treats: Make up to 3 days ahead. Store in an airtight container at room temperature.
Crush Oreos Ahead: Crush them days ahead and store in a container. One less thing to do.
Don’t Freeze: Technically you can, but the texture gets weird. Just make them fresh.
Cut Later: You can make the whole pan and cut them later. They’re easier to cut when completely cool anyway.
Questions People Keep Asking
Q: Can I use marshmallow fluff instead of marshmallows? A: No. It doesn’t work the same way. You need actual marshmallows for the right texture.
Q: My treats are too hard. What happened? A: You either overcooked the marshmallows or packed them too tightly. Next time, use lower heat and a gentler press.
Q: Can I leave out the food coloring? A: Absolutely. They’ll be regular colored but taste exactly the same.
Q: Why are mine falling apart? A: Not enough marshmallow mixture coating everything, or you didn’t press them firmly enough. Make sure every piece of cereal is coated.
Q: Can I use other cereals? A: You can, but Rice Krispies have the perfect texture for this. Cocoa Krispies could be interesting though.
Q: How much peppermint extract is too much? A: If it smells like toothpaste before you add the cereal, you’ve gone too far. Start with ½ teaspoon and work up.
Storage Reality
Room Temperature: Airtight container for up to 5 days. They stay fresh and chewy the whole time.
Refrigerator: Not necessary and actually makes them harder. Room temp is better.
Freezer: Up to 6 weeks wrapped tightly. Thaw at room temp. Texture might be slightly different.
Individual Wrapping: Wrap each square in plastic wrap for lunch boxes or easy grab-and-go situations.
Perfect Pairings
Milk: Cold milk is mandatory. The chocolate-mint combo requires it.
Coffee: Hot coffee cuts through the sweetness. Surprisingly good combination.
Ice Cream: Mint chocolate chip ice cream on the side. Redundant but nobody cares.
Hot Chocolate: With peppermint schnapps if you’re an adult having an adult moment.
Nothing: These are a complete snack. No accompaniment needed.
The Science of the Mallow
When you heat marshmallows, you’re melting the sugar and gelatin that give them structure. This creates a sticky mixture that acts as glue for the cereal. The butter adds fat, which keeps the mixture from being too sticky and adds flavor. The peppermint extract is alcohol-based, which evaporates slightly during mixing, leaving just the flavor behind.
The Oreos add fat from their filling and cocoa from their cookies, which both contribute to the overall texture and flavor. The crushed cookies also absorb some moisture from the marshmallow, which helps the treats set up properly. The chocolate drizzle on top adds another layer of texture – it sets hard while the inside stays soft and chewy.
Everything works together to create that perfect balance of crispy, chewy, crunchy, and smooth. It’s basically food engineering but fun.
When to Make These
St. Patrick’s Day: Obviously. They’re green. They’re festive. Done.
Christmas: Mint chocolate screams holiday season.
Bake Sales: They’re different enough to stand out and easy enough to make in bulk.
After School Snacks: Kids lose their minds over these.
Office Parties: Make you instantly popular with coworkers.
Tuesday: When you need something fun but don’t want to actually bake.
Why These Work So Well
Rice Krispie treats are already perfect in their simplicity. But adding mint and Oreos takes them from “classic childhood snack” to “wait, I need another one” territory. The mint makes them feel fancy and festive. The Oreos add chocolate and texture. The green color makes them fun and eye-catching.
They’re also stupid easy to make. If you can melt butter and stir things, you can make these. No mixer required. No oven required. No complicated techniques or special skills. Just a pot, a spoon, and about 15 minutes of your time.
These are the treats that make people ask for the recipe. They’re the treats that disappear first at parties. They’re the treats that prove sometimes the best desserts are the ones that don’t take themselves too seriously.
This is what happens when you let Rice Krispie treats have a minty, Oreo-filled identity crisis. And honestly? The crisis tastes amazing.
Print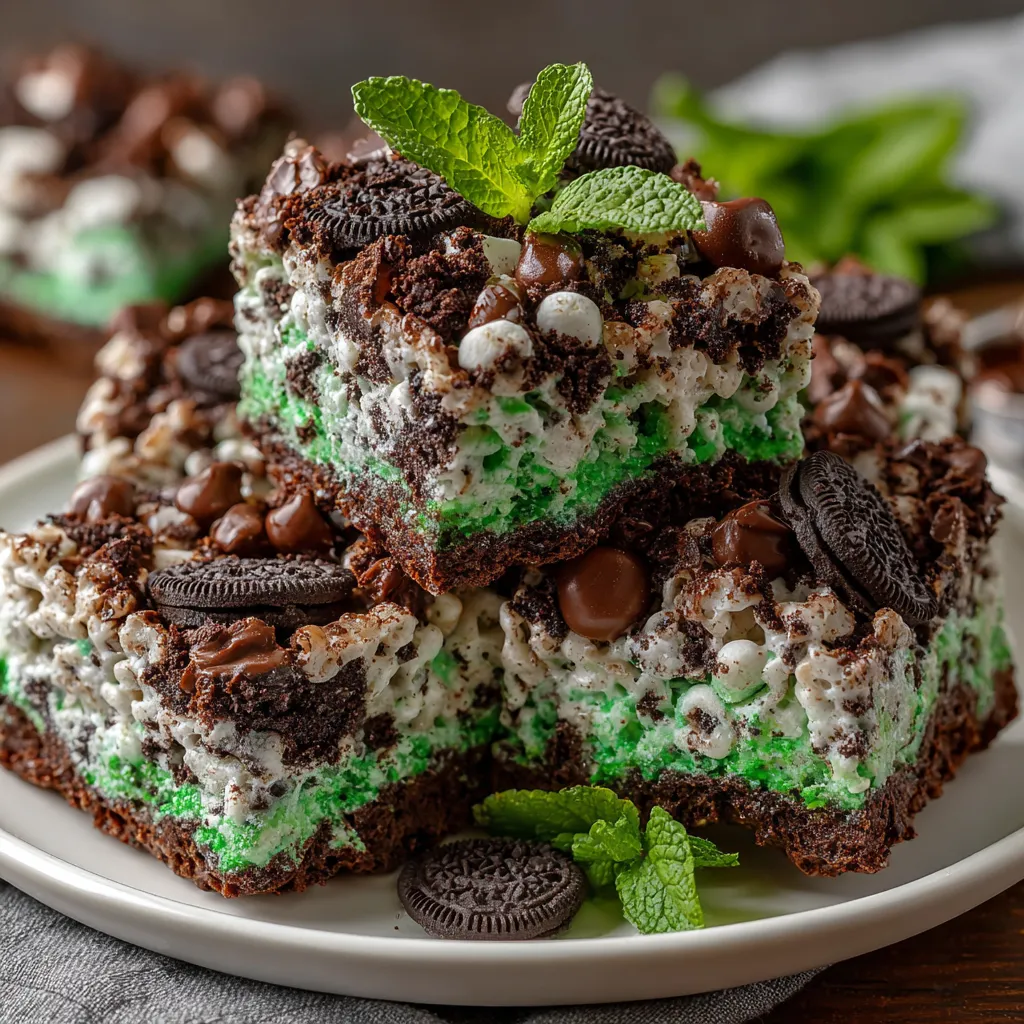
Oreo Grasshopper Rice Krispie Treats
- Total Time: 15 minutes
- Yield: 24 squares 1x
Description
Someone looked at regular Rice Krispie treats and thought “these are fine, but what if we made them AGGRESSIVELY minty and added crushed Oreos?” Then they added green food coloring because apparently we’re not subtle people, and somehow this chaotic combination became one of those desserts that disappears from the pan before it’s even fully set.
These are Rice Krispie treats that went to a mint chocolate spa and came back transformed. We’re taking that classic crispy, marshmallowy situation and loading it up with crushed Oreos, peppermint extract, and enough green coloring to make you wonder if you’re eating dessert or celebrating St. Patrick’s Day. The result is crunchy, chewy, minty, chocolatey chaos that somehow works perfectly.
This isn’t a refined dessert you serve on china. This is a “cut them into squares and watch people eat three while standing at the counter” kind of situation. They’re festive without requiring any actual baking skills. They’re impressive without being complicated. They’re exactly what happens when you stop overthinking dessert and just combine things that make you happy.
Ingredients
For the Treats:
- 6 cups Rice Krispies cereal
- 15–20 Oreo cookies, crushed (about 2 cups crushed)
- 4 tablespoons unsalted butter (½ stick)
- 1 bag (10 oz) marshmallows (or 4 cups mini marshmallows)
- 1 teaspoon peppermint extract (start with ½ if you’re scared of mint)
- Green gel food coloring (the gel kind, not liquid)
- Pinch of salt
For the Chocolate Drizzle:
- ½ cup chocolate chips (semi-sweet or dark)
- 1 teaspoon coconut oil or butter
- Optional: more crushed Oreos for topping
- Optional: Andes mints, chopped
Special Equipment:
- 9x13 inch baking pan
- Large pot or Dutch oven
- Wooden spoon or heat-resistant spatula
- Parchment paper or cooking spray
- Ziploc bag and rolling pin (for crushing Oreos)
Instructions
Line your 9×13 pan with parchment paper or spray it aggressively with cooking spray. Don’t skip this. Marshmallow is basically edible glue and you’ll be sad if you have to chisel these out of the pan. Set it aside and feel prepared.
Put your Oreos in a Ziploc bag and seal it. Now take out all your frustrations with a rolling pin. You want them crushed but not pulverized into dust. Think chunky crumbs, not Oreo powder. Some big pieces are good – they add texture and make people ask “wait, are there Oreos in this?” Set aside about ¼ cup of the crushed Oreos for topping later if you’re feeling extra.
This is important. Once you start melting marshmallows, things move FAST. Measure out your cereal into a large bowl. Have your crushed Oreos ready. Have your peppermint extract open. Have your food coloring nearby. Be ready because melted marshmallow waits for no one.
In a large pot over low heat, melt the butter. Once it’s melted, add the marshmallows. Stir constantly with a wooden spoon or spatula. The marshmallows will slowly deflate and become a smooth, gooey mess. This takes about 3-5 minutes. Don’t rush it on high heat or you’ll burn the marshmallows and they’ll taste bitter. Patience, grasshopper.
Once your marshmallows are completely melted and smooth, remove from heat. Immediately stir in the peppermint extract and a pinch of salt. Now add food coloring. Start with 3-4 drops of gel coloring and stir. Want it brighter? Add more. The color will lighten slightly when you add the cereal, so go a shade darker than you want the final product. This is your chance to make them radioactive green or subtle mint. Choose your chaos level.
Working quickly because this mixture starts setting up fast, add the Rice Krispies cereal and about ¾ of your crushed Oreos to the marshmallow mixture. Stir and fold until everything is evenly coated. Your arms will get a workout. This is not a gentle mixing situation. You need to be thorough but also quick before it hardens in the pot.
Dump the mixture into your prepared pan. Here’s the trick: spray your hands with cooking spray or butter them lightly, then press the mixture firmly and evenly into the pan. If you don’t press hard enough, they’ll be crumbly and fall apart. Too hard and they’ll be dense as rocks. Find the sweet spot. Use a piece of parchment paper on top to help press without it sticking to your hands.
Melt your chocolate chips with coconut oil or butter in the microwave in 20-second bursts, stirring between each burst. Once smooth, drizzle it over the top of your treats in whatever pattern makes you happy. Zigzags, swirls, complete coverage – you’re the artist here. Immediately sprinkle with remaining crushed Oreos and any chopped Andes mints if using. The chocolate needs to be tacky so the toppings stick.
Let the treats sit at room temperature for at least 30 minutes to set up. Or cheat and put them in the fridge for 15 minutes. Once they’re set, lift them out using the parchment paper and cut into squares. Wipe your knife between cuts for clean edges. Or don’t and embrace the messy, homemade chaos.
Grab one. Notice how the mint hits you first, then the chocolate from the Oreos, then that classic Rice Krispie crunch. Notice how you immediately reach for another one. This is normal. Everyone does this. These treats have that effect.
Notes
Marshmallow Freshness: Fresh marshmallows melt better than old, stale ones. If your bag has been open for months, get a fresh one.
Butter Your Hands: Seriously. Marshmallow mixture is sticky beyond belief. Buttered or oiled hands are your only defense.
Don’t Overcook: Once marshmallows are melted, take them off heat immediately. Overcooked marshmallow gets hard and makes tough treats.
Peppermint Extract Quality: A little goes a long way. Start with less, taste, and add more if needed. Too much and it tastes like toothpaste.
Food Coloring Type: Gel food coloring is more concentrated than liquid and won’t add extra moisture. Use gel if possible.
The Press Test: Press firmly but not aggressively. You want them compact enough to hold together but not so dense they’re hard to bite.
- Prep Time: 10 minutes
- Cook Time: 5 minutes
Nutrition
- Calories: ~140 kcal
- Carbohydrates: ~25g
- Protein: ~1g


