What the heck is this?
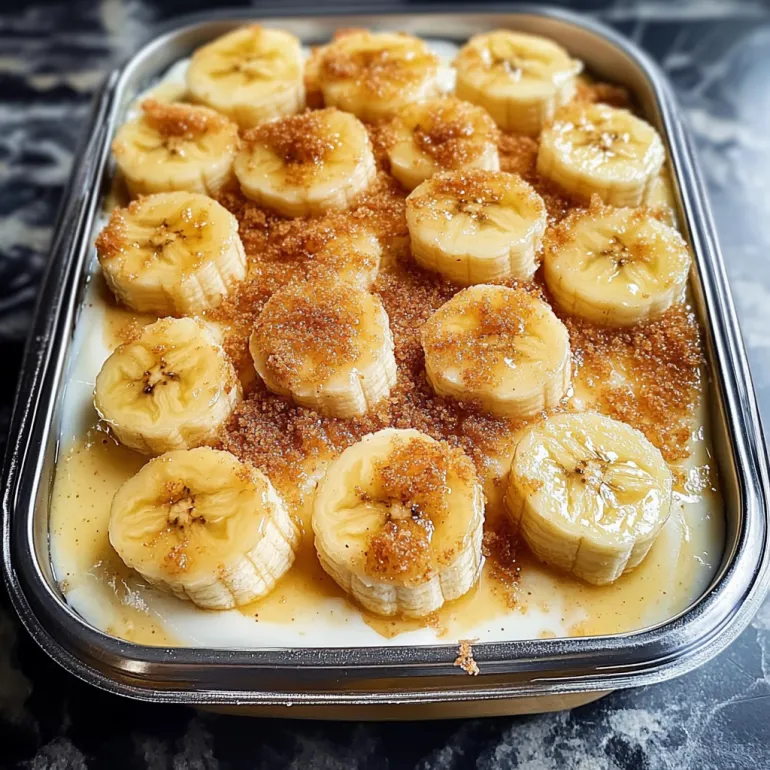
Oh, you’ve had banana pudding before, but have you had Not Yo Mama’s? This dessert takes the classic banana pudding and cranks it up to legendary status. We’re talking velvety, homemade vanilla custard, perfectly ripe bananas, buttery vanilla wafers, and a fluffy whipped topping that makes every bite feel like a treat from the dessert gods. It’s creamy, dreamy, and downright irresistible. Trust me, once you try this, you’ll never go back to the basic version. And hey, it’s just as simple as it is decadent, so get ready to make your friends (and tastebuds) swoon.
Why You’ll Love This Recipe
Classic banana pudding gets a major upgrade.
Homemade custard that’s rich and creamy — no boxes here!
Perfect balance of sweet, creamy, and fruity flavors.
A foolproof dessert for any occasion.
Makes everyone’s dessert dreams come true.
The Good Stuff You’ll Need
For the Pudding:
1 cup whole milk
1 cup heavy cream
1 cup sugar
1/4 cup cornstarch
Pinch of salt
5 large egg yolks
2 tbsp unsalted butter
1 ½ tsp pure vanilla extract
For the Layering:
1 box vanilla wafers (around 11 oz)
5 ripe bananas, sliced
For the Whipped Cream Topping:
1 ½ cups heavy cream
¼ cup powdered sugar
1 tsp vanilla extract

Let’s Do This
Step 1: Make the Custard
In a medium saucepan, combine the milk, heavy cream, sugar, cornstarch, and salt. Whisk everything together over medium heat until it begins to simmer, about 5-7 minutes.
In a separate bowl, whisk the egg yolks until smooth. Slowly pour about a cup of the hot milk mixture into the yolks while whisking constantly. This tempers the eggs, so they don’t scramble.
Pour the egg mixture back into the saucepan with the remaining milk mixture. Cook over medium heat, whisking constantly, until the custard thickens (about 5 minutes).
Once thickened, remove from heat and stir in the butter and vanilla extract. Let the custard cool slightly, then transfer to a bowl and cover with plastic wrap, pressing the wrap directly onto the surface to prevent a skin from forming. Let it cool completely at room temperature.
Step 2: Prepare the Whipped Cream
In a chilled mixing bowl, combine the heavy cream, powdered sugar, and vanilla extract. Whip using an electric mixer until stiff peaks form. Set aside in the fridge until ready to assemble.
Step 3: Layer the Pudding
In a large trifle dish or a 9×13 baking dish, layer the vanilla wafers at the bottom.
Top with a layer of sliced bananas, followed by a generous spoonful of custard. Repeat the layers until you run out of ingredients, finishing with a layer of custard on top.
Step 4: Add the Whipped Cream
Spread the whipped cream topping evenly over the top layer of custard.
For extra flair, crush a few vanilla wafers and sprinkle them over the top for a bit of crunch and decoration.
Step 5: Chill and Serve
Cover the pudding and refrigerate for at least 4 hours (overnight is even better). This allows the flavors to meld and the vanilla wafers to soften. When you’re ready to serve, grab a spoon, dive in, and enjoy the ultimate banana pudding experience!
Serving Suggestions
Serve with a cup of coffee or a glass of iced tea for the perfect pairing.
For a twist, add a layer of caramelized bananas on top for an extra touch of sweetness.
Switch It Up
Go Nutty: Add crushed pecans or walnuts between the layers for some nutty crunch.
Try Chocolate: For a decadent twist, add a layer of chocolate pudding in between the custard layers.
Swap the Bananas: Use fresh strawberries or a mixed berry medley for a different fruity vibe.
Boozy Banana Pudding: Add a splash of rum or bourbon to the custard for an adult version.
Make-Ahead Tips
This dessert is perfect for making ahead! Let it chill overnight for the best flavor.
You can prepare the custard and whipped cream a day before and store them in the fridge, then assemble right before serving.
Questions People Actually Ask
Q: Can I make this without egg yolks?
A: Yes! You can make an egg-free custard using a cornstarch-based recipe, though it will be a little less rich.
Q: Can I use frozen bananas?
A: Fresh bananas are best for this, but if you only have frozen ones, just make sure they’re thawed before using them.
Q: How long will this last in the fridge?
A: This dessert stays fresh in the fridge for 3-4 days, but it’s best enjoyed within the first two days for the best texture.
Not Yo Mama’s Banana Pudding Recipe: The Ultimate Dessert Upgrade
- Total Time: 25 minutes
- Yield: 8-10 servings
Description
Oh, you’ve had banana pudding before, but have you had Not Yo Mama’s? This dessert takes the classic banana pudding and cranks it up to legendary status. We’re talking velvety, homemade vanilla custard, perfectly ripe bananas, buttery vanilla wafers, and a fluffy whipped topping that makes every bite feel like a treat from the dessert gods. It’s creamy, dreamy, and downright irresistible. Trust me, once you try this, you’ll never go back to the basic version. And hey, it’s just as simple as it is decadent, so get ready to make your friends (and tastebuds) swoon.
Ingredients
For the Pudding:
1 cup whole milk
1 cup heavy cream
1 cup sugar
1/4 cup cornstarch
Pinch of salt
5 large egg yolks
2 tbsp unsalted butter
1 ½ tsp pure vanilla extract
For the Layering:
1 box vanilla wafers (around 11 oz)
5 ripe bananas, sliced
For the Whipped Cream Topping:
1 ½ cups heavy cream
¼ cup powdered sugar
1 tsp vanilla extract
Instructions
Step 1: Make the Custard
In a medium saucepan, combine the milk, heavy cream, sugar, cornstarch, and salt. Whisk everything together over medium heat until it begins to simmer, about 5-7 minutes.
In a separate bowl, whisk the egg yolks until smooth. Slowly pour about a cup of the hot milk mixture into the yolks while whisking constantly. This tempers the eggs, so they don’t scramble.
Pour the egg mixture back into the saucepan with the remaining milk mixture. Cook over medium heat, whisking constantly, until the custard thickens (about 5 minutes).
Once thickened, remove from heat and stir in the butter and vanilla extract. Let the custard cool slightly, then transfer to a bowl and cover with plastic wrap, pressing the wrap directly onto the surface to prevent a skin from forming. Let it cool completely at room temperature.
Step 2: Prepare the Whipped Cream
In a chilled mixing bowl, combine the heavy cream, powdered sugar, and vanilla extract. Whip using an electric mixer until stiff peaks form. Set aside in the fridge until ready to assemble.
Step 3: Layer the Pudding
In a large trifle dish or a 9×13 baking dish, layer the vanilla wafers at the bottom.
Top with a layer of sliced bananas, followed by a generous spoonful of custard. Repeat the layers until you run out of ingredients, finishing with a layer of custard on top.
Step 4: Add the Whipped Cream
Spread the whipped cream topping evenly over the top layer of custard.
For extra flair, crush a few vanilla wafers and sprinkle them over the top for a bit of crunch and decoration.
Step 5: Chill and Serve
Cover the pudding and refrigerate for at least 4 hours (overnight is even better). This allows the flavors to meld and the vanilla wafers to soften. When you’re ready to serve, grab a spoon, dive in, and enjoy the ultimate banana pudding experience!
Notes
Go Nutty: Add crushed pecans or walnuts between the layers for some nutty crunch.
Try Chocolate: For a decadent twist, add a layer of chocolate pudding in between the custard layers.
Swap the Bananas: Use fresh strawberries or a mixed berry medley for a different fruity vibe.
Boozy Banana Pudding: Add a splash of rum or bourbon to the custard for an adult version.
- Prep Time: 25 minutes
Nutrition
- Calories: ~350 kcal per serving
- Fat: ~40g
- Carbohydrates: ~20g
- Protein: ~5g