What the heck is this?
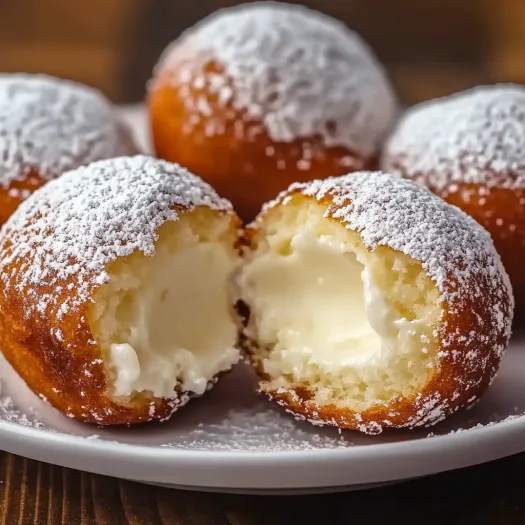
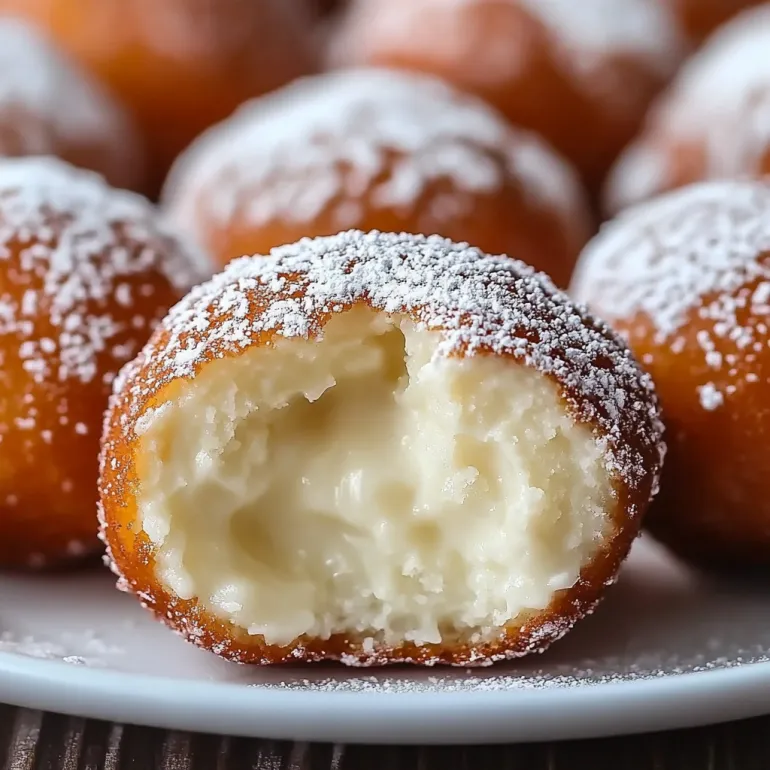
Picture this: all the creamy, tangy goodness of cherry cheesecake, but in adorable bite-sized balls that you can pop in your mouth like fancy truffles. No oven required, no water bath stress, no cracked tops to worry about. Just cream cheese, graham crackers, sweet cherries, and a little bit of magic that happens in your fridge while you binge-watch Netflix.
These little gems are basically cheesecake’s fun younger sibling who doesn’t take themselves too seriously but still knows how to impress at a party. They’re creamy, they’re fruity, they’re covered in chocolate or rolled in graham cracker crumbs, and they’re ready to eat in about 2 hours. Plus, they look like you spent way more effort than you actually did, which is always a win.
Why You’ll Love This Recipe
- Zero baking skills required — if you can mix and roll, you’re golden
- Perfect for summer when you don’t want to turn on the oven
- Makes about 30 balls, so great for parties or gift-giving
- Way easier than actual cheesecake but tastes just as good
- Customize with different toppings and coatings
- Make-ahead friendly for stress-free entertaining
- Uses simple ingredients you probably have on hand
- Portion control built-in (or not, we don’t judge)
- Kids can help with the rolling part
The Good Stuff You’ll Need
For the Cheesecake Base:
- 8 oz cream cheese, room temperature (don’t skip this step)
- 1/4 cup powdered sugar
- 1 tsp vanilla extract
- 1/4 tsp almond extract (optional but magical)
- 1 cup graham cracker crumbs (about 8 crackers)
- 1/2 cup dried cherries, chopped fine
- 2 tbsp cherry juice or lemon juice
- Pinch of salt
For Coating Options (Pick Your Adventure):
Chocolate Coating:
- 12 oz white chocolate chips or melting wafers
- 1 tbsp coconut oil or shortening
- Pink food coloring (optional)
Simple Coatings:
- More graham cracker crumbs
- Chopped toasted almonds
- Shredded coconut
- Powdered sugar
- Crushed freeze-dried cherries
Let’s Do This
Step 1: Get That Cream Cheese Ready
Make sure cream cheese is actually room temperature — cold cream cheese = lumpy balls, and nobody wants that.
In a large bowl, beat cream cheese until smooth and fluffy (about 2 minutes with an electric mixer).
Add powdered sugar, vanilla, and almond extract. Beat until combined.
Step 2: Add the Good Stuff
Fold in graham cracker crumbs, chopped cherries, cherry juice, and salt.
Mix until everything is evenly distributed and the mixture holds together when squeezed.
If it’s too soft, add more graham cracker crumbs. Too dry? Add a bit more cherry juice.
Step 3: Chill Out Time
Cover the bowl and refrigerate for at least 1 hour. This makes rolling so much easier.
Trust the process — cold mixture = easier rolling = your sanity intact.
Step 4: Roll Call
Line a baking sheet with parchment paper.
Using a small cookie scoop or spoon, portion mixture into 1-inch balls.
Roll between your palms to make them round (wet hands help prevent sticking).
Place on prepared baking sheet and chill for another 30 minutes.
Step 5: Coating Magic
For chocolate coating: Melt chocolate and coconut oil in microwave in 30-second intervals, stirring between. Add food coloring if desired.
Dip each ball in melted chocolate using a fork, letting excess drip off.
Return to parchment-lined sheet.
For simple coatings: Roll chilled balls in your chosen coating while they’re still slightly soft.
Step 6: Final Chill
Refrigerate coated balls for at least 1 hour until set.
Store in airtight container in fridge until ready to serve.
Pro Tips That’ll Save Your Sanity
Room temp cream cheese: Seriously, don’t rush this. Cold cream cheese won’t mix properly and you’ll have lumps forever.
Wet hands trick: Damp hands prevent the mixture from sticking when rolling.
Size consistency: Use a small cookie scoop for uniform balls that look professional.
Coating temperature: Let chocolate cool slightly before dipping — too hot and it’ll melt the balls.
Storage hack: These keep for up to a week in the fridge, and they actually get better after a day.
Switch It Up
Different fruits: Try dried strawberries, blueberries, or cranberries instead of cherries.
Chocolate version: Add 2 tbsp cocoa powder to the base and use chocolate graham crackers.
Lemon twist: Use lemon extract and dried lemon zest for a citrus version.
Boozy upgrade: Add a splash of cherry liqueur or amaretto (reduce other liquids slightly).
Nutty situation: Roll in chopped pistachios or almonds for extra crunch.
Oreo style: Replace graham crackers with crushed Oreos for a cookies-and-cream vibe.
Make-Ahead Magic
Full prep: Make completely and store covered in fridge for up to a week.
Freezer friendly: Freeze uncoated balls for up to 3 months. Thaw and coat when ready.
Party planning: Make these 2-3 days ahead — they’re actually better after the flavors meld.
Gift giving: Package in pretty boxes or bags for homemade gifts that people actually want.
Serving Ideas
Fancy presentation: Arrange on a tiered serving stand with other petit fours.
Casual snacking: Keep a container in the fridge for when sweet cravings hit.
Party platter: Mix different coatings for variety and visual appeal.
Holiday treats: Perfect for cookie exchanges or holiday parties.
Questions People Actually Ask
Q: Can I use fresh cherries? A: Dried cherries work better because fresh ones add too much moisture. If using fresh, pat them very dry and use less liquid.
Q: What if I don’t have cherry juice? A: Lemon juice, vanilla extract, or even a splash of milk work fine. You just need a little moisture.
Q: Can I make these dairy-free? A: Try vegan cream cheese, but the texture might be slightly different. You might need to adjust the graham cracker crumb amount.
Q: Why are my balls falling apart? A: The mixture might be too dry. Add a bit more liquid, or make sure your cream cheese was properly softened.
Q: Can I use different chocolate? A: Absolutely! Dark chocolate, milk chocolate, or even colored candy melts all work great.
Q: How long do these keep? A: Up to a week in the fridge, or 3 months in the freezer. They’re actually better after sitting overnight.
Print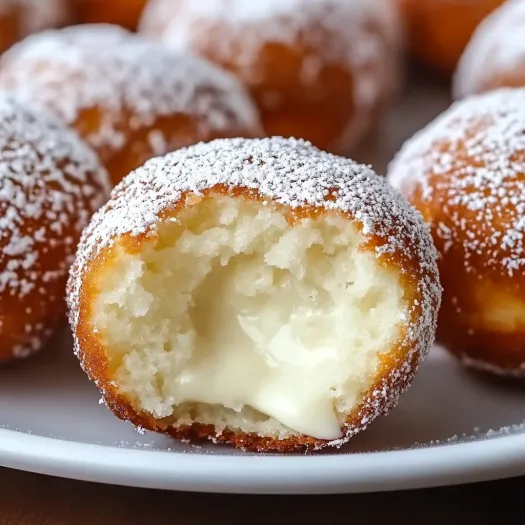
No-Bake Cherry Cheesecake Balls: When You Want Dessert But Your Oven is Off-Limits
- Total Time: 30 minutes
- Yield: About 30 balls 1x
Description
Picture this: all the creamy, tangy goodness of cherry cheesecake, but in adorable bite-sized balls that you can pop in your mouth like fancy truffles. No oven required, no water bath stress, no cracked tops to worry about. Just cream cheese, graham crackers, sweet cherries, and a little bit of magic that happens in your fridge while you binge-watch Netflix.
These little gems are basically cheesecake’s fun younger sibling who doesn’t take themselves too seriously but still knows how to impress at a party. They’re creamy, they’re fruity, they’re covered in chocolate or rolled in graham cracker crumbs, and they’re ready to eat in about 2 hours. Plus, they look like you spent way more effort than you actually did, which is always a win.
Ingredients
For the Cheesecake Base:
- 8 oz cream cheese, room temperature (don’t skip this step)
- 1/4 cup powdered sugar
- 1 tsp vanilla extract
- 1/4 tsp almond extract (optional but magical)
- 1 cup graham cracker crumbs (about 8 crackers)
- 1/2 cup dried cherries, chopped fine
- 2 tbsp cherry juice or lemon juice
- Pinch of salt
For Coating Options (Pick Your Adventure):
Chocolate Coating:
- 12 oz white chocolate chips or melting wafers
- 1 tbsp coconut oil or shortening
- Pink food coloring (optional)
Simple Coatings:
- More graham cracker crumbs
- Chopped toasted almonds
- Shredded coconut
- Powdered sugar
- Crushed freeze-dried cherries
Instructions
Make sure cream cheese is actually room temperature — cold cream cheese = lumpy balls, and nobody wants that.
In a large bowl, beat cream cheese until smooth and fluffy (about 2 minutes with an electric mixer).
Add powdered sugar, vanilla, and almond extract. Beat until combined.
Fold in graham cracker crumbs, chopped cherries, cherry juice, and salt.
Mix until everything is evenly distributed and the mixture holds together when squeezed.
If it’s too soft, add more graham cracker crumbs. Too dry? Add a bit more cherry juice.
Cover the bowl and refrigerate for at least 1 hour. This makes rolling so much easier.
Trust the process — cold mixture = easier rolling = your sanity intact.
Line a baking sheet with parchment paper.
Using a small cookie scoop or spoon, portion mixture into 1-inch balls.
Roll between your palms to make them round (wet hands help prevent sticking).
Place on prepared baking sheet and chill for another 30 minutes.
For chocolate coating: Melt chocolate and coconut oil in microwave in 30-second intervals, stirring between. Add food coloring if desired.
Dip each ball in melted chocolate using a fork, letting excess drip off.
Return to parchment-lined sheet.
For simple coatings: Roll chilled balls in your chosen coating while they’re still slightly soft.
Refrigerate coated balls for at least 1 hour until set.
Store in airtight container in fridge until ready to serve.
Notes
Room temp cream cheese: Seriously, don’t rush this. Cold cream cheese won’t mix properly and you’ll have lumps forever.
Wet hands trick: Damp hands prevent the mixture from sticking when rolling.
Size consistency: Use a small cookie scoop for uniform balls that look professional.
Coating temperature: Let chocolate cool slightly before dipping — too hot and it’ll melt the balls.
Storage hack: These keep for up to a week in the fridge, and they actually get better after a day.
- Prep Time: 30 minutes
Nutrition
- Calories: ~85 kcal
- Fat: ~5g
- Carbohydrates: ~9g
- Protein: ~2g