Description
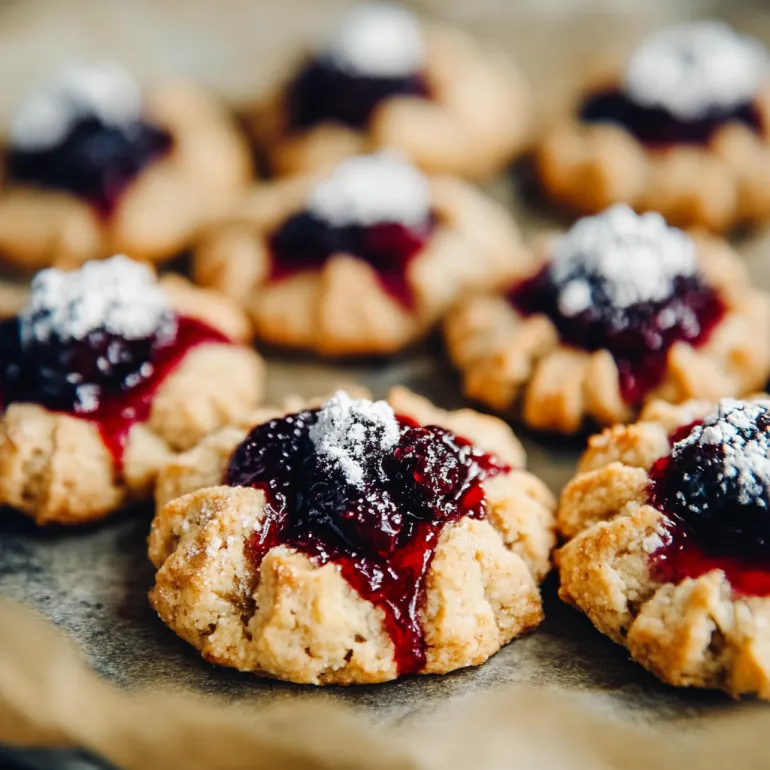
Okay, so you’ve got mulberries (lucky you!) and you’re wondering what to do with them besides eat them straight off the tree like a woodland creature? Enter these ridiculously adorable thumbprint cookies. Picture this: buttery, melt-in-your-mouth shortbread cookies with a jammy mulberry center that’s like a little jewel of summer. They’re fancy enough for your book club but easy enough for a Tuesday night baking session when you’re stress-eating your way through Netflix.
These cookies are basically the lovechild of sophistication and comfort food. The mulberry jam is tart-sweet perfection, and the cookie base is so tender it practically dissolves on your tongue. Plus, making the little thumbprint indentations is weirdly therapeutic — like adult Play-Doh but with way better results.
Ingredients
For the Mulberry Jam:
- 2 cups fresh mulberries (or frozen, thawed)
- 1/3 cup granulated sugar
- 1 tbsp lemon juice
- 1 tsp vanilla extract
- Pinch of salt
For the Cookie Dough:
- 2 cups all-purpose flour (or almond flour for gluten-free)
- 1/2 tsp salt
- 1 cup unsalted butter, room temperature (don’t skip this step)
- 2/3 cup powdered sugar
- 1 large egg yolk
- 1 tsp vanilla extract
- 1/2 tsp almond extract (trust me on this)
For Assembly:
- The mulberry jam you just made
- A little extra powdered sugar for dusting (optional but pretty)
Instructions
Toss mulberries, sugar, lemon juice, and salt in a small saucepan.
Cook over medium heat, stirring occasionally, until berries break down and mixture thickens (about 10-12 minutes).
Stir in vanilla. Let it cool completely — seriously, don’t rush this part.
Whisk flour and salt in a bowl. Set aside.
In a large bowl, cream butter and powdered sugar until light and fluffy (about 3-4 minutes with an electric mixer).
Beat in egg yolk, vanilla, and almond extract.
Gradually mix in flour mixture until just combined. Don’t overmix — we want tender cookies, not hockey pucks.
Roll dough into 1-inch balls and place on parchment-lined baking sheets.
Here’s the fun part: use your thumb to make indentations in each ball. Go about halfway down — you want a nice little well for the jam.
Pop the whole tray in the fridge for 30 minutes. This prevents spreading and keeps those thumbprints nice and defined.
Preheat oven to 350°F while cookies chill.
Bake for 12-15 minutes until edges are just barely golden. Don’t overbake — they’ll keep cooking on the hot pan.
While cookies are still warm, gently re-press the thumbprints if they puffed up during baking.
Spoon about 1/2 teaspoon of cooled mulberry jam into each indentation.
Let cookies cool completely on the pan before moving them.
Notes
Jam consistency: Your jam should coat a spoon but not be too thick. If it’s too runny, cook it a bit longer. Too thick? Add a splash of water.
Room temperature butter: This isn’t optional. Cold butter won’t cream properly and your cookies will be dense.
Don’t skip the chill: Cold dough holds its shape better and gives you those perfect thumbprint wells.
Storage hack: Store in an airtight container for up to a week. The jam actually gets better after a day or two.
- Prep Time: 45 minutes
- Cook Time: 15 minutes
Nutrition
- Calories: ~135 kcal
- Fat: ~7g
- Carbohydrates: ~18g
- Protein: ~2g