Description
Someone in the Florida Keys figured out that if you mix lime juice with sweetened condensed milk and egg yolks, something magical happens—it thickens into a creamy, tangy filling that’s basically summer in pie form. Key Lime Pie (or just Lime Pie if you can’t get Key limes) is what happens when tropical citrus meets graham cracker crust meets a cloud of whipped cream on top. It’s sweet but not cloying, tart but not face-puckering, creamy but somehow light, and so ridiculously easy to make that you’ll feel like you’re cheating when people act like you’ve performed culinary sorcery.
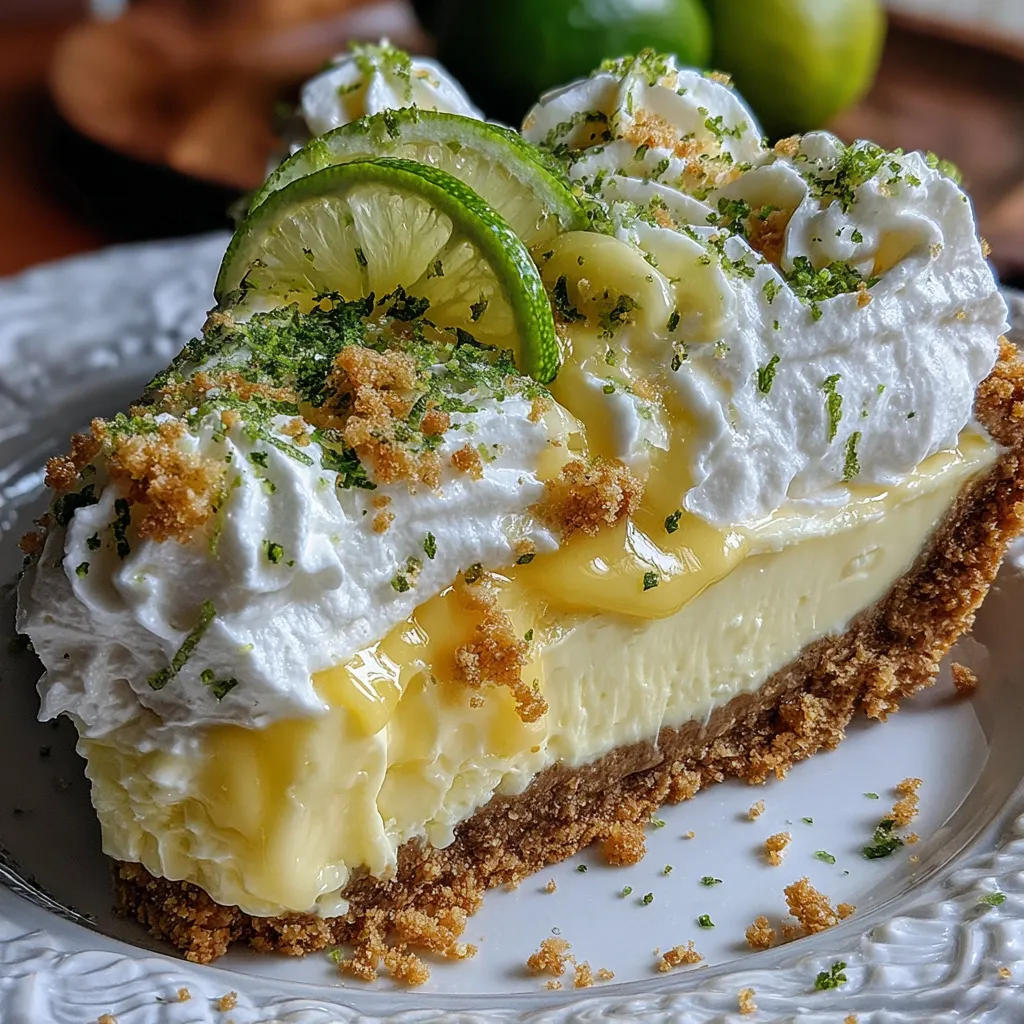
This isn’t some complicated French tart situation that requires tempering and water baths. This is “make a crust, whisk a filling, chill it, top with cream, become a dessert legend” simplicity that results in something that tastes like you spent all day in the kitchen. The crust is buttery and slightly salty from the graham crackers. The filling is silky and bright with lime. The whipped cream on top is billowy and just sweet enough. Together, they’re the perfect balance of rich and refreshing.
This is vacation energy without leaving your kitchen. It’s what happens when you take three main ingredients and let chemistry do the heavy lifting. It’s the pie that makes people forget they claimed to be too full for dessert.
Ingredients
For the Graham Cracker Crust:
- 1 3/4 cups graham cracker crumbs (about 12–14 full crackers, crushed)
- 1/3 cup granulated sugar
- 6 tablespoons unsalted butter, melted
- Pinch of salt (enhances the buttery flavor)
For the Lime Filling:
- 4 large egg yolks (save the whites for something else)
- 2 cans (14 oz each) sweetened condensed milk
- 2/3 cup fresh lime juice (about 5–6 limes, or 8–10 Key limes if you can find them)
- 1 tablespoon lime zest (from about 2 limes)
- Pinch of salt
For the Whipped Cream Topping:
- 1 1/2 cups heavy whipping cream, cold
- 3 tablespoons powdered sugar (or to taste)
- 1 teaspoon vanilla extract
- Optional: 1/2 teaspoon lime zest for extra lime punch
Optional But Highly Recommended:
- Extra lime zest for garnish
- Thin lime slices for decoration
- Toasted coconut flakes (tropical vibes)
- Fresh mint leaves (for color and freshness)
- Meringue topping instead of whipped cream (if you’re feeling fancy)
- Graham cracker crumbs sprinkled on top (texture contrast)
Special Equipment:
- 9-inch pie pan (standard size, nothing fancy)
- Citrus juicer or reamer (hand-squeezing limes gets old fast)
- Microplane or zester (for the lime zest)
- Electric mixer or whisk (for the whipped cream)
- Plastic wrap (to prevent skin formation during chilling)
Instructions
Step 1: The Crust Foundation
Preheat your oven to 350°F. In a medium bowl, mix the graham cracker crumbs, sugar, melted butter, and salt until the mixture looks like wet sand and holds together when squeezed. Dump it into your pie pan and press it firmly into the bottom and up the sides. Use the bottom of a measuring cup or glass to really pack it in—you want it compact so it doesn’t crumble when you slice the pie. Bake for 10-12 minutes until it’s golden and fragrant. Let it cool completely while you make the filling. A warm crust plus cold filling equals a soggy mess.
Step 2: The Zest Situation (Do This First)
Before you juice your limes, zest them. Trust me on this. Zesting juiced limes is miserable and inefficient. Use a Microplane or fine grater and zest just the green part—the white pith underneath is bitter. You want about 1 tablespoon of zest for the filling. Get a little extra for garnish because lime zest on top is peak presentation energy.
Step 3: The Juice Extraction
Cut the limes in half and juice them. You need 2/3 cup of juice, which is about 5-6 regular Persian limes or 8-10 Key limes if you’re being authentic. Roll the limes on the counter with firm pressure before cutting to break up the membranes and get more juice out. Strain out the seeds and pulp—you want smooth filling, not chunky. Fresh juice only. Bottled lime juice tastes like sadness and regret.
Step 4: The Magic Mixing
In a medium bowl, whisk the egg yolks until they’re smooth. Add the sweetened condensed milk and whisk until completely combined. The mixture should be thick and uniform. Now add the lime juice and lime zest. Whisk until smooth. The filling will start to thicken almost immediately—this is the acid in the lime juice reacting with the proteins in the condensed milk and egg yolks. It’s science magic and it’s beautiful. Add a pinch of salt to balance the sweetness. Taste it (yes, there are raw egg yolks, but they’re about to be cooked). It should be sweet, tart, and make your mouth water slightly.
Step 5: The Filling Pour
Pour the lime filling into your cooled graham cracker crust. Use a spatula to spread it evenly and smooth the top. Tap the pie pan gently on the counter a few times to release any air bubbles. The filling should be level and come almost to the top of the crust. If you have leftover filling, eat it with a spoon. This is your reward for making pie.
Step 6: The Optional Baking (Traditional Method)
You can bake the pie at 350°F for 15-17 minutes until the filling is just set but still slightly jiggly in the center, then chill it. OR you can skip baking entirely and just chill it—the acid in the lime juice “cooks” the eggs through a process called denaturation. Both methods work. Baking gives you a slightly firmer texture and eliminates any concern about raw eggs. Not baking is easier and gives you a creamier, more mousse-like texture. Your call. For food safety and best texture, most people bake it briefly.
Step 7: The Chilling (Non-Negotiable)
Whether you baked it or not, cover the pie with plastic wrap. Press the wrap directly onto the surface of the filling to prevent a skin from forming. Refrigerate for at least 3 hours, but preferably overnight. The filling needs time to fully set and for the flavors to meld. This is not the time to be impatient. Go do something else. The pie will be worth the wait.
Step 8: The Whipped Cream Excellence
When you’re ready to serve (or up to 4 hours before), make the whipped cream topping. Pour the cold heavy cream into a large bowl. Using an electric mixer or a whisk and some serious arm strength, beat the cream on medium-high speed until it starts to thicken. Add the powdered sugar and vanilla extract. Continue beating until stiff peaks form—the cream should hold its shape and not droop when you lift the beaters. Don’t overbeat or you’ll make butter. If you want extra lime flavor, fold in 1/2 teaspoon of lime zest at the end.
Step 9: The Topping Application
Remove the plastic wrap from the chilled pie. Dollop the whipped cream on top and spread it evenly across the surface, or pipe it on with a pastry bag if you’re feeling fancy. You can also serve slices with a dollop of whipped cream on the side instead of covering the whole pie—this keeps the pie looking clean in the fridge and lets people control how much cream they want. Both approaches are valid.
Step 10: The Garnish Glory
Sprinkle some fresh lime zest over the whipped cream. Add thin lime slices, either whole or cut into wedges, for visual appeal. If you’re using toasted coconut or graham cracker crumbs, sprinkle those on now. A small mint leaf on each slice looks professional and adds a pop of color. Don’t go overboard—you’re garnishing, not burying the pie under decorations.
Step 11: The Slicing Strategy
Use a sharp knife and wipe it clean with a damp towel between each slice. This gives you clean, professional-looking cuts instead of messy, dragged-filling disasters. Cut into 8 slices for normal servings or 10-12 for smaller portions. Lime pie is rich—a little goes a long way. Serve immediately while it’s cold and perfect.
Step 12: The Moment of Truth
Take a bite. Notice how the tangy lime filling hits your tongue first—bright, refreshing, perfectly balanced between sweet and tart. Feel the creamy texture that’s somehow both rich and light. Taste the buttery, slightly salty graham cracker crust that provides the perfect base. Experience the cool, billowy whipped cream that ties everything together. Realize you’ve just made one of the most beloved pies in American dessert history and it took you less than 30 minutes of actual work. Immediately plan when you’ll make it again.
Notes
Fresh Lime Juice Only: Bottled juice won’t set properly and tastes flat. Fresh is mandatory.
Zest Before You Juice: Makes life easier and gives you better zest.
Pack That Crust: Really press it firm. Loose crust crumbles when sliced.
Don’t Overbake: If you’re baking the filling, pull it when it’s still slightly jiggly. It firms up as it chills.
Chill Completely: The pie needs at least 3 hours in the fridge. Overnight is better.
Cold Cream Whips Better: Use cold cream and a cold bowl for the fluffiest whipped cream.
Wipe Your Knife: Clean slices require a clean knife between cuts.
- Prep Time: 20 minutes
- Cook Time: 25 minutes
Nutrition
- Calories: ~385 kcal
- Fat: ~19g
- Carbohydrates: ~48g
- Protein: ~7g