
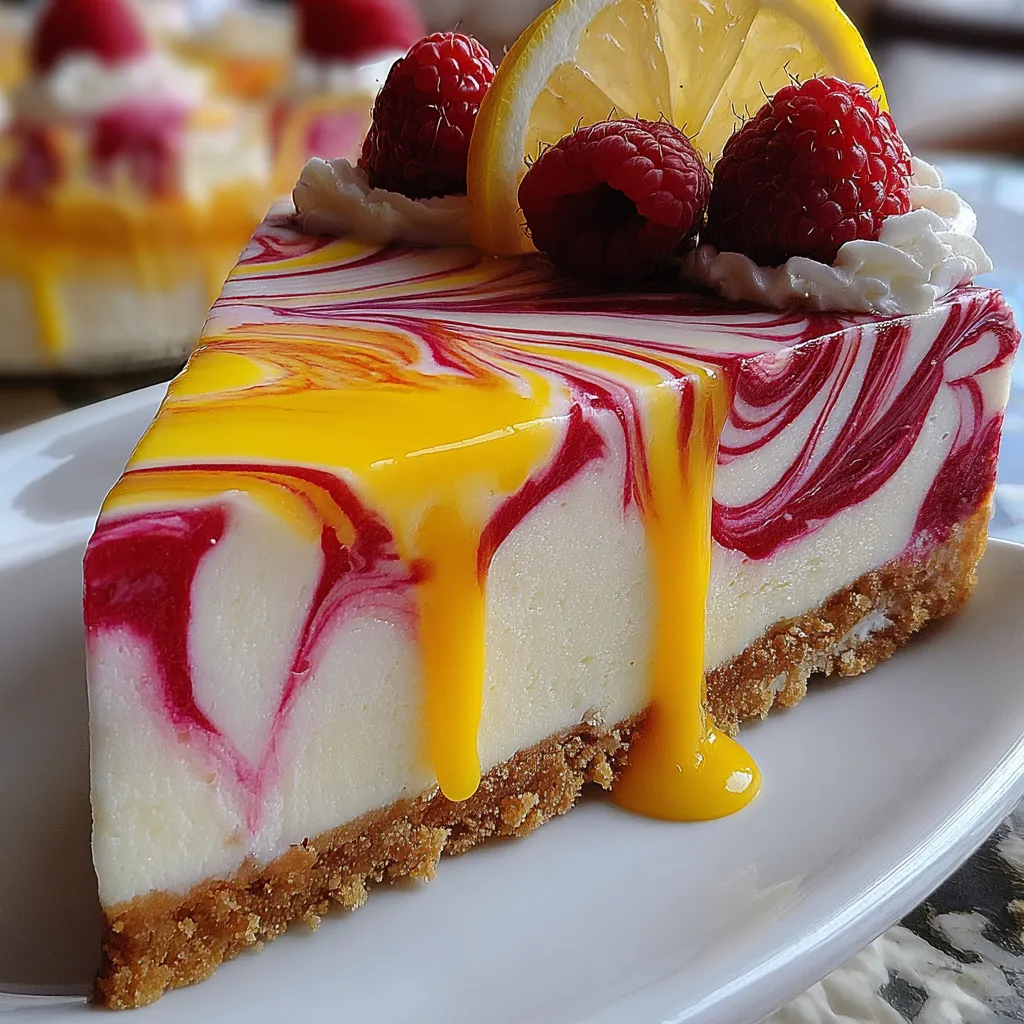
Picture this: a silky lemon cheesecake that’s like sunshine in dessert form, swirled with vibrant raspberry ribbons that look like edible art, all sitting on a buttery graham cracker crust. This is the cheesecake you make when you want people to gasp when you bring it to the table. The lemon is bright and tangy without being aggressive, the raspberry adds that gorgeous color contrast and tart-sweet pop, and those swirls? They’re easier to create than you’d think but make you look like a pastry genius. I made this for Easter brunch once and my aunt literally took a photo before eating it because she said it was “too beautiful to destroy.” Then she destroyed it anyway and asked for seconds. Someone else said it tasted like “fancy spring had a baby with delicious.” Another person just kept saying “how are you SINGLE?” while pointing at the cheesecake. This dessert makes people say weird things and I’m here for it.
Why You’ll Love This Recipe
Looks like a magazine cover. Those swirls are Instagram gold. People will assume you went to culinary school.
Bright and fresh flavors. The lemon-raspberry combo is classic for a reason—it’s tangy, sweet, refreshing, and just feels like celebration.
Not heavy. Despite being cheesecake, this feels lighter and brighter than traditional versions. Perfect after a big meal.
Natural food coloring. That pink color comes from actual raspberries. No artificial anything.
Easier than it looks. The swirl technique sounds fancy but is literally just dragging a knife through stuff. You got this.
Year-round perfect. Spring and summer vibes, but honestly works for any occasion where you want to impress people.
The Good Stuff You’ll Need
For the Crust:
- 1 3/4 cups graham cracker crumbs (about 12-14 crackers)
- 1/4 cup granulated sugar
- 6 tbsp unsalted butter, melted
- 1 tbsp lemon zest (optional but adds extra lemon love)
For the Raspberry Swirl:
- 1 1/2 cups fresh or frozen raspberries
- 1/4 cup granulated sugar
- 1 tbsp lemon juice
- 1 tbsp cornstarch mixed with 1 tbsp water
For the Lemon Cheesecake Filling:
- 24 oz (three 8-oz blocks) cream cheese, softened to room temp (seriously, don’t skip this)
- 1 cup granulated sugar
- 3 large eggs, room temperature
- 1 cup sour cream
- 1/3 cup fresh lemon juice (about 2-3 lemons)
- 2 tbsp lemon zest (about 2 lemons)
- 1 tbsp all-purpose flour
- 1 tsp vanilla extract
- 1/4 tsp salt
For Topping (Optional):
- Fresh raspberries
- Lemon zest
- Whipped cream
- Extra raspberry sauce
Let’s Do This
Step 1: Make the Raspberry Swirl (Do This First!)
In a small saucepan over medium heat, combine raspberries, 1/4 cup sugar, and lemon juice.
Cook, stirring occasionally and smashing the berries with a spoon, until they break down and get juicy, about 5-7 minutes.
Mix cornstarch with water to make a slurry, then stir it into the raspberry mixture.
Cook for another 2-3 minutes until it thickens noticeably. It should coat the back of a spoon.
Strain through a fine-mesh sieve to remove seeds (press hard to get all that gorgeous color and flavor). You should have about 1/2 cup of smooth raspberry sauce.
Let it cool completely. Seriously—hot sauce + cold filling = disaster. Stick it in the fridge while you do everything else.
Step 2: Build That Crust
Preheat your oven to 325°F (163°C).
Mix graham cracker crumbs, 1/4 cup sugar, lemon zest if using, and melted butter until it looks like wet sand. Every crumb should be coated.
Press firmly into the bottom of a 9-inch springform pan. Use the bottom of a measuring cup to really pack it down.
You can go slightly up the sides if you want, maybe 1/2 inch.
Bake for 10 minutes until it smells toasty and looks set. Let it cool while you make the filling.
Wrap the OUTSIDE of your springform pan (bottom and sides) with heavy-duty foil. Multiple layers. We’re doing a water bath and this prevents leaks.
Step 3: Make the Lemon Filling
In a large bowl or stand mixer, beat softened cream cheese on medium-high for 3-4 minutes until it’s completely smooth and fluffy. Scrape down the sides multiple times. No lumps allowed.
Add 1 cup sugar and beat for another 2-3 minutes until light and creamy.
Add eggs ONE AT A TIME, beating on low speed after each addition until just incorporated. Don’t overmix after adding eggs.
Mix in sour cream, lemon juice, lemon zest, flour, vanilla, and salt on low speed until just combined and smooth.
The batter should be pale yellow, silky, and smell like happiness.
Step 4: Create the Swirl Magic
Pour the lemon cheesecake filling over your cooled crust.
Drop spoonfuls of the cooled raspberry sauce randomly over the top of the filling. Use about 3/4 of your sauce, spacing the dollops around.
Take a butter knife, skewer, or toothpick and drag it through the dollops in a swirling motion. You can do circles, figure-eights, or just random swirls—whatever feels right.
Don’t overmix or the colors will turn muddy. You want distinct swirls, not a uniform pink. Less is more here.
Tap the pan gently on the counter to release air bubbles and settle the filling.
Step 5: Water Bath Time
Place your wrapped springform pan in a large roasting pan. Put both in the oven.
Carefully pour hot water into the roasting pan until it comes about halfway up the sides of the springform pan.
This water bath prevents cracks and creates that silky texture. Don’t skip it.
Step 6: Bake Low and Slow
Bake at 325°F for 55-70 minutes. The cheesecake is done when the edges are set but the center still has a slight wobble—about 3 inches in diameter should jiggle like Jell-O.
An instant-read thermometer should read 150-155°F in the center.
Turn off the oven, crack the door open, and let the cheesecake sit in there for 1 hour. This gradual cooling helps prevent cracks.
Remove from oven and water bath. Let cool on the counter for another hour.
Step 7: Chill and Worship
Once at room temperature, cover with plastic wrap (don’t let it touch the surface) and refrigerate for at least 6 hours, preferably overnight.
This chill time is mandatory. The flavors develop and the texture becomes perfect.
Resist the urge to peek every 20 minutes. I know it’s hard.
Step 8: Serve in Glory
Run a thin knife around the edge of the pan to loosen the cheesecake.
Remove the springform pan sides carefully.
Top with fresh raspberries, lemon zest, or a drizzle of that remaining raspberry sauce.
Let it sit at room temperature for 15-20 minutes before slicing for the cleanest cuts.
Use a sharp knife dipped in hot water (wipe clean between cuts) for perfect slices.
Admire your work. Take photos. Accept compliments graciously.
Serving Suggestions
This is already stunning, but you can take it further:
- Pile fresh raspberries on top in an artistic arrangement
- Add candied lemon slices for extra fancy points
- Serve with fresh whipped cream on the side
- Drizzle extra raspberry sauce on the plate around each slice
- Garnish with fresh mint leaves for color pop
- Dust with powdered sugar right before serving
- Pair with champagne or prosecco for maximum celebration vibes
Switch It Up
Blueberry Lemon: Use blueberries instead of raspberries for a different swirl situation.
Triple Berry: Mix raspberry, blueberry, and strawberry sauces for multiple swirls.
Key Lime Raspberry: Use key lime juice and zest instead of lemon for a different citrus vibe.
White Chocolate Addition: Fold 4 oz melted white chocolate into the filling for extra richness.
Blackberry Swirl: Blackberries work beautifully too and give a deeper purple color.
Limoncello Spike: Add 2 tablespoons limoncello to the filling for an adult version.
Graham-Gingersnap Crust: Use half graham crackers and half gingersnaps for a spiced crust.
Make-Ahead Tips
This is basically designed for making ahead—cheesecakes love the fridge.
- Make the whole thing 1-2 days ahead: It actually gets better. The flavors meld and deepen.
- The raspberry sauce: Make up to 3 days ahead. Store covered in the fridge.
- The crust: Can be baked and cooled up to 2 days ahead. Cover and refrigerate.
- Freeze it: Wrap tightly and freeze (without toppings) for up to 1 month. Thaw overnight in fridge, then decorate.
- Add toppings last minute: Fresh berries and garnishes should go on right before serving for the freshest look.
Why This Works So Damn Well
The lemon provides bright acidity that cuts through the richness of the cream cheese, keeping the cheesecake from feeling heavy. Fresh lemon juice and zest give you both the acid and the aromatic oils that make lemon flavor pop.
The raspberry swirl isn’t just pretty—it adds pockets of concentrated berry flavor that contrast beautifully with the tangy lemon. Making it into a sauce (rather than using raw berries) prevents water from making the cheesecake soggy and gives you that smooth, paintable consistency.
The water bath is crucial. It provides gentle, even heat that prevents the edges from overcooking while the center is still setting. It also adds humidity to the oven, which helps prevent cracks. The gradual cooling (first in the turned-off oven, then at room temp, then in the fridge) also minimizes cracking from temperature shock.
Using room temperature ingredients (cream cheese, eggs, sour cream) means everything incorporates smoothly without overmixing. Overmixing = too much air = cracks and weird texture.
The overnight chill isn’t just about setting—cheesecakes genuinely taste better after 12-24 hours. The flavors meld, the texture becomes creamier, and everything just settles into perfection.
When to Make This
Easter Brunch: Spring colors, fresh flavors, impressive presentation. Perfect.
Mother’s Day: Moms deserve gorgeous desserts. This says “I love you” in cheesecake form.
Spring/Summer Parties: Light, bright, refreshing. Way better than heavy chocolate desserts when it’s warm.
Baby Showers: Those pink swirls! The pretty factor! Crowd-pleasing flavors!
Birthday Alternative: Skip the cake. This is more interesting and way more impressive.
Just Because You Want Beauty: Sometimes you need to create something gorgeous and delicious. Valid.
Questions People Actually Ask
Q: Can I skip the water bath? A: You can, but you risk cracks and uneven texture. The water bath is worth the effort—it’s just hot water, not complicated.
Q: My cheesecake cracked. Is it ruined? A: Nope! Hide cracks with raspberry sauce, whipped cream, or fresh berries. No one will know. It’ll taste the same.
Q: Can I use bottled lemon juice? A: Fresh is SO much better. Bottled tastes artificial and bitter. Invest in real lemons—it makes a huge difference.
Q: The raspberry sauce is too thick/thin. Help! A: Too thick? Add a bit of water or lemon juice. Too thin? Cook it longer or add more cornstarch slurry. You want it like thick syrup.
Q: My swirls disappeared into the batter. What happened? A: The raspberry sauce was too warm, or you overmixed. Sauce must be completely cool, and swirl gently with minimal strokes.
Q: Can I use frozen raspberries? A: Absolutely! Thaw them first, then use as directed. Frozen berries actually work great for the sauce.
Q: How do I know when it’s done baking? A: The edges should be set and puffed slightly, but the center 3 inches should still wobble when you gently shake the pan. It firms up as it cools.
Q: Can I make this in a regular cake pan? A: You need a springform pan to remove it cleanly and show off those pretty sides. It’s worth buying one if you don’t have it.
Q: The lemon flavor is too strong/not strong enough. A: Too strong? Use less zest (that’s where the intensity is). Not enough? Add more zest or a bit of lemon extract.
Print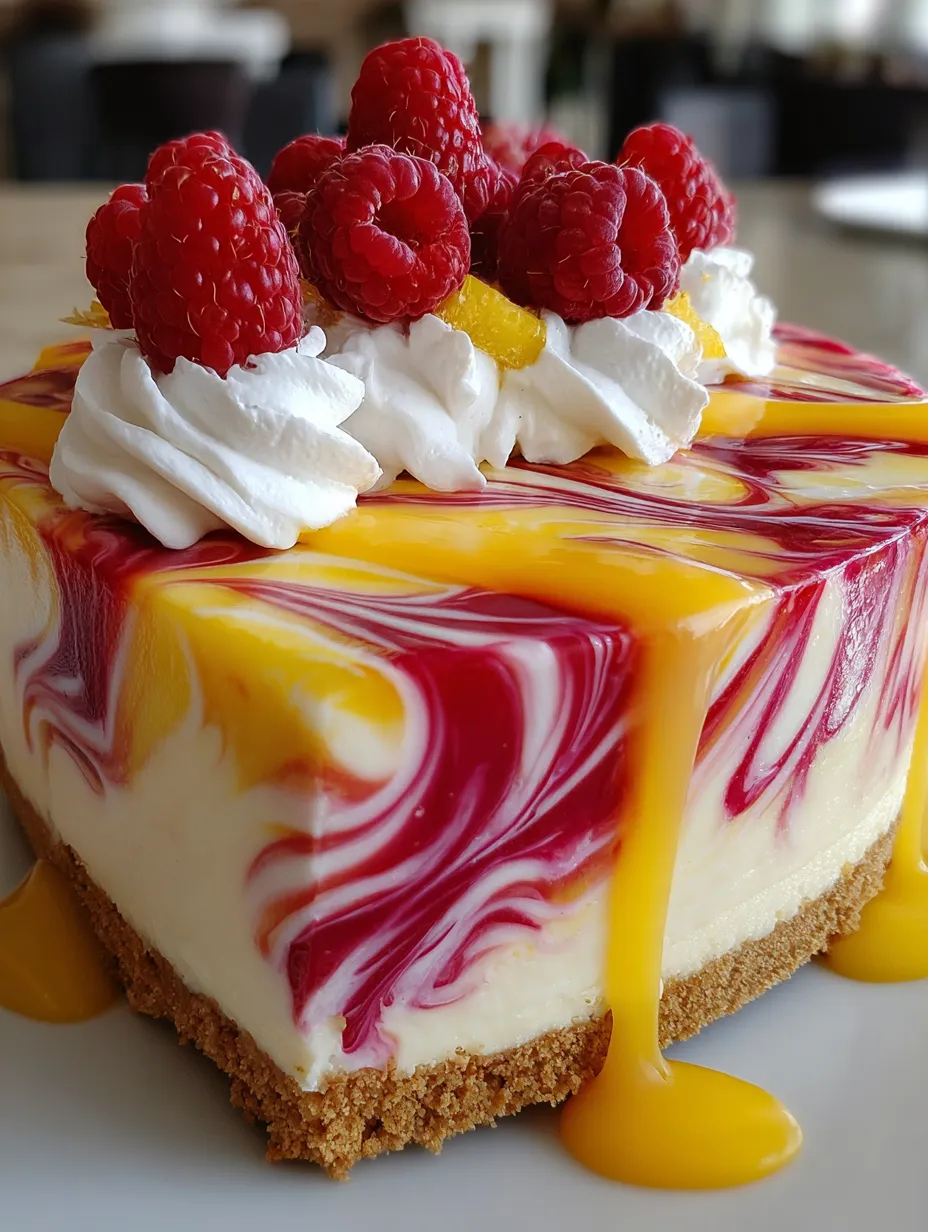
Lemon Raspberry Swirl Cheesecake
- Total Time: 1 hour 50 minutes
- Yield: 12–14 slices 1x
Description
Picture this: a silky lemon cheesecake that’s like sunshine in dessert form, swirled with vibrant raspberry ribbons that look like edible art, all sitting on a buttery graham cracker crust. This is the cheesecake you make when you want people to gasp when you bring it to the table. The lemon is bright and tangy without being aggressive, the raspberry adds that gorgeous color contrast and tart-sweet pop, and those swirls? They’re easier to create than you’d think but make you look like a pastry genius. I made this for Easter brunch once and my aunt literally took a photo before eating it because she said it was “too beautiful to destroy.” Then she destroyed it anyway and asked for seconds. Someone else said it tasted like “fancy spring had a baby with delicious.” Another person just kept saying “how are you SINGLE?” while pointing at the cheesecake. This dessert makes people say weird things and I’m here for it.
Ingredients
For the Crust:
- 1 3/4 cups graham cracker crumbs (about 12–14 crackers)
- 1/4 cup granulated sugar
- 6 tbsp unsalted butter, melted
- 1 tbsp lemon zest (optional but adds extra lemon love)
For the Raspberry Swirl:
- 1 1/2 cups fresh or frozen raspberries
- 1/4 cup granulated sugar
- 1 tbsp lemon juice
- 1 tbsp cornstarch mixed with 1 tbsp water
For the Lemon Cheesecake Filling:
- 24 oz (three 8-oz blocks) cream cheese, softened to room temp (seriously, don’t skip this)
- 1 cup granulated sugar
- 3 large eggs, room temperature
- 1 cup sour cream
- 1/3 cup fresh lemon juice (about 2–3 lemons)
- 2 tbsp lemon zest (about 2 lemons)
- 1 tbsp all-purpose flour
- 1 tsp vanilla extract
- 1/4 tsp salt
For Topping (Optional):
- Fresh raspberries
- Lemon zest
- Whipped cream
- Extra raspberry sauce
Instructions
In a small saucepan over medium heat, combine raspberries, 1/4 cup sugar, and lemon juice.
Cook, stirring occasionally and smashing the berries with a spoon, until they break down and get juicy, about 5-7 minutes.
Mix cornstarch with water to make a slurry, then stir it into the raspberry mixture.
Cook for another 2-3 minutes until it thickens noticeably. It should coat the back of a spoon.
Strain through a fine-mesh sieve to remove seeds (press hard to get all that gorgeous color and flavor). You should have about 1/2 cup of smooth raspberry sauce.
Let it cool completely. Seriously—hot sauce + cold filling = disaster. Stick it in the fridge while you do everything else.
Preheat your oven to 325°F (163°C).
Mix graham cracker crumbs, 1/4 cup sugar, lemon zest if using, and melted butter until it looks like wet sand. Every crumb should be coated.
Press firmly into the bottom of a 9-inch springform pan. Use the bottom of a measuring cup to really pack it down.
You can go slightly up the sides if you want, maybe 1/2 inch.
Bake for 10 minutes until it smells toasty and looks set. Let it cool while you make the filling.
Wrap the OUTSIDE of your springform pan (bottom and sides) with heavy-duty foil. Multiple layers. We’re doing a water bath and this prevents leaks.
In a large bowl or stand mixer, beat softened cream cheese on medium-high for 3-4 minutes until it’s completely smooth and fluffy. Scrape down the sides multiple times. No lumps allowed.
Add 1 cup sugar and beat for another 2-3 minutes until light and creamy.
Add eggs ONE AT A TIME, beating on low speed after each addition until just incorporated. Don’t overmix after adding eggs.
Mix in sour cream, lemon juice, lemon zest, flour, vanilla, and salt on low speed until just combined and smooth.
The batter should be pale yellow, silky, and smell like happiness.
Pour the lemon cheesecake filling over your cooled crust.
Drop spoonfuls of the cooled raspberry sauce randomly over the top of the filling. Use about 3/4 of your sauce, spacing the dollops around.
Take a butter knife, skewer, or toothpick and drag it through the dollops in a swirling motion. You can do circles, figure-eights, or just random swirls—whatever feels right.
Don’t overmix or the colors will turn muddy. You want distinct swirls, not a uniform pink. Less is more here.
Tap the pan gently on the counter to release air bubbles and settle the filling.
Place your wrapped springform pan in a large roasting pan. Put both in the oven.
Carefully pour hot water into the roasting pan until it comes about halfway up the sides of the springform pan.
This water bath prevents cracks and creates that silky texture. Don’t skip it.
Bake at 325°F for 55-70 minutes. The cheesecake is done when the edges are set but the center still has a slight wobble—about 3 inches in diameter should jiggle like Jell-O.
An instant-read thermometer should read 150-155°F in the center.
Turn off the oven, crack the door open, and let the cheesecake sit in there for 1 hour. This gradual cooling helps prevent cracks.
Remove from oven and water bath. Let cool on the counter for another hour.
Once at room temperature, cover with plastic wrap (don’t let it touch the surface) and refrigerate for at least 6 hours, preferably overnight.
This chill time is mandatory. The flavors develop and the texture becomes perfect.
Resist the urge to peek every 20 minutes. I know it’s hard.
Run a thin knife around the edge of the pan to loosen the cheesecake.
Remove the springform pan sides carefully.
Top with fresh raspberries, lemon zest, or a drizzle of that remaining raspberry sauce.
Let it sit at room temperature for 15-20 minutes before slicing for the cleanest cuts.
Use a sharp knife dipped in hot water (wipe clean between cuts) for perfect slices.
Admire your work. Take photos. Accept compliments graciously.
Notes
This is already stunning, but you can take it further:
- Pile fresh raspberries on top in an artistic arrangement
- Add candied lemon slices for extra fancy points
- Serve with fresh whipped cream on the side
- Drizzle extra raspberry sauce on the plate around each slice
- Garnish with fresh mint leaves for color pop
- Dust with powdered sugar right before serving
- Pair with champagne or prosecco for maximum celebration vibes
- Prep Time: 40 minutes
- Cook Time: 70 minutes
Nutrition
- Calories: ~340 kcal
- Fat: ~22g
- Carbohydrates: ~30g
- Protein: ~6g


