Quick Overview
If you’re looking for a dessert that feels like a warm hug on a chilly day, then this Hot Chocolate Poke Cake is your answer. This delightful treat combines the comforting flavors of rich hot chocolate with the moistness of a classic cake. Perfect for gatherings or just a cozy night in, this cake is sure to impress your family and friends. With each bite, you’ll discover layers of flavor that evoke memories of sipping hot cocoa by the fire.
Ingredient Breakdown
Flour
For this recipe, you will need 1 ¾ cups of all-purpose flour. The flour provides the structure for your cake and helps it rise beautifully.
Sugar
You will require 1 cup of granulated sugar. Sugar adds sweetness and contributes to the moist texture of the cake.
Cocoa Powder
Use ¾ cup of unsweetened cocoa powder. Cocoa powder gives the cake its rich chocolate flavor without adding extra sweetness.
Baking Powder
Add 2 teaspoons of baking powder. This ingredient helps the cake rise and achieve a light texture.
Baking Soda
Incorporate ½ teaspoon of baking soda. Baking soda activates with the acidic ingredients to create a fluffy crumb.
Salt
A pinch (1/2 teaspoon) of salt enhances flavors in baked goods by balancing sweetness and improving taste.
Eggs
You will need 2 large eggs. Eggs provide moisture and help bind the ingredients together for a uniform texture.
Milk
Use 1 cup of whole milk. Milk adds moisture to the batter and enriches the flavor profile.
Vegetable Oil
Add ½ cup of vegetable oil. Oil keeps the cake moist and tender while contributing to its richness.
Vanilla Extract
Incorporate 2 teaspoons of vanilla extract. This adds depth and aroma to your cake’s flavor.
Hot Chocolate Mix
Use 1 packet (about 1 ounce) of instant hot chocolate mix. It imparts that signature hot cocoa flavor into every slice.
Step By Step Recipe: Hot Chocolate Poke Cake
Preheat the Oven
Begin by preheating your oven to 350°F (175°C). Preheating ensures that your cake bakes evenly and achieves that perfect rise.
Prepare Your Baking Pan
Grease a 9×13 inch baking pan with non-stick spray or butter. This prevents your cake from sticking and makes cleanup much easier later on.
Mix Dry Ingredients
In a large mixing bowl, combine flour, sugar, cocoa powder, baking powder, baking soda, and salt. Whisk these together until well mixed to ensure even distribution in your batter.
Combine Wet Ingredients
In another bowl, whisk together eggs, milk, vegetable oil, and vanilla extract until fully combined. Mixing these ingredients separately helps ensure an even batter once combined with dry ingredients.
Combine Mixtures
Gradually pour the wet mixture into the dry ingredients. Stir gently with a spatula until no lumps remain but do not over-mix as this can lead to a dense cake texture.
Bake the Cake
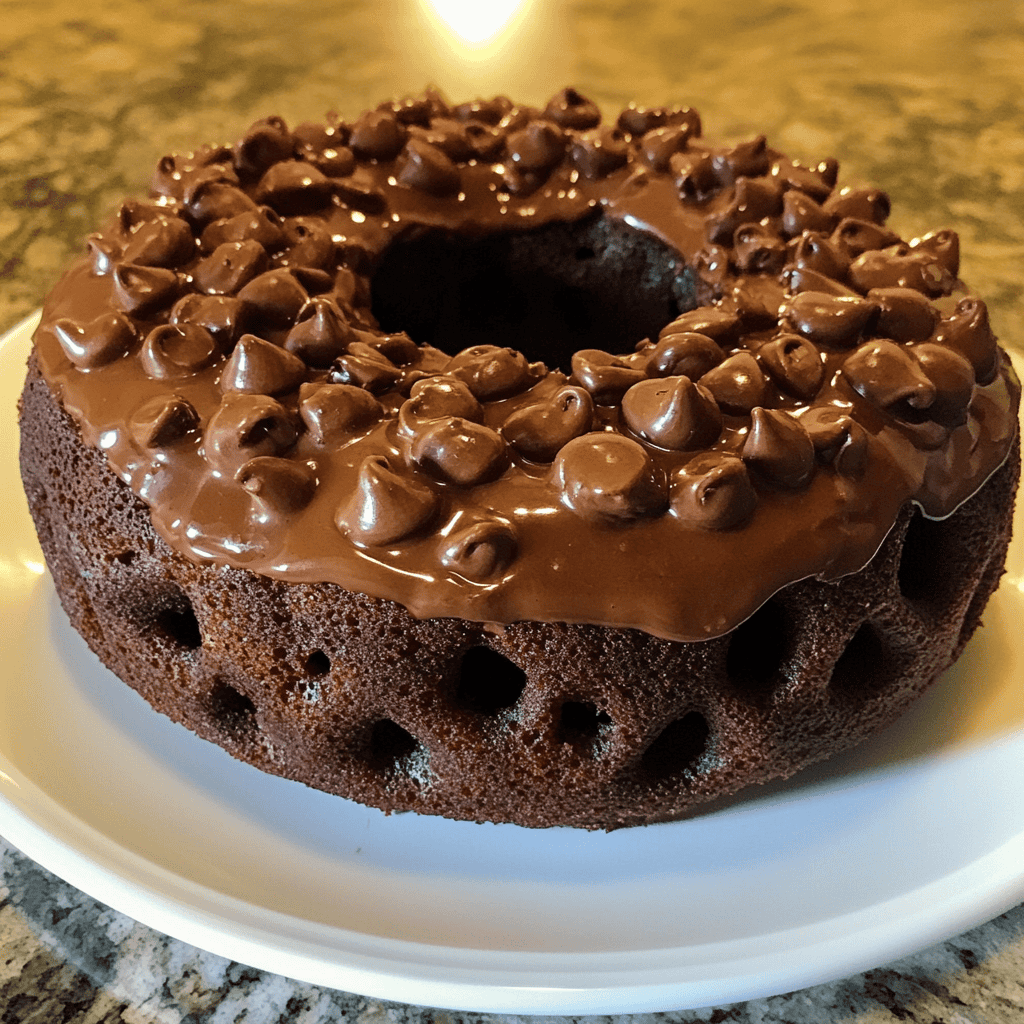
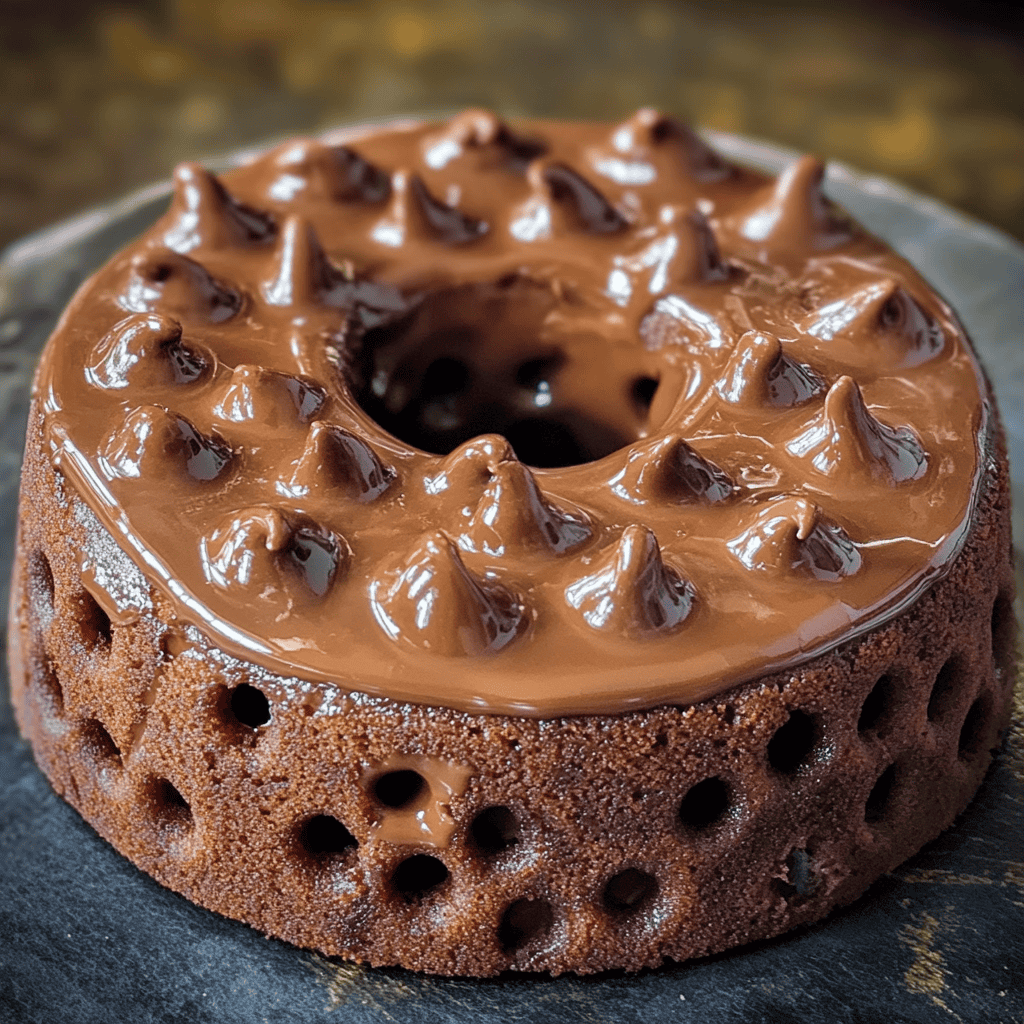
Pour the batter into your prepared pan and spread it evenly using a spatula. Bake in your preheated oven for about 30-35 minutes or until a toothpick inserted in the center comes out clean.
Prepare Hot Chocolate Mixture
While the cake is baking, mix one packet of instant hot chocolate mix with one cup of boiling water in a small bowl until dissolved completely. This mixture will soak into your baked cake for added flavor.
Poke Holes in Cake
Once baked, remove your cake from the oven and let it cool for about 10 minutes still in its pan. Use a fork or skewer to poke holes all over the surface at regular intervals—this allows the hot chocolate mixture to seep in nicely.
Soak with Hot Chocolate Mixture
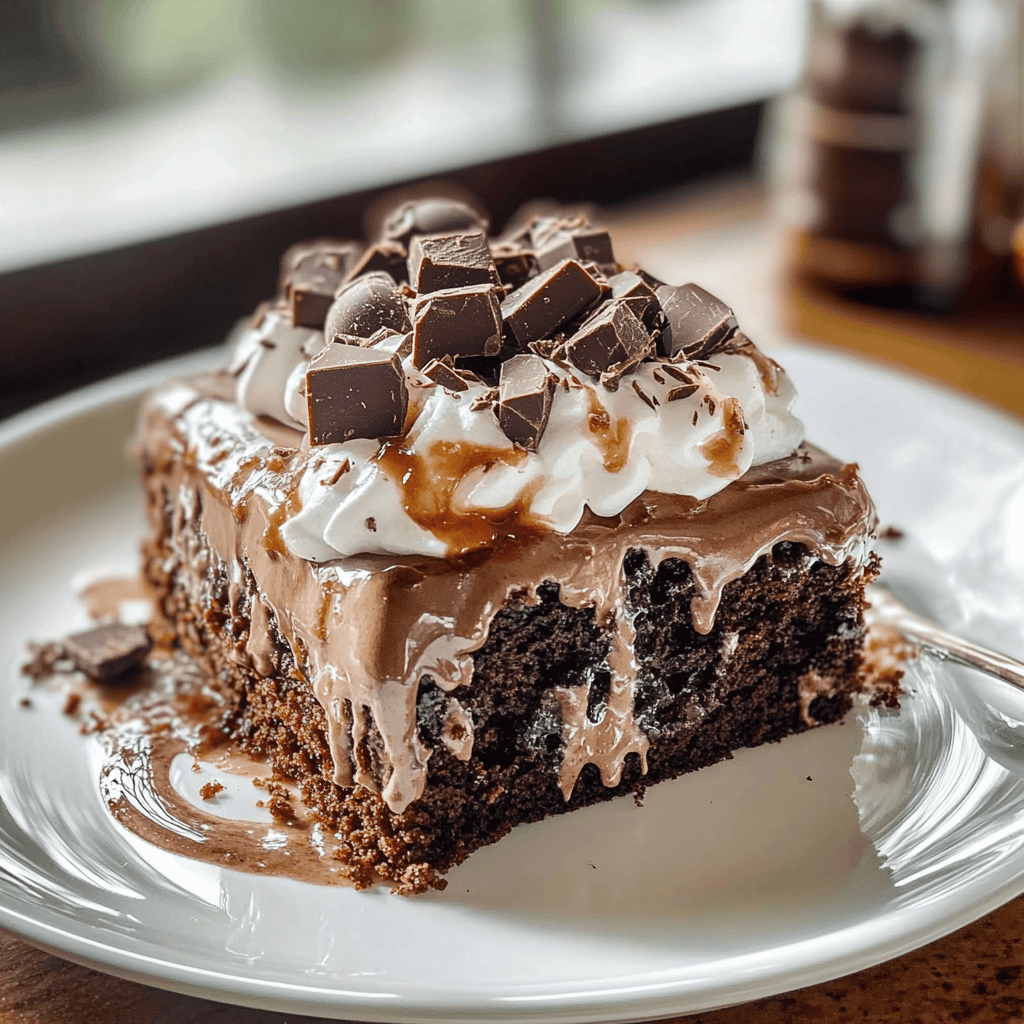
Slowly pour your hot chocolate mixture over the poked holes in the warm cake so it absorbs thoroughly. Let it sit for an additional 20 minutes before frosting; this allows maximum flavor infusion.
Frosting Preparation
To create a simple frosting, whip together some heavy cream with powdered sugar until soft peaks form or use store-bought whipped topping for convenience if you prefer less hassle.
Serving and Storing Tips
Serving Suggestions
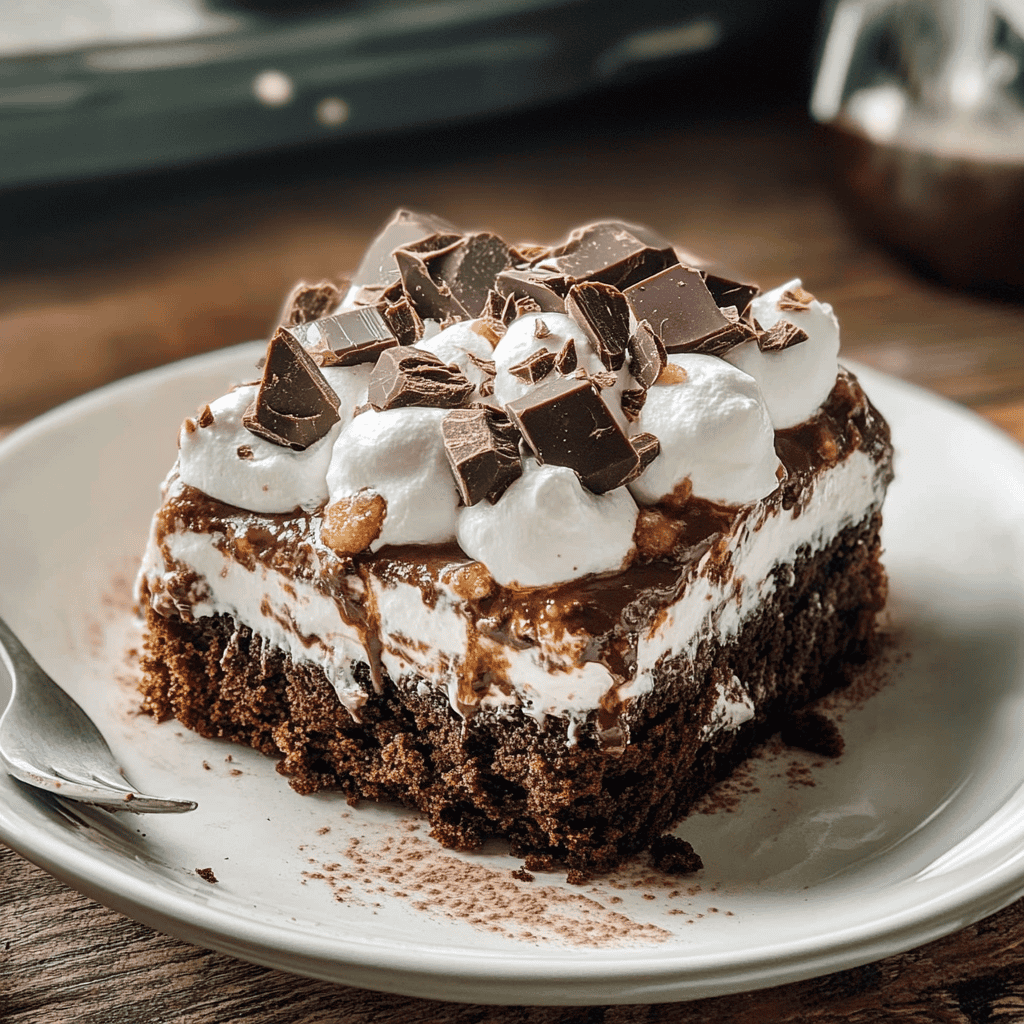
Serve slices of Hot Chocolate Poke Cake warm or chilled based on preference. Top each slice with whipped cream or marshmallows for that extra touch reminiscent of classic hot cocoa enjoyment!
Storing Leftovers
Store leftover poke cake in an airtight container at room temperature for up to two days or refrigerate it for up to one week if you have used whipped cream frosting on top; always cover tightly!
By following these instructions closely along with quality ingredients listed above, you’ll create an irresistible dessert that brings warmth not just through flavors but also through cherished moments shared around it!
Mistakes to avoid
When preparing Hot Chocolate Poke Cake, one common mistake is not allowing the cake to cool properly before poking holes. This can result in the filling not soaking in well, leading to a less flavorful cake. Always let the cake cool for at least 15-20 minutes before moving on to the next steps.
Another mistake is using insufficient liquid in your chocolate mixture. A dry cake will result from not adding enough milk or cream, making it dense instead of moist and fluffy. Follow the recipe closely to ensure you include the right amount of liquid for a perfect texture.
Using low-quality chocolate can ruin the flavor of your Hot Chocolate Poke Cake. Always choose high-quality cocoa powder or chocolate to achieve a rich and satisfying taste. The better your ingredients, the more delicious your finished product will be.
Not letting the cake sit long enough after filling is another pitfall. It’s crucial for the flavors to meld together; aim for at least an hour in the refrigerator before serving. This waiting period allows all elements to combine and enhances taste.
Finally, neglecting toppings can lead to a plain-looking dessert. Toppings add both flavor and visual appeal. Consider whipped cream, marshmallows, or chocolate shavings to make your Hot Chocolate Poke Cake more inviting and enjoyable.
Tips and tricks
To make your Hot Chocolate Poke Cake truly special, consider baking it a day ahead. Allowing it to sit overnight in the refrigerator lets flavors develop further, creating a richer taste experience when you serve it. Just remember to cover it well so that it doesn’t dry out.
When poking holes in the cake, use a skewer or fork with care. Make sure you poke deep enough but not too deep that you break apart the structure of the cake. Aim for even spacing across the surface for balanced absorption of your chocolate filling.
For an extra layer of flavor, consider adding a splash of vanilla extract or peppermint extract into your hot chocolate mixture. These subtle additions can elevate the taste without overpowering it and make your cake unique.
Don’t forget about presentation! When serving your Hot Chocolate Poke Cake, garnish with fresh whipped cream and mini marshmallows. This not only adds flavor but also creates an appealing visual element that invites guests to dig in.
Lastly, if you’re looking for variations, try incorporating different flavored jello according to seasons or personal preferences. Raspberry or mint might be fun options that complement chocolate well while providing an interesting twist on this classic dessert.
Suggestions for Hot Chocolate Poke Cake
Consider using a mix of dark and milk chocolate when preparing your filling for Hot Chocolate Poke Cake. Combining these chocolates gives depth to the flavor profile and ensures a perfect balance between sweetness and richness.
For those who enjoy added textures, consider mixing crushed graham crackers into your whipped topping. This crunchy element contrasts nicely with the soft cake and adds another dimension of flavor that makes each bite exciting.
If you want a lighter option, substitute half-and-half with unsweetened almond milk or coconut milk in your hot chocolate mixture. This keeps it dairy-free while still maintaining great flavor without sacrificing moisture in your cake.
Experiment with different toppings! Instead of traditional whipped cream only, consider adding caramel sauce or drizzling white chocolate on top of your Hot Chocolate Poke Cake for added sweetness and an eye-catching finish.
Finally, think about portion sizes when serving this indulgent treat. Cut smaller squares so guests can enjoy multiple flavors without feeling overwhelmed by richness—this way everyone gets a taste without overindulging!
FAQs
What is Hot Chocolate Poke Cake?
Hot Chocolate Poke Cake is a delightful dessert that combines rich chocolate cake with hot chocolate mix poured over poked holes in its surface. This method allows flavors to seep into every bite while keeping the cake moist and deliciously indulgent.
Can I use store-bought cake mix?
Yes! Using store-bought cake mix is perfectly acceptable when making Hot Chocolate Poke Cake. It saves time and effort while still allowing you to customize flavors through fillings and toppings as desired.
How long does Hot Chocolate Poke Cake last?
Hot Chocolate Poke Cake typically lasts around 3-5 days when stored properly in an airtight container in the refrigerator. Be sure not to leave it out at room temperature for extended periods once prepared.
Can I freeze Hot Chocolate Poke Cake?
Yes! You can freeze Hot Chocolate Poke Cake prior to adding any toppings like whipped cream or marshmallows for up to three months successfully. Just wrap it tightly in plastic wrap followed by aluminum foil before placing it into the freezer.
What are some alternative toppings I can use?
While traditional whipped cream works wonderfully on top of Hot Chocolate Poke Cake, feel free to get creative! Consider using mini marshmallows, crushed candy canes during holidays, chocolate shavings, or even Nutella drizzle as delightful alternatives!
Is there a way to make this recipe gluten-free?
Absolutely! To create a gluten-free version of Hot Chocolate Poke Cake, simply substitute regular flour with gluten-free all-purpose flour blend within the recipe while ensuring all other ingredients are also gluten-free certified.
Summary
In conclusion, mastering Hot Chocolate Poke Cake involves avoiding common mistakes like inadequate cooling time and low-quality ingredients while embracing helpful tips such as overnight chilling and creative garnishing techniques. With careful attention paid throughout preparation stages combined with suggested variations on flavors and textures—this dessert promises satisfaction every time it’s served! Enjoy baking!