
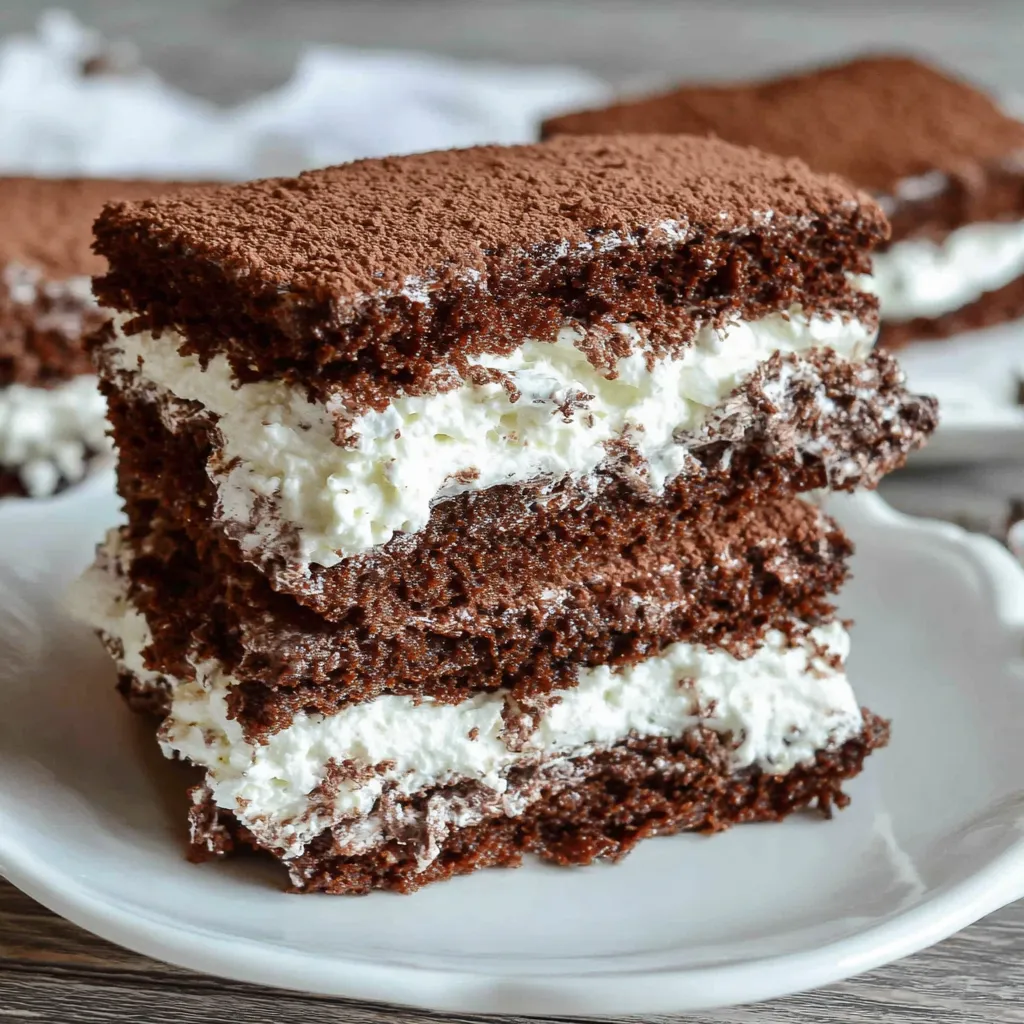
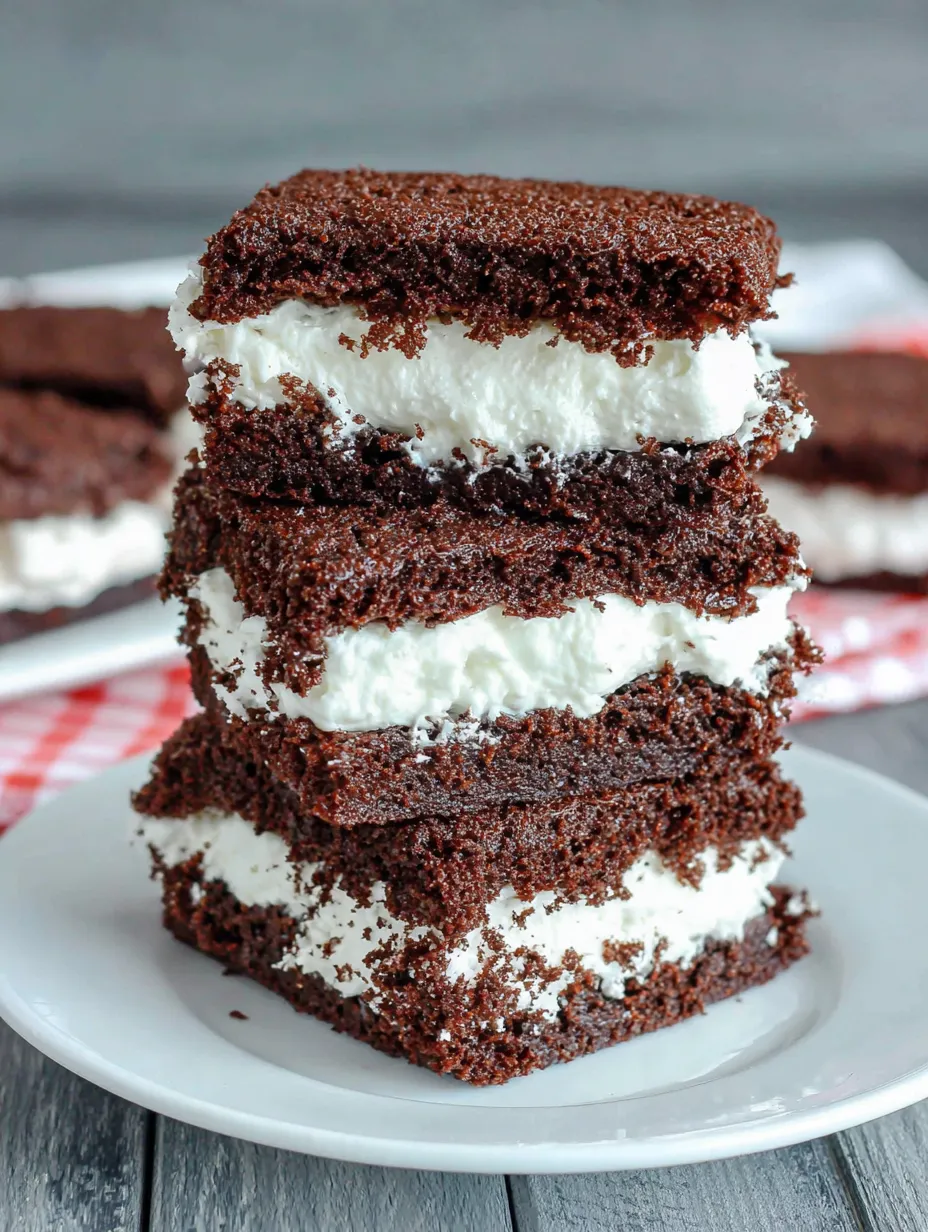
Someone at Hostess invented Suzy Q’s—two soft chocolate cakes sandwiched around a mountain of sweet cream filling—and created a lunchbox legend. Then home bakers figured out you can make them yourself with better ingredients, more filling, and none of the preservatives. This is tender, moist chocolate cake paired with fluffy vanilla cream that tastes like childhood but better because you made it from scratch. It’s what happens when you stop accepting mediocre snack cakes and decide to level up.
This isn’t some complicated patisserie project that requires culinary school. This is “make sheet cake, make cream filling, sandwich together, pretend you’re a snack cake mogul” simplicity that results in something way better than the cellophane-wrapped original. The cake is soft and chocolatey without being too rich. The cream filling is sweet and fluffy without being too heavy. Together, they’re the perfect ratio of cake to cream that Hostess wishes they could achieve.
This is nostalgia energy but upgraded. It’s what happens when you take a childhood favorite and make it with real butter, actual vanilla, and love instead of whatever chemical compounds keep store-bought cakes shelf-stable for months. It’s snack cakes that actually taste like food.
Why These Homemade Suzy Q’s Are About to Ruin Store-Bought Forever
- Better ingredients, better taste — Real butter and vanilla make all the difference
- More cream filling — Like, significantly more. Because you’re in control
- Fresher and softer — No preservatives needed when you eat them within a week
- Customizable — Make them bigger, smaller, different flavors
- Impressive but easy — Looks fancy, actually just sheet cake cut into rectangles
- Lunchbox champion — Wrap individually for the ultimate packed lunch treat
The Stuff You Need
For the Chocolate Cake:
- 1 3/4 cups all-purpose flour
- 2 cups granulated sugar
- 3/4 cup unsweetened cocoa powder (Dutch-process makes them darker)
- 2 teaspoons baking soda
- 1 teaspoon baking powder
- 1 teaspoon salt
- 2 large eggs, room temperature
- 1 cup whole milk, room temperature
- 1/2 cup vegetable oil
- 1 cup hot coffee (or hot water, but coffee enhances chocolate)
- 2 teaspoons vanilla extract
For the Cream Filling:
- 1 cup (2 sticks) unsalted butter, softened to room temperature (crucial)
- 3 cups powdered sugar (maybe more for desired thickness)
- 1/4 cup heavy cream or whole milk
- 2 teaspoons vanilla extract
- 1/4 teaspoon salt
- Optional: 2 tablespoons marshmallow fluff (for that authentic texture)
Optional But Highly Recommended:
- Chocolate ganache for drizzling on top
- Extra cocoa powder for dusting
- Vanilla bean paste instead of extract (more visible vanilla specks)
- Espresso powder (enhances chocolate flavor)
- A pinch of instant pudding mix in the filling (stabilizes it)
Special Equipment:
- 10×15 inch jelly roll pan or half sheet pan (with 1-inch sides)
- Parchment paper (makes removal easy)
- Electric mixer (for the filling)
- Offset spatula or butter knife for spreading
- Sharp knife for cutting clean rectangles
- Plastic wrap for storage
Let’s Make These Snack Cakes That’ll Transport You Back to Childhood
Step 1: The Pan Prep
Preheat your oven to 350°F. Line your 10×15 inch jelly roll pan with parchment paper, leaving some overhang on the sides for easy removal later. Spray the parchment with cooking spray. This cake is tender—you don’t want it sticking and tearing when you try to remove it.
Step 2: The Dry Ingredients
In a large bowl, whisk together the flour, sugar, cocoa powder, baking soda, baking powder, and salt. Make sure there are no cocoa lumps—sift if necessary. Set this aside and feel good about your organizational skills.
Step 3: The Wet Ingredients
In a medium bowl or large measuring cup, whisk together the eggs, milk, oil, and vanilla until well combined. The mixture should be smooth and uniform.
Step 4: The Mixing Process
Pour the wet ingredients into the dry ingredients. Stir with a wooden spoon or spatula until just combined. Don’t overmix—some small lumps are fine. The batter will be thick at this point. Now pour in the hot coffee and stir until smooth. The batter will become very thin and liquidy. This is correct. Don’t panic. Thin batter = moist cake.
Step 5: The Baking
Pour the batter into your prepared pan and spread it evenly into the corners. It should fill the pan and be about 1/2 inch thick. Bake for 15-18 minutes until the top springs back when lightly touched and a toothpick inserted in the center comes out clean or with just a few moist crumbs. Don’t overbake—you want this cake soft and tender, not dry.
Step 6: The Cooling (Crucial Step)
Let the cake cool in the pan for 10 minutes. Then use the parchment overhang to lift the entire cake out of the pan onto a wire rack or cutting board. Let it cool completely—and I mean COMPLETELY—before adding filling. If you add filling to warm cake, it’ll melt and slide everywhere and you’ll have a mess. Go watch an episode of something while it cools.
Step 7: The Cream Filling Base
While the cake cools, make the filling. In a large bowl using an electric mixer, beat the softened butter on medium-high speed for 2-3 minutes until light and fluffy. It should look pale and creamy. Scrape down the sides of the bowl.
Step 8: The Filling Assembly
Add the powdered sugar one cup at a time, beating on low speed until incorporated, then increasing to high speed for 30 seconds. Add the cream, vanilla, and salt. Beat on high speed for 3-4 minutes until the filling is light, fluffy, and holds stiff peaks. It should look like thick frosting. If it’s too soft, add more powdered sugar. If it’s too stiff, add a bit more cream. If you’re using marshmallow fluff, beat it in now.
Step 9: The Cake Cutting
Once the cake is completely cool, place it on a cutting board. Using a sharp knife, cut the cake in half lengthwise so you have two long rectangles. Then cut each half into 8 equal rectangles, giving you 16 cake pieces total. They should be roughly 3×2 inches each. Don’t worry about perfection—rustic is fine. Wipe your knife between cuts for clean edges.
Step 10: The Filling Application
Take one cake rectangle and flip it over so the flat bottom is facing up. Using an offset spatula, butter knife, or spoon, spread a generous amount of cream filling on the cake—about 2-3 tablespoons per cake. Don’t be shy. The original Suzy Q’s are known for their cream-to-cake ratio. Spread it almost to the edges.
Step 11: The Sandwich Assembly
Take another cake rectangle and place it on top of the cream filling, flat bottom side down (so both flat sides are touching the filling and the rounded baked tops are on the outside). Press down gently but firmly to spread the cream filling to the edges. The filling should be visible around the edges—this is the signature Suzy Q look.
Step 12: The Repeat Process
Continue filling and sandwiching the remaining cake pieces until you have 8 completed Suzy Q’s. This is assembly-line work. Put on some music. Get into a rhythm. Try not to eat all the extra cream filling with a spoon (you will eat some of it with a spoon).
Step 13: The Optional Topping
If you want to get fancy, drizzle melted chocolate ganache over the tops or dust them lightly with cocoa powder. The originals don’t have this, but homemade means you make the rules. Let any chocolate topping set before wrapping.
Step 14: The Storage and Eating
Wrap each Suzy Q individually in plastic wrap for storage. They’ll keep at room temperature for 2-3 days or in the fridge for up to a week (if they last that long). The texture is best at room temperature—the cake is softer and the filling is creamier. But cold ones are also delicious and remind you of eating them straight from the lunchbox.
Step 15: The Appreciation
Unwrap one and take a bite. Notice how soft and moist the chocolate cake is—tender without being crumbly. Taste the sweet vanilla cream filling—fluffy and rich without being overly heavy. Feel the nostalgia wash over you as you realize you’ve successfully recreated a childhood snack but made it actually good. Immediately reach for another one.
Pro Tips From Someone Who’s Perfected These
Room Temperature Everything: For the cake batter, room temp ingredients mix better. For the filling, soft butter is crucial.
Don’t Overbake the Cake: Pull it right when a toothpick has a few moist crumbs. Overbaked cake is dry and won’t have that soft texture.
Cool Completely: Warm cake + cream filling = melted disaster. Be patient.
Whip That Filling: Beat it longer than you think. The more you beat, the fluffier it gets.
Generous Filling: Use 2-3 tablespoons per cake. Don’t be stingy—the filling is what makes these special.
Sharp Knife, Clean Cuts: Wipe the knife between cuts for neat rectangles. Messy cuts still taste good though.
Wrap Individually: This keeps them fresh and makes them portable for lunches or snacks.
Switch It Up (Because Variety Is Fun)
Peanut Butter Filling: Use half butter and half peanut butter in the filling. Chocolate-peanut butter heaven.
Cookies and Cream: Add crushed Oreos to the vanilla filling. Mix in mini chocolate chips too.
Mint Cream: Add peppermint extract to the filling and a drop of green food coloring. Grasshopper vibes.
Strawberry Cream: Use strawberry extract in the filling and add a bit of pink food coloring. Top with freeze-dried strawberry powder.
Chocolate Cream: Add cocoa powder to the filling for double chocolate Suzy Q’s.
Salted Caramel: Drizzle caramel sauce in the filling layer and sprinkle with flaky sea salt.
Birthday Cake Version: Use funfetti cake instead of chocolate. Add sprinkles to the vanilla filling.
Make-Ahead Magic
The Cake: Bake the cake up to 2 days ahead. Wrap tightly in plastic wrap and store at room temperature.
The Filling: Make the cream filling 3-5 days ahead. Store in the fridge in an airtight container. Bring to room temperature and re-whip before using.
Fully Assembled: Make the complete Suzy Q’s up to 5 days ahead. Store individually wrapped in an airtight container.
Freeze Them: Wrap individually in plastic wrap, then in foil. Freeze for up to 3 months. Thaw at room temperature for 2 hours before eating.
Storage Real Talk
Room Temperature: Keep for 2-3 days individually wrapped. The cream filling is stable because it’s mostly butter.
Refrigerated: They’ll keep for up to a week in the fridge. Let them come to room temperature before eating for best texture.
Freezing: Freezes beautifully for 3 months. The texture is nearly identical after thawing.
Individually Wrapped: This is crucial for keeping them fresh and preventing them from drying out.
Perfect Pairings
Cold Milk: The classic pairing. Snack cakes demand milk.
Hot Coffee: The bitterness balances the sweetness. Dunk them if you dare.
Ice Cream: Make an ice cream sandwich with a Suzy Q. Life-changing.
Fresh Berries: Raspberries or strawberries on the side cut through the sweetness.
More Suzy Q’s: Just eat another one. They’re small. It’s fine.
Nothing: These are perfect as-is. Self-contained snack cake excellence.
The Science of Snack Cake Success
The hot coffee in the batter serves two purposes: it thins the batter for even spreading, and the heat activates the cocoa powder’s flavor compounds, making the chocolate taste deeper and more intense. The combination of baking soda and baking powder creates the tender, soft crumb that makes these cakes almost melt in your mouth.
The butter-based filling is stable at room temperature because butter solidifies as it cools. Beating it extensively incorporates air, making it light and fluffy rather than greasy. The powdered sugar provides sweetness and structure without graininess.
The thin cake layers ensure the proper cake-to-filling ratio. Too thick and the filling gets lost. Too thin and they’re fragile. The roughly 1/2-inch thickness is the sweet spot for structural integrity and cream filling prominence.
When to Make These Homemade Suzy Q’s
School Lunches: Make a batch, wrap individually, pack them all week. Lunchbox hero status achieved.
Bake Sales: These sell out immediately. Make extras.
Birthday Parties: Kids love these. Adults pretend they’re just eating them to be polite, then ask for seconds.
Road Trips: Pack them for car snacks. Way better than gas station options.
Care Packages: Ship them to college students or friends. They travel well and arrive as happiness.
Nostalgic Moments: When you need to remember simpler times, make these and time-travel via taste buds.
Why These Work So Damn Well
Homemade Suzy Q’s work because they take a beloved concept and improve it with better ingredients and more generous proportions. Store-bought versions have that chemical aftertaste and sparse filling. Homemade versions taste like actual food—real chocolate, real butter, real vanilla—and have filling that actually fills.
They’re also just satisfying to make. There’s something fun about recreating a commercial snack cake and realizing yours is superior. The assembly-line process is meditative. The individually wrapped packages feel like you’re running your own snack cake empire from your kitchen.
This is what happens when you apply home baking love to a childhood classic. No preservatives needed. No weird ingredients. Just tender chocolate cake and fluffy vanilla cream coming together in perfect harmony. Sometimes the best versions of things are the ones you make yourself.
Questions People Always Ask
Q: Can I use a different size pan? A: You need a jelly roll pan (10×15) or half sheet pan for the right cake thickness. A 9×13 makes the cake too thick.
Q: My filling is too soft. How do I fix it? A: Add more powdered sugar, a tablespoon at a time, until it’s thick enough to hold its shape. Or refrigerate it for 15 minutes to firm up.
Q: Can I make these gluten-free? A: Use a 1:1 gluten-free flour blend. The texture will be slightly different but still good.
Q: Why is my cake dry? A: You overbaked it or your oven runs hot. Check it at 15 minutes. The cake should be just set, not firm.
Q: Can I make mini Suzy Q’s? A: Yes! Cut the cake into smaller rectangles and use less filling. You’ll get 16-20 mini versions.
Q: Do I have to use hot coffee in the cake? A: You can use hot water, but coffee enhances the chocolate flavor without making it taste like coffee.
Q: How do I get the filling to the edges? A: Use enough filling and press down on the top cake layer to spread it out. Don’t be afraid to use your hands to shape it.
PrintHostess Suzy Q’s Copycat Recipe
- Total Time: 23 minute
- Yield: 16 cake pieces 1x
Description
Someone at Hostess invented Suzy Q’s—two soft chocolate cakes sandwiched around a mountain of sweet cream filling—and created a lunchbox legend. Then home bakers figured out you can make them yourself with better ingredients, more filling, and none of the preservatives. This is tender, moist chocolate cake paired with fluffy vanilla cream that tastes like childhood but better because you made it from scratch. It’s what happens when you stop accepting mediocre snack cakes and decide to level up.
This isn’t some complicated patisserie project that requires culinary school. This is “make sheet cake, make cream filling, sandwich together, pretend you’re a snack cake mogul” simplicity that results in something way better than the cellophane-wrapped original. The cake is soft and chocolatey without being too rich. The cream filling is sweet and fluffy without being too heavy. Together, they’re the perfect ratio of cake to cream that Hostess wishes they could achieve.
This is nostalgia energy but upgraded. It’s what happens when you take a childhood favorite and make it with real butter, actual vanilla, and love instead of whatever chemical compounds keep store-bought cakes shelf-stable for months. It’s snack cakes that actually taste like food.
Ingredients
For the Chocolate Cake:
- 1 3/4 cups all-purpose flour
- 2 cups granulated sugar
- 3/4 cup unsweetened cocoa powder (Dutch-process makes them darker)
- 2 teaspoons baking soda
- 1 teaspoon baking powder
- 1 teaspoon salt
- 2 large eggs, room temperature
- 1 cup whole milk, room temperature
- 1/2 cup vegetable oil
- 1 cup hot coffee (or hot water, but coffee enhances chocolate)
- 2 teaspoons vanilla extract
For the Cream Filling:
- 1 cup (2 sticks) unsalted butter, softened to room temperature (crucial)
- 3 cups powdered sugar (maybe more for desired thickness)
- 1/4 cup heavy cream or whole milk
- 2 teaspoons vanilla extract
- 1/4 teaspoon salt
- Optional: 2 tablespoons marshmallow fluff (for that authentic texture)
Optional But Highly Recommended:
- Chocolate ganache for drizzling on top
- Extra cocoa powder for dusting
- Vanilla bean paste instead of extract (more visible vanilla specks)
- Espresso powder (enhances chocolate flavor)
- A pinch of instant pudding mix in the filling (stabilizes it)
Special Equipment:
- 10x15 inch jelly roll pan or half sheet pan (with 1-inch sides)
- Parchment paper (makes removal easy)
- Electric mixer (for the filling)
- Offset spatula or butter knife for spreading
- Sharp knife for cutting clean rectangles
- Plastic wrap for storage
Instructions
Preheat your oven to 350°F. Line your 10×15 inch jelly roll pan with parchment paper, leaving some overhang on the sides for easy removal later. Spray the parchment with cooking spray. This cake is tender—you don’t want it sticking and tearing when you try to remove it.
In a large bowl, whisk together the flour, sugar, cocoa powder, baking soda, baking powder, and salt. Make sure there are no cocoa lumps—sift if necessary. Set this aside and feel good about your organizational skills.
In a medium bowl or large measuring cup, whisk together the eggs, milk, oil, and vanilla until well combined. The mixture should be smooth and uniform.
Pour the wet ingredients into the dry ingredients. Stir with a wooden spoon or spatula until just combined. Don’t overmix—some small lumps are fine. The batter will be thick at this point. Now pour in the hot coffee and stir until smooth. The batter will become very thin and liquidy. This is correct. Don’t panic. Thin batter = moist cake.
Pour the batter into your prepared pan and spread it evenly into the corners. It should fill the pan and be about 1/2 inch thick. Bake for 15-18 minutes until the top springs back when lightly touched and a toothpick inserted in the center comes out clean or with just a few moist crumbs. Don’t overbake—you want this cake soft and tender, not dry.
Let the cake cool in the pan for 10 minutes. Then use the parchment overhang to lift the entire cake out of the pan onto a wire rack or cutting board. Let it cool completely—and I mean COMPLETELY—before adding filling. If you add filling to warm cake, it’ll melt and slide everywhere and you’ll have a mess. Go watch an episode of something while it cools.
While the cake cools, make the filling. In a large bowl using an electric mixer, beat the softened butter on medium-high speed for 2-3 minutes until light and fluffy. It should look pale and creamy. Scrape down the sides of the bowl.
Add the powdered sugar one cup at a time, beating on low speed until incorporated, then increasing to high speed for 30 seconds. Add the cream, vanilla, and salt. Beat on high speed for 3-4 minutes until the filling is light, fluffy, and holds stiff peaks. It should look like thick frosting. If it’s too soft, add more powdered sugar. If it’s too stiff, add a bit more cream. If you’re using marshmallow fluff, beat it in now.
Once the cake is completely cool, place it on a cutting board. Using a sharp knife, cut the cake in half lengthwise so you have two long rectangles. Then cut each half into 8 equal rectangles, giving you 16 cake pieces total. They should be roughly 3×2 inches each. Don’t worry about perfection—rustic is fine. Wipe your knife between cuts for clean edges.
Take one cake rectangle and flip it over so the flat bottom is facing up. Using an offset spatula, butter knife, or spoon, spread a generous amount of cream filling on the cake—about 2-3 tablespoons per cake. Don’t be shy. The original Suzy Q’s are known for their cream-to-cake ratio. Spread it almost to the edges.
Take another cake rectangle and place it on top of the cream filling, flat bottom side down (so both flat sides are touching the filling and the rounded baked tops are on the outside). Press down gently but firmly to spread the cream filling to the edges. The filling should be visible around the edges—this is the signature Suzy Q look.
Continue filling and sandwiching the remaining cake pieces until you have 8 completed Suzy Q’s. This is assembly-line work. Put on some music. Get into a rhythm. Try not to eat all the extra cream filling with a spoon (you will eat some of it with a spoon).
If you want to get fancy, drizzle melted chocolate ganache over the tops or dust them lightly with cocoa powder. The originals don’t have this, but homemade means you make the rules. Let any chocolate topping set before wrapping.
Wrap each Suzy Q individually in plastic wrap for storage. They’ll keep at room temperature for 2-3 days or in the fridge for up to a week (if they last that long). The texture is best at room temperature—the cake is softer and the filling is creamier. But cold ones are also delicious and remind you of eating them straight from the lunchbox.
Unwrap one and take a bite. Notice how soft and moist the chocolate cake is—tender without being crumbly. Taste the sweet vanilla cream filling—fluffy and rich without being overly heavy. Feel the nostalgia wash over you as you realize you’ve successfully recreated a childhood snack but made it actually good. Immediately reach for another one.
Notes
Room Temperature Everything: For the cake batter, room temp ingredients mix better. For the filling, soft butter is crucial.
Don’t Overbake the Cake: Pull it right when a toothpick has a few moist crumbs. Overbaked cake is dry and won’t have that soft texture.
Cool Completely: Warm cake + cream filling = melted disaster. Be patient.
Whip That Filling: Beat it longer than you think. The more you beat, the fluffier it gets.
Generous Filling: Use 2-3 tablespoons per cake. Don’t be stingy—the filling is what makes these special.
Sharp Knife, Clean Cuts: Wipe the knife between cuts for neat rectangles. Messy cuts still taste good though.
Wrap Individually: This keeps them fresh and makes them portable for lunches or snacks.
- Prep Time: 30 minutes
- Cook Time: 15-18 minutes
Nutrition
- Calories: ~485 kcal
- Fat: ~26g
- Carbohydrates: ~60g
- Protein: ~4g


