Quick Overview
There’s nothing quite like the aroma of freshly baked homemade cinnamon rolls wafting through your kitchen. These delightful treats are a classic favorite for breakfast or dessert. The soft dough swirled with rich cinnamon sugar and topped with a creamy glaze makes them irresistible. In this article, we will guide you through the entire process of making delicious homemade cinnamon rolls from scratch. Get ready to impress your family and friends with this crowd-pleasing recipe.
Ingredient Breakdown
Flour
All-purpose flour is the foundation of your dough. You will need about 4 cups to achieve the right texture. This ingredient provides structure and helps the dough rise adequately when combined with yeast.
Sugar
Use granulated sugar for both the dough and filling. You will need approximately ½ cup for the dough and ¾ cup for the filling. Sugar adds sweetness and helps activate the yeast, resulting in a light and airy roll.
Yeast
Active dry yeast is essential for making your rolls rise. You’ll require about 2 packets, which equals roughly 4 teaspoons. Yeast ferments the dough, creating air bubbles that give it its fluffiness.
Milk
Whole milk is best for this recipe; you’ll need around 1 cup warmed to about 110°F (43°C). Milk adds moisture and richness to your dough, contributing to its tender texture.
Butter
Melted butter is used in both the dough and filling; you’ll need about ⅓ cup melted for the dough and another ½ cup softened for spreading over the rolled-out dough. Butter enriches flavor while also keeping the rolls moist.
Eggs
You will need one large egg for this recipe. Eggs help bind ingredients together, add richness, and contribute to a soft texture in your rolls.
Cinnamon
Ground cinnamon is crucial for flavor; you will need around 2 tablespoons for the filling. It gives these rolls their signature spicy sweetness that everyone loves.
Cream Cheese
For a delicious glaze on top of your rolls, use about 4 ounces of softened cream cheese mixed with powdered sugar and milk. This creamy topping perfectly balances the sweetness of your rolls.
Step By Step Recipe: Homemade Cinnamon Rolls
Step 1: Prepare Dough
In a large mixing bowl, combine warmed milk, melted butter, sugar, and yeast. Allow it to sit for about 5 minutes until bubbly. Then add flour and salt gradually while mixing until a soft dough forms. Knead on a floured surface for about 5-7 minutes until smooth.
Step 2: Let Dough Rise
Place your kneaded dough in a greased bowl and cover it with a clean kitchen towel or plastic wrap. Let it rise in a warm area for about one hour or until doubled in size. This step is crucial as it allows gluten to develop.
Step 3: Make Filling
While waiting for the dough to rise, prepare your filling by combining softened butter, brown sugar, ground cinnamon in a bowl until well blended into a paste-like consistency.
Step 4: Roll Out Dough
After the dough has risen sufficiently, punch it down gently to release air bubbles. Roll out on a lightly floured surface into a rectangle approximately 16×12 inches thick about half an inch. Spread your filling evenly across this rolled-out area using an offset spatula.
Step 5: Form Rolls
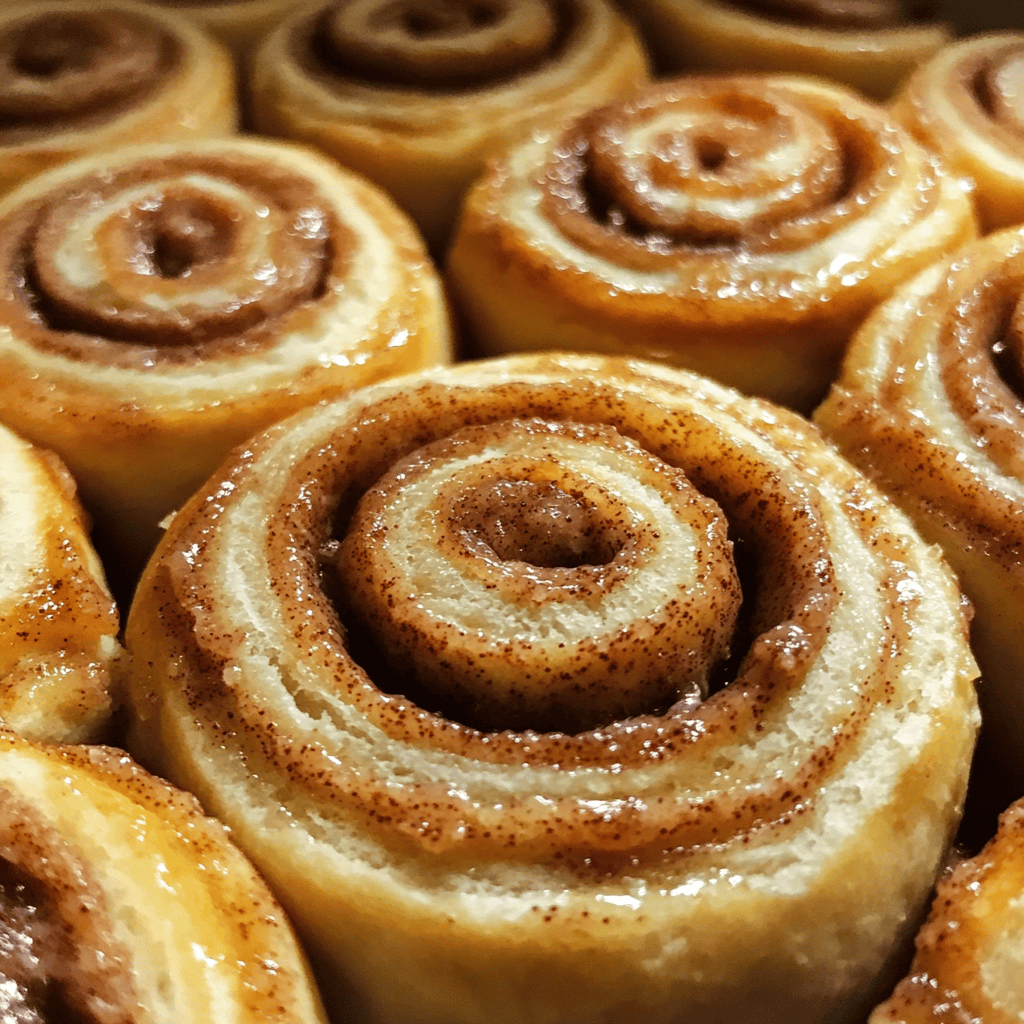
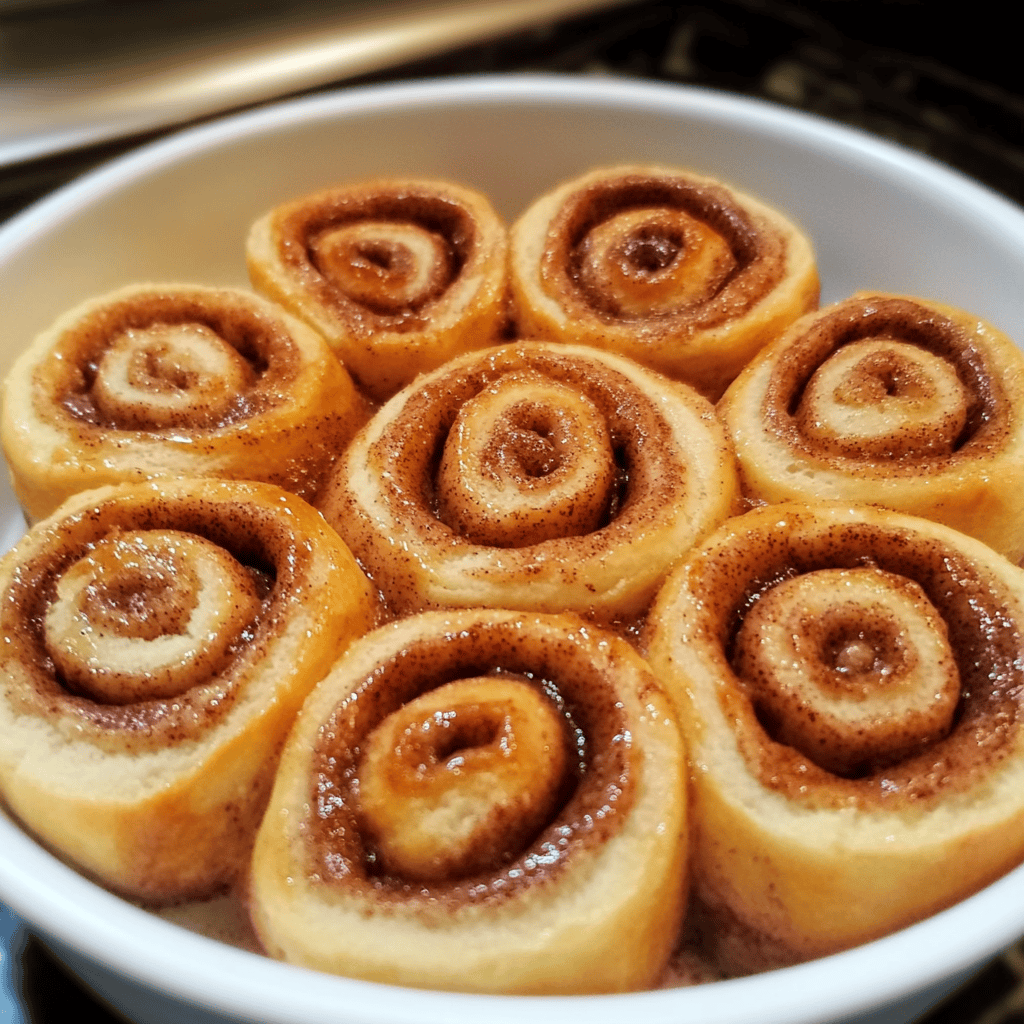
Starting from one long edge of the rectangle, tightly roll up the dough into a log shape. Pinch seams closed at each end to prevent spilling during baking then slice into equal pieces about two inches thick using unflavored dental floss or sharp knife.
Step 6: Second Rise
Place cut rolls into greased baking pans leaving space between them as they will expand again while rising—cover with towel—and let them rise in warm place again until nearly doubled (about another thirty minutes).
Step 7: Bake Rolls
Preheat your oven to 350°F (175°C) while waiting on second rise completion after which bake rolls uncovered in preheated oven for approximately twenty-five to thirty minutes until golden brown on top; keep an eye out so they don’t over-bake!
Step 8: Prepare Icing
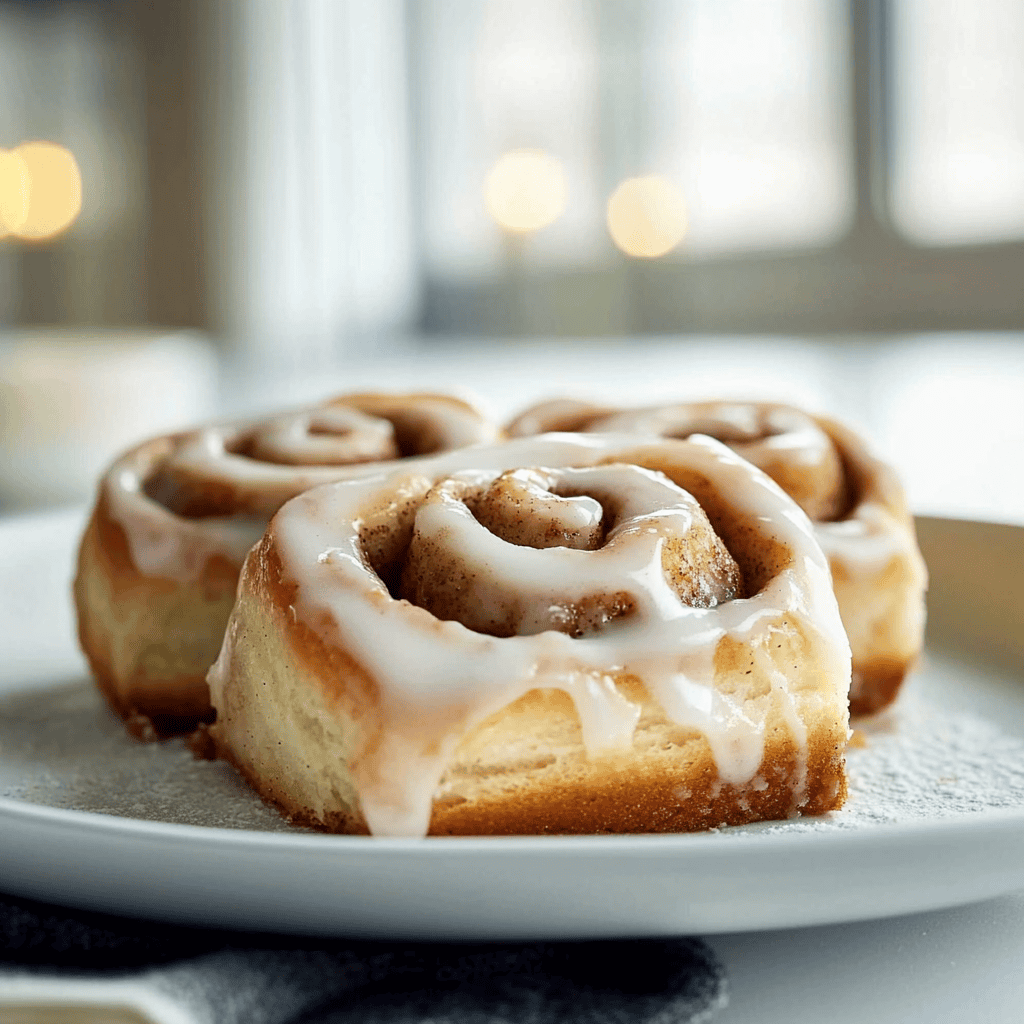
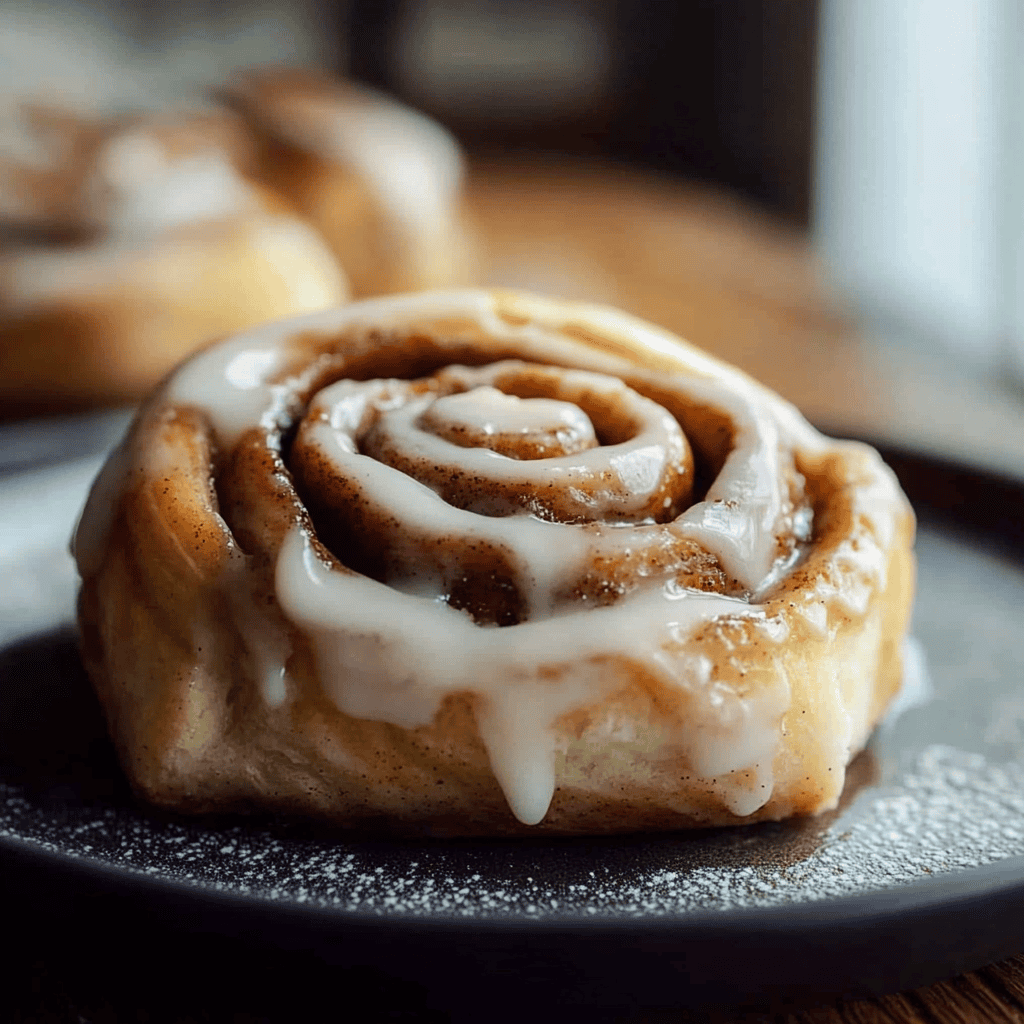
In another bowl mix softened cream cheese with powdered sugar along with enough milk until you reach desired spreadable consistency—feel free adding vanilla extract if preferred! Drizzle generously over warm cinnamon rolls once removed from oven before serving!
Serving and Storing Tips
Tip 1: Serve Warm
Homemade cinnamon rolls are best enjoyed warm from the oven! They stay soft and fluffy when served fresh but can also be reheated easily in microwave or oven just before serving time which enhances flavors even more!
Tip 2: Storage Options
If you have leftovers after enjoying these delightful treats (which may not happen!), store them covered at room temperature if consumed within two days; otherwise refrigerate them tightly wrapped up where they can last longer yet maintain flavor integrity well!
Tip 3: Freezing Instructions
For longer storage periods consider freezing unbaked assembled cinnamon roll logs wrapped tightly in plastic wrap then placed inside freezer-safe bags where they can last up three months—thaw overnight before baking fresh whenever cravings strike!
With this recipe for homemade cinnamon rolls at hand you’ll create delightful memories filled with warmth—both literally & figuratively! Enjoy every bite!
Mistakes to avoid
When making homemade cinnamon rolls, one common mistake is not allowing the dough to rise properly. Proper fermentation is crucial for fluffy rolls. Ensure your yeast is fresh and activate it in warm milk or water with a bit of sugar before mixing into the dough.
Another mistake is rolling the dough too tightly. If you roll the dough too tight, your cinnamon rolls may not bake evenly and will be difficult to pull apart. Aim for a snug but not overly tight roll.
Also, avoid skipping the resting period after shaping the rolls. This rest allows them to expand and develop more flavor. Skipping this step can result in dense rolls that lack the light texture you desire.
Lastly, don’t rush the baking process. Each oven varies, and underbaking can lead to gooey centers while overbaking results in dry, tough rolls. Always check for a golden-brown color and a firm texture before removing them from the oven.
Tips and tricks
One effective tip for making homemade cinnamon rolls is to use room temperature ingredients, especially butter and eggs. This helps create a smooth dough that rises better. Cold ingredients can slow down yeast activity, resulting in denser rolls. Allow your butter to soften naturally before mixing it into the dough.
Another trick is to experiment with various fillings beyond the classic cinnamon sugar mix. For instance, adding nuts or dried fruits can give your rolls an interesting twist. You could also try mixing in some cocoa powder for a chocolatey flavor or using different spices like nutmeg for an aromatic touch.
Be sure to knead your dough adequately until it’s smooth and elastic. Kneading develops gluten which provides structure and chewiness in your cinnamon rolls. If you’re new to baking, consider using a stand mixer fitted with a dough hook to make this process easier.
Finally, don’t forget about frostings! A cream cheese frosting adds a delightful tanginess that complements the sweetness of cinnamon rolls beautifully. You can also drizzle simple icing made from powdered sugar and milk for an easy finishing touch.
Suggestions for Homemade Cinnamon Rolls
For those who prefer less sweetness, consider reducing the sugar in both the filling and frosting recipes. This adjustment will still yield delicious homemade cinnamon rolls without overwhelming sweetness.
If you’re looking to make these treats ahead of time, prepare your dough and shape the rolls but refrigerate them overnight instead of letting them rise at room temperature before baking. This method allows for easier morning preparation as you just need to let them sit out briefly before baking.
Using high-quality ingredients will significantly impact flavor quality. Choose real butter over margarine and opt for fresh ground cinnamon instead of pre-ground varieties if possible; this enhances both taste and aroma.
Lastly, experiment with different glazes or toppings once your homemade cinnamon rolls are baked. Options like caramel sauce or maple syrup can add unique flavors that enhance your final product.
FAQs
What type of flour should I use for homemade cinnamon rolls?
For best results when making homemade cinnamon rolls, use all-purpose flour or bread flour. All-purpose flour provides a good balance between tenderness and structure while bread flour has more protein content that creates chewier rolls due to more gluten formation during kneading.
Can I freeze homemade cinnamon rolls?
Yes! Freezing homemade cinnamon rolls is an excellent way to enjoy them later on without compromising quality. After baking, allow them to cool completely before wrapping tightly in plastic wrap followed by aluminum foil or placing them in airtight containers for up to three months.
How long do I need to let my dough rise?
Typically, allowing your dough to rise for about 1-2 hours should suffice until it doubles in size at room temperature (around 75°F). However, if you’re working with colder environments or ingredients, this may take longer; patience leads to fluffier results!
How do I know when my cinnamon rolls are done baking?
To determine if your homemade cinnamon rolls are done baking, look for a golden-brown color on top and sides while gently pressing them; they should feel firm yet spring back slightly when pressed lightly in the center.
Can I make these without yeast?
Yes! Although traditional recipes rely on yeast for leavening agents producing fluffy texture characteristics inherent within baked goods like these delicious treats; consider using baking powder instead as an alternative leavening agent though textures may differ slightly from classic versions.
How do I store leftover cinnamon rolls?
To store leftover homemade cinnamon rolls effectively, place them in an airtight container at room temperature for up to two days or refrigerate them where they can last up five days maximum depending upon humidity levels present; reheating prior consumption restores their softness!
Summary
Creating delicious homemade cinnamon rolls requires attention to detail as well as avoiding common mistakes such as improper rising times or rolling too tightly. Implementing useful tips like using room temperature ingredients will enhance texture while experimenting with fillings adds creativity! Don’t forget about proper storage methods after enjoying these treats; freezing leftovers ensures they stay fresh longer! With practice comes mastery—your next batch could become everyone’s favorite treat!