
Quick Overview
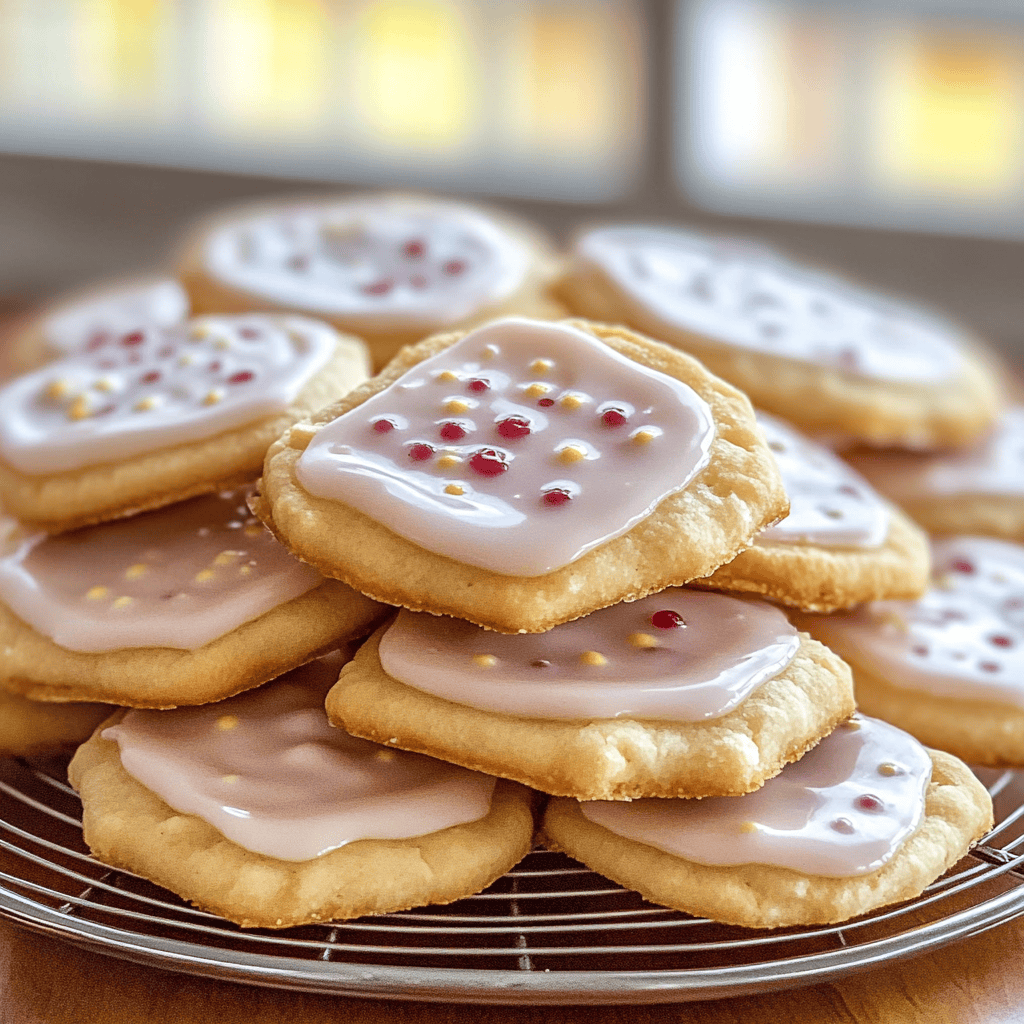
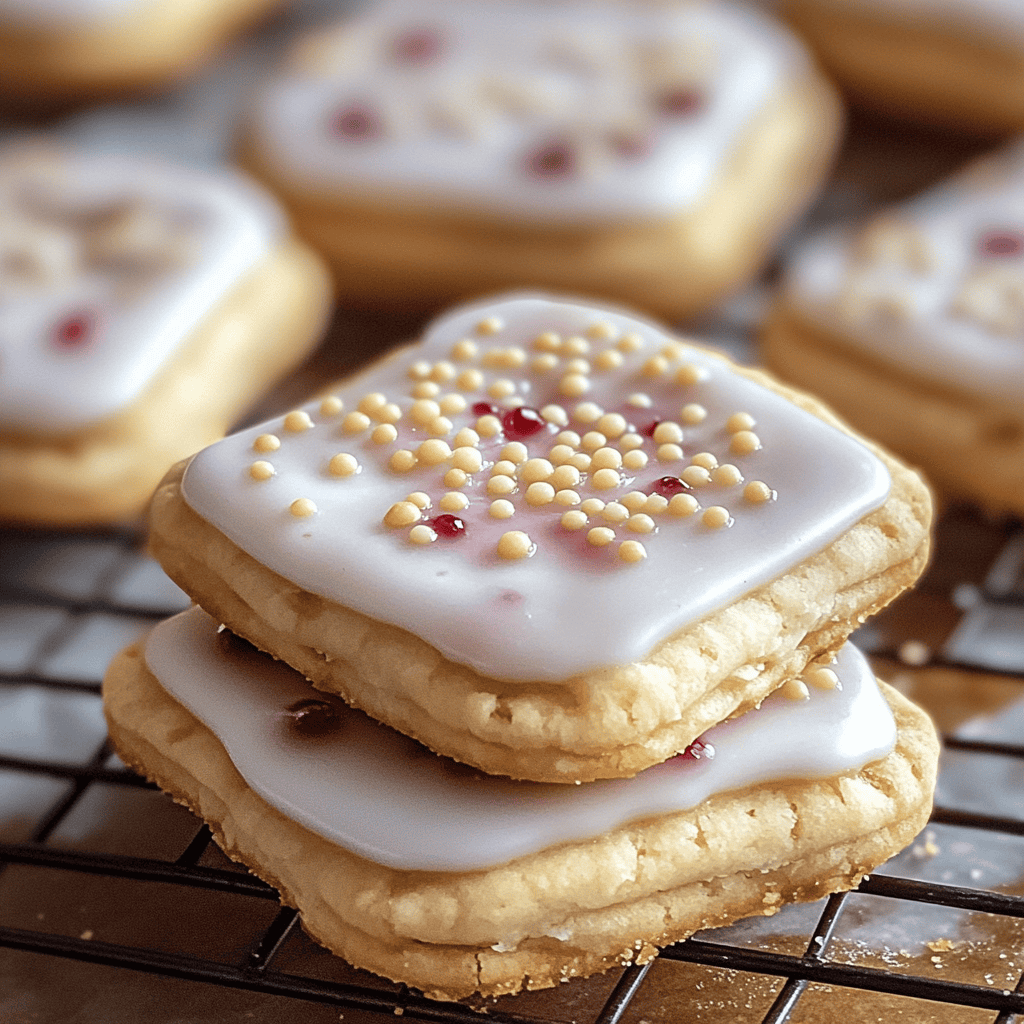
If you’re craving a sweet treat that combines nostalgia and deliciousness, look no further than these Frosted Pop-Tart Cookies. This delightful recipe captures the essence of the classic snack while offering a unique twist that will impress your friends and family. With a chewy texture and colorful frosting, these cookies are perfect for any occasion—whether it’s a birthday party or just a cozy afternoon snack. Get ready to whip up a batch of these scrumptious cookies that everyone will love.
Ingredient Breakdown
Flour
You will need 2 cups of all-purpose flour for this recipe. It provides the structure for the cookies and helps them hold their shape during baking.
Sugar
Use 1 cup of granulated sugar to add sweetness to your dough. The sugar not only contributes flavor but also helps create a tender texture in the cookies.
Butter
Incorporate 1 cup (2 sticks) of unsalted butter into your mixture. Make sure it’s softened at room temperature; this ensures your cookies are rich and flavorful.
Eggs
Add 2 large eggs to bind the ingredients together. Eggs contribute moisture and richness to the cookie dough, resulting in a soft and chewy texture.
Baking Powder
Use 1 teaspoon of baking powder to help your cookies rise slightly as they bake. This ingredient creates a light texture that contrasts nicely with the frosting.
Vanilla Extract
Include 1 teaspoon of pure vanilla extract for added flavor depth. Vanilla enhances the sweetness and gives your cookies a comforting aroma.
Salt
Add 1/2 teaspoon of salt to balance out the sweetness in your cookies. Salt is essential for enhancing flavors in baked goods.
Frosting
Prepare 1 cup of colorful frosting (store-bought or homemade) for topping your cookies. This adds not only sweetness but also visual appeal to your finished treats.
Step By Step Recipe: Frosted Pop-Tart Cookies
Step 1: Preheat Your Oven
Begin by preheating your oven to 350°F (175°C). This step is crucial as it ensures even baking. While the oven is heating up, you can prepare your cookie dough.
Step 2: Mix Dry Ingredients
In a bowl, whisk together the flour, baking powder, and salt until well combined. This step ensures that your leavening agent is evenly distributed throughout the flour before it joins the wet ingredients.
Step 3: Cream Butter and Sugar
In another bowl, beat together softened butter and granulated sugar until light and fluffy. This usually takes about 3-5 minutes using an electric mixer on medium speed; this process incorporates air into the mixture for lighter cookies.
Step 4: Add Eggs and Vanilla
Next, add eggs one at a time into the butter-sugar mixture along with vanilla extract. Mix until fully incorporated; this will help create a smooth batter without lumps from butter or sugar.
Step 5: Combine Wet and Dry Mixtures
Gradually add the dry ingredient mix into the wet mixture while stirring gently with a spatula until just combined. Be careful not to overmix; you want to retain some airiness in your dough.
Step 6: Shape Your Cookies
Scoop out tablespoon-sized portions of dough onto lined baking sheets. Leave enough space between each cookie as they will spread slightly during baking; about two inches is ideal.
Step 7: Bake Your Cookies
Place the prepared baking sheets in the preheated oven and bake for about 10-12 minutes or until edges are lightly golden brown. Keep an eye on them as baking times may vary depending on your oven.
Step 8: Cool Down Cookies
Once baked, remove them from the oven and allow them to cool on wires for about five minutes before transferring them completely off baking sheets. This cooling period allows them to firm up without getting too tough.
Step 9: Decorate with Frosting
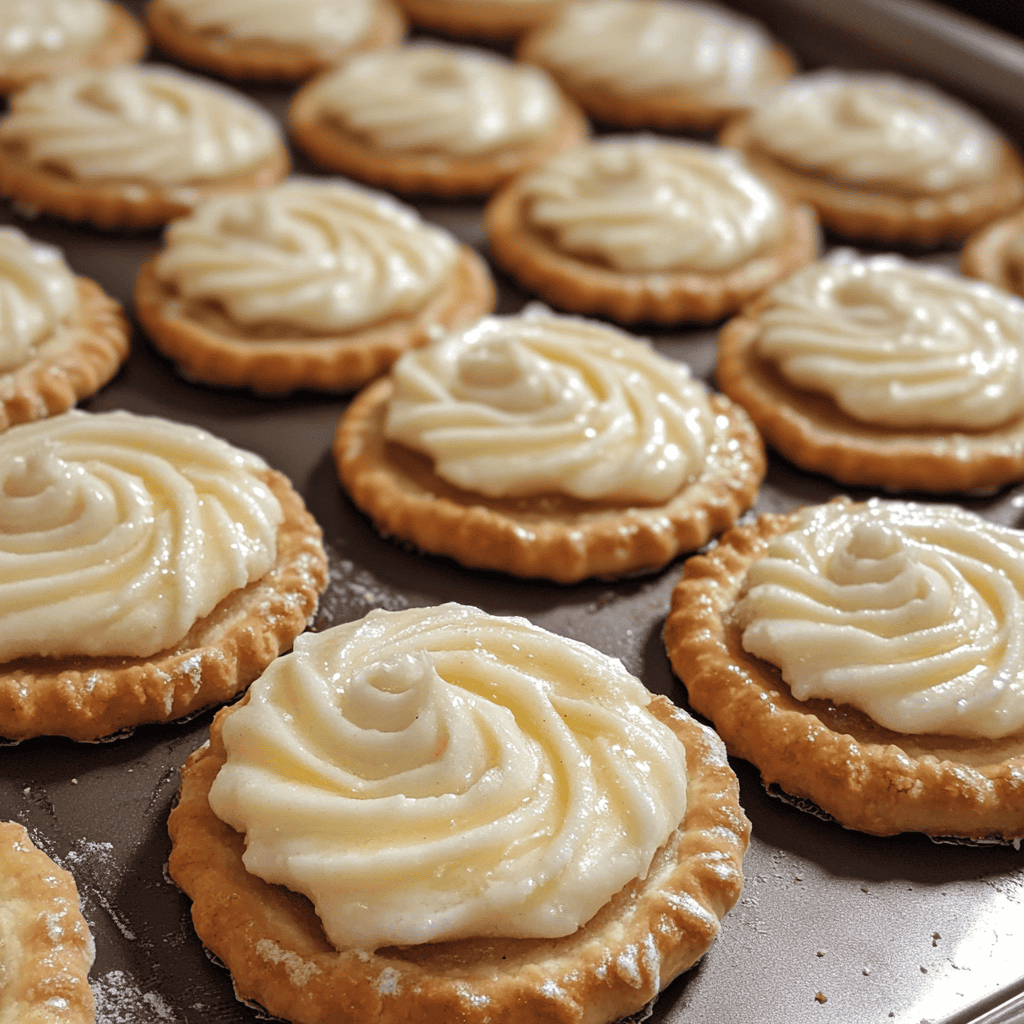
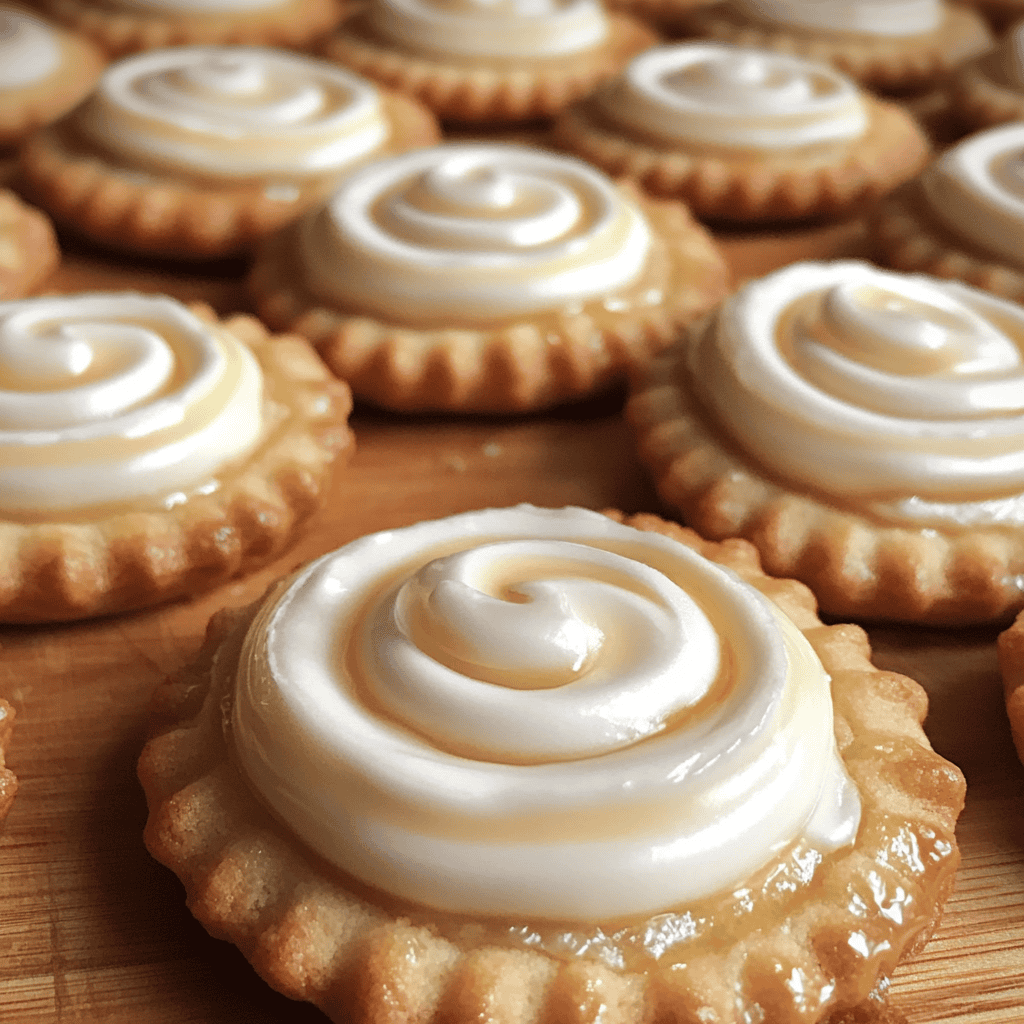
Once cooled completely, spread frosting generously over each cookie using a knife or spatula. You can also use piping bags if you want more control over decoration—making fun designs!
Serving and Storing Tips
Serving Suggestions
Serve these delightful Frosted Pop-Tart Cookies at room temperature alongside milk or coffee for an enjoyable treat! They make great snacks after school or perfect additions to dessert platters at parties.
Storing Leftovers
Store leftover cookies in an airtight container at room temperature for up to one week. If you want them fresh longer, consider refrigerating them; however, allow them to reach room temperature before serving again.
With these easy steps and tips, you’ll have mouthwatering Frosted Pop-Tart Cookies ready in no time! Enjoy making this fun dessert that brings back childhood memories while satisfying everyone’s sweet tooth!
Mistakes to avoid
One common mistake when making frosted Pop-Tart cookies is using cold butter. Cold butter doesn’t blend well with sugar, resulting in a dense texture. Always use room temperature butter for a light and fluffy cookie.
Another mistake is overmixing the dough. Overmixing activates gluten, which can lead to tough cookies. Mix just until the ingredients are combined. This will keep your frosted Pop-Tart cookies soft and chewy.
Not chilling the dough is another error. Chilling allows the flavors to meld and helps prevent spreading during baking. Aim for at least 30 minutes of chilling time before baking.
Failing to preheat the oven can lead to uneven baking. Always preheat your oven to ensure a consistent temperature throughout the baking process. This will help your frosted Pop-Tart cookies rise properly.
Lastly, neglecting to measure ingredients accurately can ruin your cookie recipe. Use proper measuring cups and spoons for dry and wet ingredients alike to achieve the best results in your frosted Pop-Tart cookies.
Tips and tricks
To perfect your frosted Pop-Tart cookies, consider using quality ingredients, such as pure vanilla extract and high-quality chocolate chips. The flavor of these items significantly impacts the overall taste of your cookies. When you use fresh, quality ingredients, you elevate the taste of your baked goods.
Another tip is to experiment with different frosting flavors. While traditional icing works well, try adding a hint of almond extract or lemon zest for a unique twist on your frosted Pop-Tart cookies. You can also top them with sprinkles or crushed candies for added texture and visual appeal.
Keep an eye on baking time as every oven varies slightly in temperature accuracy. Start checking your cookies a couple of minutes before the recommended bake time to prevent overbaking. Perfectly baked cookies should be golden around the edges but still soft in the center.
If you’re feeling adventurous, consider adding fillings inside the cookies! A layer of jam or chocolate ganache can take your frosted Pop-Tart cookies to new heights. Be sure not to overfill, as this could cause them to burst while baking.
Lastly, let your frosted Pop-Tart cookies cool completely before frosting them. This will prevent the icing from melting off and ensure a beautiful presentation with each cookie you serve.
Suggestions for Frosted Pop-Tart Cookies
For an exciting twist on your frosted Pop-Tart cookies, try incorporating different flavored extracts into the dough or frosting. Almond extract can add a lovely nutty flavor, while peppermint extract gives a refreshing touch during holidays.
Consider using colorful sprinkles or edible glitter on top of your frosting for festive occasions or celebrations. These simple additions make your frosted Pop-Tart cookies visually appealing and fun for all ages.
You might want to make mini versions of these cookies as well! Smaller-sized frosted Pop-Tart cookies are great for parties or gifting because they are easy to handle and share among guests.
Experiment with various toppings like crushed nuts or coconut flakes alongside traditional icing. These ingredients lend additional crunch and flavor that pair beautifully with the sweetness of frosting.
Lastly, store any leftover frosted Pop-Tart cookies in an airtight container at room temperature for up to one week. This helps maintain their freshness without compromising texture or taste.
FAQs
What are Frosted Pop-Tart Cookies?
Frosted Pop-Tart Cookies are delightful treats that combine elements from classic Pop-Tarts with cookie dough. They feature a soft cookie base filled with sweet frosting and topped with additional icing or sprinkles, capturing that nostalgic flavor in cookie form.
Can I customize my Frosted Pop-Tart Cookies?
Absolutely! You can customize these cookies by choosing different fillings such as fruit preserves or chocolate ganache between layers of dough. Additionally, experiment with various frostings like cream cheese or chocolate for unique flavors in each batch.
How do I store Frosted Pop-Tart Cookies?
To keep your frosted Pop-Tart cookies fresh longer, store them in an airtight container at room temperature away from direct sunlight or heat sources. Proper storage ensures they maintain their soft texture while preventing them from drying out too quickly.
Can I freeze Frosted Pop-Tart Cookies?
Yes! You can freeze unbaked cookie dough if you’d like to prepare ahead of time. Portion out individual cookie shapes onto parchment paper, freeze until solid, then transfer them into freezer bags for later baking without compromising flavor.
What’s the best way to frost my Frosted Pop-Tart Cookies?
Let your cookies cool completely before applying frosting to avoid melting it away. Use a piping bag or an offset spatula for even application over each cookie surface; feel free to get creative with colors and designs!
Are there any dietary alternatives for Frosted Pop-Tart Cookies?
You can make dietary adjustments by substituting gluten-free flour blends or vegan butter if needed. For lower sugar content, consider natural sweeteners like honey or maple syrup as alternatives while keeping proportions consistent for successful baking results.
Summary
Making delicious frosted Pop-Tart cookies requires attention to detail and creativity in both preparation and decoration methods. By avoiding common mistakes such as using cold butter and overmixing dough, you’ll achieve optimal results every time you bake these delightful treats.
Incorporating tips like experimenting with flavors and toppings enhances their appeal further while ensuring freshness through proper storage techniques extends enjoyment beyond just one day!


