Quick Overview
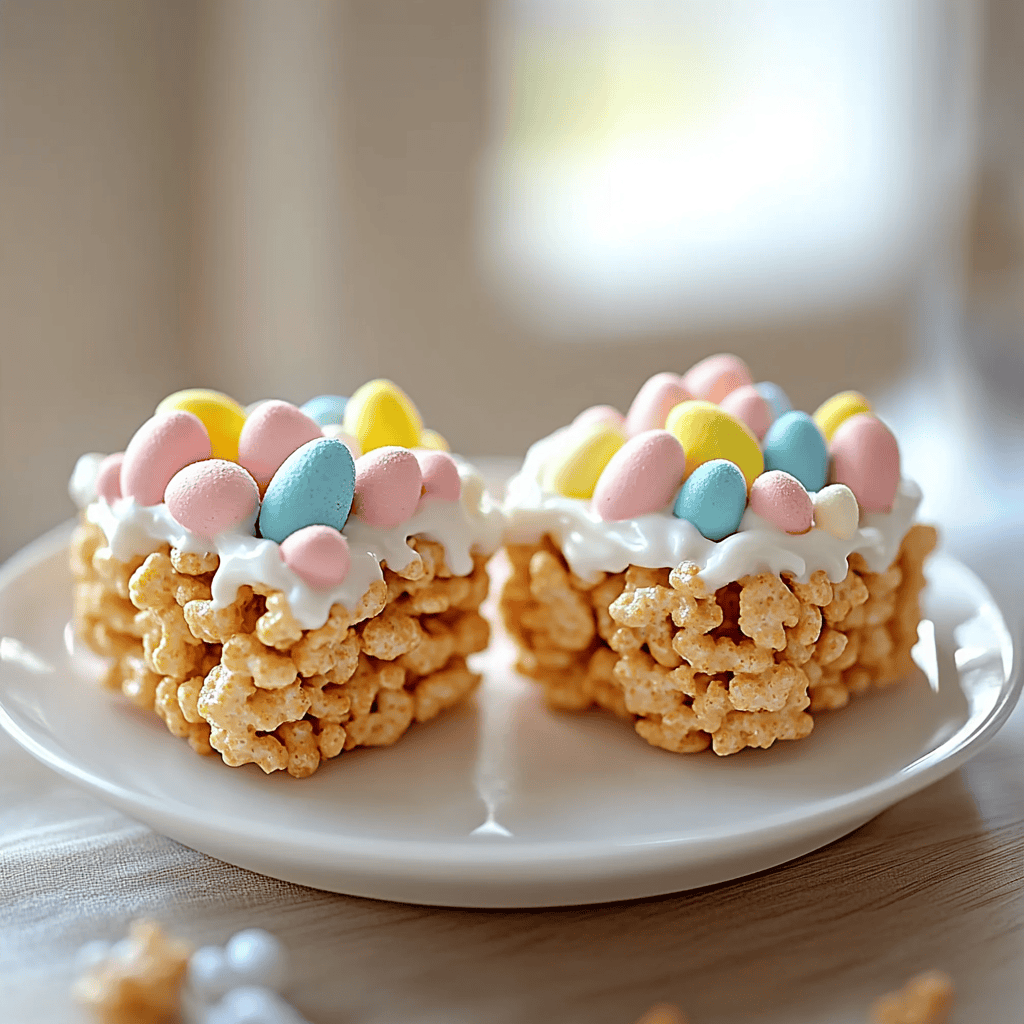
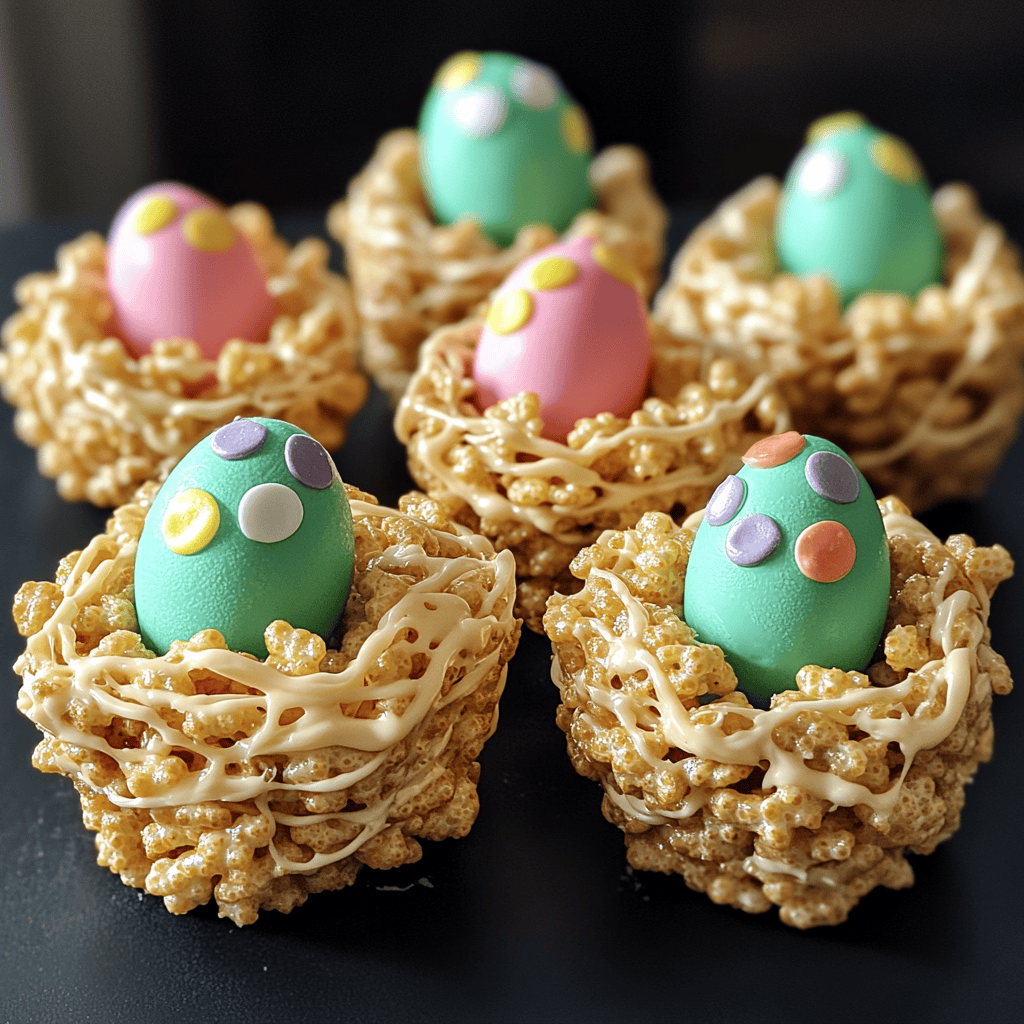
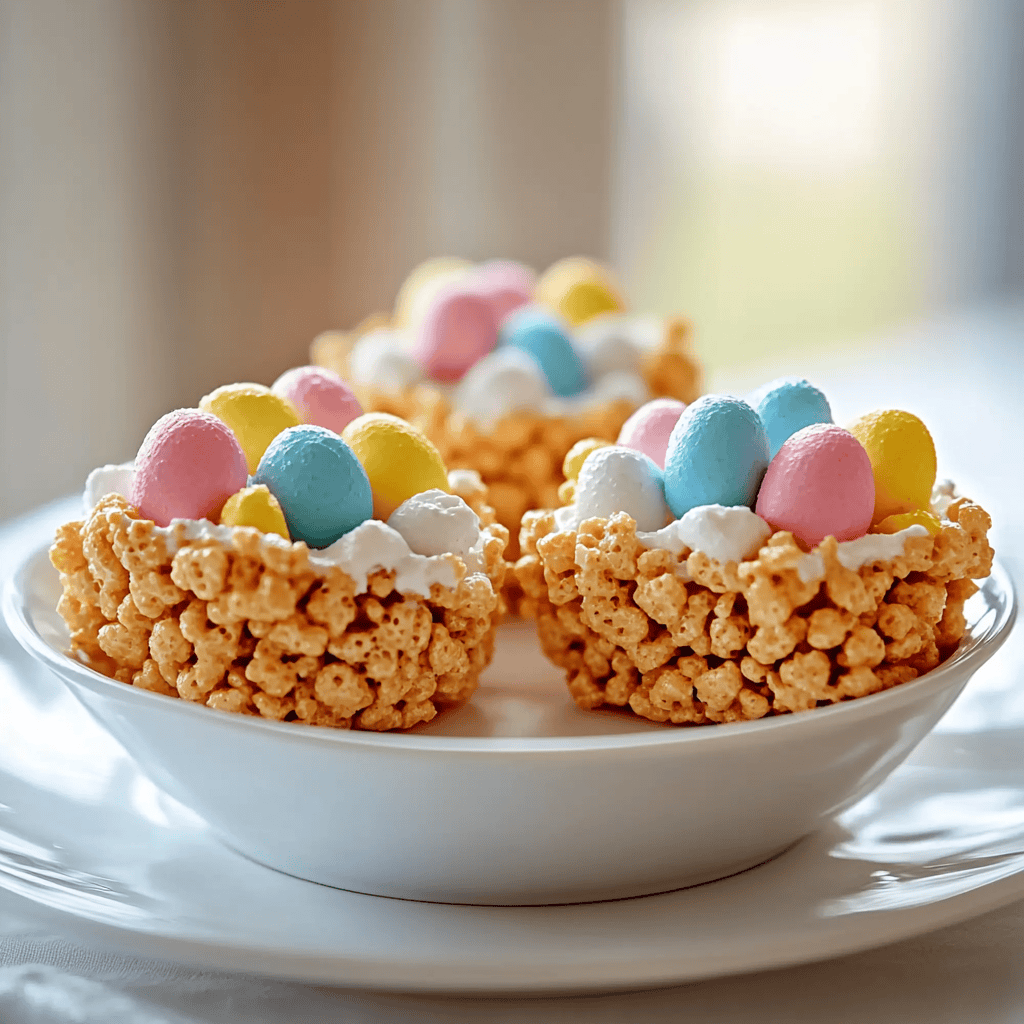
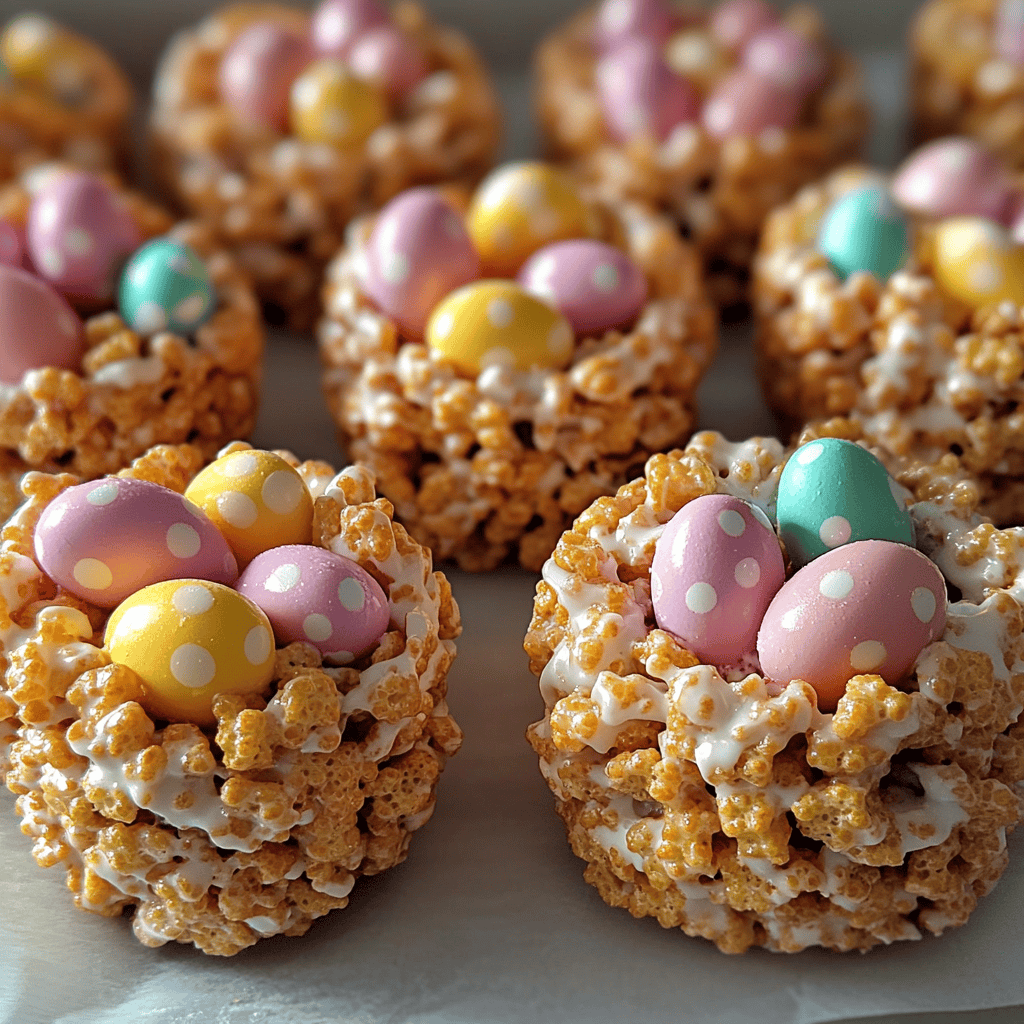
Easter is a time of joy and celebration, often filled with colorful decorations and sweet treats. One such delightful treat is the Krispies Easter Egg Nests. These fun and delicious nests made from Rice Krispies cereal bring together the flavors of marshmallows and chocolate, creating an irresistible combination. They’re not only visually appealing but also incredibly easy to make, making them the perfect addition to your Easter festivities.
Ingredient Breakdown
Rice Krispies Cereal
You will need 6 cups of Rice Krispies cereal for this recipe. This crispy cereal forms the base of the nests and provides that signature crunch. It’s light and airy, which helps balance out the sweetness of the marshmallows and chocolate.
Marshmallows
Use 10 ounces of mini marshmallows. These fluffy confections melt down beautifully when heated, creating a sticky mixture that holds everything together. They add sweetness and texture to your nests.
Butter
You will require 3 tablespoons of unsalted butter. The butter adds richness to the mixture while helping to prevent sticking during cooking. It also contributes to the overall flavor profile of your nests.
Chocolate Chips
For decoration, use 1 cup of chocolate chips. Any type will work—milk chocolate, dark chocolate, or even white chocolate—depending on your preference. They can be melted or used as-is for a delightful contrast in texture.
Candy Eggs
You will need about 1 cup of candy eggs for decoration. These can be small chocolate eggs or candy-coated chocolates. They add a festive touch to your nests and make them look like real egg-filled nests!
Step By Step Recipe: Krispies Easter Egg Nests
Step 1: Prepare Your Baking Dish
Begin by lining a 9×13-inch baking dish with parchment paper or greasing it lightly with cooking spray. This step ensures that your nests release easily once they are set. Set aside while you prepare the mixture.
Step 2: Melt Butter and Marshmallows
In a large saucepan over medium heat, melt the butter completely. Once melted, add in the mini marshmallows. Stir continuously until they are fully melted and smooth. Be cautious not to let them burn; keep stirring until you achieve a creamy consistency.
Step 3: Combine Rice Krispies Cereal
Remove the saucepan from heat after melting the marshmallows. Gradually add in the Rice Krispies cereal while gently folding it into the mixture using a spatula or wooden spoon. Make sure all cereal is coated evenly without crushing it too much.
Step 4: Shape the Nests
Once combined thoroughly, allow it to cool slightly but not too much—just enough so that you can handle it without burning yourself! Use your hands or a spoon to scoop portions from the mixture and shape them into nest forms directly in your prepared dish.
Step 5: Create Nest Indentations
As you shape each portion into a nest form, make an indentation in the center with your fingers or a spoon. This will create space for adding candy eggs later on. Aim for uniformity in size so that they look appealing when finished.
Step 6: Chill Until Firm
Place your shaped nests in the refrigerator for at least 30 minutes so they can firm up properly. This cooling time allows them to hold their shape well when removed from the dish later on.
Step 7: Decorate With Chocolate Chips
Melt half of your chosen chocolate chips in a microwave-safe bowl until smooth (about 30 seconds). Drizzle or spread this melted chocolate over each nest as desired using a spoon or piping bag for precision.
Step 8: Add Candy Eggs
While the chocolate is still warm but not hot, gently press two or three candy eggs into each nest’s center indentation. This adds both color and charm to your creations! Allow everything to cool completely before serving.
Serving and Storing Tips
Serving Suggestions
Serve these delightful Krispies Easter Egg Nests on a large platter arranged festively with some spring-themed decorations nearby! They make great conversation starters at any gathering and are sure to please both kids and adults alike during holiday celebrations.
Storage Instructions
Store any leftover nests in an airtight container at room temperature for up to five days. If you want them fresher longer, consider refrigerating them; however, be aware that cold storage may slightly alter their texture due to moisture absorption from refrigeration.
By following this detailed guide on making Krispies Easter Egg Nests, you can create wonderful memories while enjoying delicious treats with family and friends during this joyous season!
Mistakes to avoid
One common mistake when making Krispies Easter Egg Nests is not measuring your ingredients correctly. Accurate measurements ensure that your nests hold together well and don’t crumble. Using too much marshmallow can make the mixture too sticky, while too little will result in dry nests. Always use a kitchen scale or measuring cups for precision.
Another mistake is not allowing the mixture to cool sufficiently before shaping it into nests. If the mixture is too hot, it can stick to your hands and lose shape. Patience is key; let it cool for at least 10-15 minutes before forming the nests.
Failing to coat your hands with butter or cooking spray can lead to a sticky situation. This step helps prevent the mixture from adhering to your hands while shaping each nest. Skipping this step can make the process frustrating and messy, so be sure to grease your hands properly.
Overbaking the chocolate eggs or candies that you use as decorations can ruin their texture and taste. Keep a close eye on them in the oven, as even a minute too long can lead to burnt chocolate. Follow package instructions closely for best results.
Finally, neglecting to store your Krispies Easter Egg Nests in an airtight container can diminish their freshness. They will become stale and lose their crunch if exposed to air too long. Make sure to seal them properly after cooling.
Tips and tricks
To create perfect Krispies Easter Egg Nests, consider using flavored marshmallows for a unique twist. These marshmallows come in various flavors, such as strawberry or vanilla, adding an extra layer of taste to your nests. Choose flavors that complement or contrast nicely with chocolate eggs for a delightful surprise in every bite.
Using colorful sprinkles or edible glitter on top of your nests can enhance their visual appeal. Kids especially love vibrant colors during holiday celebrations, making these treats more exciting. You can mix sprinkles into the rice cereal mixture or sprinkle them on top after forming the nests for an added touch of joy.
If you want to make these treats ahead of time, they store well in an airtight container at room temperature for up to a week. Consider making them a few days before your celebration, freeing up time on the day of the event. Just remember to keep them sealed tightly so they maintain their crunchiness.
Experimenting with different types of chocolate eggs or candies adds variety and fun! From classic chocolate eggs to gummy candies, you have many options. Each type brings its own texture and flavor, encouraging creativity when decorating each nest.
Lastly, involving children in the preparation process makes creating Krispies Easter Egg Nests even more enjoyable! Let them mix ingredients or decorate their own nests with candies and sprinkles. This participation not only makes lasting memories but also sparks interest in cooking and baking.
Suggestions for Krispies Easter Egg Nests
Consider using dark chocolate eggs instead of milk chocolate for a richer flavor profile in your Krispies Easter Egg Nests. Dark chocolate pairs well with sweetness from marshmallows and adds depth to each bite. Plus, dark chocolate has health benefits that contribute positively to your treat’s overall appeal.
For those who prefer gluten-free options, make sure to choose gluten-free rice cereal when preparing these nests. Many brands offer gluten-free alternatives without compromising taste or texture. This way, everyone at your gathering can enjoy these festive treats without worry about dietary restrictions.
Adding a touch of sea salt on top of each nest creates a delightful contrast between sweet and salty flavors. Just a pinch enhances the overall taste experience while balancing sweetness from other ingredients beautifully. Your guests will appreciate this unexpected twist!
If you want smaller-sized nests perfect for party favors or kids’ treats, simply adjust the size of each nest during formation. Smaller portions are easier for little hands to hold and share during gatherings while still maintaining deliciousness in every bite.
Lastly, consider incorporating seasonal fruits like mini chocolate-covered strawberries as decoration atop your nests for an added fresh element! These fruits not only look appealing but also provide natural sweetness that complements the dessert beautifully.
FAQs
What are Krispies Easter Egg Nests?
Krispies Easter Egg Nests are delightful no-bake treats made from crispy rice cereal mixed with melted marshmallows and butter. They resemble bird’s nests and are typically filled with colorful chocolate eggs or candy decorations on top. These festive treats are popular during Easter celebrations due to their fun appearance and delicious taste!
How do I store Krispies Easter Egg Nests?
To keep your Krispies Easter Egg Nests fresh, store them in an airtight container at room temperature away from direct sunlight or heat sources. Proper storage ensures they maintain their crunchiness while preventing staleness over time. If stored correctly, they should last up to one week without losing flavor!
Can I make Krispies Easter Egg Nests vegan?
Yes! To create vegan-friendly Krispies Easter Egg Nests, substitute regular marshmallows with vegan versions available at many grocery stores today—these options offer similar textures without animal products involved! Additionally, use non-dairy butter alternatives when preparing these tasty treats for everyone’s enjoyment!
How long does it take to prepare Krispies Easter Egg Nests?
Preparing Krispies Easter Egg Nests usually takes about 30 minutes total—this includes melting ingredients together (approximately 10 minutes) followed by cooling time (10-15 minutes) before shaping them into nests! Afterward comes decorating; allow extra time depending on how elaborate you want each creation!
Can I customize my Krispies Easter Egg Nests?
Absolutely! Customization is part of what makes these treats special! Feel free to experiment by using different kinds of candy fillings—like jellybeans—or adding flavored extracts such as vanilla extract while mixing everything together! The possibilities are endless when it comes down personalization—get creative!
Are there any allergy concerns with Krispies Easter Egg Nests?
Yes! When preparing Krispies Easter Egg Nests be mindful of potential allergens like gluten found in some rice cereals or dairy present within traditional marshmallows/butter used unless specifically sourcing allergen-free alternatives beforehand—checking ingredient labels ensures safety against allergies present among guests attending events where served!
Summary
In summary, creating delicious Krispies Easter Egg Nests involves avoiding common mistakes like improper ingredient measurement and ensuring proper cooling time before shaping them into nests. Helpful tips such as using flavored marshmallows and colorful decorations can enhance both flavor and presentation significantly! Don’t forget about storage methods either—keeping these treats fresh in airtight containers guarantees maximum enjoyment throughout festivities! Remember: creativity knows no bounds when crafting these festive delights tailored perfectly according individual tastes preferences!