Quick Overview
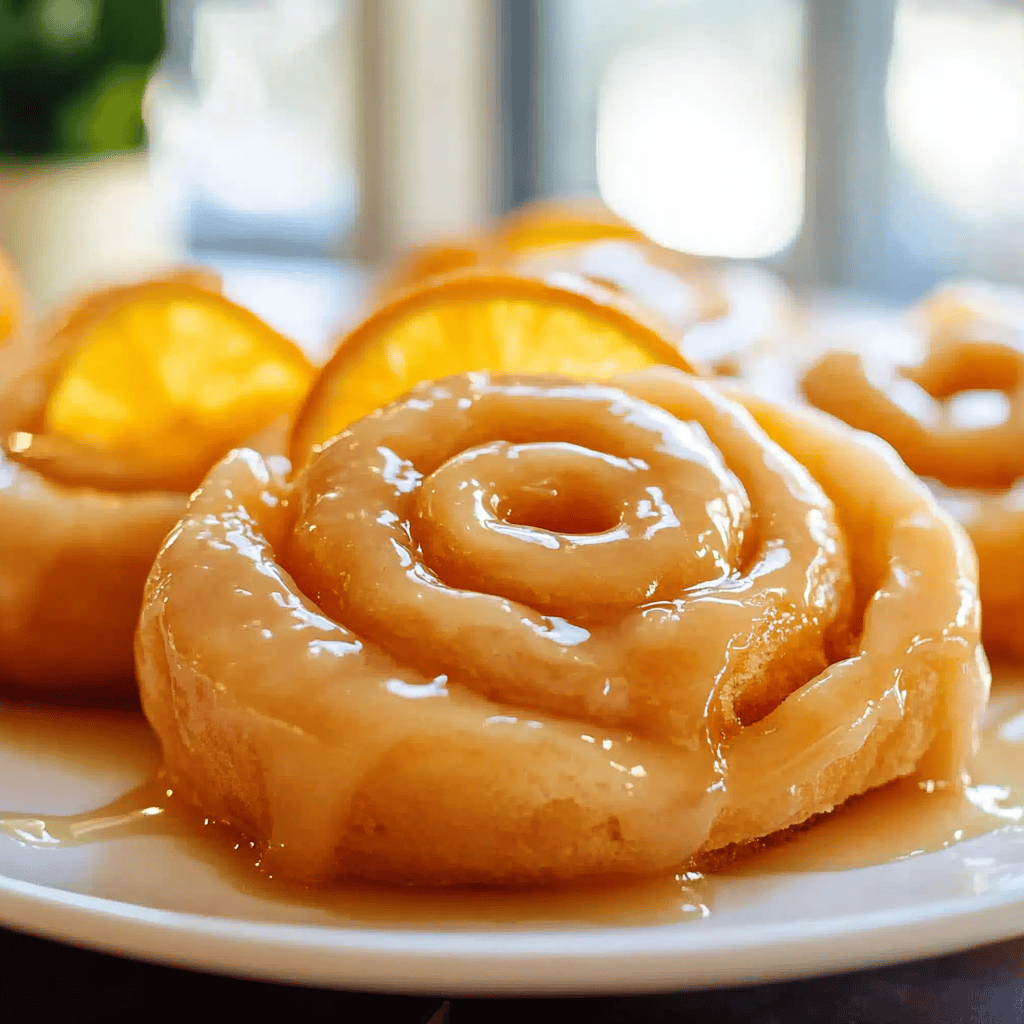
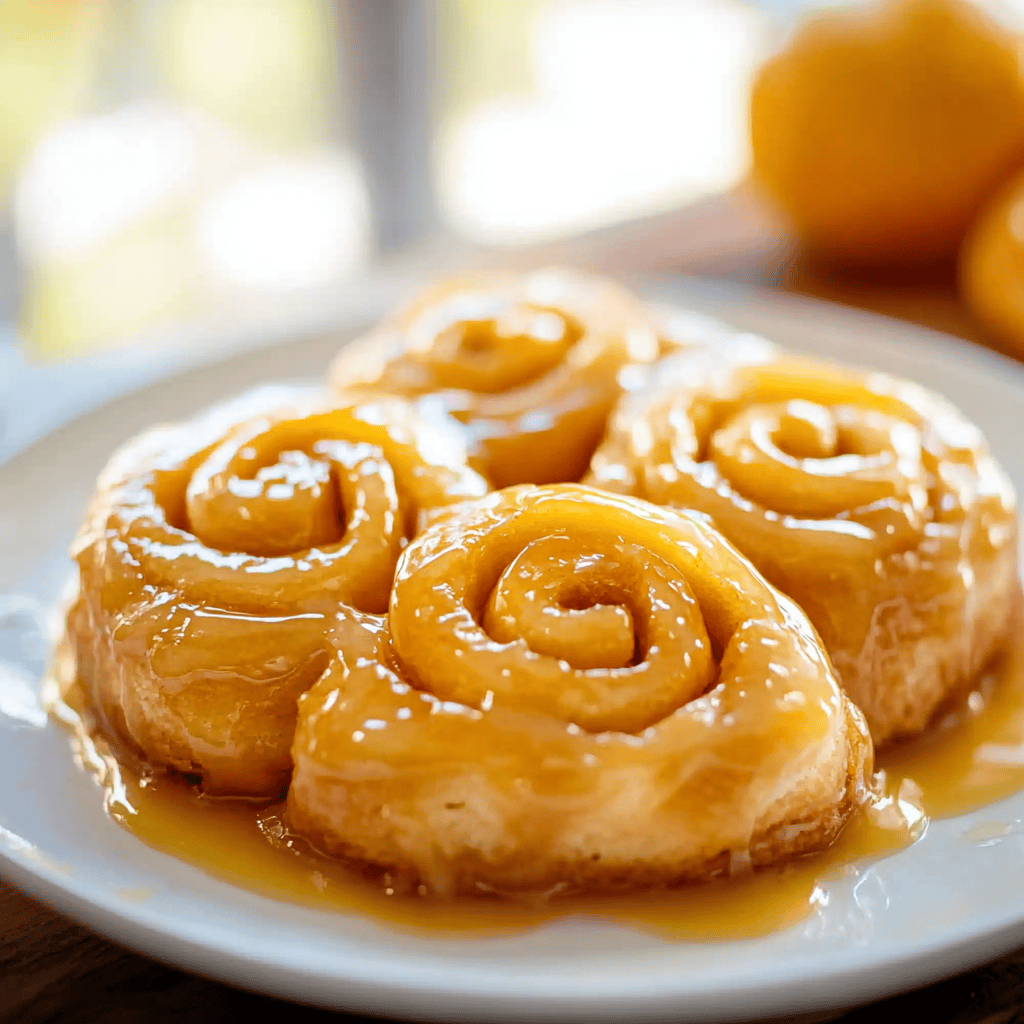
Homemade glazed orange rolls are a delightful treat that can brighten up your morning routine. Soft and fluffy with a sweet glaze, these rolls are perfect for breakfast or brunch. Imagine the aroma of freshly baked orange rolls wafting through your kitchen. This recipe is simple enough for beginners yet impressive enough to serve at gatherings. With just a few ingredients and steps, you’ll create a delicious batch of homemade glazed orange rolls that everyone will love.
Ingredient Breakdown
Flour
For this recipe, you will need 4 cups of all-purpose flour. Flour acts as the primary structure for the rolls. It provides the necessary gluten to give the dough its elasticity and chewiness.
Sugar
You will need 1/2 cup of granulated sugar to add sweetness to your dough. Sugar not only enhances flavor but also helps activate yeast during the rising process, resulting in light and airy rolls.
Yeast
Using 2 teaspoons of active dry yeast is essential for making your dough rise. Yeast ferments the sugars and produces carbon dioxide, which causes the dough to expand and become fluffy.
Milk
Add 1 cup of warm milk (about 110°F) to hydrate the yeast and provide moisture to the dough. Warm milk helps activate the yeast effectively while contributing richness to the final product.
Butter
Use 1/3 cup of unsalted butter melted for flavor and tenderness in your rolls. Butter adds richness and keeps your baked goods moist while enhancing their overall taste.
Eggs
Incorporate 2 large eggs into your dough mixture. Eggs provide structure and stability while adding moisture and richness to your homemade glazed orange rolls.
Orange Zest
Zest from one large orange (about 1 tablespoon) brings a bright citrus flavor to your rolls. The zest enhances aroma and taste without adding extra liquid to the dough.
Powdered Sugar
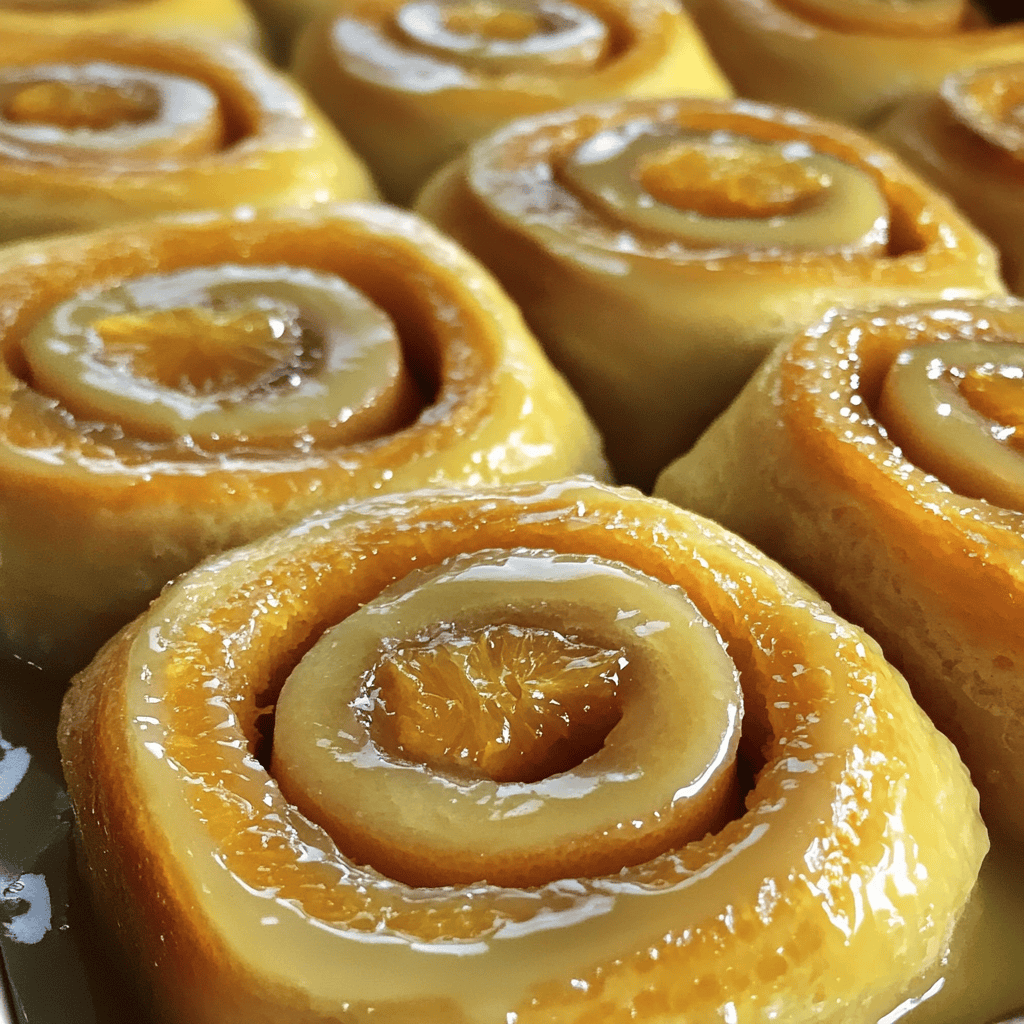
For glazing, you’ll need 1 cup of powdered sugar mixed with fresh orange juice for sweetness and a smooth texture. This glaze gives your rolls a delightful finish that complements their flavors perfectly.
Step By Step Recipe: Homemade Glazed Orange Rolls
Prepare the Dough
In a large mixing bowl, combine 4 cups of flour with 1/2 cup of sugar and 2 teaspoons of active dry yeast. Mix well before creating a well in the center. Pour in 1 cup of warm milk followed by melted butter and two beaten eggs. Stir until combined; then knead on a floured surface for about 8 minutes until smooth.
Let It Rise
Place the kneaded dough in a greased bowl, cover it with a clean cloth, and let it rise in a warm area for about an hour or until doubled in size. This step is crucial as it allows yeast time to work its magic, creating light and fluffy rolls.
Roll Out the Dough
Once risen, punch down the dough gently to release air bubbles before transferring it onto a floured surface again. Roll out into a rectangle approximately 12×18 inches thick about 1/2 inch. The even thickness ensures uniform baking throughout each roll.
Add Filling
Spread melted butter over rolled-out dough evenly using a spatula or brush; then sprinkle on one tablespoon of orange zest along with any additional sugar desired (about 1/4 cup). This filling will add sweetness along with vibrant flavor throughout each roll when baked.
Cut Into Rolls
Using a sharp knife or pizza cutter, slice rolled dough into equal pieces (about 12-15). Each piece should be roughly two inches wide so they bake evenly; place them snugly in greased baking dish after cutting.
Second Rise
Cover cut rolls loosely with plastic wrap or cloth again; allow them to rise in warm location for another half hour until they double again in size once more—this results in wonderfully soft texture!
Bake The Rolls
Preheat oven to 350°F (175°C). Bake risen rolls for about 20-25 minutes until golden brown on top. Keep an eye on them near end so they do not over-bake; adjust timing accordingly based on oven’s performance.
Prepare The Glaze
While waiting for your glorious buns finish baking whisk together one cup powdered sugar with two tablespoons fresh orange juice until smooth consistency forms—adjust sweetness by adding more juice if preferred!
Glaze The Rolls
As soon as baked orange rolls come out from oven drench generously using prepared glaze while still warm! This step creates that irresistible shine atop each roll making them even more tempting!

Serving and Storing Tips
Serving Suggestions
Serve these delicious homemade glazed orange rolls warm straight from the oven or at room temperature alongside coffee or tea during breakfast or brunch gatherings. They pair beautifully with fresh fruit or yogurt as well!
Storing Leftovers
If you have any leftover baked goods store them tightly wrapped at room temperature for up three days; however refrigerating can extend freshness but may alter texture slightly causing dryness over time—consider reheating briefly before enjoying again!
Enjoy making this delightful treat as part of your culinary repertoire! Your family will surely appreciate these easy-to-make homemade glazed orange rolls any morning!
Mistakes to avoid
One common mistake when making Homemade Glazed Orange Rolls is not allowing the dough to rise properly. Rising is crucial for achieving a light and fluffy texture. Always make sure your dough doubles in size during the first rise.
Another mistake is using fresh orange juice that isn’t strained. Pulp can interfere with the glaze and texture. Always strain your juice to ensure a smooth, flavorful glaze that perfectly complements your rolls.
Some bakers overlook the importance of measuring ingredients accurately. Baking requires precision, so use measuring cups for dry ingredients and liquid measuring cups for wet ones, ensuring your rolls turn out consistently delicious.
Failing to preheat your oven can lead to uneven baking. Ensure your oven reaches the correct temperature before placing your rolls in it. This helps achieve that golden-brown finish while keeping the inside soft and warm.
Lastly, don’t skip the glaze! The keyto Homemade Glazed Orange Rolls lies in the sweet citrus topping. Apply it generously after baking for added flavor and visual appeal, making your rolls irresistible.
Tips and tricks
To master Homemade Glazed Orange Rolls, start with high-quality ingredients. Fresh oranges give your glaze a vibrant flavor that surpasses store-bought options. Use organic oranges if available, as they typically have better taste profiles without pesticides.
Pay attention to dough resting times. After kneading, let the dough rest for about 10 minutes before shaping it into rolls. This allows gluten to relax, making it easier to shape and leading to softer rolls once baked.
When rolling out the dough, ensure you dust your work surface with flour to prevent sticking. However, avoid over-flouring as this can make your rolls dry and dense. Use just enough flour for a smooth surface while maintaining moisture in the dough.
Experiment with fillings for customization! While citrus is traditional, consider adding chocolate chips or nuts for variation. These additions can enhance flavor while still keeping the essence of Homemade Glazed Orange Rolls intact.
Lastly, keep an eye on baking time as ovens vary in temperature accuracy. Start checking your rolls around 20 minutes of baking time to ensure they don’t overbake or burn. Perfectly baked rolls should be golden brown and spring back when lightly pressed.
Suggestions for Homemade Glazed Orange Rolls
For an extra touch of flavor in Homemade Glazed Orange Rolls, consider adding zest from the oranges into both the dough and glaze. This enhances the citrus notes significantly and adds depth to each bite.
If you want a more decadent experience, try incorporating cream cheese into your filling mixture along with the orange zest. The creamy texture pairs beautifully with the sweetness of the glaze while providing a delightful contrast in flavors.
Consider serving these rolls warm straight from the oven alongside a cup of coffee or tea for breakfast or brunch gatherings. They are perfect for sharing with family or friends during special occasions or cozy weekend mornings.
You could also prepare these rolls ahead of time by freezing unbaked rolls after shaping them. When you’re ready to enjoy, simply thaw them overnight in the refrigerator and bake them fresh in the morning for warm delights without much hassle.
Lastly, garnishing with thin slices of candied orange peel can add an attractive presentation while enhancing citrus flavor on top of your freshly glazed rolls.
FAQs
What makes Homemade Glazed Orange Rolls different from regular cinnamon rolls?
Homemade Glazed Orange Rolls differ mainly due to their citrus flavor profile instead of cinnamon spice. The sweet orange glaze provides a zesty twist that brightens each bite compared to traditional cinnamon-enhanced versions.
Can I make Homemade Glazed Orange Rolls ahead of time?
Yes! You can prepare these rolls ahead by freezing unbaked ones after shaping but before proofing them. Simply thaw overnight in the fridge before baking them fresh when you want them!
How do I store leftover orange rolls?
Store any leftover Homemade Glazed Orange Rolls in an airtight container at room temperature for up to two days or refrigerate them for up to five days if you prefer longer storage options.
Can I substitute other fruits in this recipe?
Absolutely! While oranges create a delicious base flavor, you can substitute other fruits like lemons or even berries if desired—just remember that different fruits may require adjustments in sweetness levels within glazes!
What type of flour works best for these rolls?
All-purpose flour works great when making Homemade Glazed Orange Rolls since it provides enough structure without being too heavy; however, feel free to mix whole wheat flour into half portions if seeking added nutrition!
How long should I let my dough rise?
Letting your dough rise until it doubles in size usually takes about one hour but varies depending on room temperature conditions; always check visually rather than solely relying on time guidelines!
Summary
Homemade Glazed Orange Rolls are a delightful treat that brings brightness to any occasion with their sweet citrus flavor and soft texture. Avoid common mistakes like improper rising and inaccurate measurements by following our tips closely for success every time! Experimenting with fillings and garnishes adds personalization while preparing ahead saves you time during busy mornings or gatherings! Enjoy these warm pastries fresh from your oven paired perfectly alongside coffee or tea; they always make moments memorable.