
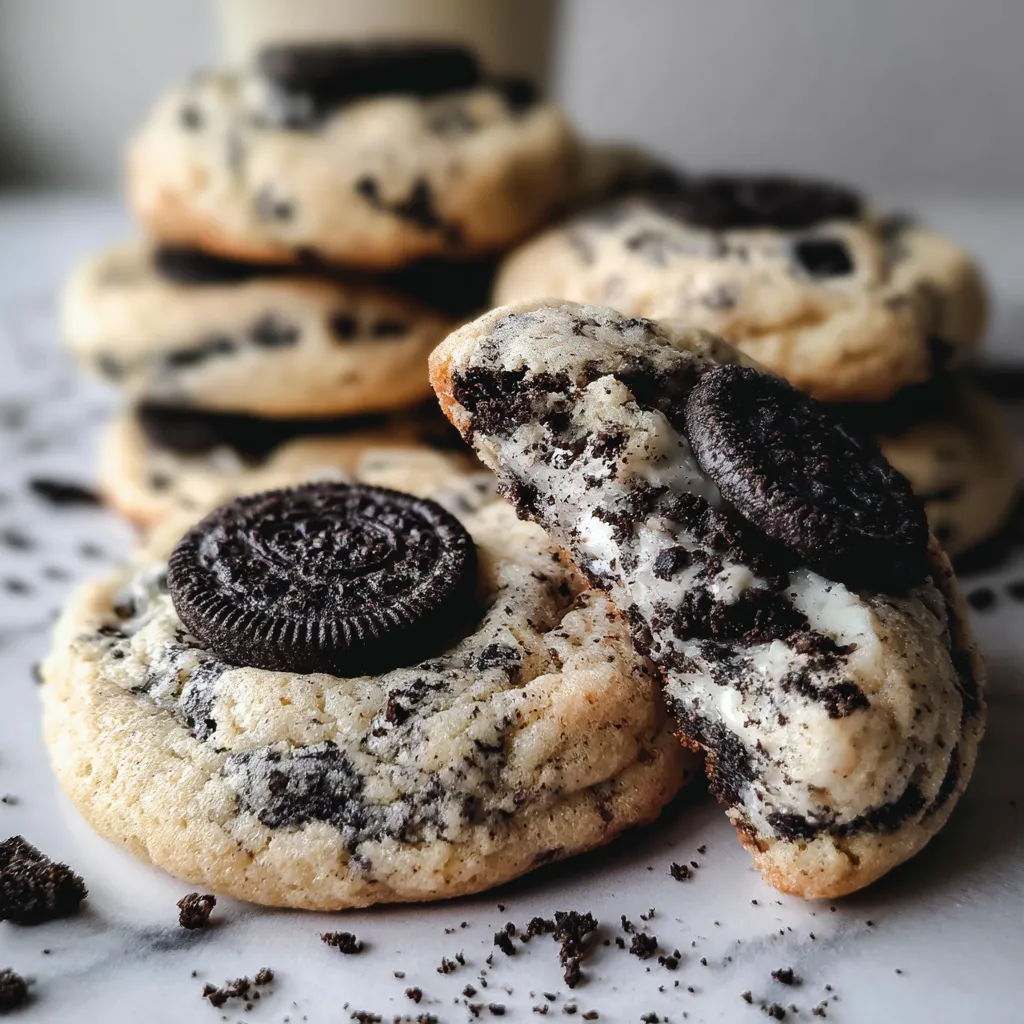
Okay, so imagine if a soft sugar cookie and an Oreo had a baby, then invited more Oreos to the party, and everyone decided to get covered in cookie crumbs and look absolutely stunning. That’s what we’re dealing with here. Cookies and Cream Cookies are basically soft, chewy sugar cookies loaded with crushed Oreos, studded with Oreo pieces throughout, and topped with a whole Oreo cookie on top like a crown. You get that sweet vanilla cookie base speckled with dark Oreo crumbs, chunks of chocolate cookie and cream filling in every bite, and that iconic cookies-and-cream flavor that’s been winning hearts since childhood. They’re soft, they’re pretty, they’re covered in Oreo debris like they just survived a delicious explosion. I made these for a bake sale once and they sold out in fifteen minutes. Someone asked if I had a secret bakery. Another person bought six and ate three before leaving the parking lot. These cookies inspire rapid sell-outs and public snacking without shame.
Why You’ll Love This Recipe
Oreo overload. Oreos in the dough, Oreos on top, Oreo crumbs everywhere. This is peak Oreo dedication.
Soft and chewy. Not crunchy, not cakey—perfectly soft with slight chew. Texture heaven.
Visually stunning. That whole Oreo on top and the speckled appearance make these look professional.
Easy as hell. If you can make basic cookies, you can make these. No special skills required.
Crowd destroyer. Kids love them, adults love them, Oreo haters don’t exist so everyone’s happy.
Customizable. Want to use different Oreo flavors? Golden Oreos? Birthday cake Oreos? Go wild.
The Good Stuff You’ll Need
For the Cookie Dough:
- 1/2 cup (1 stick) unsalted butter, softened to room temp
- 1/2 cup granulated sugar
- 1/4 cup packed light brown sugar
- 1 large egg, room temperature
- 1 tsp vanilla extract
- 1.5 cups all-purpose flour
- 1/2 tsp baking soda
- 1/4 tsp baking powder
- 1/2 tsp salt
- 1.5 cups coarsely chopped Oreos (about 15 cookies)
- 1/2 cup finely crushed Oreos (about 5-6 cookies, for rolling)
For Topping:
- 12-15 whole Oreo cookies (one per cookie)
- Extra Oreo crumbs for sprinkling
Optional Add-Ins:
- 1/2 cup white chocolate chips
- 1/2 cup mini chocolate chips
- Cream cheese frosting drizzle
- Vanilla glaze
- Sea salt flakes
Equipment:
- Stand mixer or hand mixer
- Two mixing bowls
- Cookie scoop (2 tablespoon size)
- Baking sheets
- Parchment paper or silicone baking mats
- Sharp knife or food processor for crushing Oreos
- Wire cooling rack
- Shallow bowl for Oreo crumbs
Let’s Do This
Step 1: Prep Your Oreos
This is important—you need Oreos in different textures for maximum impact.
Coarsely chopped Oreos (for the dough): Roughly chop about 15 Oreos into chunks. Think quarter-sized pieces. You want visible chunks, not dust.
Finely crushed Oreos (for rolling): Put 5-6 Oreos in a food processor and pulse until they’re fine crumbs. Or put them in a zip-top bag and crush with a rolling pin. These should be almost powder-like.
Place the finely crushed Oreos in a shallow bowl—you’ll roll the dough balls in this.
Set aside your whole Oreos for topping.
Keep some extra crumbs for sprinkling at the end.
Step 2: Make the Cookie Dough
In a large bowl (or stand mixer), beat the softened butter, granulated sugar, and brown sugar on medium-high speed for 2-3 minutes until light and fluffy.
Scrape down the sides of the bowl.
Add the egg and vanilla extract. Beat for another minute until well combined and smooth.
In a separate bowl, whisk together flour, baking soda, baking powder, and salt.
Add the dry ingredients to the wet ingredients and mix on low speed until just combined. Don’t overmix or your cookies will be tough.
Fold in the coarsely chopped Oreos with a spatula. Mix until they’re evenly distributed throughout the dough.
The dough will be thick, soft, and speckled with dark Oreo pieces. It should look like cookies-and-cream ice cream in cookie form.
Step 3: Chill the Dough
Cover the bowl with plastic wrap and refrigerate for at least 30 minutes, up to 2 hours.
Chilling helps the cookies hold their shape and prevents excessive spreading.
If you’re in a rush, 30 minutes works. If you have time, an hour is ideal.
Don’t skip this step—warm dough makes flat, greasy cookies.
Step 4: Prep for Baking
Preheat your oven to 350°F (175°C).
Line two baking sheets with parchment paper or silicone baking mats.
Get your bowl of finely crushed Oreos ready.
Have your whole Oreos nearby for topping.
Make sure the dough is cold but scoopable. If it got too hard in the fridge, let it sit at room temp for 5-10 minutes.
Step 5: Shape and Roll the Cookies
Use a cookie scoop (2 tablespoon size) to portion out the dough.
Roll each portion into a ball between your palms.
Roll the dough ball in the finely crushed Oreos, coating it completely. This creates that gorgeous speckled exterior.
Press the crumbs in gently so they stick.
Place the coated dough balls on the prepared baking sheets about 2-3 inches apart. They spread a bit, so give them room.
Step 6: Add the Oreo Crown
Gently press a whole Oreo cookie on top of each dough ball.
Press it in slightly so it sticks, but don’t flatten the dough ball completely—you want height.
The Oreo should sit on top like a little hat.
Optional: Press a few extra Oreo crumbs around the base of the whole Oreo for extra texture and visual appeal.
Step 7: Bake to Perfection
Bake for 11-13 minutes. The edges should look set and slightly golden, but the centers should still look soft and pale.
DO NOT OVERBAKE. These cookies continue baking on the sheet after you pull them out.
They should look slightly underdone when you remove them. Trust the process.
Let them cool on the baking sheet for 10 minutes. They’re very soft when hot and will break if moved too soon.
After 10 minutes, transfer to a wire rack to cool completely.
Step 8: Finishing Touches
Once cooled (or still slightly warm if you’re impatient), sprinkle extra Oreo crumbs over the top for that “just made in a fancy bakery” look.
Optional: Drizzle with vanilla glaze or cream cheese frosting for extra indulgence.
Serve with cold milk for the full cookies-and-cream experience.
Try to save some for other people. This is nearly impossible.
Serving Suggestions
These are basically perfect as-is, but here are some ideas:
- Serve with a glass of cold milk (the only correct beverage pairing)
- Make ice cream sandwiches with vanilla or cookies-and-cream ice cream
- Crumble over vanilla ice cream or milkshakes
- Package individually in clear bags tied with ribbon for gifts
- Serve on a dessert board with other cookie varieties
- Warm slightly and serve with vanilla ice cream on the side
- Stack them dramatically for photos because they’re gorgeous
Switch It Up
Golden Oreo Version: Use Golden Oreos instead of regular for a vanilla-on-vanilla experience.
Double Stuffed: Use Double Stuf Oreos for extra cream filling in every bite.
Birthday Cake: Use Birthday Cake Oreos and add rainbow sprinkles to the dough.
Mint Chocolate: Use Mint Oreos and add 1/2 tsp peppermint extract to the dough.
Peanut Butter: Use Peanut Butter Oreos and add 1/4 cup peanut butter to the dough.
Red Velvet: Use Red Velvet Oreos and add a cream cheese frosting drizzle.
S’mores: Add mini marshmallows and chocolate chips to the dough along with the Oreos.
Brownie Batter: Add 2 tbsp cocoa powder to the dough for chocolate cookies with Oreos.
Stuffed Oreo Cookies: Press an Oreo into the center of each dough ball before baking for an Oreo core.
Storage and Make-Ahead Tips
These store beautifully and stay soft for days.
Room temperature: Store in an airtight container for up to 5 days. They stay soft and chewy the entire time.
Keep them soft: Add a slice of bread to the container. It keeps cookies from drying out by releasing moisture slowly.
Refrigerate: Not necessary, but the fridge keeps them extra chewy if that’s your thing. Bring to room temp before eating.
Freeze baked cookies: Cool completely, layer with parchment in an airtight container, freeze up to 3 months. Thaw at room temperature.
Freeze the dough: Scoop, roll in crumbs, add the Oreo top, then freeze on a baking sheet. Transfer to freezer bags for up to 3 months. Bake from frozen, adding 1-2 extra minutes.
Make dough ahead: Refrigerate dough for up to 3 days before baking. Let it come to room temp slightly before scooping.
Refresh if needed: Microwave for 8-10 seconds to bring back that fresh-baked softness.
Why This Works So Damn Well
The combination of butter and both white and brown sugar creates the perfect chewy texture. Brown sugar adds moisture and chewiness through its molasses content, while granulated sugar provides structure and spread.
Room temperature ingredients are crucial. Cold eggs and butter don’t incorporate well, which leads to dense, tough cookies. Everything should be at room temp for smooth mixing.
Chopping Oreos coarsely means you get big, visible chunks in every bite. If you crush them too fine, they just blend into the dough and you lose that textural contrast.
Rolling in Oreo crumbs creates a beautiful speckled exterior and adds extra cookies-and-cream flavor. It also adds slight texture to the outside while the inside stays soft.
Chilling the dough prevents excessive spreading and allows the flour to fully hydrate. This creates thicker cookies with better texture.
The whole Oreo on top isn’t just decoration—it bakes into the cookie slightly, becoming part of the structure. Plus it looks incredible.
Underbaking slightly is the secret to soft cookies. They firm up as they cool, so pulling them out when they look slightly underdone ensures perfect chewiness.
Cooling on the pan lets them finish baking from residual heat without getting hard. Moving them too early causes breakage.
When to Make These
Cookie Swaps: Bring these and win. Everyone else brought basic chocolate chip. You brought cookie inception.
Birthday Parties: Kids lose their minds for these. Adults do too but hide it better.
Bake Sales: These sell for premium prices because they look expensive.
Movie Night: Make a batch, grab some milk, settle in for a cozy evening.
After School Snacks: Kids will remember you as the cool parent/aunt/grandparent/neighbor.
Random Tuesday: You don’t need a reason. Make cookies whenever you want.
Questions People Actually Ask
Q: Can I use a different cookie instead of Oreos? A: You can try, but Oreos are kind of the point here. Other sandwich cookies work but won’t taste the same.
Q: My cookies spread too much. What happened? A: Your dough wasn’t chilled long enough, or your butter was too warm when you mixed it. Always chill for at least 30 minutes.
Q: The Oreo on top fell off. Help! A: Press it into the dough ball firmly before baking. It should stick as the cookie bakes around it.
Q: Can I skip rolling in the Oreo crumbs? A: You can, but you’ll lose that signature speckled look. It’s part of what makes these special.
Q: My cookies are hard, not soft. What did I do wrong? A: You overbaked them. Pull them out when the centers still look slightly underdone. They’ll firm up as they cool.
Q: Can I make these gluten-free? A: Use a 1:1 gluten-free flour blend and gluten-free Oreos (they exist!). The texture will be slightly different but still good.
Q: The cookies are too sweet. How do I fix that? A: Reduce the granulated sugar to 1/3 cup, or sprinkle with flaky sea salt before baking to balance the sweetness.
Q: Can I use Oreo Thins? A: Sure, but you might need more of them since they’re smaller. Regular Oreos work best though.
Q: How do I keep the white cream filling from melting everywhere? A: It’s going to melt a bit—that’s part of the charm. Just embrace the delicious mess.
Print
Cookies and Cream Cookies
- Total Time: 1 hour
- Yield: 12–15 large cookies 1x
Description
Okay, so imagine if a soft sugar cookie and an Oreo had a baby, then invited more Oreos to the party, and everyone decided to get covered in cookie crumbs and look absolutely stunning. That’s what we’re dealing with here. Cookies and Cream Cookies are basically soft, chewy sugar cookies loaded with crushed Oreos, studded with Oreo pieces throughout, and topped with a whole Oreo cookie on top like a crown. You get that sweet vanilla cookie base speckled with dark Oreo crumbs, chunks of chocolate cookie and cream filling in every bite, and that iconic cookies-and-cream flavor that’s been winning hearts since childhood. They’re soft, they’re pretty, they’re covered in Oreo debris like they just survived a delicious explosion. I made these for a bake sale once and they sold out in fifteen minutes. Someone asked if I had a secret bakery. Another person bought six and ate three before leaving the parking lot. These cookies inspire rapid sell-outs and public snacking without shame.
Ingredients
For the Cookie Dough:
- 1/2 cup (1 stick) unsalted butter, softened to room temp
- 1/2 cup granulated sugar
- 1/4 cup packed light brown sugar
- 1 large egg, room temperature
- 1 tsp vanilla extract
- 1.5 cups all-purpose flour
- 1/2 tsp baking soda
- 1/4 tsp baking powder
- 1/2 tsp salt
- 1.5 cups coarsely chopped Oreos (about 15 cookies)
- 1/2 cup finely crushed Oreos (about 5–6 cookies, for rolling)
For Topping:
- 12–15 whole Oreo cookies (one per cookie)
- Extra Oreo crumbs for sprinkling
Optional Add-Ins:
- 1/2 cup white chocolate chips
- 1/2 cup mini chocolate chips
- Cream cheese frosting drizzle
- Vanilla glaze
- Sea salt flakes
Equipment:
- Stand mixer or hand mixer
- Two mixing bowls
- Cookie scoop (2 tablespoon size)
- Baking sheets
- Parchment paper or silicone baking mats
- Sharp knife or food processor for crushing Oreos
- Wire cooling rack
- Shallow bowl for Oreo crumbs
Instructions
This is important—you need Oreos in different textures for maximum impact.
Coarsely chopped Oreos (for the dough): Roughly chop about 15 Oreos into chunks. Think quarter-sized pieces. You want visible chunks, not dust.
Finely crushed Oreos (for rolling): Put 5-6 Oreos in a food processor and pulse until they’re fine crumbs. Or put them in a zip-top bag and crush with a rolling pin. These should be almost powder-like.
Place the finely crushed Oreos in a shallow bowl—you’ll roll the dough balls in this.
Set aside your whole Oreos for topping.
Keep some extra crumbs for sprinkling at the end.
In a large bowl (or stand mixer), beat the softened butter, granulated sugar, and brown sugar on medium-high speed for 2-3 minutes until light and fluffy.
Scrape down the sides of the bowl.
Add the egg and vanilla extract. Beat for another minute until well combined and smooth.
In a separate bowl, whisk together flour, baking soda, baking powder, and salt.
Add the dry ingredients to the wet ingredients and mix on low speed until just combined. Don’t overmix or your cookies will be tough.
Fold in the coarsely chopped Oreos with a spatula. Mix until they’re evenly distributed throughout the dough.
The dough will be thick, soft, and speckled with dark Oreo pieces. It should look like cookies-and-cream ice cream in cookie form.
Cover the bowl with plastic wrap and refrigerate for at least 30 minutes, up to 2 hours.
Chilling helps the cookies hold their shape and prevents excessive spreading.
If you’re in a rush, 30 minutes works. If you have time, an hour is ideal.
Don’t skip this step—warm dough makes flat, greasy cookies.
Preheat your oven to 350°F (175°C).
Line two baking sheets with parchment paper or silicone baking mats.
Get your bowl of finely crushed Oreos ready.
Have your whole Oreos nearby for topping.
Make sure the dough is cold but scoopable. If it got too hard in the fridge, let it sit at room temp for 5-10 minutes.
Use a cookie scoop (2 tablespoon size) to portion out the dough.
Roll each portion into a ball between your palms.
Roll the dough ball in the finely crushed Oreos, coating it completely. This creates that gorgeous speckled exterior.
Press the crumbs in gently so they stick.
Place the coated dough balls on the prepared baking sheets about 2-3 inches apart. They spread a bit, so give them room.
Gently press a whole Oreo cookie on top of each dough ball.
Press it in slightly so it sticks, but don’t flatten the dough ball completely—you want height.
The Oreo should sit on top like a little hat.
Optional: Press a few extra Oreo crumbs around the base of the whole Oreo for extra texture and visual appeal.
Bake for 11-13 minutes. The edges should look set and slightly golden, but the centers should still look soft and pale.
DO NOT OVERBAKE. These cookies continue baking on the sheet after you pull them out.
They should look slightly underdone when you remove them. Trust the process.
Let them cool on the baking sheet for 10 minutes. They’re very soft when hot and will break if moved too soon.
After 10 minutes, transfer to a wire rack to cool completely.
Once cooled (or still slightly warm if you’re impatient), sprinkle extra Oreo crumbs over the top for that “just made in a fancy bakery” look.
Optional: Drizzle with vanilla glaze or cream cheese frosting for extra indulgence.
Serve with cold milk for the full cookies-and-cream experience.
Try to save some for other people. This is nearly impossible.
Notes
These are basically perfect as-is, but here are some ideas:
- Serve with a glass of cold milk (the only correct beverage pairing)
- Make ice cream sandwiches with vanilla or cookies-and-cream ice cream
- Crumble over vanilla ice cream or milkshakes
- Package individually in clear bags tied with ribbon for gifts
- Serve on a dessert board with other cookie varieties
- Warm slightly and serve with vanilla ice cream on the side
- Stack them dramatically for photos because they’re gorgeous
- Prep Time: 20 minutes
- Cook Time: 12 minutes per batch
Nutrition
- Calories: ~220 kcal
- Sugar: ~18g
- Sodium: ~180mg
- Fat: ~10g
- Carbohydrates: ~32g
- Protein: ~3g


