Description
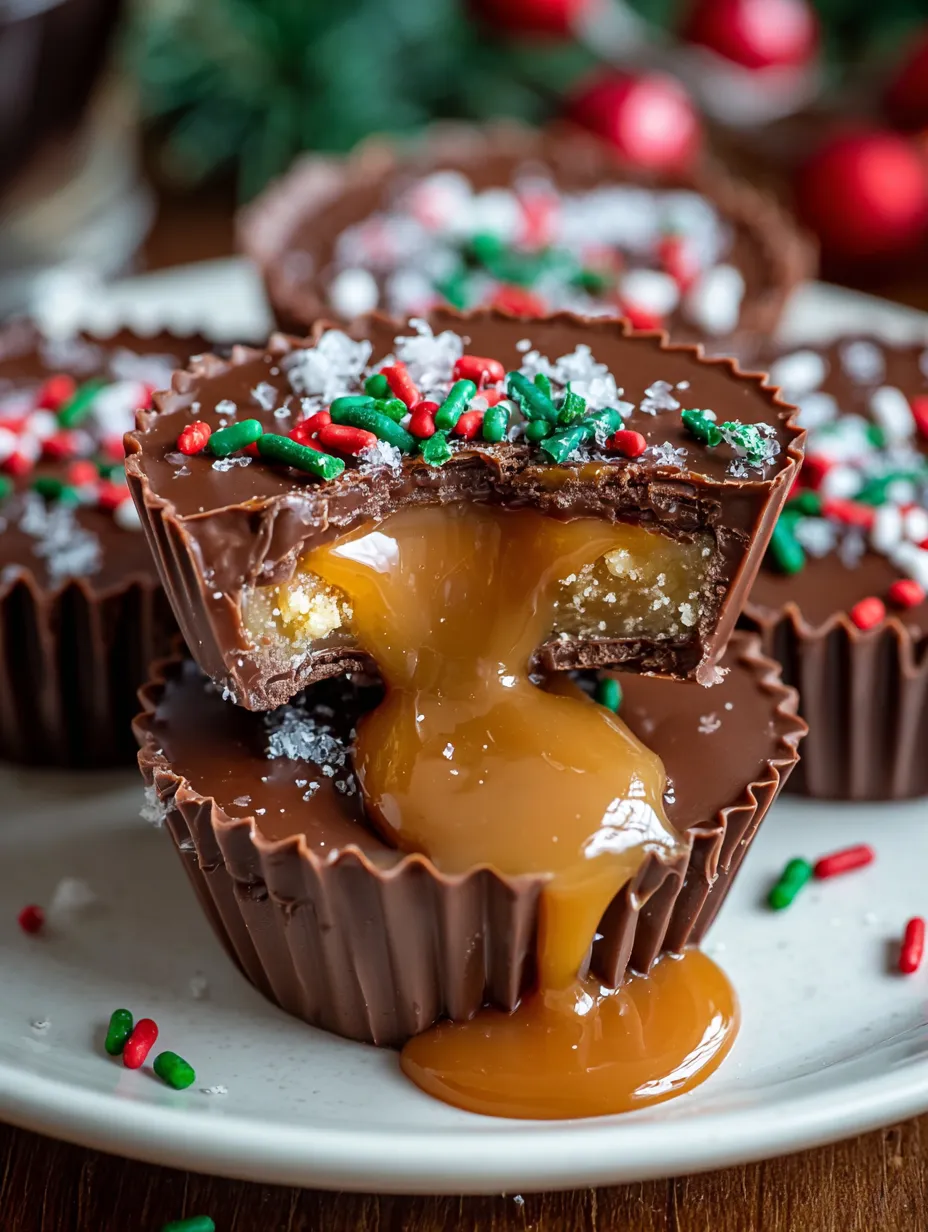
Okay, so imagine if a Reese’s peanut butter cup and a Rolo had a baby during the most magical Christmas party ever, and that baby decided to be filled with gooey caramel and topped with festive sprinkles and M&Ms. That’s what we’re dealing with here. Christmas Chocolate Caramel Cups are basically homemade chocolate cups filled with silky caramel, then decorated with holiday M&Ms, sprinkles, and sometimes a snowflake on top because we’re extra like that. They’re like store-bought candy but a thousand times better because you made them, they’re fresh, and you can control exactly how much caramel goes in (spoiler: it’s a LOT). I made these for a Christmas party once and someone literally gasped when they bit into one and the caramel oozed out. Another person asked if I was secretly running a chocolate shop. Reader, I made these in my kitchen while listening to Mariah Carey’s “All I Want for Christmas.” These cups create holiday magic and caramel-induced joy.
Ingredients
For the Chocolate Cups:
- 16 oz (about 2 2/3 cups) milk chocolate chips or chopped chocolate
- 1 tbsp coconut oil or shortening (makes the chocolate smooth and shiny)
- OR use dark chocolate, semi-sweet, or even white chocolate
For the Caramel Filling:
- 20–25 soft caramels, unwrapped (like Kraft caramels)
- 2 tbsp heavy cream
- Pinch of sea salt
- OR 1 cup homemade caramel if you’re feeling ambitious
- OR 1 cup store-bought caramel sauce, slightly thickened
For Topping:
- Holiday M&Ms (red and green)
- Christmas sprinkles
- Crushed candy canes (optional)
- White chocolate for drizzle (optional)
- Edible snowflakes (optional but adorable)
- Flaky sea salt (optional but highly recommended)
Equipment:
- Mini muffin tin
- Mini cupcake liners (or silicone molds)
- Small spoon or pastry brush for chocolate
Instructions
Step 1: Prep Your Station
Line a mini muffin tin with mini cupcake liners. You should get about 24 cups.
Unwrap all your caramels if using store-bought. This is tedious but necessary. Do it while binge-watching something.
Have your decorations ready and within reach. Once you start assembling, you’ll want to move quickly.
Step 2: Melt the Chocolate
Melt chocolate chips with coconut oil in a double boiler or microwave (30-second bursts, stirring between each) until smooth and completely melted.
Let it cool slightly—if it’s too hot, it’ll be too thin. You want it warm but starting to thicken slightly.
Step 3: Make the Chocolate Shells
Spoon about 1 tablespoon of melted chocolate into each cupcake liner.
Use the back of a small spoon or a pastry brush to spread the chocolate up the sides of the liner, creating a cup shape. Make sure there are no thin spots or gaps.
The chocolate layer should be thick enough to hold the caramel—aim for about 1/4 inch thick on the bottom and sides.
Place the muffin tin in the freezer for 10-15 minutes to set the chocolate completely.
Step 4: Make the Caramel Filling
In a microwave-safe bowl, combine unwrapped caramels and heavy cream.
Microwave in 30-second bursts, stirring between each, until the caramels are completely melted and smooth.
Stir in a pinch of sea salt. The mixture should be thick but pourable. If it’s too thin, let it cool a bit. If too thick, add a tiny splash more cream.
Let the caramel cool for about 5 minutes—you don’t want it hot when you add it to the chocolate cups or it’ll melt them.
Step 5: Fill and Seal
Remove the chocolate cups from the freezer. They should be completely solid.
Spoon about 1-2 teaspoons of caramel into each chocolate cup, leaving about 1/4 inch space at the top for the chocolate seal.
Don’t overfill or the caramel will overflow when you add the top layer.
Return to the freezer for 5 minutes to firm up the caramel slightly.
Step 6: Top and Decorate
Spoon more melted chocolate over each caramel-filled cup, spreading to the edges to completely seal the caramel inside.
Smooth the tops with the back of a spoon.
IMMEDIATELY (before the chocolate sets) add your decorations: press holiday M&Ms into the chocolate, sprinkle with Christmas sprinkles, add crushed candy canes, whatever your festive heart desires.
If adding sea salt, sprinkle it on now while the chocolate is still wet.
Place the muffin tin back in the fridge for at least 30 minutes to set completely.
Step 7: Optional Finishing Touches
Once the cups are set, you can drizzle with melted white chocolate for a snowy effect.
Add edible snowflakes or dust with powdered sugar for extra holiday vibes.
Carefully peel off the cupcake liners (or pop them out of silicone molds).
Store in the fridge until ready to serve or package.
Notes
These are basically perfect as-is, but here are some ideas:
- Serve on a festive platter with other holiday treats
- Package in clear boxes or bags tied with ribbon for gifts
- Serve alongside coffee or hot chocolate at holiday gatherings
- Arrange in a candy dish as part of your holiday decor (they’re too pretty not to display)
- Pair with champagne or dessert wine for adult gatherings
- Give as teacher gifts, neighbor gifts, or party favors
- Prep Time: 30 minutes
Nutrition
- Calories: ~145 kcal
- Fat: ~8g
- Carbohydrates: ~18g
- Protein: ~2g