
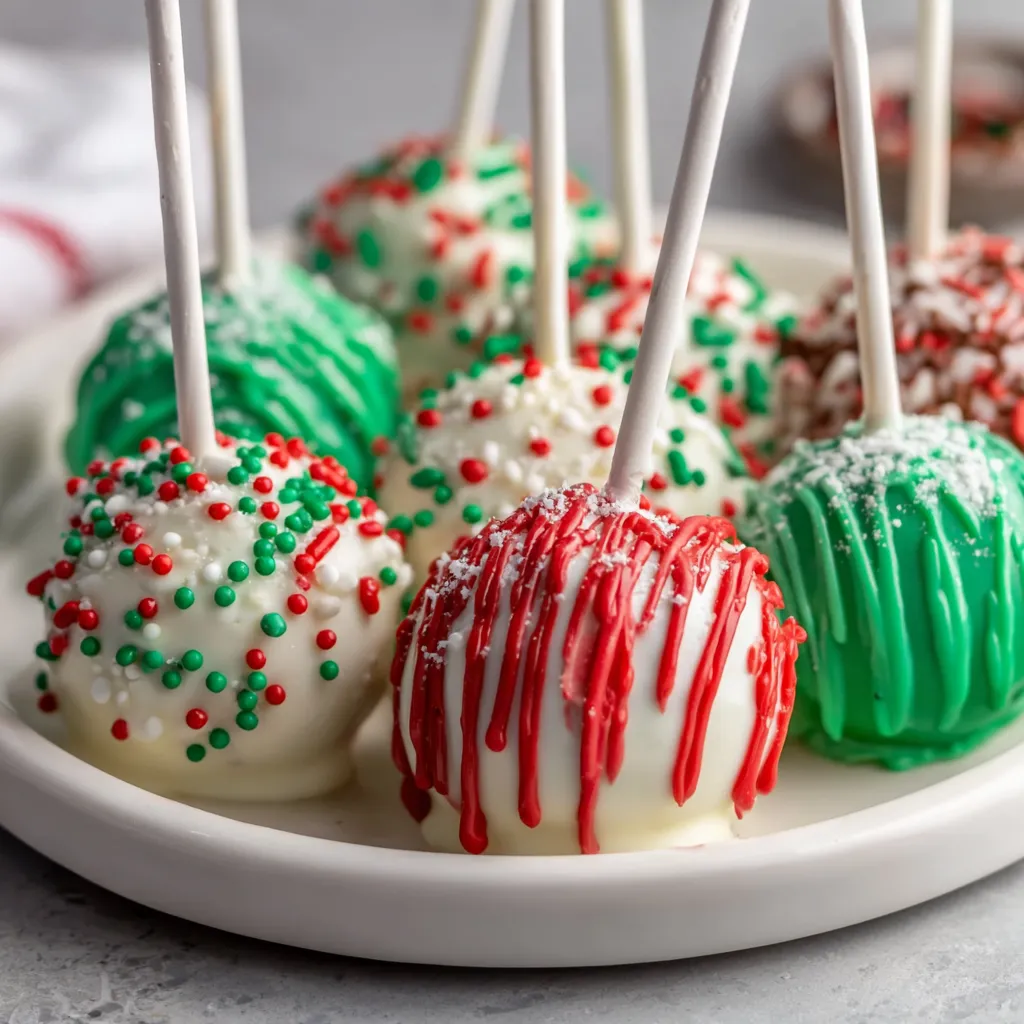
Someone figured out that if you crumble cake, mix it with frosting, roll it into balls, stick them on lollipop sticks, and dip them in melted chocolate, you create the most addictive dessert delivery system known to humanity. Then someone else added Christmas decorations and suddenly these became the centerpiece of every holiday party. These are moist cake balls coated in chocolate or white chocolate, decorated with sprinkles, drizzles, and festive designs that make people go “aww” before they devour them. It’s what happens when you combine the best parts of cake and candy into one portable, poppable, impossibly cute package.
This isn’t some complicated pastry technique that requires years of training. This is “bake cake, crumble it, mix with frosting, dip in chocolate, decorate” simplicity that somehow results in something that looks bakery-professional. The cake stays moist because of the frosting. The chocolate coating adds texture and richness. The decorations make them festive and fun. It’s everything good about cake but in a form that you can eat with one hand while holding a glass of eggnog in the other.
This is holiday dessert energy that’s actually manageable. It’s what happens when you want something impressive for your cookie exchange but don’t want to spend eight hours in the kitchen. It’s cake that became a lollipop and decided to dress up for Christmas.
Why These Christmas Cake Pops Are About to Dominate Your Holiday Baking
- Make-ahead miracle — Bake and assemble days before you need them
- Crowd-pleaser guarantee — Kids and adults both lose their minds over these
- No plates or forks needed — Portable, party-perfect dessert
- Customizable decorations — Make them as simple or elaborate as you want
- Great for gifting — Wrap individually, give as presents, become everyone’s favorite person
- Freezer-friendly — Make a huge batch, freeze extras for emergencies
The Stuff You Need
For the Cake Base:
- 1 box (15.25 oz) cake mix (vanilla, chocolate, or red velvet—any flavor works)
- Ingredients listed on box (usually eggs, oil, water)
- OR: 1 homemade 9×13 cake (any flavor)
For Assembly:
- 1 cup frosting (cream cheese, buttercream, or store-bought—match or complement your cake flavor)
- 40-50 lollipop sticks or paper straws
- 24 oz candy melts or chocolate (white, milk, dark, or a combination)
- 2 tablespoons coconut oil or vegetable shortening (helps thin the chocolate)
For Christmas Decorations:
- Red and green sprinkles
- Christmas-themed sprinkles (trees, snowflakes, ornaments)
- White chocolate for drizzling
- Red and green sanding sugar
- Mini chocolate chips for “eyes” on snowmen
- Pretzel sticks (for reindeer antlers or snowman arms)
- Candy canes, crushed
- Edible gold luster dust or gold sprinkles
- Red candy pearls or dragées
Optional But Festive:
- Food coloring for tinting white chocolate (red, green, gold)
- Edible markers for drawing faces or designs
- Royal icing for detailed decorations
- Mini M&Ms (great for ornament designs)
- Coarse sanding sugar for a sparkly look
- Mini marshmallows for snowman details
Special Equipment:
- 9×13 inch baking pan (for the cake)
- Large mixing bowl
- Cookie scoop or tablespoon (for portioning)
- Styrofoam block or cake pop stand (for drying)
- Microwave-safe bowls (for melting chocolate)
- Tall glasses or mugs (to hold melting chocolate for easy dipping)
- Parchment paper
- Patience and creativity
Let’s Make These Cake Pops That’ll Make You the Hero of Every Holiday Party
Step 1: The Cake Foundation
Bake your cake according to package or recipe directions in a 9×13 pan. Let it cool COMPLETELY. And I mean completely—like, room temperature cool. If you try to work with warm cake, it’ll turn into a mushy disaster. This is the perfect time to bake it the day before. Once cool, you can even refrigerate it to make it easier to work with.
Step 2: The Crumbling Process
Once the cake is completely cool, crumble it into a large bowl using your hands. Break it up into fine crumbs—no large chunks. This is therapeutic. Embrace the destruction. You want it to look like coarse breadcrumbs or sand. Get all the edges and corners. Every bit of cake should be crumbled.
Step 3: The Frosting Addition
Add frosting to the crumbled cake, starting with 1/2 cup. Using your hands (cleanest tool for this job), mix the frosting into the cake crumbs until the mixture holds together when squeezed. It should be like Play-Doh—moldable but not sticky or wet. If it’s too dry and crumbly, add more frosting one tablespoon at a time. If it’s too wet, add more cake crumbs or refrigerate for 15 minutes.
Step 4: The Rolling Process
Using a cookie scoop or tablespoon, portion out the cake mixture into equal amounts. Roll each portion between your palms into a smooth ball, about 1-1.5 inches in diameter. Place the balls on a parchment-lined baking sheet. Try to make them as uniform as possible—they look better and cook more evenly. This is assembly-line work. Put on a Christmas playlist. Get in the zone.
Step 5: The Chilling (Crucial Step)
Once all the balls are rolled, refrigerate them for at least 2 hours or freeze for 30 minutes. They need to be firm before dipping or they’ll fall apart in the chocolate. This is NOT optional. Cold, firm cake balls = success. Warm, soft cake balls = disaster. Use this time to prepare your decorations and chocolate.
Step 6: The Chocolate Melting
Melt your candy melts or chocolate in a microwave-safe bowl in 30-second intervals, stirring between each, until smooth and completely melted. Add 1-2 tablespoons of coconut oil or shortening to thin it out—this makes dipping easier and creates a smoother coating. The chocolate should be the consistency of heavy cream. If you’re using multiple colors, melt them in separate bowls.
Step 7: The Stick Insertion
Dip the tip of a lollipop stick about 1/2 inch into the melted chocolate, then insert it into a cake ball, pushing it about halfway through. The chocolate acts as glue and prevents the ball from sliding off the stick later. Repeat with all the balls. Return them to the fridge or freezer for 10 minutes to let the chocolate-stick connection set.
Step 8: The Dipping Process
Remove a few cake pops from the fridge at a time—working with cold pops is key. Hold a cake pop by the stick and dip it into the melted chocolate, submerging it completely. Lift it out and let excess chocolate drip back into the bowl. Gently rotate or tap the stick against the edge of the bowl to remove more excess chocolate. Don’t shake it or the ball might fly off.
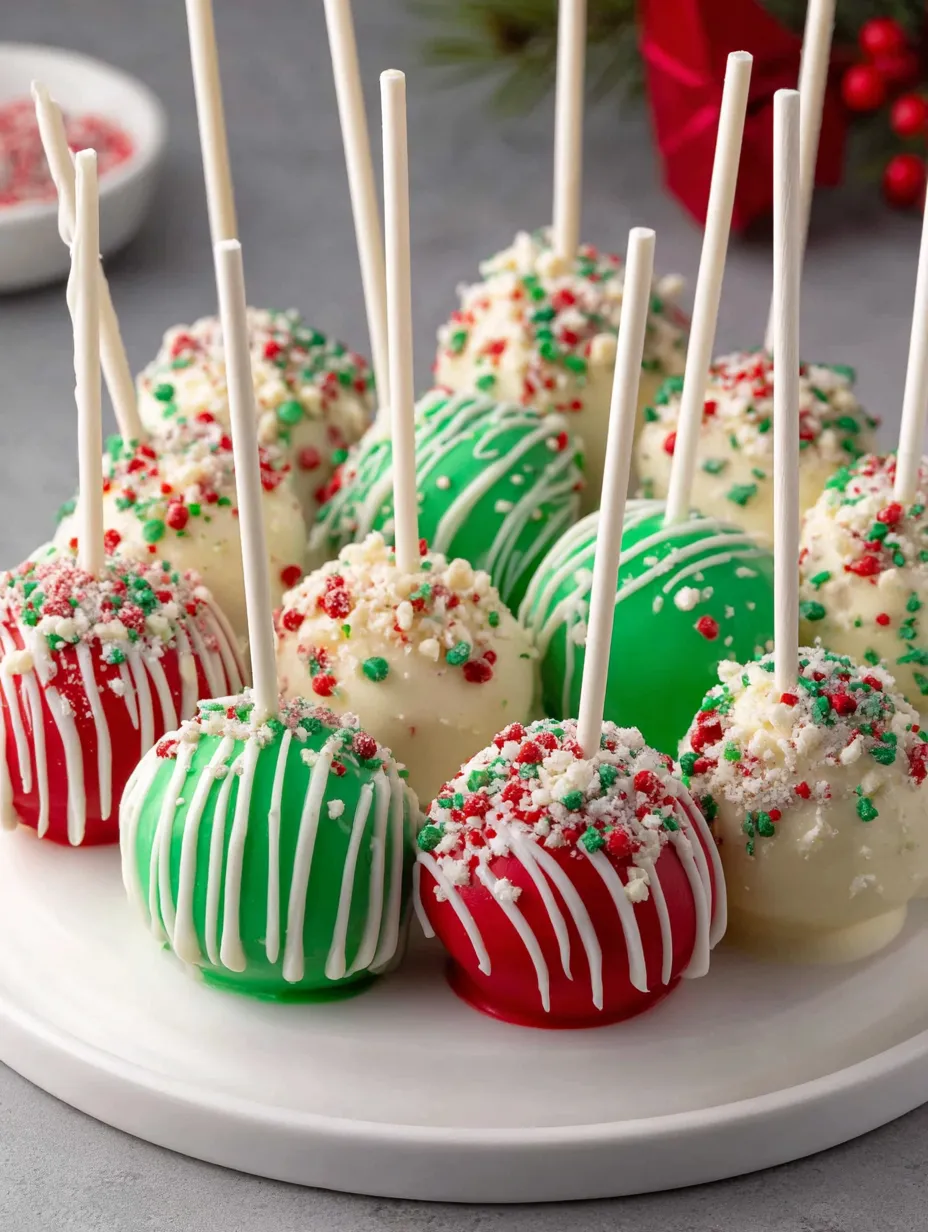
Step 9: The Decorating Magic
While the chocolate is still wet, add your decorations. Work quickly—chocolate sets fast. Sprinkle with holiday sprinkles, add candy decorations, or drizzle with contrasting chocolate. Get creative. Make some look like ornaments, some like snowmen, some like reindeer. There’s no wrong way to decorate. If you mess up, lick it off and start over (just kidding, but also not really).
Step 10: The Drying Process
Stick the decorated cake pops into a styrofoam block, floral foam, or cake pop stand to dry vertically. You can also lay them on parchment paper to dry horizontally. Let them sit at room temperature for 15-20 minutes until the chocolate is completely set. Once set, they can be stored upright or laid down.
Step 11: The Advanced Decorating (Optional)
Once the base coat is completely dry, you can add more details. Use melted chocolate in a piping bag or squeeze bottle to create drizzles, dots, or lines. Use edible markers to draw faces or designs. Add pretzels for antlers. Stack mini marshmallows and cake pops to make snowmen. Let your creativity run wild.
Step 12: The Presentation
Arrange your finished cake pops on a platter, in a festive container, or wrap them individually in cellophane bags tied with ribbon. They’re almost too pretty to eat. Almost. Take one, admire your handiwork, take a bite, and experience the perfect ratio of moist cake interior to chocolate shell to festive decorations. Feel proud. You just made edible Christmas art.
Pro Tips From Someone Who Makes These Every December
Completely Cool Cake: Warm cake + frosting = soup. Be patient. Let it cool completely.
Don’t Add Too Much Frosting: Start with less, add more if needed. Too much makes them fall apart.
Firm Before Dipping: Cold cake balls are crucial. Warm ones fall off the stick into the chocolate.
Thin the Chocolate: Adding coconut oil or shortening makes dipping so much easier.
Work in Small Batches: Keep most pops in the fridge, work with a few at a time.
Tap, Don’t Shake: Gently tap the stick to remove excess chocolate. Shaking sends balls flying.
Decorate While Wet: Add sprinkles immediately after dipping, before chocolate sets.
Stand to Dry: Vertical drying prevents flat spots and makes them look more professional.
Switch It Up (Because Variety Makes Holiday Platters Beautiful)
Snowman Pops: Use white chocolate, add mini chocolate chips for buttons and eyes, pretzel arms, orange sprinkle nose.
Reindeer Pops: Chocolate coating, pretzel antlers, red M&M nose, candy eyes.
Ornament Pops: Any color coating, drizzle with gold, add a “cap” with contrasting chocolate at the top.
Santa Hat Pops: White chocolate, dip top in red candy melts, add white sprinkles at the tip.
Christmas Tree Pops: Green chocolate, decorate with colorful sprinkles like ornaments, yellow star on top.
Peppermint Pops: White chocolate coating, crushed candy cane topping.
Gingerbread Pops: Chocolate cake, brown chocolate coating, white icing details.
Red Velvet Pops: Red velvet cake, cream cheese frosting, white chocolate coating.
Make-Ahead Magic
The Cake: Bake the cake up to 3 days ahead. Wrap tightly and refrigerate.
Uncoated Cake Balls: Roll and refrigerate for 2 days or freeze for up to 1 month before dipping.
Fully Finished Pops: Make completely 1 week ahead. Store in airtight container in the fridge.
Freeze Them: Finished cake pops freeze beautifully for up to 2 months. Thaw in the fridge overnight.
Assembly Line: Bake multiple cakes at once, portion the mixture, freeze extras for later batches.
Storage Real Talk
Room Temperature: Keep in an airtight container for 2-3 days. They don’t need refrigeration once the chocolate is set.
Refrigerated: They’ll keep for up to 2 weeks in the fridge in an airtight container.
Freezing: Freeze in a single layer, then transfer to bags or containers. Freeze for up to 2 months. Thaw in fridge.
Individual Wrapping: Wrap each pop in a cellophane bag for gifting or to keep them fresh longer.
Humidity Warning: In humid environments, chocolate can “sweat.” Store in the fridge if your kitchen is warm.
Perfect Pairings
Hot Chocolate: Festive and perfect for holiday parties.
Coffee: The bitterness balances the sweetness beautifully.
Milk: Classic pairing. Kids especially love this combination.
Eggnog: Lean into the holiday spirit completely.
Champagne or Prosecco: For adult holiday parties, pair with bubbles.
More Cake Pops: Just eat another one. They’re small. It’s Christmas.
The Science of Perfect Cake Pops
The frosting acts as a binder, holding the crumbled cake together and adding moisture. The ratio is crucial—too much and they’re too soft, too little and they’re dry and crumbly. Chilling firms up the fats in the frosting, making the balls hold their shape.
The chocolate coating needs to be the right consistency—too thick and it doesn’t coat smoothly, too thin and it drips off. The coconut oil or shortening adjusts the viscosity. Dipping the stick in chocolate first creates a secure connection that prevents the ball from sliding off.
The cold cake ball meeting the warm chocolate creates a quick set, which is why decorations need to be added immediately. Once the chocolate sets, it creates a protective shell that keeps the cake moist inside.
When to Make These Christmas Cake Pops
Christmas Parties: These are party showstoppers. Everyone wants to try them.
Cookie Exchanges: Bring something different. Stand out from the cookie crowd.
Bake Sales: These sell out instantly. Make extras.
Teacher Gifts: Wrap individually, give as festive presents.
Office Parties: Easy to transport, no utensils needed, always appreciated.
Christmas Eve Dessert: Something fun and festive after dinner.
Why These Work So Damn Well
Christmas Cake Pops work because they combine visual appeal with delicious flavor in a perfect bite-sized package. They’re cute enough to be Instagram-worthy but tasty enough that you don’t care about photos after the first bite. The coating-to-cake ratio is perfect—enough chocolate for texture but not so much that it’s overwhelming.
They’re also just fun to make and customize. You can make some simple and some elaborate. Different flavors, different decorations, different color schemes. Every batch can be unique. Kids love helping decorate. Adults love eating them (and also decorating them, let’s be honest).
This is what happens when you take cake—already good—and make it portable, customizable, and festive. Sometimes the best innovations are just new presentations of classic flavors. Cake on a stick was genius. Cake on a stick dressed up for Christmas is genius squared.
Questions People Always Ask
Q: Why do my cake pops fall off the stick? A: The balls weren’t cold enough when dipping, or you didn’t dip the stick in chocolate before inserting. Both steps are crucial.
Q: My chocolate is too thick to dip. Help? A: Add more coconut oil or shortening, one teaspoon at a time, until it’s thinner and easier to work with.
Q: Can I use regular chocolate instead of candy melts? A: Yes, but temper it properly or add coconut oil. Candy melts are easier because they don’t require tempering.
Q: How do I fix cracks in the chocolate coating? A: The cake balls were too cold or the chocolate was too thick. Let them sit at room temp for 5 minutes before dipping.
Q: Can I make these without sticks? A: Yes! They’re just cake balls then. Still delicious, just not pops. Roll, coat, decorate, eat.
Q: My cake mixture is too dry and won’t hold together. A: Add more frosting, one tablespoon at a time, until it’s moldable.
Q: How far in advance can I make these? A: Up to 2 weeks in the fridge or 2 months in the freezer. They’re perfect make-ahead treats.
PrintChristmas Cake Pops Recipe
- Total Time: 1 hour 30 minutes
- Yield: 40–50 cake pops 1x
Description
Someone figured out that if you crumble cake, mix it with frosting, roll it into balls, stick them on lollipop sticks, and dip them in melted chocolate, you create the most addictive dessert delivery system known to humanity. Then someone else added Christmas decorations and suddenly these became the centerpiece of every holiday party. These are moist cake balls coated in chocolate or white chocolate, decorated with sprinkles, drizzles, and festive designs that make people go “aww” before they devour them. It’s what happens when you combine the best parts of cake and candy into one portable, poppable, impossibly cute package.
This isn’t some complicated pastry technique that requires years of training. This is “bake cake, crumble it, mix with frosting, dip in chocolate, decorate” simplicity that somehow results in something that looks bakery-professional. The cake stays moist because of the frosting. The chocolate coating adds texture and richness. The decorations make them festive and fun. It’s everything good about cake but in a form that you can eat with one hand while holding a glass of eggnog in the other.
This is holiday dessert energy that’s actually manageable. It’s what happens when you want something impressive for your cookie exchange but don’t want to spend eight hours in the kitchen. It’s cake that became a lollipop and decided to dress up for Christmas.
Ingredients
For the Cake Base:
- 1 box (15.25 oz) cake mix (vanilla, chocolate, or red velvet—any flavor works)
- Ingredients listed on box (usually eggs, oil, water)
- OR: 1 homemade 9×13 cake (any flavor)
For Assembly:
- 1 cup frosting (cream cheese, buttercream, or store-bought—match or complement your cake flavor)
- 40–50 lollipop sticks or paper straws
- 24 oz candy melts or chocolate (white, milk, dark, or a combination)
- 2 tablespoons coconut oil or vegetable shortening (helps thin the chocolate)
For Christmas Decorations:
- Red and green sprinkles
- Christmas-themed sprinkles (trees, snowflakes, ornaments)
- White chocolate for drizzling
- Red and green sanding sugar
- Mini chocolate chips for “eyes” on snowmen
- Pretzel sticks (for reindeer antlers or snowman arms)
- Candy canes, crushed
- Edible gold luster dust or gold sprinkles
- Red candy pearls or dragées
Optional But Festive:
- Food coloring for tinting white chocolate (red, green, gold)
- Edible markers for drawing faces or designs
- Royal icing for detailed decorations
- Mini M&Ms (great for ornament designs)
- Coarse sanding sugar for a sparkly look
- Mini marshmallows for snowman details
Special Equipment:
- 9x13 inch baking pan (for the cake)
- Large mixing bowl
- Cookie scoop or tablespoon (for portioning)
- Styrofoam block or cake pop stand (for drying)
- Microwave-safe bowls (for melting chocolate)
- Tall glasses or mugs (to hold melting chocolate for easy dipping)
- Parchment paper
- Patience and creativity
Instructions
Bake your cake according to package or recipe directions in a 9×13 pan. Let it cool COMPLETELY. And I mean completely—like, room temperature cool. If you try to work with warm cake, it’ll turn into a mushy disaster. This is the perfect time to bake it the day before. Once cool, you can even refrigerate it to make it easier to work with.
Once the cake is completely cool, crumble it into a large bowl using your hands. Break it up into fine crumbs—no large chunks. This is therapeutic. Embrace the destruction. You want it to look like coarse breadcrumbs or sand. Get all the edges and corners. Every bit of cake should be crumbled.
Add frosting to the crumbled cake, starting with 1/2 cup. Using your hands (cleanest tool for this job), mix the frosting into the cake crumbs until the mixture holds together when squeezed. It should be like Play-Doh—moldable but not sticky or wet. If it’s too dry and crumbly, add more frosting one tablespoon at a time. If it’s too wet, add more cake crumbs or refrigerate for 15 minutes.
Using a cookie scoop or tablespoon, portion out the cake mixture into equal amounts. Roll each portion between your palms into a smooth ball, about 1-1.5 inches in diameter. Place the balls on a parchment-lined baking sheet. Try to make them as uniform as possible—they look better and cook more evenly. This is assembly-line work. Put on a Christmas playlist. Get in the zone.
Once all the balls are rolled, refrigerate them for at least 2 hours or freeze for 30 minutes. They need to be firm before dipping or they’ll fall apart in the chocolate. This is NOT optional. Cold, firm cake balls = success. Warm, soft cake balls = disaster. Use this time to prepare your decorations and chocolate.
Melt your candy melts or chocolate in a microwave-safe bowl in 30-second intervals, stirring between each, until smooth and completely melted. Add 1-2 tablespoons of coconut oil or shortening to thin it out—this makes dipping easier and creates a smoother coating. The chocolate should be the consistency of heavy cream. If you’re using multiple colors, melt them in separate bowls.
Dip the tip of a lollipop stick about 1/2 inch into the melted chocolate, then insert it into a cake ball, pushing it about halfway through. The chocolate acts as glue and prevents the ball from sliding off the stick later. Repeat with all the balls. Return them to the fridge or freezer for 10 minutes to let the chocolate-stick connection set.
Remove a few cake pops from the fridge at a time—working with cold pops is key. Hold a cake pop by the stick and dip it into the melted chocolate, submerging it completely. Lift it out and let excess chocolate drip back into the bowl. Gently rotate or tap the stick against the edge of the bowl to remove more excess chocolate. Don’t shake it or the ball might fly off.
While the chocolate is still wet, add your decorations. Work quickly—chocolate sets fast. Sprinkle with holiday sprinkles, add candy decorations, or drizzle with contrasting chocolate. Get creative. Make some look like ornaments, some like snowmen, some like reindeer. There’s no wrong way to decorate. If you mess up, lick it off and start over (just kidding, but also not really).
Stick the decorated cake pops into a styrofoam block, floral foam, or cake pop stand to dry vertically. You can also lay them on parchment paper to dry horizontally. Let them sit at room temperature for 15-20 minutes until the chocolate is completely set. Once set, they can be stored upright or laid down.
Once the base coat is completely dry, you can add more details. Use melted chocolate in a piping bag or squeeze bottle to create drizzles, dots, or lines. Use edible markers to draw faces or designs. Add pretzels for antlers. Stack mini marshmallows and cake pops to make snowmen. Let your creativity run wild.
Arrange your finished cake pops on a platter, in a festive container, or wrap them individually in cellophane bags tied with ribbon. They’re almost too pretty to eat. Almost. Take one, admire your handiwork, take a bite, and experience the perfect ratio of moist cake interior to chocolate shell to festive decorations. Feel proud. You just made edible Christmas art.
Notes
Snowman Pops: Use white chocolate, add mini chocolate chips for buttons and eyes, pretzel arms, orange sprinkle nose.
Reindeer Pops: Chocolate coating, pretzel antlers, red M&M nose, candy eyes.
Ornament Pops: Any color coating, drizzle with gold, add a “cap” with contrasting chocolate at the top.
Santa Hat Pops: White chocolate, dip top in red candy melts, add white sprinkles at the tip.
Christmas Tree Pops: Green chocolate, decorate with colorful sprinkles like ornaments, yellow star on top.
Peppermint Pops: White chocolate coating, crushed candy cane topping.
- Prep Time: 1 hour
- Cook Time: 30 minutes
Nutrition
- Calories: ~110 kcal
- Fat: ~5g
- Carbohydrates: ~16g
- Protein: ~1g


