
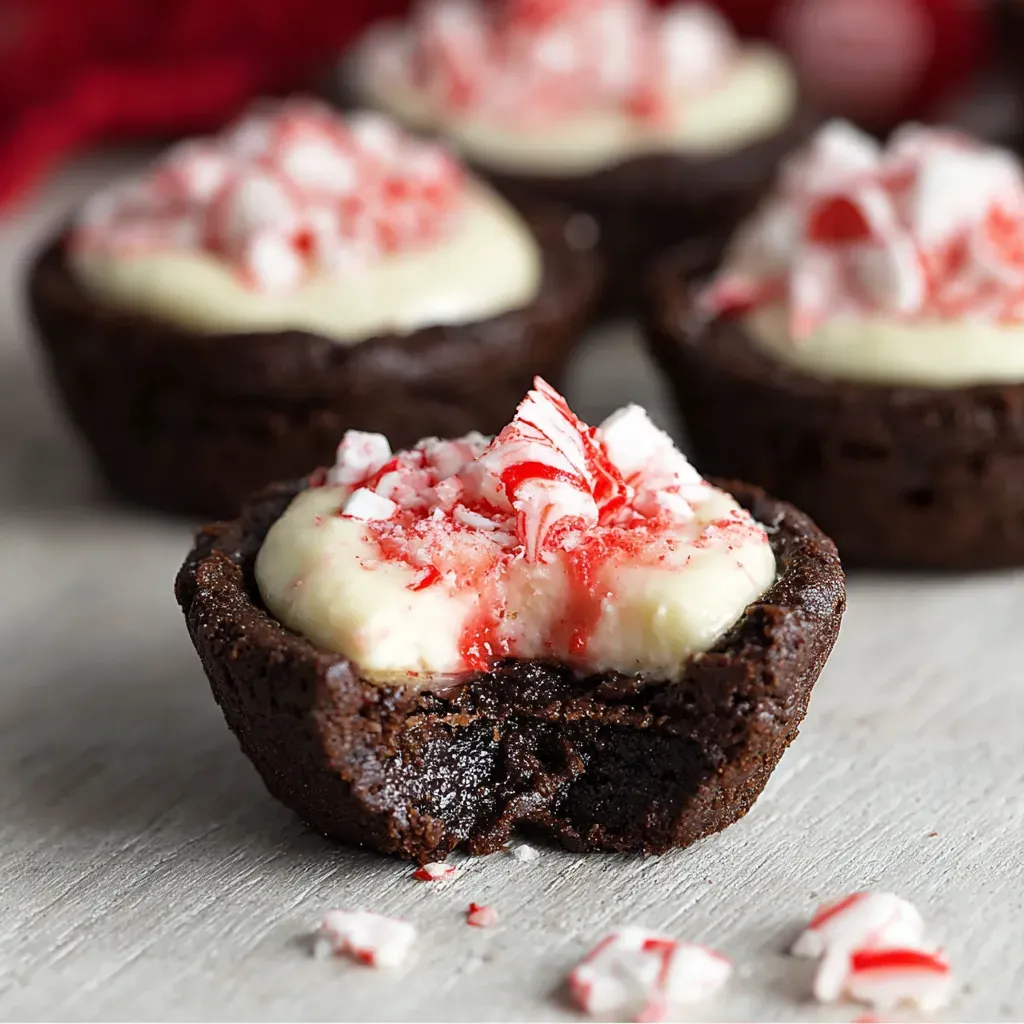
Indulge in the festive flavors of these Chocolate Peppermint Cookie Cups, a delightful treat perfect for holiday gatherings or cozy evenings at home. The rich, dark chocolate cookie base pairs harmoniously with a light, whipped peppermint cheesecake filling, offering a balance of decadent and refreshing tastes.
These cookie cups not only look stunning garnished with crushed candy canes, but they are also easy to make ahead, making them ideal for entertaining or gifting. Each bite captures the spirit of the season with a wonderful chocolate and peppermint combination.
- The dual cocoa powder cookie cups provide intense, complex chocolate flavor.
- The creamy peppermint cheesecake filling is light yet indulgent.
- Make-ahead friendly, perfect for stress-free holiday hosting.
- Beautifully festive presentation with crushed candy cane topping.
Ingredients
- All-purpose flour: Provides the structure and foundation for the cookie cups with a tender crumb.
- Dutch-processed cocoa powder: Adds deep, smooth chocolate flavor with rich color to cookies.
- Black cocoa powder: Offers an extra-dark chocolate intensity and a nearly black hue for dramatic cookie cups.
- Baking soda: Leavens and helps the cookies rise slightly while keeping them soft inside.
- Salt: Enhances the chocolate flavor and balances sweetness in the dough.
- Unsalted butter: Adds richness and moisture, ensuring a tender, flavorful cookie base.
- Granulated sugar: Sweetens dough while contributing to a slight crispness around edges.
- Light brown sugar: Adds moisture and a subtle caramel depth to the cookie texture.
- Large eggs: Bind ingredients together and enrich the dough for softness.
- Vanilla extract: Enhances overall flavor and pairs well with chocolate and peppermint notes.
- Heavy whipping cream: Whipped to stiff peaks to create a light, airy peppermint cheesecake filling.
- Cream cheese (full fat): Provides creamy richness and slight tang to the filling.
- Granulated sugar (filling): Sweetens the cheesecake filling for balanced flavor.
- Peppermint extract: Infuses the filling with refreshing minty flavor essential for holiday vibes.
- Red food color gel: Adds festive color streaks inside the piping bag for a decorative touch.
- Candy canes (chopped): Sprinkled on top for a crunchy garnish and peppermint boost.
Instructions
- Preheat and Prepare Baking Pans
Set the oven to 350°F (175°C) and thoroughly grease two standard cupcake pans with cooking spray. This prep ensures cookie cups don’t stick and hold their shape well during baking.
- Mix Dry Ingredients
In a bowl, whisk together all-purpose flour, Dutch-processed cocoa, black cocoa powder, baking soda, and salt. Sifting helps prevent lumps and ensures an even distribution of leavening and cocoa powders for consistent flavor and texture.
- Cream Butter and Sugars
Beat the softened butter with granulated and light brown sugars on medium-high speed until the mixture is light, fluffy, and pale, about 2-3 minutes. This aeration is crucial for tender, well-risen cookie cups.
- Add Eggs and Vanilla
Lower the mixer speed and add eggs one at a time, followed by vanilla extract. Mixing gradually helps maintain the emulsion and prevents curdling, resulting in smooth, uniform dough.
- Combine Wet and Dry Ingredients
Slowly add the flour mixture to the butter mixture and mix just until combined, avoiding overmixing to keep the cookie cups tender and soft inside.
- Scoop Dough into Tins
Using a large cookie scoop (approximately 3 tablespoons), evenly portion dough into the prepared cupcake pans. This ensures uniform cookie cup sizes and even baking.
- Bake and Shape Cookie Cups
Bake the dough for about 10-13 minutes until they appear mostly set but are still soft in the centers. Immediately after removing from oven, press down gently with a small jar to form a well for the filling. This shaping ensures each cookie cup can hold the luscious filling perfectly.
- Cool and Remove from Pans
Let the cookie cups cool in the pans for 10 minutes. Loosen edges gently by twisting, then transfer to a wire rack to cool completely. Cooling allows the cookies to set and makes removal easier without breaking.
- Whip the Cream
Chill a whisk and bowl before whipping heavy cream to stiff peaks. Cold tools help the cream whip faster and hold shape better, creating a light texture for the cheesecake filling.
- Prepare Cheesecake Filling
Beat cream cheese with sugar and peppermint extract until silky smooth. Fold the whipped cream into this mixture carefully to retain an airy, creamy consistency.
- Color and Pipe Filling
Use a food-safe paintbrush to streak red food gel stripes inside a piping bag fitted with a large round tip. Fill the bag with the peppermint cheesecake filling and pipe generous swirls into the cooled cookie cups. The stripes add a festive splash of color to the filling.
- Chill and Garnish
Refrigerate assembled cookie cups for 1-2 hours to let the filling set firmly. Before serving, sprinkle with chopped candy canes for texture and extra peppermint flavor.
- Press cookie centers immediately after baking to shape cups before they cool and harden.
- Use room temperature eggs and butter for an even batter and better texture.
- Refrigerate filling to ensure it holds its shape when piped, especially if made in warm kitchens.
- Store cookie cups without candy cane decorations if freezing, to keep toppings fresh.
Storage Tips
Keep cookie cups refrigerated in an airtight container for up to 3 days to maintain freshness. For longer storage, freeze the cookie cups (without candy cane toppings) for up to 4 weeks and thaw in the fridge before serving.
Serving Suggestions
Serve these cookie cups chilled for the best texture and flavor experience. Pair them with a warm cup of coffee, hot chocolate, or your favorite holiday tea to complement the peppermint and chocolate notes.
- Sift cocoa powders well to avoid clumps and ensure rich, even chocolate flavor.
- Chill the piping bag after adding the filling if not serving immediately to maintain crisp piping details.
- Use a small jar or bottle with a narrow mouth to press cookie wells uniformly and gently.
FAQs
- Can I make these cookie cups ahead of time?
Yes, the cookie cups can be baked and shaped in advance. Fill and garnish them a few hours before serving or freeze the baked cups without filling for later use.
- What can I substitute for black cocoa powder?
If unavailable, you can use additional Dutch-processed cocoa powder or incorporate dark cocoa nibs for a slightly different flavor and color intensity.
- Is there a dairy-free option for the filling?
You can substitute cream cheese and heavy cream with dairy-free alternatives like almond or coconut-based cream cheese and coconut cream, adjusting sweetness to taste.
- How do I store leftover cookie cups?
Store cookie cups in an airtight container in the refrigerator for up to 3 days. Avoid leaving them at room temperature because of the cream cheese filling.
- Can I omit the candy canes on top?
Yes, the crushed candy canes are optional. They add texture and festive flair but can be left off if preferred.
- Can I use regular peppermint extract instead of pure?
Yes, just use the same amount. Pure peppermint extract offers a fresher and stronger flavor, but standard extract works fine too.
Chocolate Peppermint Cookie Cups
Equipment
- 2 cupcake tins regular sized
- 1 large cookie scoop 3 tablespoon size
- 1 mixing bowl large
- 1 small jar or container for pressing cookie cups
- 1 wire rack for cooling
- 1 piping bag fitted with large round tip
- 1 whisk or electric mixer for whipping cream
- 1 small food-safe paintbrush optional for piping bag decoration
Ingredients
- 2 cups all-purpose flour
- 1/4 cup Dutch-processed cocoa powder sifted
- 1/4 cup black cocoa powder
- 1 tsp baking soda
- 1/2 tsp salt
- 1 cup unsalted butter room temperature
- 1/2 cup granulated sugar
- 1 cup light brown sugar packed
- 2 large eggs room temperature
- 1 tsp vanilla extract
- 1 cup heavy whipping cream chilled
- 8 oz full-fat cream cheese
- 1/2 cup granulated sugar
- 1 tsp peppermint extract
- red color gel
- candy canes chopped for topping
Instructions
- Preheat oven to 350°F and spray two regular-sized cupcake tins with cooking spray.
- Whisk together all-purpose flour, Dutch-processed cocoa powder, black cocoa powder, baking soda, and salt.
- Beat unsalted butter, granulated sugar, and brown sugar on medium-high speed until light and fluffy, about 2 to 3 minutes.
- Reduce mixer speed, add eggs one at a time, then add vanilla extract and beat until combined.
- Fold in the flour mixture just until combined.
- Using a 3-tablespoon cookie scoop, portion dough into muffin tins.
- Bake for 10 to 13 minutes until mostly set but still soft in the center.
- Remove from oven and immediately press the center of each cookie down firmly with a small jar or container to create a well.
- Cool the cookie cups in the pans for 10 minutes, loosen slightly by twisting, then cool for 5 more minutes before transferring to a wire rack to cool completely.
- Whip chilled heavy cream until stiff peaks form using a cold whisk and bowl.
- In a separate bowl, beat cream cheese, granulated sugar, and peppermint extract until smooth.
- Fold whipped cream gently into the cream cheese mixture until combined.
- Use a small food-safe paintbrush to paint two stripes of red color gel inside a piping bag fitted with a large round tip.
- Fill the piping bag with peppermint cheesecake filling and pipe swirls into cooled cookie cups.
- Refrigerate the filled cookie cups for 1 to 2 hours until set.
- Sprinkle with chopped candy canes before serving.
- Serve chilled and consume within 2 to 3 days or freeze without candy canes for up to 4 weeks.
Notes
- Chill mixing tools before whipping cream for best results.
- Use a silicone brush for even color gel stripes inside piping bag.
- Freeze un-topped cookie cups to maintain candy cane crunch.
- Remove from freezer 30 minutes before serving for best texture.


