Quick Overview
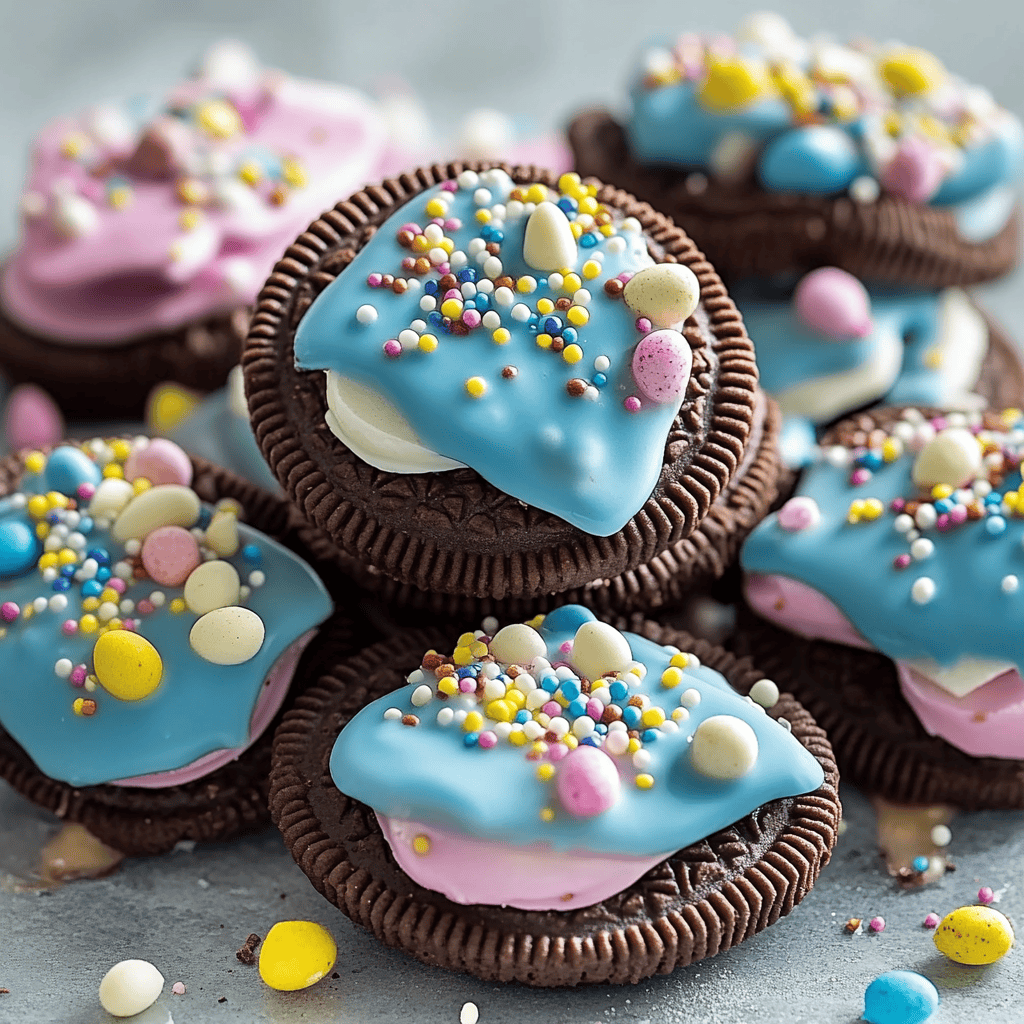
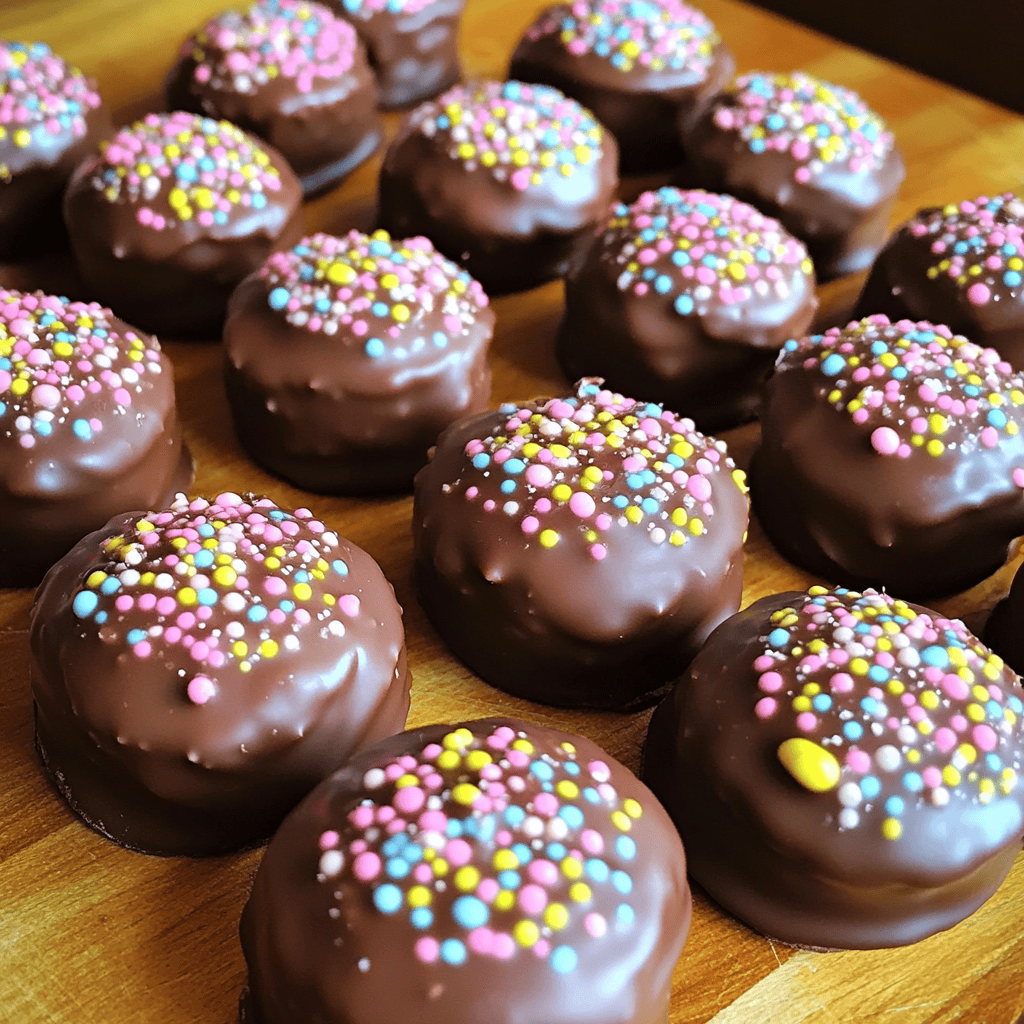
Celebrate the joy of Easter with a delightful treat that everyone will love—Chocolate Covered Easter Oreos. This simple yet indulgent recipe transforms classic Oreo cookies into festive delights perfect for any holiday gathering. Coated in rich chocolate and decorated with colorful sprinkles, these tasty bites are sure to impress family and friends. Whether for an egg hunt or a festive dessert table, these Chocolate Covered Easter Oreos will be the highlight of your celebrations.
Ingredient Breakdown
To create these delicious Chocolate Covered Easter Oreos, you will need a handful of core ingredients that come together to make this delightful treat.
Oreo Cookies
Use one package of standard Oreo cookies. The classic flavor offers a perfect balance of sweetness and creaminess that pairs wonderfully with the chocolate coating. You can use regular or double-stuffed Oreos based on your preference.
Chocolate Melts
Purchase 12 ounces of chocolate melts in your preferred color—dark, milk, or white. These melts provide a smooth and creamy coating that envelops the Oreos beautifully. Opt for high-quality brands to enhance the overall flavor of your treats.
Sprinkles
Choose about 1 cup of vibrant sprinkles for decoration. These colorful toppings add a fun touch and festive flair to your Chocolate Covered Easter Oreos. Feel free to mix various shapes and colors to match your Easter theme!
Coconut Oil (Optional)
If desired, include 1 tablespoon of coconut oil to help thin the chocolate melts. This ingredient can improve the consistency of your coating, making it easier to dip the cookies without clumping.
Step By Step Recipe: Chocolate Covered Easter Oreos
Follow these detailed instructions to prepare your own batch of Chocolate Covered Easter Oreos at home.
Step 1: Prepare Your Workspace
Begin by gathering all ingredients and equipment needed for the recipe. Line a baking sheet with parchment paper to prevent sticking during the cooling process. Make sure you have a microwave-safe bowl ready for melting the chocolate.
Step 2: Melt the Chocolate
Place the chocolate melts in a microwave-safe bowl and heat them in 30-second intervals. Stir between each interval until fully melted and smooth. If using coconut oil, mix it in at this stage for a better dipping consistency. Be careful not to overheat as this can burn the chocolate.
Step 3: Dip the Oreos
Once the chocolate is melted, take an Oreo cookie and carefully dip it into the chocolate using forks or a dipping tool. Ensure each cookie is fully coated before gently shaking off any excess chocolate back into the bowl.
Step 4: Add Sprinkles
While the chocolate is still wet on each dipped Oreo, sprinkle your chosen decorations generously on top. This step adds color and fun designs that make your treats visually appealing and festive.
Step 5: Set Your Cookies
Place each decorated Oreo onto the lined baking sheet. Allow them to sit at room temperature or refrigerate them for approximately 30 minutes until the chocolate has fully hardened and set.
Serving and Storing Tips
Enjoying your Chocolate Covered Easter Oreos is easy with these simple serving and storage guidelines.
Serving Tip
These tasty treats can be served as individual sweets at parties or arranged on platters for sharing during gatherings. Pair them with milk or other beverages for a delightful snack experience! They also make excellent gifts when packaged in decorative boxes.
Storing Tip
Store any leftover Chocolate Covered Easter Oreos in an airtight container at room temperature for up to one week. If you prefer longer storage time, keep them in the refrigerator where they can last up to two weeks without losing quality or taste.
Mistakes to avoid
When making Chocolate Covered Easter Oreos, one common mistake is not tempering the chocolate properly. Tempering chocolate ensures that it sets with a glossy finish and a satisfying snap. If you skip this step, your coating may appear dull and could even be soft or sticky.
Another mistake is using too much chocolate when coating the Oreos. While it may seem tempting to dip thoroughly, excess chocolate can lead to a messy presentation. Instead, ensure an even coating by dipping and gently shaking off any extra before placing them on the cooling rack.
Not allowing the cookies to cool completely before dipping is also a big error. If the Oreos are warm, the chocolate will melt and won’t adhere properly. Let them chill in the refrigerator for about 10-15 minutes prior to coating for optimal results.
Lastly, neglecting to add toppings or decorations before the chocolate hardens can make your treats look plain. Sprinkles, crushed nuts, or drizzled chocolate add visual appeal and enhance flavor, so don’t skip this creative step!
Tips and tricks
To achieve perfect Chocolate Covered Easter Oreos, consider using high-quality chocolate for coating. Chocolate chips often contain stabilizers that prevent proper melting and can affect texture. Instead, opt for real chocolate bars or couverture chocolate that melts smoothly for a beautiful finish.
When melting chocolate, use a double boiler or microwave in short intervals to avoid scorching it. If using the microwave, heat in 30-second bursts while stirring in between until fully melted. This method keeps the temperature consistent and avoids burning your precious chocolate.
For added flavor, try using flavored candy melts instead of regular chocolate. These come in various colors and flavors, allowing you to customize your Easter treats creatively. Pair different colors with festive sprinkles for an eye-catching presentation that captures the holiday spirit.
Lastly, if you want to make your Chocolate Covered Easter Oreos extra special, consider adding a touch of sea salt on top just before they set. The contrast between sweet and salty makes each bite delightful and unforgettable!
Suggestions for Chocolate Covered Easter Oreos
Consider adding a variety of toppings after dipping your Chocolate Covered Easter Oreos in chocolate. Options like crushed graham crackers or shredded coconut can provide different textures and flavors. You might also use colorful edible glitter or themed sprinkles that enhance their visual appeal during festivities.
If you’re looking to personalize these treats further, try using flavored Oreo cookies such as mint or peanut butter varieties. This twist adds an unexpected layer of taste that delights those who enjoy unique flavors during holiday celebrations.
Package your finished Chocolate Covered Easter Oreos in decorative boxes tied with ribbons for gifting. This thoughtful presentation makes them perfect for sharing with friends or family during Easter gatherings or as party favors at springtime events.
FAQs
How long do Chocolate Covered Easter Oreos last?
Chocolate Covered Easter Oreos can typically last up to two weeks if stored properly in an airtight container at room temperature. However, if you live in a warm climate, it’s best to refrigerate them to prevent melting or softening of the chocolate coating.
Can I use white chocolate for my Chocolate Covered Easter Oreos?
Yes! White chocolate works beautifully for coating Chocolate Covered Easter Oreos and offers a sweet contrast to the cookie’s rich flavor. Just remember that white chocolate requires careful melting to avoid clumping; use low heat settings while melting.
Is it necessary to chill the Oreos before dipping?
Chilling the Oreos before dipping is highly recommended as it helps maintain their structure during the dipping process. If they are warm or at room temperature, they may become soft and lose their shape when coated with melted chocolate.
What kinds of toppings work well with Chocolate Covered Easter Oreos?
Toppings like colorful sprinkles, crushed nuts, or mini marshmallows complement Chocolate Covered Easter Oreos perfectly. You can also consider drizzling additional melted chocolate on top for extra flair besides enhancing taste and appearance.
Can I freeze Chocolate Covered Easter Oreos?
Yes! You can freeze Chocolate Covered Easter Oreos if you need to store them longer than two weeks. Place them in a single layer within an airtight container separated by parchment paper. When ready to enjoy them again, thaw them slowly at room temperature.
How do I know when the chocolate has set properly?
You’ll know the chocolate has set properly when it appears firm and shiny without any soft spots remaining on the surface. Properly tempered chocolate will harden quickly as well; usually within 20-30 minutes at room temperature or faster in refrigeration.
Summary
In summary, creating delightful Chocolate Covered Easter Oreos involves avoiding common mistakes such as overheating your chocolate or overloading each cookie with too much coating. Utilizing tips like high-quality ingredients and proper storage will help you achieve beautiful results every time. Remember to embrace creativity through toppings and personalized presentations for festive occasions! Enjoy making these treats this season!