
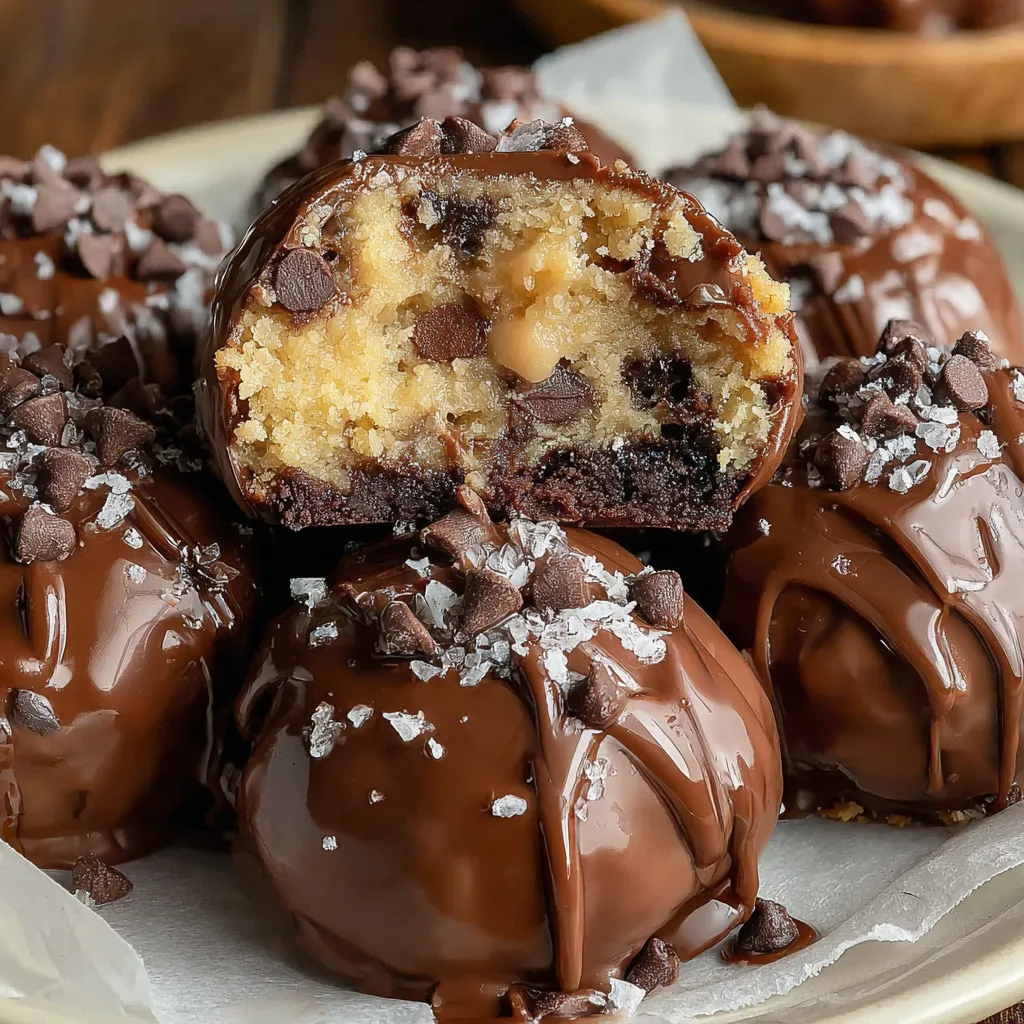
Listen, someone looked at cookie dough, looked at brownies, looked at chocolate coating, and said “what if we just… combined all of them into little balls of chaos?” And that’s how we got Chocolate Chip Cookie Dough Brownie Bombs. These are literally edible cookie dough (the safe kind, calm down) stuffed inside a brownie, covered in chocolate, and drizzled with more chocolate because apparently we have no chill. They’re bite-sized spheres of pure indulgence that taste like every dessert you’ve ever loved had a group meeting and decided to move in together. The outside is smooth chocolate, the middle layer is fudgy brownie, and the center is straight-up chocolate chip cookie dough. I brought these to a dinner party once and someone asked if I was a professional pastry chef. Another person ate five and then pretended they only had two. These bombs turn reasonable adults into sneaky dessert thieves.
Why You’ll Love This Recipe
Three desserts in one. Cookie dough, brownies, AND chocolate coating? It’s like dessert Voltron.
No baking the cookie dough. Egg-free, heat-treated flour means safe raw cookie dough. Live your dreams.
Impressive as hell. These look like you went to culinary school. You didn’t. You just followed directions.
Perfect bite-size. No plates, no forks, just pop them in your mouth like a fancy truffle.
Make-ahead magic. These keep in the fridge for a week or freezer for months. Future you will be grateful.
Party showstopper. Bring these anywhere and watch people lose their minds.
Customize everything. Different brownies, different cookie dough, different toppings. Go wild.
The Good Stuff You’ll Need
For the Edible Cookie Dough:
- 1 cup all-purpose flour (heat-treated, see instructions)
- 1/2 cup (1 stick) unsalted butter, softened
- 1/2 cup brown sugar, packed
- 1/4 cup granulated sugar
- 2 tbsp milk (any kind works)
- 1 tsp vanilla extract
- 1/4 tsp salt
- 3/4 cup mini chocolate chips
For the Brownie Layer:
- 1 box brownie mix (plus ingredients listed on box)
- OR homemade brownies (your favorite recipe)
- You’ll need a 9×13 pan of brownies, cooled completely
For the Chocolate Coating:
- 16 oz chocolate melting wafers or candy melts (milk, dark, or semi-sweet)
- 2 tbsp coconut oil or vegetable shortening (makes it smooth)
Optional Toppings:
- Extra melted chocolate for drizzling
- Flaky sea salt
- Crushed cookies
- Sprinkles
- Mini chocolate chips
- Whatever your heart desires
Equipment:
- 9×13 baking pan for brownies
- Cookie scoop or spoon
- Baking sheet
- Parchment paper
- Fork or dipping tool for chocolate coating
- Piping bag or ziplock for drizzling (optional)
Let’s Do This
Step 1: Heat-Treat That Flour (IMPORTANT)
Raw flour can have bacteria, so we need to heat-treat it. This is quick and easy, don’t skip it.
Microwave method: Spread flour on a microwave-safe plate and microwave in 30-second intervals, stirring between, until it reaches 165°F (about 1-2 minutes total). Use a thermometer to check.
Oven method: Spread flour on a baking sheet and bake at 350°F for 5 minutes, stirring halfway through. Let it cool completely.
Once cooled, whisk the flour to break up any lumps. Set aside.
Step 2: Make the Edible Cookie Dough
In a large bowl (or stand mixer), beat the softened butter with both sugars on medium-high speed for 2-3 minutes until light and fluffy.
Add milk, vanilla extract, and salt. Beat until combined.
Add the heat-treated flour and mix on low speed until just combined. The dough will be thick and slightly crumbly—that’s perfect.
Fold in the mini chocolate chips. The dough should hold together when you press it. If it’s too dry, add another tablespoon of milk.
Cover and refrigerate the dough for at least 30 minutes. This makes it easier to work with and helps it hold its shape.
Step 3: Make Your Brownies
Bake brownies according to box directions (or your homemade recipe) in a 9×13 pan. Let them cool COMPLETELY. Like, actually completely. Warm brownies won’t work for this.
Once cool, you’re going to crumble them up. Yes, you read that right. All that beautiful brownie is getting demolished. Use your hands or a fork to break them into fine crumbs. You want a texture like wet sand—crumbly but moldable.
If your brownies are too dry to hold together, add 2-3 tablespoons of chocolate frosting to help bind them. Mix well. When you squeeze a handful, it should hold its shape.
Step 4: Assemble the Bombs
This is where the magic happens. Line a baking sheet with parchment paper.
Take about 1 tablespoon of chilled cookie dough and roll it into a ball. You should get about 20-24 balls.
Take about 1 tablespoon of brownie crumbs and flatten it in your palm into a disc.
Place the cookie dough ball in the center of the brownie disc. Wrap the brownie around the cookie dough, sealing it completely. Roll it between your palms to make a smooth ball.
Place on the prepared baking sheet. Repeat with remaining dough and brownie crumbs.
Once all bombs are assembled, freeze them for 30 minutes to 1 hour. This is CRUCIAL. Cold bombs are easier to dip and the chocolate sets properly. Don’t skip this step or you’ll hate yourself during the dipping process.
Step 5: Chocolate Coating Time
In a microwave-safe bowl, combine chocolate melting wafers and coconut oil. Microwave in 30-second intervals, stirring between each, until completely melted and smooth. Usually takes 1.5-2 minutes total.
The chocolate should be thin enough to coat easily but not hot (hot chocolate melts the bombs). Let it cool slightly if needed.
Remove bombs from the freezer. Working one at a time, place a bomb on a fork and lower it into the melted chocolate. Spoon chocolate over the top to coat completely.
Lift it out, letting excess chocolate drip off. Tap the fork gently on the side of the bowl to remove more excess. You want a thin, even coating—not a chocolate blob.
Slide the coated bomb off the fork onto a parchment-lined baking sheet. Repeat with remaining bombs.
Work quickly because the bombs start to thaw. If they get too soft, pop them back in the freezer for 10 minutes and resume.
Step 6: Decorate and Set
While the chocolate coating is still wet, add any toppings you want—sea salt, sprinkles, crushed cookies, whatever.
For chocolate drizzle: Save some melted chocolate (or melt additional chocolate), put it in a piping bag or ziplock with a tiny corner cut off, and drizzle over the set bombs in a zigzag pattern.
Let the bombs sit at room temperature for 15-20 minutes until the chocolate sets, or refrigerate for 10 minutes if you’re impatient.
Once set, store in an airtight container in the fridge until ready to serve.
Step 7: Try to Share (Good Luck)
Remove from fridge about 10 minutes before serving for the best texture. Cold is good, but room temp is chef’s kiss.
Arrange on a pretty plate and watch people’s eyes light up when they bite into them.
Hide a few in the back of the fridge for yourself. Trust me on this.
Serving Suggestions
These are already extra, but here’s how to make them even more ridiculous:
- Serve with vanilla ice cream and hot fudge
- Pair with coffee, hot chocolate, or cold milk
- Arrange on a dessert board with other treats
- Package in clear boxes tied with ribbon for gifts
- Serve at parties with toothpicks for easy grabbing
- Make a dessert platter with various chocolate bombs
- Cut one in half to show off the layers (Instagram gold)
Switch It Up
Peanut Butter Explosion: Use peanut butter instead of butter in the cookie dough. Add Reese’s pieces.
Mint Chocolate: Add 1/2 tsp peppermint extract to cookie dough. Use dark chocolate coating.
S’mores Bombs: Add mini marshmallows to cookie dough, use graham cracker crumbs mixed with brownie.
Cookies and Cream: Use white chocolate cookie dough (no cocoa), Oreo-stuffed brownies, white chocolate coating.
Salted Caramel: Add caramel bits to cookie dough, drizzle with caramel and sprinkle with sea salt.
Nutella Center: Add a frozen Nutella ball in the center of the cookie dough before wrapping in brownie.
Triple Chocolate: Use dark chocolate chips in dough, dark chocolate brownies, dark chocolate coating.
Birthday Cake: Use funfetti cookie dough and blonde brownies, white chocolate coating with sprinkles.
Storage and Make-Ahead Tips
These are perfect for making ahead, which is good because they take some time.
Refrigerate: Store in an airtight container in the fridge for up to 2 weeks. Let sit at room temp 10 minutes before eating.
Freeze: Freeze in a single layer on a baking sheet, then transfer to freezer bags for up to 3 months. Thaw in fridge overnight.
Make-ahead strategy: Make cookie dough and brownies one day, assemble the next day, coat with chocolate the day of serving.
Cookie dough: Can be made 3 days ahead and stored in the fridge.
Brownie crumbs: Can be made and crumbled 2 days ahead, stored in an airtight container.
Assembled but not coated: Freeze assembled bombs for up to 1 month, coat when ready.
Transport: Keep cold in a cooler with ice packs if taking to a party. They can sit at room temp for a couple hours.
Why This Works So Damn Well
The magic of Brownie Bombs is in the layers and temperature control. The cookie dough center stays soft and chewy because it’s never baked. The egg-free recipe means it’s safe to eat raw, and the heat-treated flour eliminates any bacterial concerns. This gives you that forbidden cookie dough experience in a completely safe package.
The brownie layer acts as a protective barrier between the cookie dough and chocolate coating. Without it, the chocolate would stick directly to the soft cookie dough and create a mess. The brownie is moldable enough to wrap around the dough but firm enough to hold its shape once frozen.
Freezing before dipping is absolutely essential. Cold bombs don’t melt when you dip them in chocolate, which means the chocolate sets quickly into a thin, even shell. If you try to dip room-temp bombs, they’ll partially melt, the chocolate won’t set properly, and you’ll end up with a gloopy disaster.
Adding coconut oil to the melting chocolate makes it thinner and smoother, which creates a better coating. Pure chocolate alone is too thick and clumpy. The oil helps it flow smoothly and creates that professional-looking glossy finish.
Mini chocolate chips work better than regular ones in the cookie dough because they distribute more evenly and don’t create lumps that make the bombs harder to coat. They also give you chocolate in every bite.
The combination of textures—smooth chocolate shell, dense brownie layer, soft cookie dough center—creates contrast that keeps each bite interesting. All one texture would be boring. This way, you get crunch, chew, and softness all at once.
When to Make These
Holiday parties: These are festive enough for any celebration. Add holiday sprinkles.
Valentine’s Day: Make them heart-shaped or use pink/red decorations.
Birthday parties: Better than cake for chocolate lovers. Make a bomb tower.
Bake sales: These sell for premium prices. Charge accordingly.
Girls’ night: Make these together with wine. It’s an event.
Game day: Bring these and be the MVP of the snack table.
Because it’s Tuesday: You don’t need an excuse. Make the bombs.
Questions People Actually Ask
Q: Do I have to heat-treat the flour? A: YES. Raw flour can have E. coli. It takes 2 minutes. Don’t skip this step or you might get sick.
Q: Can I use box brownie mix? A: Absolutely. This is not the time for baking snobbery. Box mix works perfectly.
Q: My bombs are falling apart when I dip them. Help! A: They’re not cold enough. Freeze them longer. Also make sure the brownie layer is thick enough to hold everything together.
Q: The chocolate is too thick to coat smoothly. A: Add more coconut oil or shortening, one teaspoon at a time, until it’s thinner. You can also gently reheat it.
Q: Can I use regular chocolate chips instead of candy melts? A: You can, but add coconut oil or shortening to thin them out. Candy melts are designed for coating and work better.
Q: How long can these sit out at room temp? A: About 2-3 hours max. After that, refrigerate them or the chocolate might melt and they’ll get soft.
Q: My cookie dough is too crumbly to roll. A: Add another tablespoon of milk or softened butter until it holds together when squeezed.
Q: Can I make these without the brownie layer? A: You can, but they’ll be harder to dip because the soft cookie dough will partially melt. The brownie layer is structural.
Q: Why are they called “bombs”? A: Because they’re round like bombs, and also because they’re flavor bombs that explode in your mouth. Also they’re kind of dangerous to your diet.
Print
Chocolate Chip Cookie Dough Brownie Bombs
- Total Time: 1 hour 15 minutes
- Yield: 20–24 bombs 1x
Description
Listen, someone looked at cookie dough, looked at brownies, looked at chocolate coating, and said “what if we just… combined all of them into little balls of chaos?” And that’s how we got Chocolate Chip Cookie Dough Brownie Bombs. These are literally edible cookie dough (the safe kind, calm down) stuffed inside a brownie, covered in chocolate, and drizzled with more chocolate because apparently we have no chill. They’re bite-sized spheres of pure indulgence that taste like every dessert you’ve ever loved had a group meeting and decided to move in together. The outside is smooth chocolate, the middle layer is fudgy brownie, and the center is straight-up chocolate chip cookie dough. I brought these to a dinner party once and someone asked if I was a professional pastry chef. Another person ate five and then pretended they only had two. These bombs turn reasonable adults into sneaky dessert thieves.
Ingredients
For the Edible Cookie Dough:
- 1 cup all-purpose flour (heat-treated, see instructions)
- 1/2 cup (1 stick) unsalted butter, softened
- 1/2 cup brown sugar, packed
- 1/4 cup granulated sugar
- 2 tbsp milk (any kind works)
- 1 tsp vanilla extract
- 1/4 tsp salt
- 3/4 cup mini chocolate chips
For the Brownie Layer:
- 1 box brownie mix (plus ingredients listed on box)
- OR homemade brownies (your favorite recipe)
- You’ll need a 9×13 pan of brownies, cooled completely
For the Chocolate Coating:
- 16 oz chocolate melting wafers or candy melts (milk, dark, or semi-sweet)
- 2 tbsp coconut oil or vegetable shortening (makes it smooth)
Optional Toppings:
- Extra melted chocolate for drizzling
- Flaky sea salt
- Crushed cookies
- Sprinkles
- Mini chocolate chips
- Whatever your heart desires
Equipment:
- 9x13 baking pan for brownies
- Cookie scoop or spoon
- Baking sheet
- Parchment paper
- Fork or dipping tool for chocolate coating
- Piping bag or ziplock for drizzling (optional)
Instructions
Raw flour can have bacteria, so we need to heat-treat it. This is quick and easy, don’t skip it.
Microwave method: Spread flour on a microwave-safe plate and microwave in 30-second intervals, stirring between, until it reaches 165°F (about 1-2 minutes total). Use a thermometer to check.
Oven method: Spread flour on a baking sheet and bake at 350°F for 5 minutes, stirring halfway through. Let it cool completely.
Once cooled, whisk the flour to break up any lumps. Set aside.
In a large bowl (or stand mixer), beat the softened butter with both sugars on medium-high speed for 2-3 minutes until light and fluffy.
Add milk, vanilla extract, and salt. Beat until combined.
Add the heat-treated flour and mix on low speed until just combined. The dough will be thick and slightly crumbly—that’s perfect.
Fold in the mini chocolate chips. The dough should hold together when you press it. If it’s too dry, add another tablespoon of milk.
Cover and refrigerate the dough for at least 30 minutes. This makes it easier to work with and helps it hold its shape.
Bake brownies according to box directions (or your homemade recipe) in a 9×13 pan. Let them cool COMPLETELY. Like, actually completely. Warm brownies won’t work for this.
Once cool, you’re going to crumble them up. Yes, you read that right. All that beautiful brownie is getting demolished. Use your hands or a fork to break them into fine crumbs. You want a texture like wet sand—crumbly but moldable.
If your brownies are too dry to hold together, add 2-3 tablespoons of chocolate frosting to help bind them. Mix well. When you squeeze a handful, it should hold its shape.
This is where the magic happens. Line a baking sheet with parchment paper.
Take about 1 tablespoon of chilled cookie dough and roll it into a ball. You should get about 20-24 balls.
Take about 1 tablespoon of brownie crumbs and flatten it in your palm into a disc.
Place the cookie dough ball in the center of the brownie disc. Wrap the brownie around the cookie dough, sealing it completely. Roll it between your palms to make a smooth ball.
Place on the prepared baking sheet. Repeat with remaining dough and brownie crumbs.
Once all bombs are assembled, freeze them for 30 minutes to 1 hour. This is CRUCIAL. Cold bombs are easier to dip and the chocolate sets properly. Don’t skip this step or you’ll hate yourself during the dipping process.
In a microwave-safe bowl, combine chocolate melting wafers and coconut oil. Microwave in 30-second intervals, stirring between each, until completely melted and smooth. Usually takes 1.5-2 minutes total.
The chocolate should be thin enough to coat easily but not hot (hot chocolate melts the bombs). Let it cool slightly if needed.
Remove bombs from the freezer. Working one at a time, place a bomb on a fork and lower it into the melted chocolate. Spoon chocolate over the top to coat completely.
Lift it out, letting excess chocolate drip off. Tap the fork gently on the side of the bowl to remove more excess. You want a thin, even coating—not a chocolate blob.
Slide the coated bomb off the fork onto a parchment-lined baking sheet. Repeat with remaining bombs.
Work quickly because the bombs start to thaw. If they get too soft, pop them back in the freezer for 10 minutes and resume.
While the chocolate coating is still wet, add any toppings you want—sea salt, sprinkles, crushed cookies, whatever.
For chocolate drizzle: Save some melted chocolate (or melt additional chocolate), put it in a piping bag or ziplock with a tiny corner cut off, and drizzle over the set bombs in a zigzag pattern.
Let the bombs sit at room temperature for 15-20 minutes until the chocolate sets, or refrigerate for 10 minutes if you’re impatient.
Once set, store in an airtight container in the fridge until ready to serve.
Remove from fridge about 10 minutes before serving for the best texture. Cold is good, but room temp is chef’s kiss.
Arrange on a pretty plate and watch people’s eyes light up when they bite into them.
Hide a few in the back of the fridge for yourself. Trust me on this.
Notes
These are already extra, but here’s how to make them even more ridiculous:
- Serve with vanilla ice cream and hot fudge
- Pair with coffee, hot chocolate, or cold milk
- Arrange on a dessert board with other treats
- Package in clear boxes tied with ribbon for gifts
- Serve at parties with toothpicks for easy grabbing
- Make a dessert platter with various chocolate bombs
- Cut one in half to show off the layers (Instagram gold)
- Prep Time: 45 minutes
- Cook Time: 30 minutes
Nutrition
- Calories: ~190 kcal
- Sugar: ~16g
- Sodium: ~85mg
- Fat: ~10g
- Carbohydrates: ~24g
- Protein: ~2g


