Description
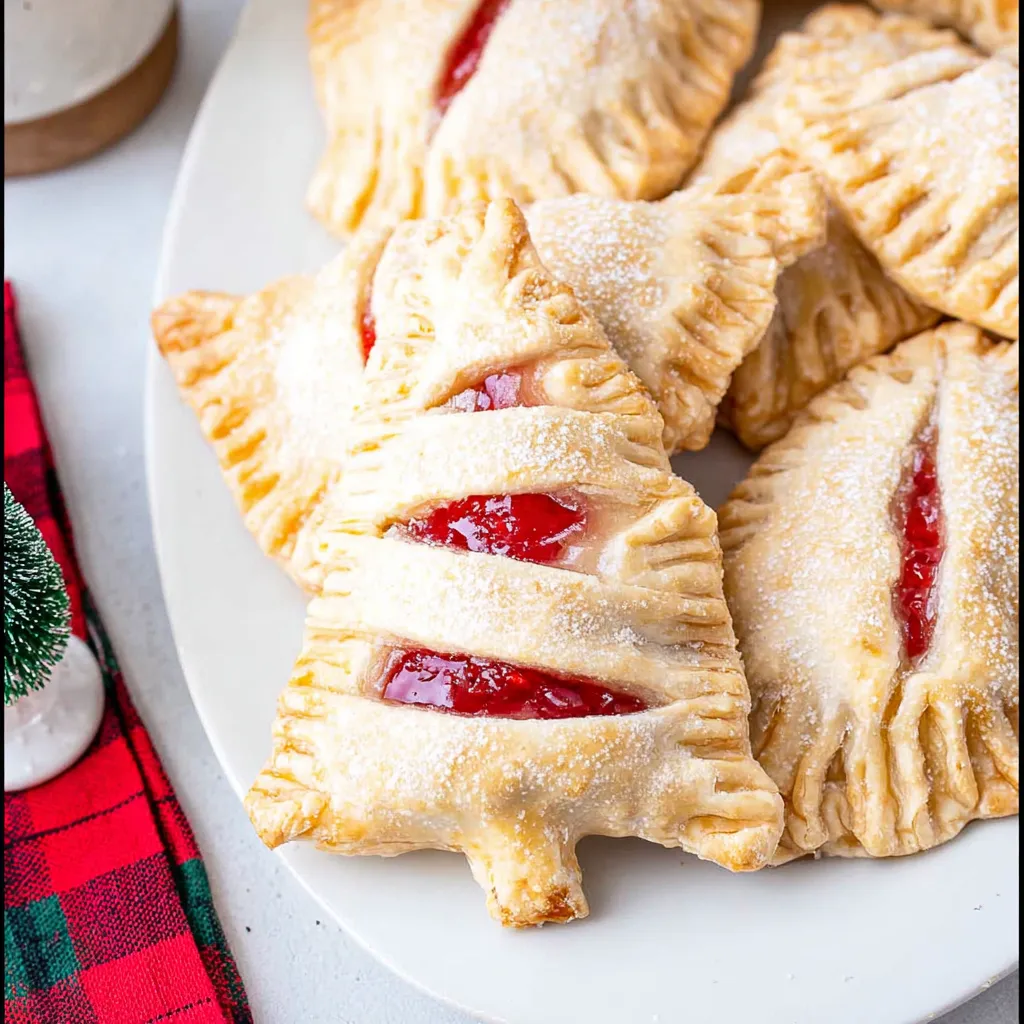
Okay, so imagine if a Pop-Tart went to finishing school, got a culinary degree, and came back looking absolutely precious and tasting a thousand times better. That’s what we’re dealing with here. Cherry Hand Pies are basically individual-sized pies that you can hold in your hand like the civilized snack they are—flaky, buttery pastry wrapped around sweet-tart cherry filling, crimped into cute little packages, and topped with a simple glaze and extra sparkle. They’re like regular cherry pie decided to become portion-controlled and infinitely more transportable. I made these for a brunch once and someone literally asked if I’d gotten up at 3am to bake because “they look too professional to be real.” Reader, I made them the night before while watching Netflix in my pajamas. Another person ate three and then tried to sneak a fourth into their purse. I pretended not to notice because honestly? Relatable. These hand pies inspire theft.
Ingredients
For the Pastry:
- 2 1/2 cups all-purpose flour
- 1 tbsp granulated sugar
- 1 tsp salt
- 1 cup (2 sticks) cold unsalted butter, cut into cubes
- 6–8 tbsp ice water
- OR just buy 2 boxes of refrigerated pie crust if you’re not trying to be a hero
For the Cherry Filling:
- 2 cups fresh or frozen pitted cherries, chopped
- 1/3 cup granulated sugar
- 2 tbsp cornstarch
- 1 tbsp lemon juice
- 1/2 tsp vanilla extract
- Pinch of salt
- OR 1 can (21 oz) cherry pie filling if you’re going the easy route
For Assembly:
- 1 egg beaten with 1 tbsp water (egg wash)
- Coarse sugar for sprinkling (optional but pretty)
For the Glaze:
- 1 cup powdered sugar
- 2–3 tbsp milk or cream
- 1/2 tsp vanilla extract
- Red food coloring (optional, for pink glaze)
Instructions
Step 1: Make the Pastry (or Don’t)
If making homemade: Mix flour, sugar, and salt in a large bowl. Cut in cold butter using a pastry cutter or your hands until the mixture looks like coarse crumbs with pea-sized butter chunks.
Add ice water 1 tablespoon at a time, mixing until the dough just comes together. Don’t overmix or the pastry will be tough.
Divide dough in half, form into disks, wrap in plastic, and refrigerate for at least 1 hour.
If using store-bought: Open the boxes. You’re done. No shame, only delicious hand pies.
Step 2: Make the Cherry Filling
If using fresh/frozen cherries: In a medium saucepan, combine chopped cherries, sugar, cornstarch, lemon juice, vanilla, and salt.
Cook over medium heat, stirring frequently, until the mixture thickens and becomes jammy, about 8-10 minutes. It should coat the back of a spoon.
Remove from heat and let cool completely. The filling MUST be cool before assembling or it’ll make the pastry soggy.
If using canned pie filling: Open the can. Congratulations, you’re done. Maybe add a squeeze of lemon juice to brighten it up.
Step 3: Roll and Cut
Preheat oven to 375°F (190°C). Line two baking sheets with parchment paper.
On a floured surface, roll out one disk of dough to about 1/8-inch thickness.
Cut out rectangles or circles—about 4×5 inches for rectangles, or 5-inch circles. You should get about 8-10 pieces per disk of dough.
Gather scraps, re-roll, and cut more. Waste not, want not.
Step 4: Fill and Seal
Place half of your pastry pieces on the prepared baking sheets—these are your bottoms.
Spoon about 2-3 tablespoons of cooled cherry filling onto the center of each bottom piece, leaving about 1/2 inch border around the edges.
Don’t overfill or the filling will leak out during baking. Less is more here.
Brush the edges with egg wash—this is the glue that holds everything together.
Place a top pastry piece over each filled bottom and press the edges together firmly to seal.
Crimp the edges with a fork for that classic hand pie look. Press down hard—you want a good seal.
Cut 2-3 small slits in the top of each pie to let steam escape. This prevents explosions.
Step 5: Bake to Golden Perfection
Brush the tops of each hand pie with egg wash.
Sprinkle with coarse sugar if using—this creates a sparkly, crunchy top.
Bake for 22-28 minutes until the pastry is golden brown and you can see the filling bubbling slightly through the vents.
Let cool on the baking sheet for 5 minutes, then transfer to a wire rack to cool completely before glazing.
Step 6: Glaze and Garnish
In a small bowl, whisk together powdered sugar, milk/cream, and vanilla until smooth. The glaze should be thick but pourable—adjust liquid as needed.
Add a drop of red food coloring if you want pink glaze (totally optional but cute).
Drizzle glaze over the cooled hand pies using a spoon or fork. Let it drip down the sides naturally.
Let the glaze set for about 15-20 minutes before serving or storing.
Step 7: Devour
Serve at room temperature or slightly warm.
Try not to eat all of them in one sitting. This is harder than it sounds.
Accept compliments graciously when people ask where you bought them.
Notes
These are perfect as-is, but here are some ideas to take them over the top:
- Serve warm with vanilla ice cream on the side
- Pair with coffee or tea for breakfast or brunch
- Dust with powdered sugar instead of glazing for a simpler look
- Serve alongside other pastries on a brunch platter
- Pack in lunchboxes for the world’s best packed lunch
- Warm them slightly in the microwave (10-15 seconds) before eating
- Prep Time: 30 minutes
- Cook Time: 25 minutes
Nutrition
- Calories: ~285 kcal
- Fat: ~14g
- Carbohydrates: ~38g
- Protein: ~3g
