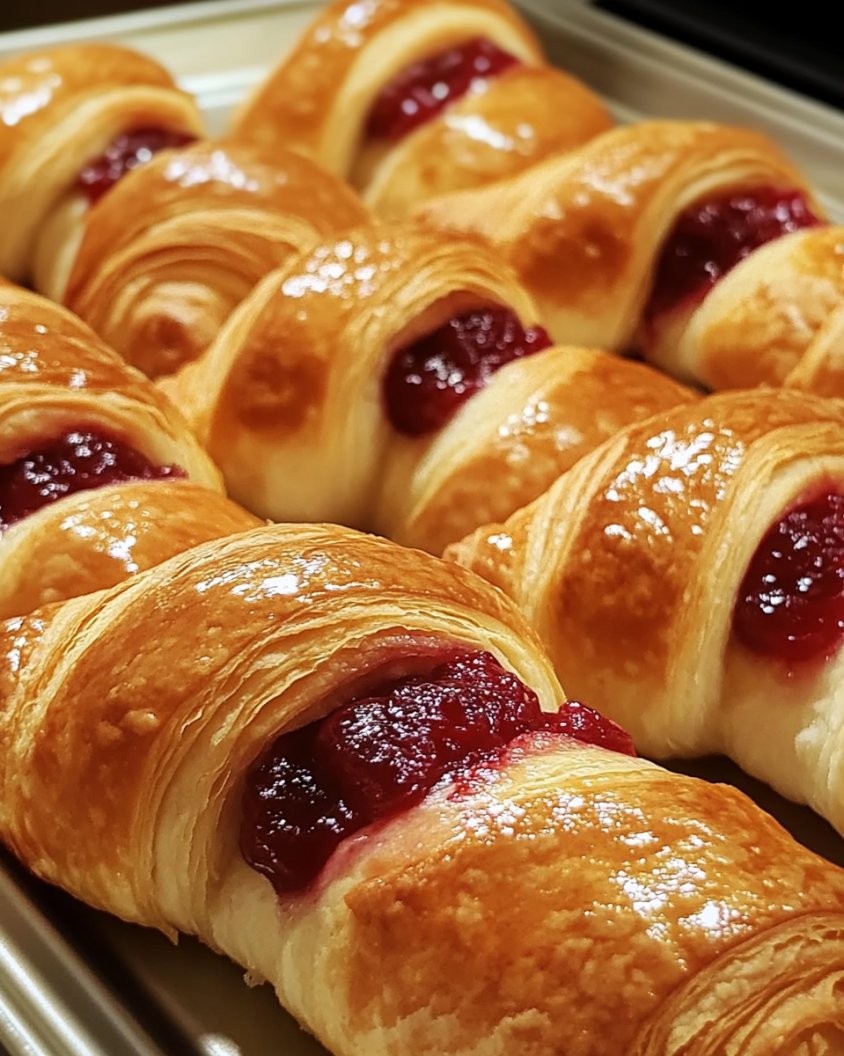
Crescent rolls are a staple in many households, known for their light, flaky texture and buttery flavor. But when you add a sweet cherry filling, they transform into a delightful dessert that’s not just easy to make but also incredibly satisfying. These Cherry Filled Crescent Rolls are perfect for breakfast, brunch, or even a simple dessert after dinner. The best part? They come together in less than 30 minutes, making them a go-to recipe when you need something quick, tasty, and sure to impress. Whether you’re hosting a brunch or just treating yourself, these rolls offer the perfect blend of sweet and flaky that will keep you coming back for more.
Let’s dive into the details of this recipe, ensuring that even the most novice baker can create this delicious treat with ease. From choosing the right type of cherries to nailing the perfect roll, this guide will cover everything you need to know.
Ingredients
The ingredients for these Cherry Filled Crescent Rolls are simple and straightforward, but the quality of each component can make a significant difference in the final product. Let’s look at each ingredient and discuss why it’s used and what to consider when purchasing.
- Crescent Roll Dough (1 can, 8 oz): Crescent roll dough is the backbone of this recipe. You can find it in the refrigerated section of most grocery stores. Brands like Pillsbury are commonly used, but any brand will work as long as the dough is fresh. The dough comes pre-cut into triangles, which are perfect for rolling into crescents. This dough is buttery, flaky, and rises beautifully, creating a light and airy texture that pairs well with the cherry filling.
- Cherry Pie Filling (1 cup): This ingredient is the star of the show. Cherry pie filling is typically made from tart cherries, sugar, and a thickening agent like cornstarch. You can use store-bought cherry pie filling, which is convenient and available in cans. However, if you prefer, you can also make your own cherry filling using fresh or frozen cherries, sugar, lemon juice, and cornstarch. The homemade version allows you to control the sweetness and adjust the flavor to your liking.
- Powdered Sugar (1 tablespoon, optional for dusting): A light dusting of powdered sugar adds a touch of sweetness and an elegant finish to the crescent rolls. This step is optional but highly recommended for a bakery-like appearance. The powdered sugar can also be mixed with a bit of milk to create a glaze if you prefer a little extra sweetness on top.
- Melted Butter (1 tablespoon, optional for brushing): Brushing the crescent rolls with melted butter before baking adds a golden color and enhances the flavor. It’s a small touch that makes a big difference, giving the rolls a glossy finish and an extra layer of richness.
Instructions
To ensure that you get the best results, follow these detailed instructions. Even if you’re a beginner, this step-by-step guide will walk you through the process, making it easy to achieve perfect cherry-filled crescents.
- Preheat the Oven: Start by preheating your oven to 375°F (190°C). Proper preheating ensures that the rolls bake evenly and puff up nicely. Line a baking sheet with parchment paper to prevent sticking and make cleanup a breeze.
- Prepare the Crescent Rolls: Open the can of crescent roll dough carefully. Unroll the dough on a flat surface and separate it into the pre-cut triangles. Lay them out on the parchment-lined baking sheet, ensuring there is enough space between each triangle for them to expand while baking.
- Fill with Cherry Pie Filling: Spoon about 1-2 tablespoons of cherry pie filling onto the wide end of each triangle. Be careful not to overfill, as too much filling can cause the rolls to leak during baking. If you’re making your own filling, ensure that it’s thick enough to hold together when placed on the dough. If it’s too runny, add a bit more cornstarch and cook it down until it thickens.
- Roll the Dough: Starting from the wide end, gently roll each triangle towards the pointed end, encasing the cherry filling inside. Tuck the ends slightly to prevent the filling from spilling out during baking. This technique will create a nice, compact crescent shape that holds the filling securely.
- Brush with Melted Butter (Optional): For a golden and glossy finish, brush the tops of the rolls with melted butter. This step enhances the flavor and adds an extra touch of richness. If you want a sweeter finish, you can also sprinkle a little sugar on top after brushing with butter.
- Bake: Place the baking sheet in the preheated oven and bake for 10-12 minutes or until the crescent rolls are golden brown and puffed up. Keep an eye on them in the last few minutes to ensure they don’t overbake. The aroma of baking dough and cherries will fill your kitchen, making it hard to wait until they’re done!
- Cool and Serve: Once baked, remove the rolls from the oven and let them cool for a few minutes on the baking sheet. Transfer them to a wire rack to cool slightly before serving. Dust with powdered sugar for an elegant touch, or drizzle with a simple glaze made from powdered sugar and milk.
Duration Time
One of the best things about this recipe is its quick turnaround time. Here’s a breakdown of how long each step will take:
- Preparation Time: 10 minutes
- Baking Time: 12 minutes
- Total Time: 22 minutes
This quick bake time makes the rolls an excellent choice for impromptu gatherings, last-minute desserts, or just a sweet treat on a busy day.
Nutritional Information
Understanding the nutritional content of your food helps you make informed choices. Below is the nutritional breakdown for one cherry-filled crescent roll. Keep in mind that these values are approximate and can vary depending on the specific brands of ingredients used.
- Calories: 160
- Total Fat: 7g
- Saturated Fat: 3.5g
- Cholesterol: 5mg
- Sodium: 210mg
- Total Carbohydrates: 22g
- Sugars: 9g
- Dietary Fiber: 1g
- Protein: 2g
These rolls are a delightful indulgence, and while they are not low-calorie, they offer a balanced treat that can fit into a moderate diet when enjoyed in moderation.
FAQs
1. Can I Use Fresh or Frozen Cherries Instead of Canned Filling?
Yes, you can definitely use fresh or frozen cherries if you prefer a more homemade touch. To make your own cherry filling, combine 2 cups of pitted cherries (fresh or thawed if frozen), 1/2 cup sugar, 1 tablespoon lemon juice, and 1 tablespoon cornstarch in a saucepan. Cook over medium heat until the cherries release their juices and the mixture thickens. Let it cool slightly before using as a filling.
2. How Do I Prevent the Filling from Leaking Out?
To minimize leaking, be sure not to overfill the dough and tuck the ends of the crescent rolls as you roll them. Brushing the edges with a little water before rolling can also help seal the dough. Additionally, keeping the rolls seam side down on the baking sheet helps prevent the filling from escaping during baking.
3. Can I Use a Different Pie Filling?
Absolutely! This recipe is versatile, and you can substitute the cherry filling with apple, blueberry, raspberry, or even peach pie filling. The process remains the same, allowing you to customize the rolls to your taste or what you have on hand.
4. Are There Any Toppings I Can Add?
Aside from powdered sugar, you can add a drizzle of vanilla glaze or a sprinkle of sliced almonds for extra flavor and texture. For a more decadent treat, serve the crescent rolls with a scoop of vanilla ice cream or a dollop of whipped cream.
5. How Should I Store Leftover Rolls?
If you have leftovers (which rarely happens!), store them in an airtight container at room temperature for up to 2 days. To reheat, place them in the oven at 300°F (150°C) for about 5 minutes to restore their crispiness. Avoid microwaving, as it can make the rolls soggy.
6. Can I Make These Rolls in Advance?
Yes, you can prepare the crescent rolls up to the rolling stage and refrigerate them for up to 8 hours before baking. When you’re ready to bake, preheat the oven and proceed as directed. This makes them a convenient option for early morning baking or pre-planning for a gathering.
7. What Should I Do if My Dough Tears?
If your dough tears while unrolling or rolling, don’t worry. Simply pinch the dough back together with your fingers or patch it with a small piece of extra dough. Crescent roll dough is quite forgiving, and minor imperfections won’t affect the taste or overall appearance significantly.
8. Can I Use a Gluten-Free Dough?
Yes, if you’re gluten-sensitive or catering to someone who is, you can use gluten-free crescent roll dough available in specialty grocery stores. The process is the same, but keep in mind that gluten-free doughs can sometimes be a bit more delicate, so handle them with care.
9. Are These Rolls Suitable for Vegetarians?
Most crescent roll doughs and cherry fillings are suitable for vegetarians, but always check the ingredient labels to be sure. Some brands might use gelatin or animal-derived stabilizers in their fillings, so opting for a certified vegetarian or vegan product is the best way to ensure suitability.
These Cherry Filled Crescent Rolls are the perfect blend of simplicity and indulgence, making them an ideal choice for any occasion. With minimal ingredients and easy steps, you can whip up a batch of these delightful rolls that will have everyone asking for more. So why wait? Grab that can of dough and your favorite cherry filling, and enjoy a sweet moment with every bite!