
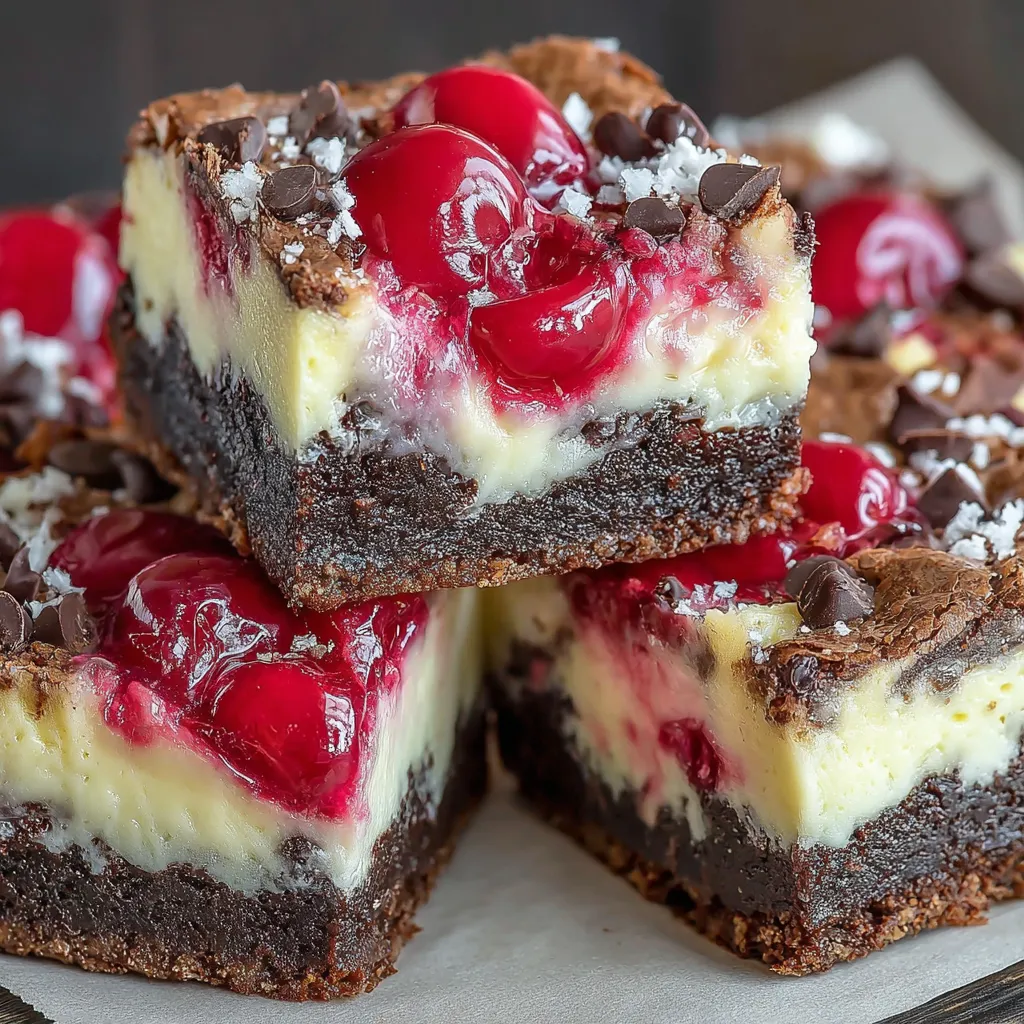
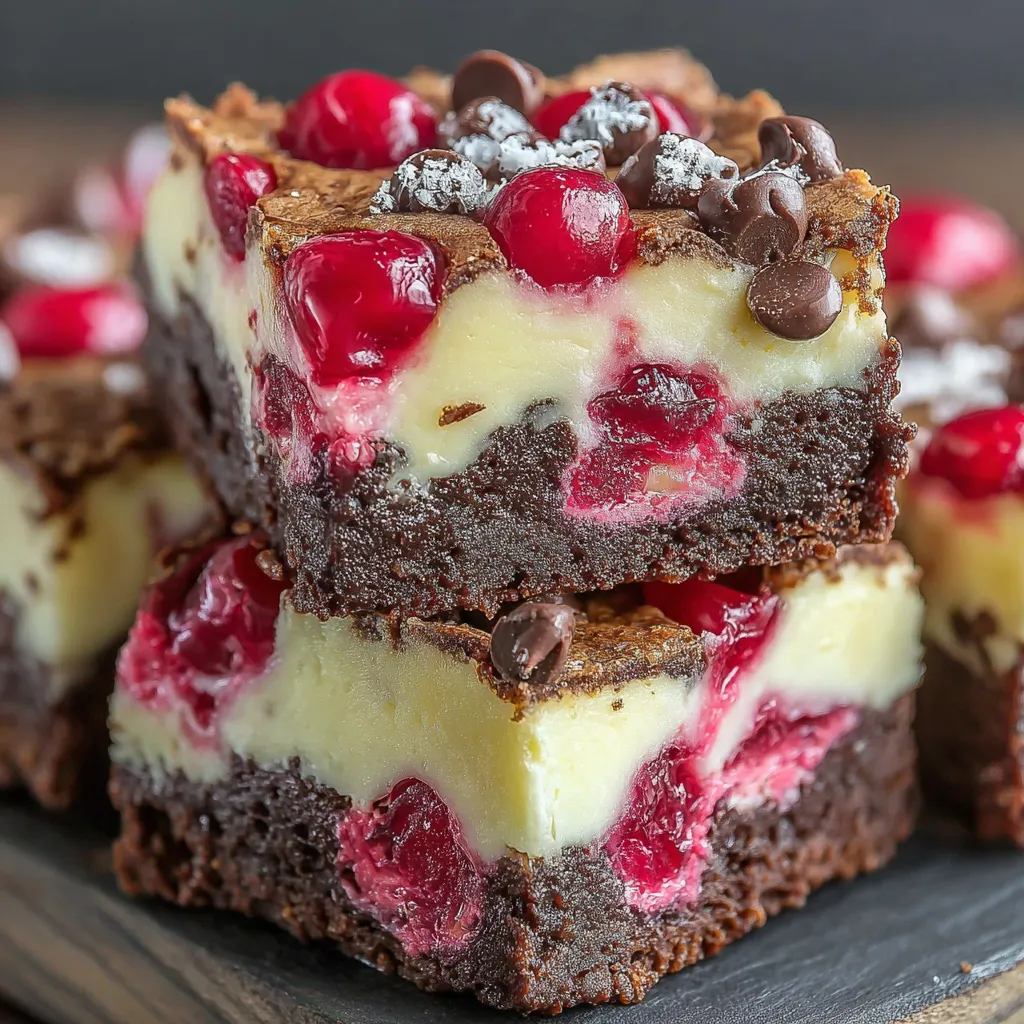
Okay, so picture this: a fudgy, rich brownie that’s been topped with tangy cream cheese cheesecake, then studded with sweet cherries and swirled into a gorgeous marble pattern. It’s like brownies and cheesecake got together, fell madly in love, and created the most ridiculously indulgent love child that’s ever graced a baking pan. These Cherry Cheesecake Brownie Bars are what happens when you can’t decide between brownies or cheesecake for dessert and someone brilliant says “why not BOTH?” And then adds cherries because apparently we’re living in a world where dreams come true.
I brought these to a potluck once and had three people corner me demanding the recipe. One person said they “awakened something” in her. Another guy took a photo before eating it like it was a celebrity. These bars don’t just satisfy a sweet tooth—they create an experience.
Why You’ll Love This Recipe
Three desserts in one bite. Brownie, cheesecake, and cherry pie had a meeting and this is what they decided on.
That swirl though. The marble pattern makes you look like a professional pastry chef even if you burn toast regularly.
Perfect texture combo. Dense fudgy brownie + creamy tangy cheesecake + jammy cherry pockets = texture heaven.
Crowd destroyer. Make these for any gathering and watch them disappear faster than free samples at Costco.
Actually not that hard. Looks fancy, tastes expensive, but honestly pretty straightforward to make.
Make-ahead friendly. These actually taste better after sitting overnight when all the flavors get cozy together.
The Good Stuff You’ll Need
For the Brownie Layer:
- 1/2 cup (1 stick) unsalted butter
- 8 oz semi-sweet or dark chocolate, chopped (or 1 1/3 cups chocolate chips)
- 3/4 cup granulated sugar
- 1/4 cup brown sugar
- 3 large eggs
- 1 tsp vanilla extract
- 3/4 cup all-purpose flour
- 1/4 cup unsweetened cocoa powder
- 1/2 tsp salt
For the Cheesecake Layer:
- 16 oz (two 8-oz blocks) cream cheese, softened to room temp (this is IMPORTANT)
- 1/2 cup granulated sugar
- 2 large eggs
- 1 tsp vanilla extract
- 2 tbsp all-purpose flour
For the Cherry Topping:
- 1 1/2 cups fresh or frozen pitted cherries (if using frozen, don’t thaw them)
- OR 1 cup cherry pie filling
- OR 1 cup cherry preserves
- 1/4 cup sugar (only if using fresh/frozen cherries)
- 1 tbsp cornstarch (only if using fresh/frozen cherries)
Let’s Do This
Step 1: Prep Like a Boss
Preheat your oven to 350°F (175°C).
Line a 9×13 inch baking pan with parchment paper, leaving some overhang on the sides (this is your get-out-of-pan-free card later).
Take your cream cheese out NOW if you forgot earlier. Room temp cream cheese is non-negotiable or you’ll have lumpy cheesecake and sadness.
Step 2: Make the Brownie Base
In a microwave-safe bowl, melt butter and chocolate together in 30-second bursts, stirring between each one until smooth and glossy. Don’t rush this—burned chocolate is a tragedy.
Let it cool for 5 minutes so you don’t scramble the eggs in the next step.
Whisk in both sugars until combined. It’ll look grainy—that’s fine.
Add eggs one at a time, whisking well after each addition. The mixture should get smooth and glossy.
Stir in vanilla extract.
In a separate bowl, whisk together flour, cocoa powder, and salt.
Fold the dry ingredients into the chocolate mixture until just combined. Don’t overmix or you’ll have cakey brownies instead of fudgy ones, and we’re not about that life.
Pour brownie batter into your prepared pan and spread it evenly. Set aside while you make the cheesecake layer.
Step 3: Whip Up That Cheesecake
In a large bowl (or stand mixer), beat the softened cream cheese on medium speed for 2-3 minutes until it’s completely smooth and fluffy. Scrape down the sides.
Add sugar and beat for another 2 minutes until light and creamy.
Add eggs one at a time, beating well after each addition.
Mix in vanilla extract and flour until just combined. Don’t overmix once the flour is in.
The mixture should be smooth, creamy, and pourable. If it’s lumpy, your cream cheese wasn’t soft enough (I warned you).
Step 4: Prep Your Cherries
If using fresh or frozen cherries: In a small bowl, toss cherries with sugar and cornstarch. The cornstarch will prevent them from making the bars watery.
If using cherry pie filling: You’re good to go, just give it a stir.
If using preserves: If it’s super thick, you can thin it slightly with a teaspoon of water.
Step 5: The Assembly (This Is Where the Magic Happens)
Pour the cheesecake mixture over the brownie layer. Spread it carefully to cover the entire surface.
Drop spoonfuls of cherry mixture (or pie filling, or preserves) randomly across the top. Don’t overthink the placement—messy is beautiful here.
Using a butter knife or skewer, swirl through all the layers in a figure-8 or S-pattern. Don’t overdo it—you want distinct swirls, not a muddy mess. About 8-10 swirls total is perfect.
Some of the brownie will come up into the cheesecake. THAT’S THE GOAL. That’s what creates the gorgeous marble effect.
Step 6: Bake to Perfection
Bake for 35-40 minutes. The edges should be set and lightly golden, but the center should still jiggle slightly when you shake the pan.
The cheesecake will puff up while baking—that’s normal. It’ll deflate as it cools.
A toothpick inserted in the center should come out with a few moist crumbs, not wet batter.
DO NOT OVERBAKE. These should be fudgy, not cakey.
Step 7: The Hardest Part (Cooling and Chilling)
Let the bars cool in the pan on a wire rack for at least 1 hour at room temperature.
Then cover with plastic wrap and refrigerate for AT LEAST 4 hours, but overnight is even better.
I know it’s torture, but cheesecake needs to chill completely to set properly. If you cut these warm, they’ll be a gooey mess (still delicious, but not pretty).
Step 8: Cut and Serve
Once completely chilled, use the parchment paper overhang to lift the entire block out of the pan.
Use a sharp knife, wiping it clean between each cut for neat edges.
Cut into 16-20 squares depending on how generous you’re feeling.
Serve cold or at room temperature. Both are incredible.
Serving Suggestions
These are perfect as-is, but if you want to get extra:
- Top with a dollop of whipped cream
- Drizzle with chocolate ganache
- Add a fresh cherry on top of each square for garnish
- Serve with a scoop of vanilla ice cream
- Dust with powdered sugar for a fancy finish
- Pair with coffee for the ultimate afternoon treat
- Serve on a platter with fresh cherries scattered around for aesthetics
Switch It Up
Raspberry Swirl: Swap cherries for fresh raspberries or raspberry preserves.
Strawberry Cheesecake Brownies: Use diced strawberries and strawberry jam instead.
Blueberry Version: Fresh or frozen blueberries work beautifully here.
Triple Chocolate: Add 1/2 cup chocolate chips to the brownie batter for extra chocolate chunks.
Salted Caramel: Drizzle caramel sauce over the top before swirling and add a sprinkle of flaky sea salt.
Oreo Cheesecake Brownies: Mix crushed Oreos into the cheesecake layer and skip the cherries.
Peanut Butter Swirl: Replace cherries with dollops of peanut butter for a PB chocolate situation.
Make-Ahead Tips
Brownies improve with age (unlike most things in life).
- Make these up to 3 days ahead. Store covered in the fridge.
- They actually taste BETTER on day 2 when the flavors have melded.
- Freeze cut bars wrapped individually for up to 3 months. Thaw in the fridge overnight.
- The uncut block can be frozen for up to 3 months. Thaw in fridge before cutting.
- Always store these in the refrigerator because of the cheesecake layer.
Why This Works So Damn Well
The magic here is all about contrasts and balance. The brownie layer is intensely chocolatey and fudgy—almost truffle-like in texture. The cheesecake layer is tangy and creamy, cutting through all that chocolate richness. The cherries add pockets of fruity sweetness and a little tartness that keeps these from being one-dimensional.
The swirling isn’t just pretty—it ensures you get all three components in every bite. The brownie marbles into the cheesecake, creating little chocolate rivers through the cream cheese. The cherries sink slightly and create jammy pockets of fruit that surprise you.
Baking them together creates this beautiful fusion where the layers stay distinct but also marry together. The brownie stays fudgy because the cheesecake layer protects it from overbaking. The cheesecake gets a slight chocolate flavor from the swirling. It’s dessert symbiosis.
When to Make These
Potlucks and parties: These feed a crowd and transport well. Plus they look FANCY.
Holiday dessert tables: Perfect for Christmas, Valentine’s Day, or any celebration that needs an impressive dessert.
Bake sales: These will sell out first. Price them high—they’re worth it.
Date night dessert: Make these for someone you want to impress. Results guaranteed.
Weekend baking project: Not too complicated, but fancy enough to feel accomplished.
Stress baking: Sometimes you just need to make something ridiculously indulgent.
Questions People Actually Ask
Q: Can I use a different pan size?
A: An 8×8 will give you thicker bars (bake for 45-50 minutes). A 9×9 works too (bake 40-45 minutes). Don’t go bigger or they’ll be too thin.
Q: My cheesecake layer cracked. Did I ruin them?
A: Nope! Cracks happen, especially if you overbaked slightly or cooled too fast. They still taste amazing and the swirls hide imperfections anyway.
Q: Can I skip the cherry layer?
A: Sure, you’ll just have regular cheesecake brownies, which are still delicious. But the cherries really make these special.
Q: The brownie layer is too thin/thick.
A: Spread it evenly! If it’s not covering the whole pan, you might need to make 1.5x the brownie recipe for a 9×13 pan.
Q: Can I use low-fat cream cheese?
A: You CAN, but the cheesecake layer won’t be as creamy and rich. Full-fat is really worth it here.
Q: How do I know when they’re done?
A: The edges should be set and pulling slightly away from the pan. The center should jiggle slightly but not look wet. Remember they’ll continue setting as they cool.
Q: Can I make these in a springform pan?
A: Yes! Use a 9-inch springform. Wrap the outside in foil and place in a water bath to prevent cracking. Bake time stays the same.
Q: These are too rich—how do I fix that?
A: Cut smaller squares. These are RICH. Also, the tartness of fresh cherries helps balance the richness more than pie filling does.
Cherry Cheesecake Brownie Bars
- Total Time: 1 hour 5 minutes
- Yield: 16–20 bars 1x
Description
Okay, so picture this: a fudgy, rich brownie that’s been topped with tangy cream cheese cheesecake, then studded with sweet cherries and swirled into a gorgeous marble pattern. It’s like brownies and cheesecake got together, fell madly in love, and created the most ridiculously indulgent love child that’s ever graced a baking pan. These Cherry Cheesecake Brownie Bars are what happens when you can’t decide between brownies or cheesecake for dessert and someone brilliant says “why not BOTH?” And then adds cherries because apparently we’re living in a world where dreams come true.
I brought these to a potluck once and had three people corner me demanding the recipe. One person said they “awakened something” in her. Another guy took a photo before eating it like it was a celebrity. These bars don’t just satisfy a sweet tooth—they create an experience.
Ingredients
For the Brownie Layer:
- 1/2 cup (1 stick) unsalted butter
- 8 oz semi-sweet or dark chocolate, chopped (or 1 1/3 cups chocolate chips)
- 3/4 cup granulated sugar
- 1/4 cup brown sugar
- 3 large eggs
- 1 tsp vanilla extract
- 3/4 cup all-purpose flour
- 1/4 cup unsweetened cocoa powder
- 1/2 tsp salt
For the Cheesecake Layer:
- 16 oz (two 8-oz blocks) cream cheese, softened to room temp (this is IMPORTANT)
- 1/2 cup granulated sugar
- 2 large eggs
- 1 tsp vanilla extract
- 2 tbsp all-purpose flour
For the Cherry Topping:
- 1 1/2 cups fresh or frozen pitted cherries (if using frozen, don’t thaw them)
- OR 1 cup cherry pie filling
- OR 1 cup cherry preserves
- 1/4 cup sugar (only if using fresh/frozen cherries)
- 1 tbsp cornstarch (only if using fresh/frozen cherries)
Instructions
Preheat your oven to 350°F (175°C).
Line a 9×13 inch baking pan with parchment paper, leaving some overhang on the sides (this is your get-out-of-pan-free card later).
Take your cream cheese out NOW if you forgot earlier. Room temp cream cheese is non-negotiable or you’ll have lumpy cheesecake and sadness.
In a microwave-safe bowl, melt butter and chocolate together in 30-second bursts, stirring between each one until smooth and glossy. Don’t rush this—burned chocolate is a tragedy.
Let it cool for 5 minutes so you don’t scramble the eggs in the next step.
Whisk in both sugars until combined. It’ll look grainy—that’s fine.
Add eggs one at a time, whisking well after each addition. The mixture should get smooth and glossy.
Stir in vanilla extract.
In a separate bowl, whisk together flour, cocoa powder, and salt.
Fold the dry ingredients into the chocolate mixture until just combined. Don’t overmix or you’ll have cakey brownies instead of fudgy ones, and we’re not about that life.
Pour brownie batter into your prepared pan and spread it evenly. Set aside while you make the cheesecake layer.
In a large bowl (or stand mixer), beat the softened cream cheese on medium speed for 2-3 minutes until it’s completely smooth and fluffy. Scrape down the sides.
Add sugar and beat for another 2 minutes until light and creamy.
Add eggs one at a time, beating well after each addition.
Mix in vanilla extract and flour until just combined. Don’t overmix once the flour is in.
The mixture should be smooth, creamy, and pourable. If it’s lumpy, your cream cheese wasn’t soft enough (I warned you).
If using fresh or frozen cherries: In a small bowl, toss cherries with sugar and cornstarch. The cornstarch will prevent them from making the bars watery.
If using cherry pie filling: You’re good to go, just give it a stir.
If using preserves: If it’s super thick, you can thin it slightly with a teaspoon of water.
Pour the cheesecake mixture over the brownie layer. Spread it carefully to cover the entire surface.
Drop spoonfuls of cherry mixture (or pie filling, or preserves) randomly across the top. Don’t overthink the placement—messy is beautiful here.
Using a butter knife or skewer, swirl through all the layers in a figure-8 or S-pattern. Don’t overdo it—you want distinct swirls, not a muddy mess. About 8-10 swirls total is perfect.
Some of the brownie will come up into the cheesecake. THAT’S THE GOAL. That’s what creates the gorgeous marble effect.
Bake for 35-40 minutes. The edges should be set and lightly golden, but the center should still jiggle slightly when you shake the pan.
The cheesecake will puff up while baking—that’s normal. It’ll deflate as it cools.
A toothpick inserted in the center should come out with a few moist crumbs, not wet batter.
DO NOT OVERBAKE. These should be fudgy, not cakey.
Let the bars cool in the pan on a wire rack for at least 1 hour at room temperature.
Then cover with plastic wrap and refrigerate for AT LEAST 4 hours, but overnight is even better.
I know it’s torture, but cheesecake needs to chill completely to set properly. If you cut these warm, they’ll be a gooey mess (still delicious, but not pretty).
Once completely chilled, use the parchment paper overhang to lift the entire block out of the pan.
Use a sharp knife, wiping it clean between each cut for neat edges.
Cut into 16-20 squares depending on how generous you’re feeling.
Serve cold or at room temperature. Both are incredible.
Notes
These are perfect as-is, but if you want to get extra:
- Top with a dollop of whipped cream
- Drizzle with chocolate ganache
- Add a fresh cherry on top of each square for garnish
- Serve with a scoop of vanilla ice cream
- Dust with powdered sugar for a fancy finish
- Pair with coffee for the ultimate afternoon treat
- Serve on a platter with fresh cherries scattered around for aesthetics
- Prep Time: 25 minutes
- Cook Time: 40 minutes
Nutrition
- Calories: ~285 kcal
- Fat: ~18g
- Carbohydrates: ~28g
- Protein: ~5g


