Someone decided that wraps didn’t have to be boring health food and loaded one up with garlic-butter chicken, way too much cheese, and then grilled the whole thing until it was crispy on the outside and melty on the inside. That person is a hero, and this wrap is what happens when you stop pretending you want a salad and embrace your cheese-loving truth.
These aren’t those depressing cold wraps you eat at your desk while questioning your life choices. These are hot, crispy, pressed wraps that are basically quesadillas pretending to be sophisticated. The chicken is coated in garlic butter, the cheese melts into every crevice, and the tortilla gets golden and crunchy like the best grilled cheese you’ve ever had. It’s handheld comfort food that tastes way fancier than the 20 minutes it takes to make.
This is the kind of meal that makes lunch exciting again. It’s what you make when you want something satisfying but don’t want to deal with plates and utensils. Just pick it up, take a bite, and experience the textural journey of crispy exterior meeting melty, garlicky interior.
Why These Wraps Are About to Dominate Your Meal Rotation
- 20 minutes total — Faster than delivery and infinitely better
- Crispy exterior, melty interior — The texture contrast is everything
- Garlic butter everything — Because we’re not playing around
- Customizable fillings — Use what you have, make it your own
- Perfect for meal prep — Assemble ahead, grill when ready
- Handheld convenience — No plates required, eat it anywhere
The Stuff You Need
For the Garlic Butter Chicken:
- 1 lb boneless, skinless chicken breasts or thighs
- 4 tablespoons butter, melted
- 4 cloves garlic, minced
- 1 teaspoon Italian seasoning
- ½ teaspoon paprika
- Salt and pepper to taste
- 1 tablespoon olive oil
For the Wraps:
- 4 large flour tortillas (burrito size, 10-12 inches)
- 2 cups shredded mozzarella cheese (or Mexican blend, cheddar, whatever melts)
- ½ cup cream cheese, softened
- 2 tablespoons mayonnaise
- 1 teaspoon garlic powder
- 2 cups fresh spinach or lettuce
- 1 cup diced tomatoes (or sun-dried tomatoes for extra flavor)
- ½ cup diced red onion (optional but adds crunch)
- Butter for grilling
Optional Add-Ins:
- Bacon (because bacon makes everything better)
- Sliced avocado
- Pickled jalapeños for heat
- Ranch dressing instead of the cream cheese mixture
- Caramelized onions
- Roasted red peppers
Special Equipment:
- Large skillet for cooking chicken
- Panini press, grill pan, or regular skillet for pressing wraps
- Something heavy if you don’t have a press (another skillet works)
Let’s Make These Wraps That’ll Make You Forget Sandwiches Exist
Step 1: The Chicken Prep
Cut your chicken into thin strips or bite-sized pieces. This helps it cook faster and makes it easier to wrap later. Season with salt and pepper. Set aside and try to resist eating it raw (don’t actually do this).
Step 2: The Garlic Butter Magic
In a small bowl, mix melted butter with minced garlic, Italian seasoning, and paprika. This is your flavor bomb. The smell alone will make you hungry. Set aside about 2 tablespoons for brushing the tortillas later.
Step 3: Cook That Chicken
Heat olive oil in a large skillet over medium-high heat. Add the chicken pieces and cook for about 5-6 minutes, stirring occasionally, until they’re cooked through and starting to get golden. Pour the garlic butter mixture (saving those 2 tablespoons) over the chicken and toss to coat. Let it cook for another minute so the butter gets slightly caramelized and the garlic becomes fragrant. Remove from heat. Try not to eat all of it straight from the pan.
Step 4: The Cream Cheese Situation
In a small bowl, mix softened cream cheese with mayo and garlic powder until smooth. This is your spread that keeps everything together and adds creaminess. If it’s too thick, add a splash of milk. If you’re feeling lazy, just use ranch dressing. We’re not judging.
Step 5: The Assembly Line
Lay out your tortillas. Spread the cream cheese mixture down the center of each tortilla, leaving about an inch on each end. Layer on some spinach or lettuce, then add the garlic butter chicken, tomatoes, red onion if using, and a generous amount of shredded cheese. Don’t be shy with the cheese – it’s literally in the name of the recipe.
Step 6: The Wrap Technique
Fold in the sides of the tortilla first (like you’re closing a present), then roll it up tightly from the bottom, keeping everything tucked in as you go. The cream cheese mixture helps it stick. If you’re bad at wrapping (no judgment), use a toothpick to hold it together.
Step 7: The Grill That Changes Everything
Heat a clean skillet or grill pan over medium heat. Brush the outside of each wrap with some of that reserved garlic butter. Place the wraps seam-side down in the pan. Here’s the key: press them down with a spatula or another heavy pan. If you have a panini press, this is its moment to shine. Cook for 2-3 minutes per side until golden brown and crispy, and the cheese inside is melted. The pressing is what makes these special – it creates that crispy exterior and seals everything together.
Step 8: The Rest
Let the wraps rest for about 2 minutes after grilling. This helps the cheese set up slightly so it doesn’t all ooze out when you cut them. Plus it prevents you from burning your mouth on molten cheese, which is a public service.
Step 9: The Cut and Serve
Cut each wrap in half diagonally because diagonal cuts are scientifically proven to taste better (this is not true but it looks better). Serve with extra ranch, hot sauce, salsa, or just eat them plain because they’re already perfect.
Step 10: The Experience
Pick up that half. Notice the crispy, golden tortilla. Bite into it and experience the layers – the crunchy exterior, the melted cheese, the garlicky chicken, the fresh vegetables. Understand why pressed wraps are superior to regular wraps. Make mental note to never eat a sad cold wrap again.
Pro Tips From Someone Who’s Made These Too Many Times
Thin Chicken is Key: Pound your chicken flat or cut it thin. Thick chicken pieces make the wraps bulky and hard to eat.
Don’t Overfill: It’s tempting, but overstuffed wraps are impossible to close and will explode when you grill them. Exercise restraint.
Warm Tortillas First: Microwave them for 10 seconds to make them more pliable. Cold tortillas crack when you fold them.
The Press Matters: Really press down when grilling. This is what creates that crispy, compact texture. No pressing = no crispy exterior.
Seam Side Down First: Always start grilling with the seam side down. This seals it closed with heat before you flip it.
Medium Heat Only: Too hot and the outside burns before the cheese melts. Too low and it gets soggy instead of crispy.
Switch It Up (Because Variety Keeps Life Interesting)
Buffalo Chicken Wraps: Toss chicken in buffalo sauce instead of garlic butter. Add blue cheese crumbles. Spicy and tangy.
Caesar Chicken Wraps: Use Caesar dressing, romaine, Parmesan, and add bacon. Classic for a reason.
Pesto Chicken: Replace garlic butter with pesto. Add mozzarella and sun-dried tomatoes. Very Italian, very good.
BBQ Ranch Chicken: Use BBQ sauce on the chicken, add ranch, cheddar, and bacon. Peak American flavors.
Mediterranean Wraps: Add feta, olives, cucumbers, and hummus instead of cream cheese. Refreshing and different.
Breakfast Wraps: Use scrambled eggs, bacon, cheese, and the garlic butter. Breakfast just got interesting.
Philly Cheesesteak Style: Use steak instead of chicken, add sautéed peppers and onions, use provolone. Not traditional but delicious.
Make-Ahead Magic
Cooked Chicken: Cook the chicken up to 3 days ahead. Store in the fridge and use as needed.
Assembled Wraps: Assemble (but don’t grill) up to 24 hours ahead. Wrap tightly in plastic wrap and refrigerate. Grill when ready to eat.
Freezer Prep: Assemble and wrap tightly. Freeze for up to 2 months. Thaw overnight and grill.
Meal Prep: Make 4-5 wraps on Sunday. Grill them fresh each day for lunch. Takes 5 minutes and tastes fresh.
Questions Everyone Has
Q: My tortilla isn’t getting crispy. What happened? A: Not enough butter on the outside, heat too low, or you didn’t press it down enough. Brush with butter and press hard.
Q: The cheese isn’t melting. Help? A: Lower the heat and cook longer, or cover the pan with a lid for a minute to trap heat and melt the cheese faster.
Q: My wrap keeps falling apart when I eat it. A: Didn’t roll it tight enough, or you cut into it too soon. Roll tighter and let it rest before cutting.
Q: Can I use rotisserie chicken? A: Absolutely. Shred it, toss with garlic butter, and skip the cooking step. Shortcut approved.
Q: What if I don’t have a panini press? A: Use a regular skillet and press down with another heavy skillet or a foil-wrapped brick. Pressure creates the crispy texture.
Q: Can I make these in an air fryer? A: Yes! Brush with butter, secure with toothpicks, and air fry at 380°F for 5-6 minutes, flipping halfway.
Storage Real Talk
Grilled Wraps: Best eaten immediately. Can refrigerate for up to 2 days but they’ll lose crispiness. Reheat in a skillet to re-crisp.
Ungrilled Assembled Wraps: Refrigerate up to 24 hours wrapped tightly in plastic wrap.
Cooked Chicken: Store separately for up to 4 days. Assemble wraps fresh for best results.
Freezing: Freeze assembled (but not grilled) wraps for up to 2 months. Thaw and grill from chilled.
Perfect Pairings
Sides: Sweet potato fries, regular fries, side salad, or just eat two wraps.
Dipping Sauces: Ranch, honey mustard, garlic aioli, or marinara sauce.
Drinks: Iced tea, lemonade, or cold beer if you’re having a day.
Chips: Tortilla chips and salsa on the side because why not double down on carbs.
Soup: Tomato soup for dipping the wrap. Game changer.
The Science of the Press
When you press a filled tortilla onto a hot, buttered surface, the exterior gets crispy through the Maillard reaction while the interior heats up and melts the cheese. The pressure creates contact between all the layers, helping them meld together and preventing air pockets. It also reduces the thickness, making the wrap easier to bite through.
The butter on the outside adds fat, which helps with browning and creates that golden, crispy texture similar to grilled cheese. The cheese inside melts and acts as glue, holding everything together. The pressing also helps seal the edges, preventing fillings from escaping.
It’s basically the same principle as a panini – heat, fat, and pressure create textural magic that transforms a simple wrap into something special.
When to Make These Wraps
Lunch Upgrade: When you’re sick of sad desk salads.
Quick Dinner: When you need food fast but want it to feel substantial.
Game Day: Easy to eat while watching TV. No fork required.
Meal Prep: Make several for the week. Quick lunches solved.
After-School Snack: Kids love these because they’re basically fancy hot pockets.
Anytime You Want Cheese: Which is always, so make these often.
Why These Work So Well
Wraps get a bad reputation for being boring diet food or lazy meal solutions. But when you add garlic butter, press them until crispy, and load them with melted cheese, they transform into something actually craveable. The crispy exterior provides textural contrast to the soft, melty interior. The garlic butter adds flavor to every component. The pressing makes them feel substantial rather than flimsy.
They’re also incredibly practical. They’re portable, customizable, quick to make, and use ingredients most people already have. You can make them as simple or as loaded as you want. They work for any meal. They satisfy the same craving as a grilled cheese or quesadilla but feel more complete because of the vegetables and protein.
These wraps prove that sometimes the best recipes are the ones that take familiar ingredients and treat them slightly differently. A pressed wrap isn’t revolutionary, but it’s different enough from a regular wrap that it feels special. And that garlic butter? That’s what takes it from “fine” to “I’m making this again next week.”
This is what happens when you stop accepting mediocre lunches and decide you deserve something crispy, cheesy, and garlicky. And honestly? You do deserve that.
Print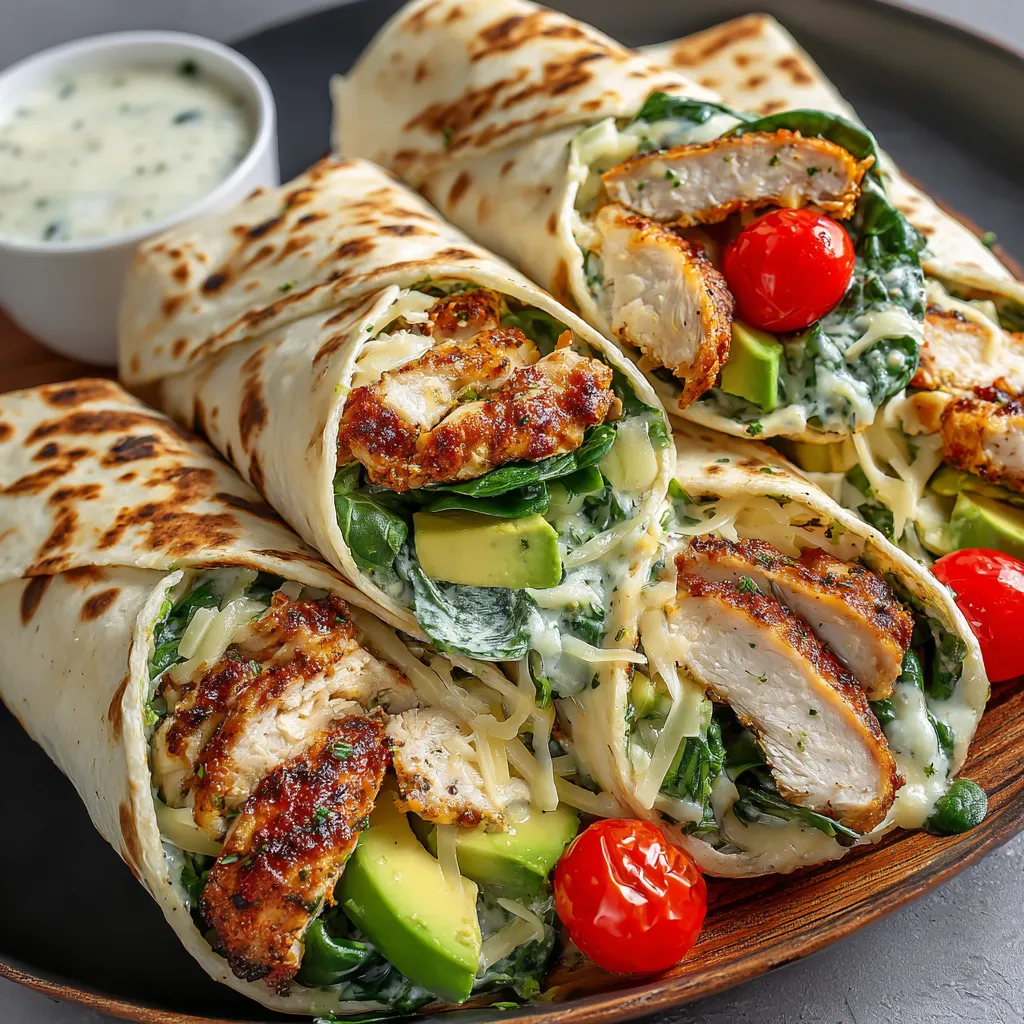
Cheesy Garlic Chicken Wraps
- Total Time: 20 minutes
- Yield: 4 wraps 1x
Description
Someone decided that wraps didn’t have to be boring health food and loaded one up with garlic-butter chicken, way too much cheese, and then grilled the whole thing until it was crispy on the outside and melty on the inside. That person is a hero, and this wrap is what happens when you stop pretending you want a salad and embrace your cheese-loving truth.
These aren’t those depressing cold wraps you eat at your desk while questioning your life choices. These are hot, crispy, pressed wraps that are basically quesadillas pretending to be sophisticated. The chicken is coated in garlic butter, the cheese melts into every crevice, and the tortilla gets golden and crunchy like the best grilled cheese you’ve ever had. It’s handheld comfort food that tastes way fancier than the 20 minutes it takes to make.
This is the kind of meal that makes lunch exciting again. It’s what you make when you want something satisfying but don’t want to deal with plates and utensils. Just pick it up, take a bite, and experience the textural journey of crispy exterior meeting melty, garlicky interior.
Ingredients
For the Garlic Butter Chicken:
- 1 lb boneless, skinless chicken breasts or thighs
- 4 tablespoons butter, melted
- 4 cloves garlic, minced
- 1 teaspoon Italian seasoning
- ½ teaspoon paprika
- Salt and pepper to taste
- 1 tablespoon olive oil
For the Wraps:
- 4 large flour tortillas (burrito size, 10–12 inches)
- 2 cups shredded mozzarella cheese (or Mexican blend, cheddar, whatever melts)
- ½ cup cream cheese, softened
- 2 tablespoons mayonnaise
- 1 teaspoon garlic powder
- 2 cups fresh spinach or lettuce
- 1 cup diced tomatoes (or sun-dried tomatoes for extra flavor)
- ½ cup diced red onion (optional but adds crunch)
- Butter for grilling
Optional Add-Ins:
- Bacon (because bacon makes everything better)
- Sliced avocado
- Pickled jalapeños for heat
- Ranch dressing instead of the cream cheese mixture
- Caramelized onions
- Roasted red peppers
Special Equipment:
- Large skillet for cooking chicken
- Panini press, grill pan, or regular skillet for pressing wraps
- Something heavy if you don’t have a press (another skillet works)
Instructions
Cut your chicken into thin strips or bite-sized pieces. This helps it cook faster and makes it easier to wrap later. Season with salt and pepper. Set aside and try to resist eating it raw (don’t actually do this).
In a small bowl, mix melted butter with minced garlic, Italian seasoning, and paprika. This is your flavor bomb. The smell alone will make you hungry. Set aside about 2 tablespoons for brushing the tortillas later.
Heat olive oil in a large skillet over medium-high heat. Add the chicken pieces and cook for about 5-6 minutes, stirring occasionally, until they’re cooked through and starting to get golden. Pour the garlic butter mixture (saving those 2 tablespoons) over the chicken and toss to coat. Let it cook for another minute so the butter gets slightly caramelized and the garlic becomes fragrant. Remove from heat. Try not to eat all of it straight from the pan.
In a small bowl, mix softened cream cheese with mayo and garlic powder until smooth. This is your spread that keeps everything together and adds creaminess. If it’s too thick, add a splash of milk. If you’re feeling lazy, just use ranch dressing. We’re not judging.
Lay out your tortillas. Spread the cream cheese mixture down the center of each tortilla, leaving about an inch on each end. Layer on some spinach or lettuce, then add the garlic butter chicken, tomatoes, red onion if using, and a generous amount of shredded cheese. Don’t be shy with the cheese – it’s literally in the name of the recipe.
Fold in the sides of the tortilla first (like you’re closing a present), then roll it up tightly from the bottom, keeping everything tucked in as you go. The cream cheese mixture helps it stick. If you’re bad at wrapping (no judgment), use a toothpick to hold it together.
Heat a clean skillet or grill pan over medium heat. Brush the outside of each wrap with some of that reserved garlic butter. Place the wraps seam-side down in the pan. Here’s the key: press them down with a spatula or another heavy pan. If you have a panini press, this is its moment to shine. Cook for 2-3 minutes per side until golden brown and crispy, and the cheese inside is melted. The pressing is what makes these special – it creates that crispy exterior and seals everything together.
Let the wraps rest for about 2 minutes after grilling. This helps the cheese set up slightly so it doesn’t all ooze out when you cut them. Plus it prevents you from burning your mouth on molten cheese, which is a public service.
Cut each wrap in half diagonally because diagonal cuts are scientifically proven to taste better (this is not true but it looks better). Serve with extra ranch, hot sauce, salsa, or just eat them plain because they’re already perfect.
Pick up that half. Notice the crispy, golden tortilla. Bite into it and experience the layers – the crunchy exterior, the melted cheese, the garlicky chicken, the fresh vegetables. Understand why pressed wraps are superior to regular wraps. Make mental note to never eat a sad cold wrap again.
Notes
Thin Chicken is Key: Pound your chicken flat or cut it thin. Thick chicken pieces make the wraps bulky and hard to eat.
Don’t Overfill: It’s tempting, but overstuffed wraps are impossible to close and will explode when you grill them. Exercise restraint.
Warm Tortillas First: Microwave them for 10 seconds to make them more pliable. Cold tortillas crack when you fold them.
The Press Matters: Really press down when grilling. This is what creates that crispy, compact texture. No pressing = no crispy exterior.
Seam Side Down First: Always start grilling with the seam side down. This seals it closed with heat before you flip it.
Medium Heat Only: Too hot and the outside burns before the cheese melts. Too low and it gets soggy instead of crispy.
- Prep Time: 10 minutes
- Cook Time: 10 minutes
Nutrition
- Calories: ~520 kcal
- Fat: ~28g
- Carbohydrates: ~35g
- Protein: ~35g