Quick Overview
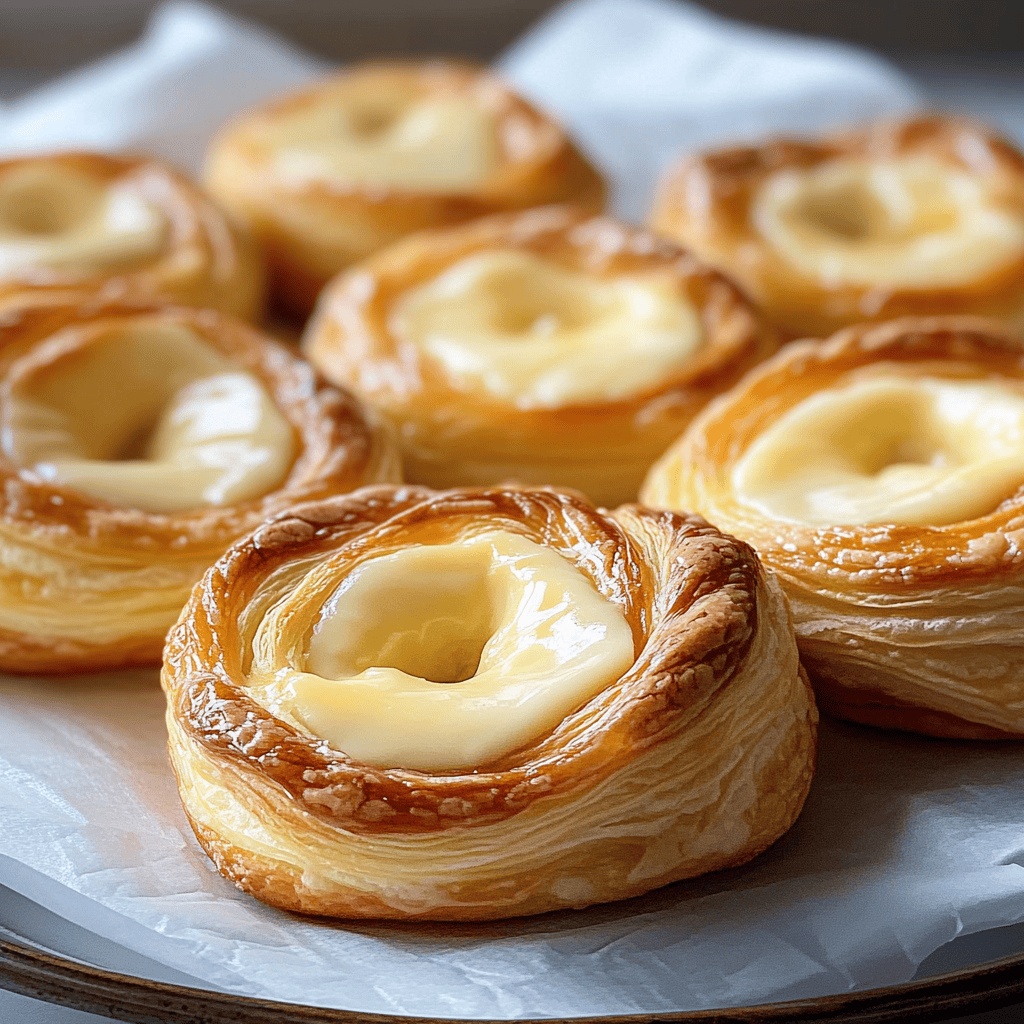
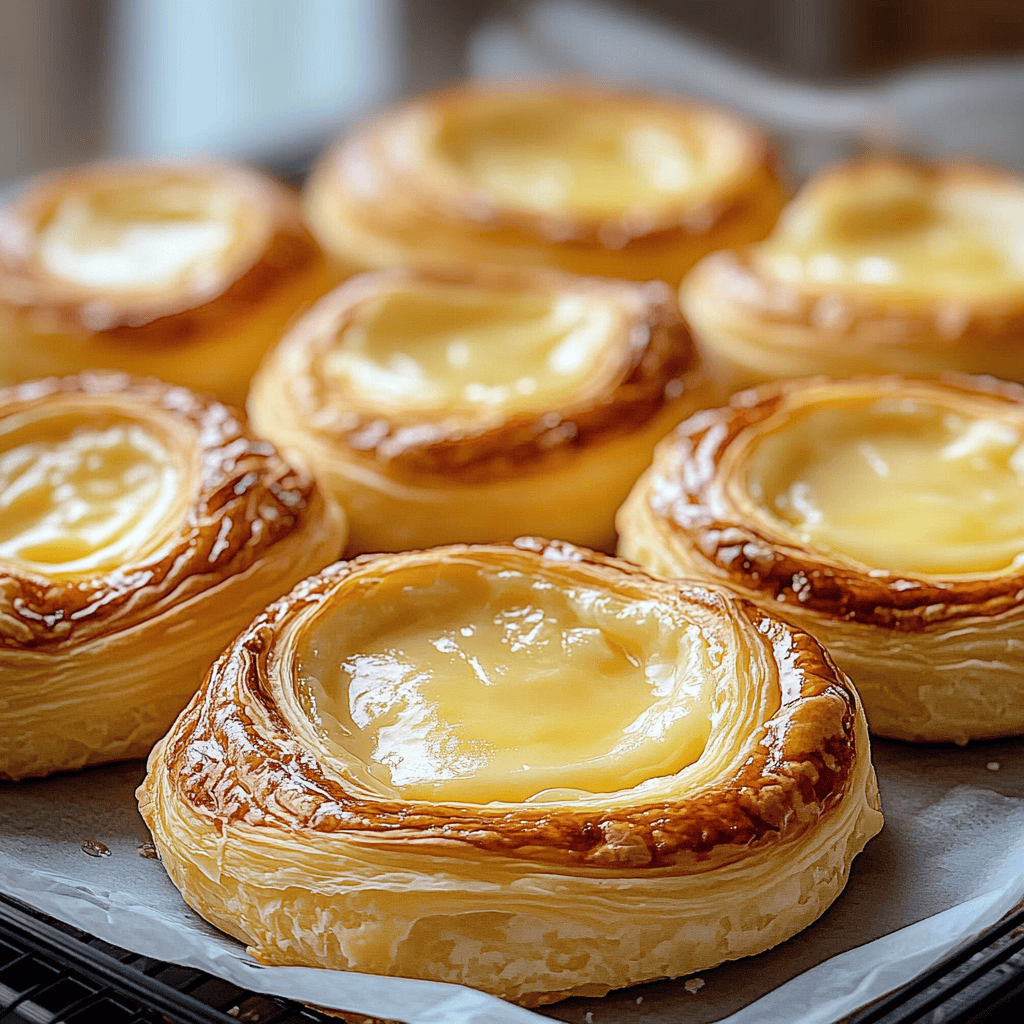
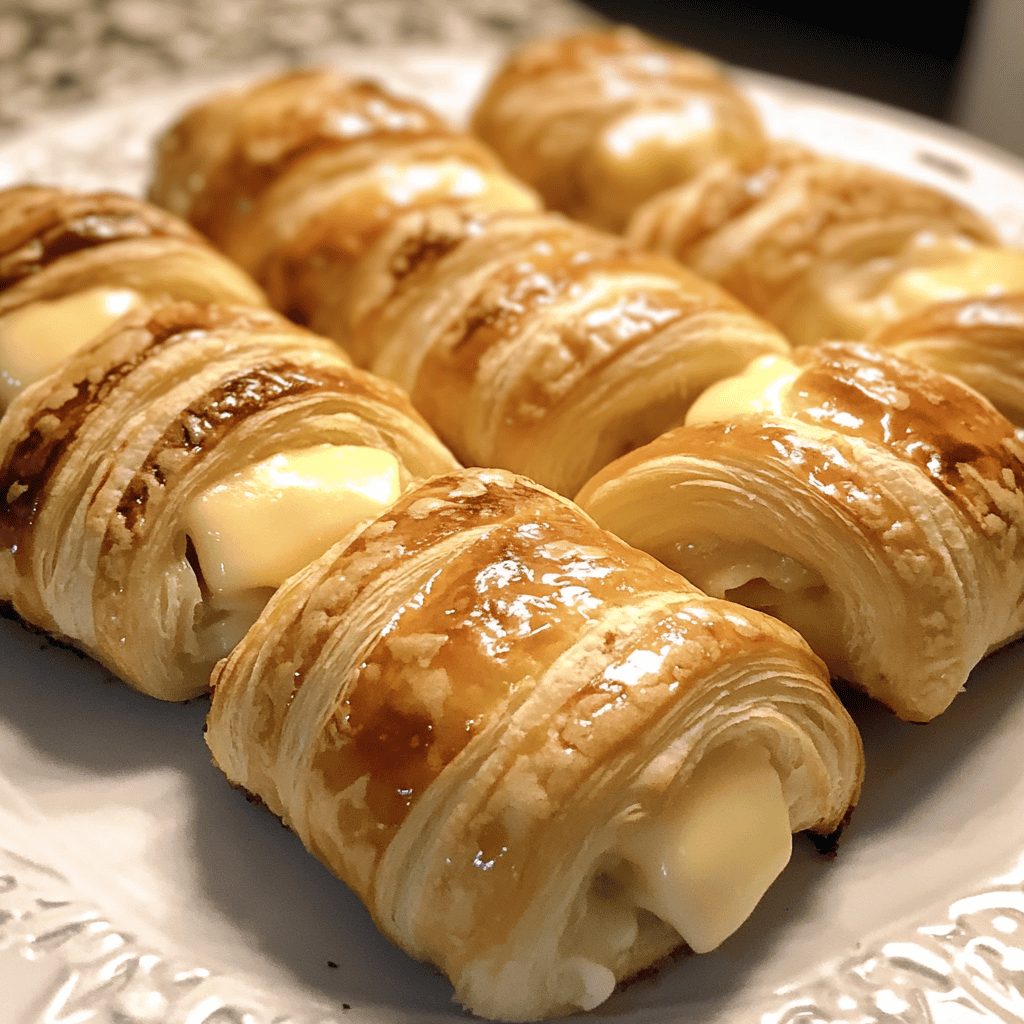
Cheese Danishes are a delightful treat that combines flaky pastry with a creamy filling. Perfect for breakfast or as a snack, these pastries are a crowd-pleaser at any gathering. With their golden brown exterior and sweet cheese interior, they provide a comforting indulgence that many love. This recipe will guide you through making these delicious pastries from scratch, ensuring you impress your family and friends with your baking skills.
Ingredient Breakdown
Puff Pastry
Puff pastry serves as the base of the Cheese Danishes. You can use store-bought for convenience or make it from scratch for an authentic touch. The layers create that flaky texture everyone loves.
Cream Cheese
Cream cheese is essential for the filling. It adds richness and creaminess, balancing the sweetness of sugar and vanilla. Ensure it’s softened to make mixing easier.
Sugar
Sugar sweetens the cream cheese filling and enhances the overall flavor. Use granulated sugar in the filling and powdered sugar for dusting on top after baking.
Vanilla Extract
Vanilla extract brings warmth to the filling and elevates the flavor profile of the Cheese Danishes. A little goes a long way in enhancing sweetness.
Egg
Eggs are used to create an egg wash that gives your pastries a beautiful golden color once baked. They also help bind some ingredients together in the filling.
Lemon Zest
Lemon zest adds brightness to the filling, creating a refreshing contrast to the rich creaminess. It’s an optional ingredient but highly recommended for added flavor depth.
Step By Step Recipe: Cheese Danishes
Prepare Your Oven and Baking Sheet
Preheat your oven to 400°F (200°C). Line a baking sheet with parchment paper to prevent sticking and ensure even baking of your Cheese Danishes.
Roll Out the Puff Pastry
Take your puff pastry out of the refrigerator and let it sit at room temperature for about 10 minutes. Once pliable, roll it out on a lightly floured surface until it reaches about 1/8-inch thickness.
Cut the Pastry into Squares
Using a sharp knife or pizza cutter, cut the rolled puff pastry into squares measuring approximately 4×4 inches. This size will allow you to fold them easily while holding enough filling.
Make the Cream Cheese Filling
In a mixing bowl, combine softened cream cheese, granulated sugar, vanilla extract, lemon zest (if using), and one egg yolk. Mix until smooth and creamy without any lumps remaining.
Fill Each Square with Cream Cheese Mixture
Spoon about one tablespoon of cream cheese mixture into the center of each square of puff pastry. Be careful not to overfill; otherwise, they may spill out while baking.
Fold Over Corners of Pastry Squares
Take each corner of the puff pastry squares and fold them towards the center over the cream cheese filling. Pinch them together gently to seal completely; this helps keep the filling inside during baking.
Brush with Egg Wash
In a small bowl, beat one egg with a tablespoon of water to create an egg wash. Brush this mixture over each folded pastry square to give them that beautiful golden-brown finish once baked.
Bake Until Golden Brown
Place your filled pastries in the preheated oven and bake for about 20-25 minutes or until they turn golden brown and puffed up nicely. Keep an eye on them towards the end to avoid burning.
Cool Before Serving
Once baked, remove your Cheese Danishes from the oven and let them cool on a wire rack for about 10 minutes before serving. This cooling time allows flavors to settle beautifully.

Serving and Storing Tips
Serve Warm or Room Temperature
Cheese Danishes can be enjoyed warm straight from the oven or at room temperature later in the day. They pair well with coffee or tea for breakfast or dessert.
Store in an Airtight Container
To store leftover Cheese Danishes, place them in an airtight container at room temperature if consuming within two days. For longer storage, refrigerate them in an airtight container.
Reheat Before Serving
If you refrigerate leftovers, consider reheating them in an oven at low heat (around 350°F) for about 10 minutes before serving again to restore their flaky texture.
Mistakes to avoid
One common mistake when making Cheese Danishes is using cold ingredients. Always ensure your cream cheese and butter are at room temperature for a smooth filling and flaky pastry. Cold ingredients can lead to a dense texture.
Another mistake is not allowing the dough to rise properly. Skipping this step can result in tough danishes. Patience is key; let the dough rest and rise until it doubles in size for the best results.
Overfilling the danish is another frequent error. While it’s tempting to add more filling, too much can cause the pastry to burst during baking. Stick to a moderate amount of filling for better structure.
Failing to preheat the oven can lead to uneven baking. Always preheat your oven before placing the danishes inside; this ensures they cook evenly and achieve that perfect golden color.
Lastly, not watching the baking time can ruin your Cheese Danishes. Keep an eye on them as they bake, as every oven varies. Remove them when they are golden brown for that ideal texture.
Tips and tricks
To perfect your Cheese Danishes, always choose high-quality ingredients. Fresh cream cheese and real butter significantly improve flavor and texture. Avoid using substitutions like margarine or low-fat cream cheese, as these can alter the outcome drastically.
Roll out your puff pastry on a lightly floured surface. This prevents sticking and allows you to achieve a uniform thickness. Aim for about 1/8-inch thick; this ensures that your pastries will puff up beautifully during baking.
When preparing the filling, blend cream cheese with sugar and vanilla until smooth. This creates a creamy consistency that spreads easily into your pastry without lumps. Consider adding lemon zest or almond extract for an extra layer of flavor.
Chill your prepared danishes before baking them. This helps maintain their shape while they cook and promotes even puffing of the pastry layers, resulting in a flaky texture upon serving.
Lastly, experiment with different toppings after baking. A simple icing made from powdered sugar and milk drizzled over the top adds sweetness and visual appeal, while fresh fruit or nuts can provide contrasting flavors and textures.
Suggestions for Cheese Danishes
Consider incorporating fruit into your Cheese Danishes for added flavor and color. Fresh berries or sliced peaches pair wonderfully with the sweet cream cheese filling, creating a delightful contrast that enhances every bite.
For those who enjoy a nutty flavor, adding crushed almonds or walnuts into your filling can elevate your danish experience. Nuts bring both crunch and richness that complements the creamy texture of the cheese perfectly.
If you want to make mini versions of Cheese Danishes, simply cut smaller pieces of dough for individual servings. They bake quicker than larger ones and are perfect for brunch gatherings or tea parties where guests prefer bite-sized treats.
Experiment with flavored cream cheeses such as strawberry or pumpkin spice during seasonal holidays, which adds variety to traditional recipes. You might discover new favorites that delight family and friends alike!
Lastly, serve your Cheese Danishes warm alongside coffee or tea for an indulgent breakfast or afternoon snack experience that everyone will appreciate.
FAQs
What type of cheese is best for Cheese Danishes?
The best cheese for Cheese Danishes is cream cheese due to its rich flavor and creamy texture. Make sure it’s softened before mixing with sugars or other flavorings so that it blends smoothly into a luscious filling without lumps.
Can I make Cheese Danishes ahead of time?
Yes, you can prepare Cheese Danishes ahead of time! Assemble them but leave unbaked in the refrigerator overnight. When you’re ready to bake, just preheat your oven and follow normal baking instructions; this allows you to enjoy fresh pastries with minimal effort at serving time.
How long do leftovers last?
Leftover Cheese Danishes can last about 2-3 days when stored in an airtight container at room temperature. If you want them to stay fresh longer, consider refrigerating them where they may last up to one week but reheat before serving for optimal taste.
Can I freeze my Cheese Danishes?
Absolutely! You can freeze unbaked Cheese Danishes by wrapping them tightly in plastic wrap followed by foil or placing them in airtight containers. When ready, bake from frozen; add a few extra minutes to ensure they cook through properly without sacrificing quality.
What should I serve with Cheese Danishes?
Cheese Danishes pair beautifully with coffee or tea as beverages that enhance their flavors well! You may also offer fruit preserves or fresh fruits alongside them for added freshness; these complement the sweet creaminess perfectly!
Are there gluten-free options available?
Yes! You can use gluten-free puff pastry alternatives if you want gluten-free options for making Cheese Danishes at home easily available in many grocery stores nowadays; check labels carefully when purchasing!
Summary
In conclusion, making delicious Cheese Danishes involves avoiding common mistakes like using cold ingredients or overfilling them. Use quality products while rolling out dough evenly ensures perfect results every time! Experimenting with fillings offers exciting variations too! Store leftovers correctly so everyone enjoys each delightful pastry long after baking day ends!