Description
Let’s be real — charcuterie boards are having a MOMENT. Everyone’s posting these gorgeous spreads on Instagram, and you’re sitting there wondering how the heck they made meat and cheese look like art. Well, buckle up buttercup, because I’m about to spill all the secrets to creating a board that’ll make your guests think you went to some fancy European culinary school. Spoiler alert: it’s way easier than it looks, and you don’t need to spend your rent money at the fancy cheese shop.
Ingredients
Cheese Game (The Star of the Show)
Rule of thumb: 3-5 varieties, about 3-4 oz per person
The Dream Team:
- Something Soft: Brie, camembert, or goat cheese (creamy crowd-pleasers)
- Something Hard: Aged cheddar, gouda, or manchego (the reliable workhorses)
- Something Funky: Blue cheese or aged gruyere (for the adventurous souls)
- Something Safe: Mild white cheddar or mozzarella (for the cheese scaredy-cats)
Pro Cheese Tips:
- Take cheese out 30-60 minutes before serving — cold cheese has no personality
- Leave some cheese whole, slice some, cube some — variety is the spice of life
- Provide different knives for different cheeses — nobody wants blue cheese on their brie
Meat Parade (The Supporting Actor)
Aim for: 2-4 varieties, about 2-3 oz per person
The Classics:
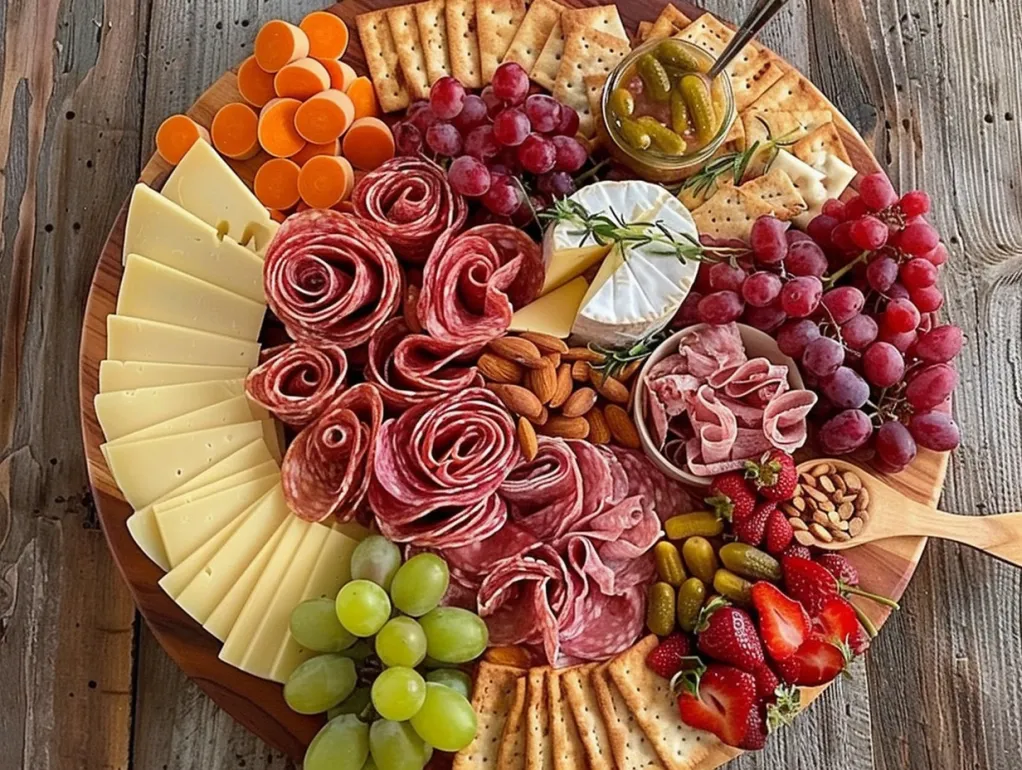
- Salami: Crowd favorite, makes pretty roses when folded
- Prosciutto: Fancy Italian vibes, drape it artfully
- Chorizo: Adds some spice and color
- Sopressata: Peppery and sophisticated
Meat Styling 101:
- Fold salami in half and arrange in overlapping rows — instant elegance
- Scrunch prosciutto into little nests — looks effortless but intentional
- Fan out pepperoni slices — simple but effective
Instructions
Start with your cheeses — they’re the biggest items and set the foundation. Space them around the board so people can access them from different angles.
Add small bowls for olives, nuts, and jam. This creates height and keeps wet stuff contained.
Fill in around the cheese with your folded, fanned, and scrunched meats. Think curves and flowing lines, not rigid rows.
Tuck crackers into any remaining spaces. Fan them out or stack them — whatever fits.
Add grapes in small clusters, scatter berries, and fill any sad empty spots.
Sprinkle nuts around, add small spoons to jams, and maybe throw in some fresh herbs for that “I definitely know what I’m doing” vibe.
Notes
- Trader Joe’s is your friend — great cheese selection, won’t break the bank
- Costco for crowds — buy in bulk and use what you need
- Regular grocery store — they have perfectly good options, don’t be a snob
- Prep Time: 30-45 minutes