What the heck is this?
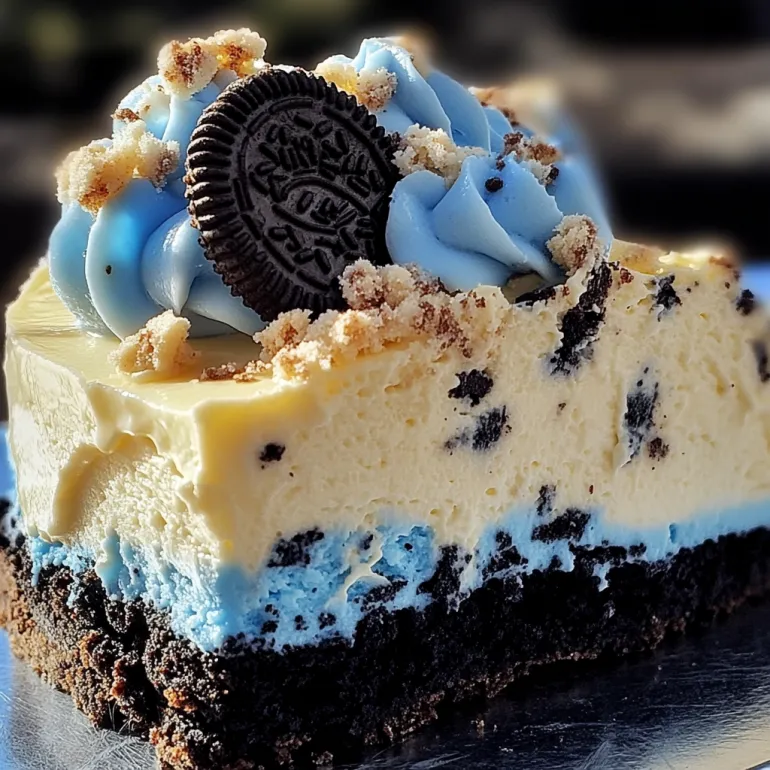
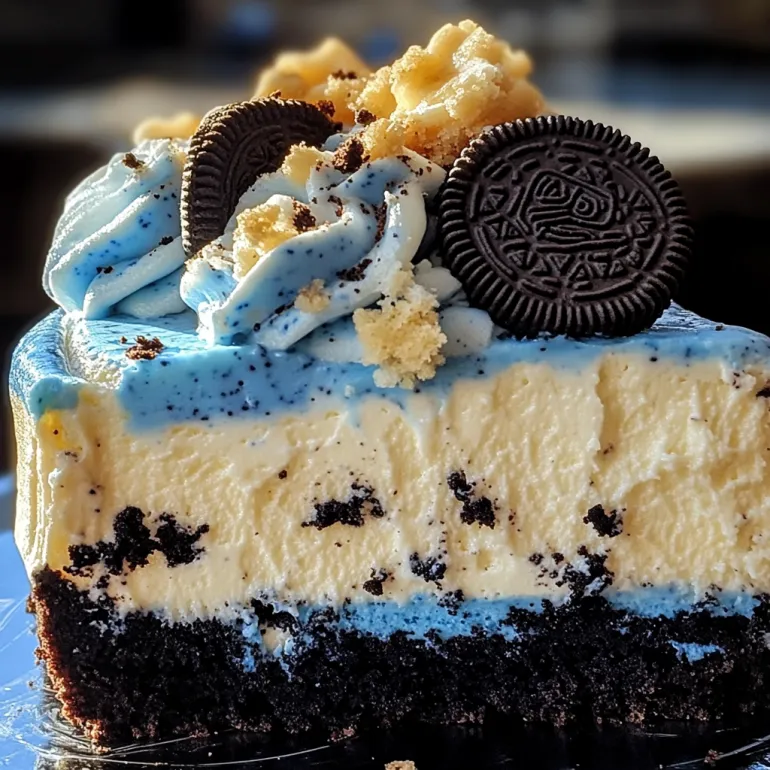
Think of your favorite red velvet cheesecake—but swap the red for a moody, electric blue, layer it with crushed Oreo cookies, and suddenly you’ve got a dessert that turns heads and breaks diets. This Blue Velvet Oreo Cheesecake is dramatic in color, rich in texture, and pure indulgence on a fork. It’s got a buttery Oreo crust, a lusciously smooth blue velvet cheesecake layer, and more cookies on top because… we respect the Oreo. Whether you’re baking for a birthday, a themed party, or just living your extra life, this one’s for you.
Why You’ll Love This Recipe
– That vibrant blue hue is a total showstopper
– Cookies + cheesecake = guaranteed happiness
– Oreo crust that’s not soggy? Oh yes.
– It’s rich but not too rich—just the right amount of sweet
– Perfect for birthdays, holidays, or any excuse to serve something over-the-top
The Good Stuff You’ll Need
For the crust:
– 24 Oreo cookies (crushed into crumbs)
– 5 tbsp melted butter
For the blue velvet cheesecake layer:
– 3 (8 oz) packages cream cheese, softened
– 1 cup granulated sugar
– 3 large eggs
– 1/2 cup sour cream
– 1/4 cup buttermilk
– 1 tbsp cocoa powder
– 1 tsp vanilla extract
– 1 tsp white vinegar
– Blue food coloring (gel preferred)
– 10 Oreo cookies, coarsely chopped
Optional toppings:
– Whipped cream
– Extra Oreos
– White chocolate drizzle
Let’s Do This
Step 1: Make that crust
Preheat your oven to 325°F (163°C). Line the bottom of a 9-inch springform pan with parchment and grease the sides. In a bowl, combine crushed Oreos and melted butter until the texture is like wet sand. Press it firmly into the bottom of the pan. Bake for 10 minutes, then let it cool while you move on.
Step 2: Whip up the blue velvet filling
In a large mixing bowl, beat the cream cheese until smooth and lump-free. Add sugar and beat again. Then add eggs one at a time, mixing just until combined (don’t overdo it!). Mix in sour cream, buttermilk, cocoa powder, vanilla, and vinegar. Now for the fun part—add blue food coloring until you hit that rich, velvet blue shade. Fold in chopped Oreos.
Step 3: Bake it low and slow
Pour the batter over the crust. Smooth the top. Tap it gently on the counter to release air bubbles. Bake at 325°F for 50–60 minutes or until the center is just slightly jiggly. Turn the oven off, crack the door, and let it cool inside for 1 hour. Then chill it in the fridge at least 4 hours (overnight is even better).
Step 4: Dress it up
Once chilled, top with whipped cream, extra Oreos, or a drizzle of melted white chocolate. Slice it up and wait for the gasps.
Serving Suggestions
– Serve with a glass of cold milk or a bold espresso
– Great for themed parties (think 4th of July, winter wonderland, or galaxy!)
– Keep it simple, or go over-the-top with colored whipped cream
Switch It Up
– Don’t want blue? Make it red velvet or purple haze instead
– Swap Oreos for Golden Oreos or Biscoff for a twist
– Use a chocolate ganache topping instead of whipped cream for extra drama
Make-Ahead Tips
– This cheesecake is a dream to make ahead—just chill overnight
– Freeze slices individually and thaw in the fridge when the craving hits
– Keep it covered in the fridge for up to 5 days
Questions People Actually Ask
Q: Can I use store-bought Oreo crust?
A: You could, but they’re usually too shallow for this thick, glorious filling. Homemade is best here!
Q: Can I use liquid food coloring?
A: Gel food coloring is way more potent and won’t water down the batter. But if liquid’s all you’ve got, go slow and add more as needed.
Q: How do I avoid cracks?
A: Don’t overmix, bake it low and slow, and let it cool gradually. If it still cracks, that’s what toppings are for.
Blue Velvet Oreo Cheesecake: Bold, Creamy, and Ridiculously Gorgeous
- Total Time: 1 hour 30 minutes
- Yield: 12 slices
Description
Think of your favorite red velvet cheesecake—but swap the red for a moody, electric blue, layer it with crushed Oreo cookies, and suddenly you’ve got a dessert that turns heads and breaks diets. This Blue Velvet Oreo Cheesecake is dramatic in color, rich in texture, and pure indulgence on a fork. It’s got a buttery Oreo crust, a lusciously smooth blue velvet cheesecake layer, and more cookies on top because… we respect the Oreo. Whether you’re baking for a birthday, a themed party, or just living your extra life, this one’s for you.
Ingredients
For the crust:
– 24 Oreo cookies (crushed into crumbs)
– 5 tbsp melted butter
For the blue velvet cheesecake layer:
– 3 (8 oz) packages cream cheese, softened
– 1 cup granulated sugar
– 3 large eggs
– 1/2 cup sour cream
– 1/4 cup buttermilk
– 1 tbsp cocoa powder
– 1 tsp vanilla extract
– 1 tsp white vinegar
– Blue food coloring (gel preferred)
– 10 Oreo cookies, coarsely chopped
Optional toppings:
– Whipped cream
– Extra Oreos
– White chocolate drizzle
Instructions
Step 1: Make that crust
Preheat your oven to 325°F (163°C). Line the bottom of a 9-inch springform pan with parchment and grease the sides. In a bowl, combine crushed Oreos and melted butter until the texture is like wet sand. Press it firmly into the bottom of the pan. Bake for 10 minutes, then let it cool while you move on.
Step 2: Whip up the blue velvet filling
In a large mixing bowl, beat the cream cheese until smooth and lump-free. Add sugar and beat again. Then add eggs one at a time, mixing just until combined (don’t overdo it!). Mix in sour cream, buttermilk, cocoa powder, vanilla, and vinegar. Now for the fun part—add blue food coloring until you hit that rich, velvet blue shade. Fold in chopped Oreos.
Step 3: Bake it low and slow
Pour the batter over the crust. Smooth the top. Tap it gently on the counter to release air bubbles. Bake at 325°F for 50–60 minutes or until the center is just slightly jiggly. Turn the oven off, crack the door, and let it cool inside for 1 hour. Then chill it in the fridge at least 4 hours (overnight is even better).
Step 4: Dress it up
Once chilled, top with whipped cream, extra Oreos, or a drizzle of melted white chocolate. Slice it up and wait for the gasps.
Notes
– Serve with a glass of cold milk or a bold espresso
– Great for themed parties (think 4th of July, winter wonderland, or galaxy!)
– Keep it simple, or go over-the-top with colored whipped cream
- Prep Time: 30 minutes
- Cook Time: 60 minutes
Nutrition
- Calories: ~460 kcal
- Fat: ~28g
- Carbohydrates: ~45g
- Protein: ~6g