
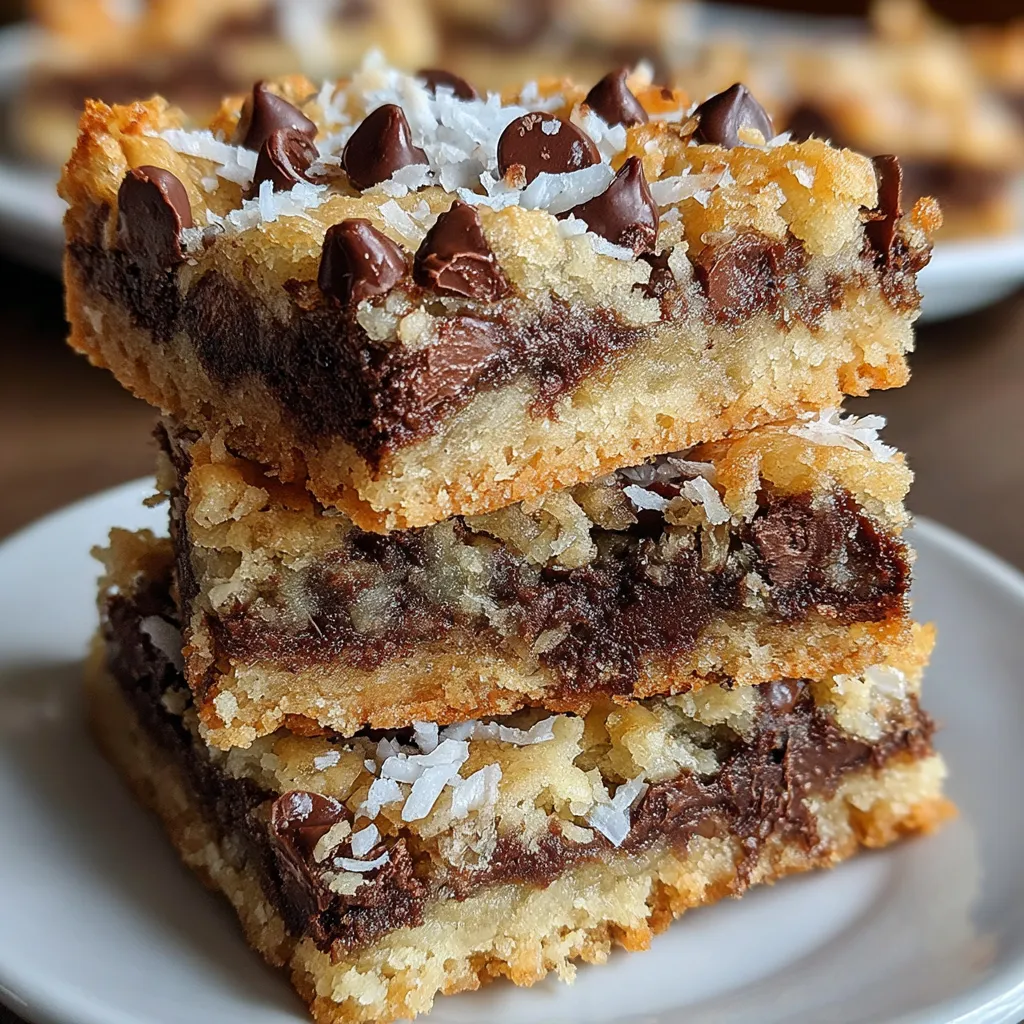
Okay, so imagine taking your favorite childhood candy bar—you know, the one with coconut, almonds, and chocolate that your weird uncle always hoarded—and turning it into a cookie bar situation that’s about 47 times better than the original. Almond Joy Cookie Bars are thick, chewy chocolate cookie bars layered with sweet coconut filling, topped with whole almonds, and drowned in melted chocolate. They’re like if an Almond Joy, a magic bar, and a brownie had a threesome and this was the delicious result. The bottom is a fudgy chocolate cookie base, the middle is coconutty heaven, and the top is a chocolate-almond situation that’ll make you forget regular cookies exist. I made these for a potluck once and had three people ask if I was selling them. Another person offered to trade me their firstborn. These bars inspire inappropriate behavior and questionable life decisions.
Why You’ll Love This Recipe
Candy bar nostalgia. All the Almond Joy vibes without the tiny, unsatisfying portion size.
Easy as hell. Press dough in a pan, add layers, bake. No fancy techniques or cookie rolling nonsense.
Crowd pleaser. Even people who claim they don’t like coconut somehow love these. It’s witchcraft.
Perfect portions. Cut them into bars and everyone gets the same amount. No cookie size drama.
Make-ahead friendly. These actually taste better the next day once everything sets up.
Feeds a crowd. One pan makes 16-20 bars depending on how generous you’re feeling.
Coconut lover’s dream. If you’re team coconut, this is your moment to shine.
The Good Stuff You’ll Need
For the Cookie Base:
- 1 1/2 cups all-purpose flour
- 1/2 cup unsweetened cocoa powder
- 1 tsp baking powder
- 1/2 tsp salt
- 3/4 cup (1 1/2 sticks) unsalted butter, melted
- 1 cup granulated sugar
- 1/2 cup brown sugar, packed
- 2 large eggs
- 2 tsp vanilla extract
For the Coconut Layer:
- 3 cups sweetened shredded coconut
- 1 can (14 oz) sweetened condensed milk
- 1/2 tsp vanilla extract
- 1/4 tsp almond extract
- Pinch of salt
For the Topping:
- 1 1/2 cups semi-sweet chocolate chips
- 2 tbsp coconut oil or butter (makes it smooth and glossy)
- 1 cup whole almonds (raw or roasted, your choice)
- Flaky sea salt (optional but highly recommended)
Equipment:
- 9×13 inch baking pan
- Parchment paper
- Mixing bowls
- Spatula
- Microwave-safe bowl for melting chocolate
Let’s Do This
Step 1: Prep Your Situation
Preheat your oven to 350°F (175°C). This is important. Don’t be that person who forgets.
Line a 9×13 inch baking pan with parchment paper, leaving some overhang on the sides. This overhang is your escape route later—it lets you lift the whole thing out for easy cutting. If you skip this, you’ll be scraping bars out of the pan like an animal. Use cooking spray on the parchment for extra insurance.
Step 2: Make the Cookie Base
In a medium bowl, whisk together flour, cocoa powder, baking powder, and salt. Set it aside and try not to think about how good this already smells.
In a large bowl, whisk together the melted butter with both sugars until combined. It should look smooth and slightly glossy.
Add eggs one at a time, whisking well after each. Then add vanilla extract and whisk until everything is unified and happy together.
Add the flour mixture to the wet ingredients and stir with a spatula until just combined. Don’t overmix or you’ll end up with tough bars and regret.
The dough will be thick and fudgy. Pour it into your prepared pan and spread it evenly with a spatula. Press it into the corners and make sure it’s level. This is your foundation—don’t half-ass it.
Step 3: Make the Coconut Layer
In a medium bowl, mix together the shredded coconut, sweetened condensed milk, vanilla extract, almond extract, and a pinch of salt. Stir until the coconut is completely coated and the mixture is sticky and cohesive.
Carefully spread this coconut mixture over the unbaked cookie base. Use a spatula or your hands (lightly dampened so it doesn’t stick). Spread it evenly and press it down gently so it adheres to the base.
Don’t worry if it looks like a lot of coconut. It is. That’s the point. Embrace it.
Step 4: Add the Almonds
Press whole almonds into the coconut layer in rows or a pattern. You can be organized about this or just scatter them randomly like you’re planting seeds. Either way works.
Use about 1 cup of almonds, spacing them so each bar will get at least one or two almonds. Press them in gently but firmly so they stick.
Step 5: Bake These Bad Boys
Bake for 30-35 minutes, until the edges of the cookie base are set and the coconut on top is starting to turn golden in spots. The center might still look slightly soft—that’s fine. It’ll firm up as it cools.
Don’t overbake or the cookie base will be dry instead of fudgy. We’re going for brownie-level richness here.
Remove from the oven and let cool in the pan for about 15 minutes. Then carefully lift the whole thing out using the parchment paper overhang and place it on a wire rack. Let it cool completely before adding chocolate. I know it’s hard to wait, but warm bars + melted chocolate = a melty mess.
Step 6: Chocolate Time (The Best Part)
Once the bars are completely cool, it’s chocolate o’clock. In a microwave-safe bowl, combine chocolate chips and coconut oil (or butter).
Microwave in 30-second intervals, stirring after each, until completely melted and smooth. Usually takes 1-2 minutes total. Don’t rush this or you’ll burn the chocolate and cry.
Pour the melted chocolate over the cooled bars and spread it evenly with a spatula. Make sure you cover everything—the top, the sides, all of it. Be generous. This is not the time for restraint.
If you’re using flaky sea salt (and you should), sprinkle it over the wet chocolate. Just a light sprinkle—you want to enhance, not overpower.
Let the chocolate set at room temperature for about 30 minutes, or pop it in the fridge for 15 minutes if you’re impatient. Once the chocolate is firm, cut into bars with a sharp knife. Wipe the knife between cuts for clean edges.
Step 7: Enjoy Your Victory
Cut into 16-20 bars depending on how big you want them. I usually go with 20 because I have some self-control. Barely.
Serve at room temperature for the best texture. Cold bars are good too, but they’re a little harder.
Store in an airtight container and try not to eat them all in one sitting. This is extremely difficult.
Serving Suggestions
These are already perfect, but here’s how to take them over the top:
- Serve with a cold glass of milk (essential)
- Warm for 10 seconds in the microwave for gooey chocolate
- Serve alongside coffee or hot chocolate
- Cut into small squares for a dessert platter
- Package individually in cellophane bags for gifts
- Drizzle with extra melted chocolate for Instagram purposes
- Pair with vanilla ice cream for a sundae situation
Switch It Up
Dark Chocolate Version: Use dark chocolate chips instead of semi-sweet for a more grown-up flavor.
Triple Chocolate: Add chocolate chips to the cookie base for extra chocolate chunks throughout.
Toasted Coconut: Toast the shredded coconut before mixing it with condensed milk for deeper flavor.
Mounds Bars: Skip the almonds entirely for a Mounds bar vibe instead of Almond Joy.
White Chocolate Drizzle: Drizzle white chocolate over the dark chocolate for contrast.
Nutella Layer: Spread a thin layer of Nutella between the cookie base and coconut layer.
Espresso Chocolate: Add 1 tbsp instant espresso powder to the cookie base for mocha vibes.
Salted Caramel: Drizzle salted caramel over the chocolate layer before it sets.
Storage and Make-Ahead Tips
These actually get better after a day, which is rare and magical.
Room temperature: Store in an airtight container for up to 5 days. Keep them in a cool, dry place.
Refrigerate: They’ll last up to 2 weeks in the fridge. They get firmer when cold, which some people prefer.
Freeze: Cut into bars, wrap individually in plastic wrap, and freeze for up to 3 months. Thaw at room temp for 30 minutes before eating.
Make-ahead: You can make these up to 3 days in advance. They actually taste better after sitting because the flavors meld.
Chocolate tip: If your kitchen is hot, store these in the fridge so the chocolate doesn’t melt. Bring to room temp before serving for best texture.
Cutting tip: For the cleanest cuts, refrigerate until firm, then cut with a hot knife (run it under hot water and wipe dry between cuts).
Why This Works So Damn Well
Almond Joy Cookie Bars work because they nail the texture contrast. The bottom cookie layer is dense and fudgy, almost brownie-like. The coconut middle is chewy and sweet. The chocolate top is smooth and snappy. Three distinct textures in every bite keeps things interesting.
The sweetened condensed milk is crucial for the coconut layer. It acts as a binder that holds all that shredded coconut together while adding sweetness and moisture. Without it, you’d just have dry coconut sitting on top of a cookie. With it, you have magic.
Using melted butter in the base instead of softened butter creates a denser, fudgier texture. Melted butter doesn’t trap air the way creamed butter does, so you get bars that are more compact and brownie-like instead of cakey.
Adding coconut oil to the melted chocolate isn’t just for smoothness—it also helps the chocolate stay glossy and prevents it from getting dull or streaky as it sets. It also makes the chocolate easier to spread and gives it a better mouthfeel.
The almond extract in the coconut layer is subtle but important. It reinforces the almond flavor without overpowering the coconut. Combined with the whole almonds on top, you get almond flavor in two different forms (extract and nuts) which creates complexity.
Letting everything cool completely before adding chocolate is non-negotiable. If the bars are even slightly warm, the chocolate melts too quickly and slides off or gets absorbed instead of creating a clean layer on top.
When to Make These
Potlucks and parties: These travel well and serve a crowd. Win-win.
Bake sales: These sell out fast. Price them high because they’re worth it.
Office treats: Bring these to work and become everyone’s favorite coworker.
Birthday parties: Better than cake for coconut lovers. Fight me.
Holiday cookie trays: Add variety to your cookie selection with a bar that looks impressive.
Coconut cravings: When you need coconut in bar form, this is the answer.
Weekend baking projects: Easy enough for lazy Sundays but impressive enough to feel accomplished.
Questions People Actually Ask
Q: I don’t like coconut. Can I make these without it? A: No. That’s literally the whole point. Make different bars.
Q: Can I use unsweetened coconut instead? A: You can, but add an extra 1/4 cup sugar to the coconut mixture or they’ll be less sweet than intended.
Q: My chocolate layer cracked when I cut the bars. Why? A: The chocolate was too cold and brittle. Let bars sit at room temp for 10 minutes before cutting, and use a hot knife.
Q: The coconut layer is sliding off. Help! A: You didn’t press it into the base firmly enough, or you tried to cut before everything set. Make sure the chocolate is completely firm before cutting.
Q: Can I use a different type of nut? A: Sure. Cashews, pecans, or hazelnuts would all work. But then they’re not Almond Joy bars, are they?
Q: The bottom is too cakey, not fudgy. What happened? A: You might have overbaked them, or you overmixed the batter which incorporated too much air. Mix just until combined and check them at 30 minutes.
Q: Can I make these in a different size pan? A: An 8×8 pan will make thicker bars (bake longer, 35-40 minutes). A 9×9 works too. Anything bigger and they’ll be too thin.
Q: Do I have to use sweetened condensed milk? A: Yes. Regular milk or cream won’t bind the coconut the same way. Sweetened condensed milk is thick and sticky—that’s what you need.
Q: The bars are too sweet. How can I fix that? A: Use dark chocolate instead of semi-sweet, skip the flaky salt, or use unsweetened coconut. But honestly, they’re supposed to be sweet. It’s a candy bar.
Print
Almond Joy Cookie Bars
- Total Time: 1 hour 30 minutes
- Yield: 16–20 bars 1x
Description
Okay, so imagine taking your favorite childhood candy bar—you know, the one with coconut, almonds, and chocolate that your weird uncle always hoarded—and turning it into a cookie bar situation that’s about 47 times better than the original. Almond Joy Cookie Bars are thick, chewy chocolate cookie bars layered with sweet coconut filling, topped with whole almonds, and drowned in melted chocolate. They’re like if an Almond Joy, a magic bar, and a brownie had a threesome and this was the delicious result. The bottom is a fudgy chocolate cookie base, the middle is coconutty heaven, and the top is a chocolate-almond situation that’ll make you forget regular cookies exist. I made these for a potluck once and had three people ask if I was selling them. Another person offered to trade me their firstborn. These bars inspire inappropriate behavior and questionable life decisions.
Ingredients
For the Cookie Base:
- 1 1/2 cups all-purpose flour
- 1/2 cup unsweetened cocoa powder
- 1 tsp baking powder
- 1/2 tsp salt
- 3/4 cup (1 1/2 sticks) unsalted butter, melted
- 1 cup granulated sugar
- 1/2 cup brown sugar, packed
- 2 large eggs
- 2 tsp vanilla extract
For the Coconut Layer:
- 3 cups sweetened shredded coconut
- 1 can (14 oz) sweetened condensed milk
- 1/2 tsp vanilla extract
- 1/4 tsp almond extract
- Pinch of salt
For the Topping:
- 1 1/2 cups semi-sweet chocolate chips
- 2 tbsp coconut oil or butter (makes it smooth and glossy)
- 1 cup whole almonds (raw or roasted, your choice)
- Flaky sea salt (optional but highly recommended)
Equipment:
- 9x13 inch baking pan
- Parchment paper
- Mixing bowls
- Spatula
- Microwave-safe bowl for melting chocolate
Instructions
Preheat your oven to 350°F (175°C). This is important. Don’t be that person who forgets.
Line a 9×13 inch baking pan with parchment paper, leaving some overhang on the sides. This overhang is your escape route later—it lets you lift the whole thing out for easy cutting. If you skip this, you’ll be scraping bars out of the pan like an animal. Use cooking spray on the parchment for extra insurance.
In a medium bowl, whisk together flour, cocoa powder, baking powder, and salt. Set it aside and try not to think about how good this already smells.
In a large bowl, whisk together the melted butter with both sugars until combined. It should look smooth and slightly glossy.
Add eggs one at a time, whisking well after each. Then add vanilla extract and whisk until everything is unified and happy together.
Add the flour mixture to the wet ingredients and stir with a spatula until just combined. Don’t overmix or you’ll end up with tough bars and regret.
The dough will be thick and fudgy. Pour it into your prepared pan and spread it evenly with a spatula. Press it into the corners and make sure it’s level. This is your foundation—don’t half-ass it.
In a medium bowl, mix together the shredded coconut, sweetened condensed milk, vanilla extract, almond extract, and a pinch of salt. Stir until the coconut is completely coated and the mixture is sticky and cohesive.
Carefully spread this coconut mixture over the unbaked cookie base. Use a spatula or your hands (lightly dampened so it doesn’t stick). Spread it evenly and press it down gently so it adheres to the base.
Don’t worry if it looks like a lot of coconut. It is. That’s the point. Embrace it.
Press whole almonds into the coconut layer in rows or a pattern. You can be organized about this or just scatter them randomly like you’re planting seeds. Either way works.
Use about 1 cup of almonds, spacing them so each bar will get at least one or two almonds. Press them in gently but firmly so they stick.
Bake for 30-35 minutes, until the edges of the cookie base are set and the coconut on top is starting to turn golden in spots. The center might still look slightly soft—that’s fine. It’ll firm up as it cools.
Don’t overbake or the cookie base will be dry instead of fudgy. We’re going for brownie-level richness here.
Remove from the oven and let cool in the pan for about 15 minutes. Then carefully lift the whole thing out using the parchment paper overhang and place it on a wire rack. Let it cool completely before adding chocolate. I know it’s hard to wait, but warm bars + melted chocolate = a melty mess.
Once the bars are completely cool, it’s chocolate o’clock. In a microwave-safe bowl, combine chocolate chips and coconut oil (or butter).
Microwave in 30-second intervals, stirring after each, until completely melted and smooth. Usually takes 1-2 minutes total. Don’t rush this or you’ll burn the chocolate and cry.
Pour the melted chocolate over the cooled bars and spread it evenly with a spatula. Make sure you cover everything—the top, the sides, all of it. Be generous. This is not the time for restraint.
If you’re using flaky sea salt (and you should), sprinkle it over the wet chocolate. Just a light sprinkle—you want to enhance, not overpower.
Let the chocolate set at room temperature for about 30 minutes, or pop it in the fridge for 15 minutes if you’re impatient. Once the chocolate is firm, cut into bars with a sharp knife. Wipe the knife between cuts for clean edges.
Cut into 16-20 bars depending on how big you want them. I usually go with 20 because I have some self-control. Barely.
Serve at room temperature for the best texture. Cold bars are good too, but they’re a little harder.
Store in an airtight container and try not to eat them all in one sitting. This is extremely difficult.
Notes
These are already perfect, but here’s how to take them over the top:
- Serve with a cold glass of milk (essential)
- Warm for 10 seconds in the microwave for gooey chocolate
- Serve alongside coffee or hot chocolate
- Cut into small squares for a dessert platter
- Package individually in cellophane bags for gifts
- Drizzle with extra melted chocolate for Instagram purposes
- Pair with vanilla ice cream for a sundae situation
- Prep Time: 20 minutes
- Cook Time: 35 minutes
Nutrition
- Calories: ~280 kcal
- Sugar: ~24g
- Sodium: ~140mg
- Fat: ~16g
- Carbohydrates: ~32g
- Protein: ~4g


