

Quick Overview
Easter is a time for family gatherings, celebrations, and delicious food. What better way to celebrate than by baking adorable and fluffy Easter Bunny Buns? These delightful treats are not only visually appealing but also incredibly tasty. Perfect for brunch or as a sweet snack during the holiday festivities, these cute bunny-shaped rolls will surely bring smiles to both children and adults alike. Follow this simple recipe to make your very own Easter Bunny Buns that everyone will love!
Ingredient Breakdown
Flour
For these delicious buns, you will need 4 cups of all-purpose flour. This ingredient serves as the base for your dough, providing structure and texture.
Yeast
Use 2 teaspoons of active dry yeast to help your dough rise. Yeast is essential for creating that light and airy texture in the buns.
Sugar
Add 1/4 cup of granulated sugar to sweeten the dough. Sugar also feeds the yeast, promoting fermentation for a fluffier result.
Milk
You’ll need 1 cup of warm milk (around 110°F) to activate the yeast. Warm milk adds moisture and richness to the dough.
Butter
Incorporate 1/3 cup of unsalted butter, melted. Butter adds flavor and contributes to a tender crumb in your buns.
Eggs
Use 2 large eggs in the dough for richness and structure. They help bind the ingredients together while adding moisture.
Salt
A teaspoon of salt enhances the flavor of your buns. Salt balances sweetness and controls yeast activity during fermentation.
Step By Step Recipe: Easter Bunny Buns
Prepare the Dough
In a large mixing bowl, combine warm milk and sugar. Sprinkle yeast on top and let it sit for about 5 minutes until bubbly. This step activates the yeast, ensuring your buns rise properly.
Mix Ingredients
Once the yeast is activated, add melted butter, eggs, and salt into the mixture. Gradually add flour one cup at a time while mixing until a soft dough forms that pulls away from the sides of the bowl.
Knead the Dough
Transfer the dough onto a floured surface and knead it for about 8-10 minutes until smooth and elastic. Proper kneading develops gluten in the dough which gives your buns structure.
Let It Rise
Place the kneaded dough in a greased bowl and cover it with a clean kitchen towel. Allow it to rise in a warm place for about an hour or until doubled in size.
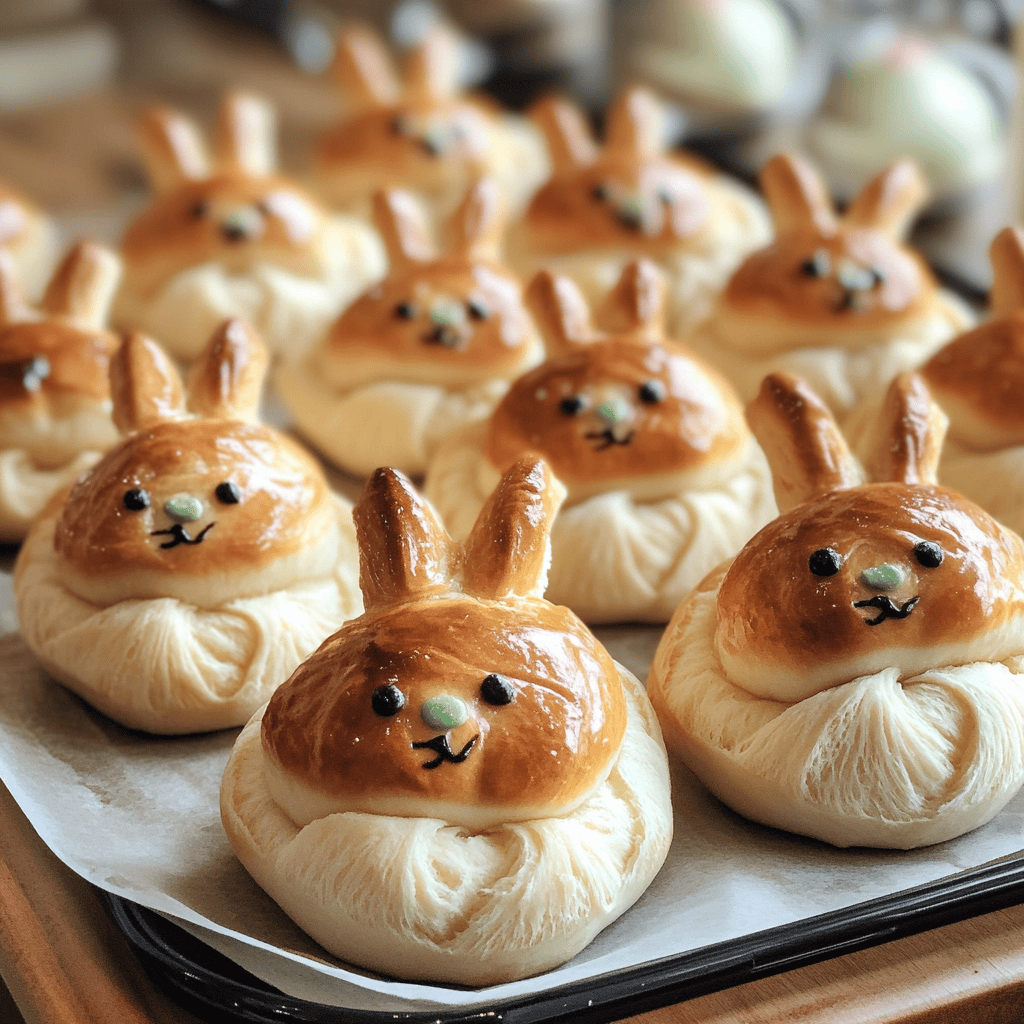
Shape Bunny Buns
After rising, punch down the dough gently to release air bubbles. Divide it into equal portions (about 12). Shape each piece into a round ball for the body and smaller balls for ears according to your desired bunny shape.
Assemble Buns
To assemble each bun, attach two smaller balls (for ears) onto each larger ball (the body). Use kitchen scissors or a sharp knife to cut slits into the ears before placing them on a baking sheet lined with parchment paper.
Second Rise
Cover shaped bunny buns with a towel again and let them rise for another 30 minutes until puffy. This second rise helps achieve that perfect fluffy texture when baked.
Bake Buns
Preheat your oven to 350°F (175°C). Once preheated, bake your bunny buns for about 15-20 minutes or until they turn golden brown. Keep an eye on them so they don’t over-bake!
Cool Before Serving
Once baked, remove them from the oven and let them cool on a wire rack. Allowing them to cool makes handling easier when serving or decorating later on.
Serving and Storing Tips
How to Serve
Serve these delightful Easter Bunny Buns warm from the oven with butter or jam spread over them. They make an excellent addition to any festive brunch table or as part of dessert during Easter celebrations.
Storing Leftovers
If you have leftovers after serving, store them in an airtight container at room temperature for up to three days. To keep them fresh longer, you can refrigerate them in an airtight container for up to one week.
Freezing Options
For longer storage options, freeze unbaked shaped bunny buns before their second rise by placing them on parchment-lined trays until frozen solid then transfer them into freezer bags. Bake straight from frozen when ready!
With this easy recipe, enjoy making these delightful Easter Bunny Buns that will surely impress your guests! Happy baking!
Mistakes to avoid
One common mistake when making Easter Bunny Buns is not properly measuring your ingredients. Accurate measurements ensure the right texture and flavor. Using too much flour can lead to dry buns, while too little may cause them to collapse. Always use a kitchen scale or measuring cups for precision.
Another mistake is over-kneading the dough. Kneading develops gluten, which gives the buns structure. However, excessive kneading can make them tough instead of fluffy. Aim for a smooth, elastic dough without going overboard on kneading.
Failing to let the dough rise adequately is also a common pitfall. Allowing the dough to rest helps it become airy and light. Skipping this step results in dense and heavy buns. Patience is key; let your dough double in size before shaping it.
Not preheating the oven can ruin your baking. The right temperature helps achieve that golden-brown crust and soft inside. Always check your oven’s settings before placing your buns inside to ensure even cooking.
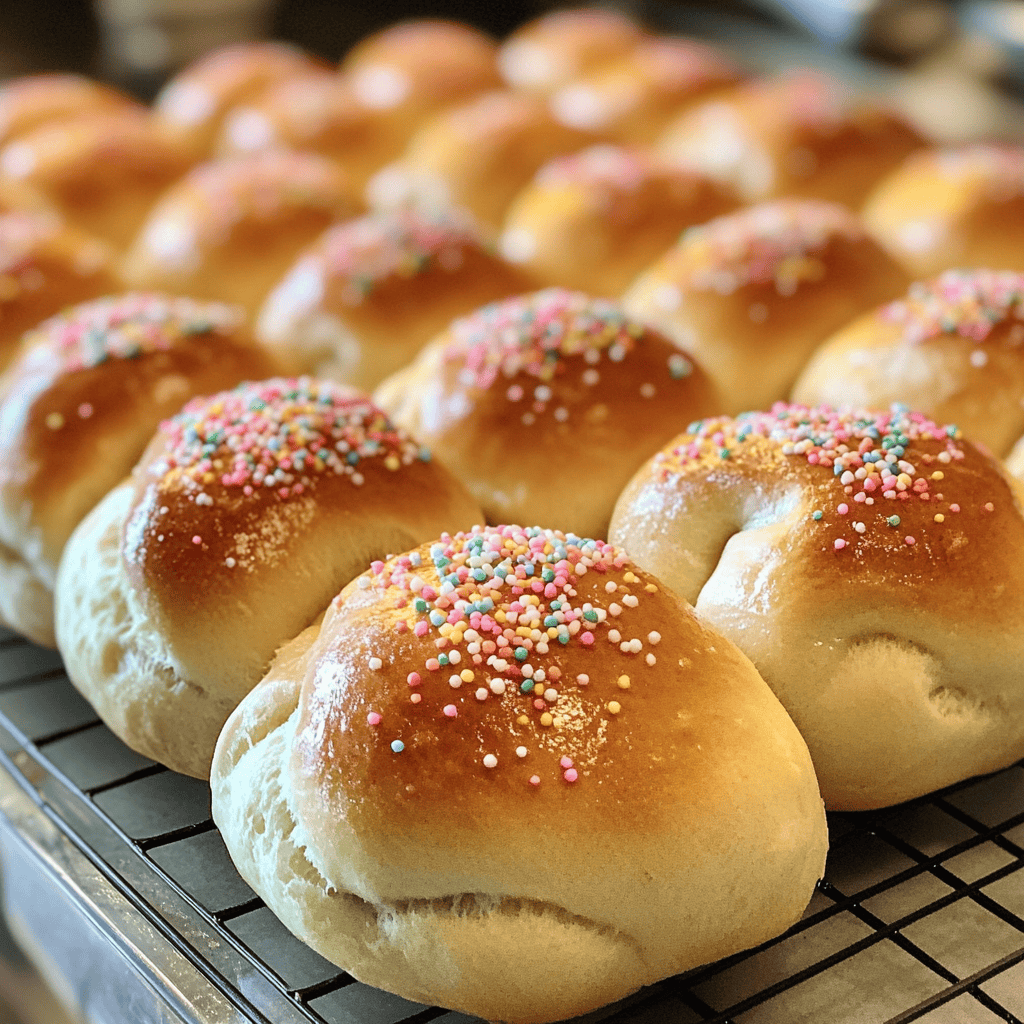
Lastly, ignoring the importance of decoration can make your Easter Bunny Buns less festive. Use raisins or chocolate chips for eyes, and consider adding colored sprinkles for extra fun. A well-decorated bun adds charm and excitement to your Easter table.
Tips and tricks
To achieve perfect Easter Bunny Buns, start by using fresh yeast rather than expired options. Fresh yeast activates better, leading to airy and soft buns. Check the expiration date on your yeast package before starting the recipe. This simple step ensures a successful rise and a delightful texture in your baked goods.
Another tip is to incorporate a milk wash before baking for a beautiful golden color on your buns. A mixture of milk and egg brushed on top creates an appealing finish while adding moisture during baking. This small touch enhances both appearance and flavor.
Consider using flavored extracts like vanilla or almond in your dough for added depth of taste. A teaspoon mixed into your liquid ingredients can elevate the flavor profile significantly without overpowering it. Experiment with different extracts to find what you enjoy most.
Pay attention to the resting time for shaped buns as well; letting them rise again after shaping allows for better volume and fluffiness. The second rise can be shorter than the first but should still be enough for noticeable expansion.
Lastly, don’t hesitate to get creative with fillings! While traditional Easter Bunny Buns might be plain, adding chocolate chips or cinnamon sugar brings new life to this classic treat. Let your imagination guide you as you customize these delightful pastries.
Suggestions for Easter Bunny Buns
For an extra touch of sweetness, consider drizzling icing over your Easter Bunny Buns once they cool down. A simple glaze made from powdered sugar and milk provides a lovely finish that complements their fluffy texture beautifully.
Another suggestion is to serve these buns warm with butter or jam at breakfast or brunch gatherings during the Easter holiday. The warmth enhances their flavor while providing guests with an inviting experience that brings everyone together around the table.
If you’re hosting a gathering, think about creating bunny-themed decorations to accompany your buns. Simple centerpieces featuring spring flowers paired with colorful napkins create a festive atmosphere perfect for celebrating Easter.
For those who want a healthier twist, swap out some of the white flour with whole wheat flour in your recipe. This adjustment adds fiber and nutrients while maintaining delicious taste and texture in your Easter Bunny Buns.
Lastly, consider preparing smaller versions of these buns as delightful treats for kids’ parties or school events during springtime celebrations. Fun-sized bunnies attract young ones’ attention while making them easy to enjoy on-the-go!
FAQs
How long do I need to let my dough rise?
Allowing your dough to rise typically takes about one hour until it doubles in size in a warm area free from drafts. If your environment is cooler, it may take longer—up to 90 minutes—so be patient! The rising process is essential for achieving light and fluffy Easter Bunny Buns that everyone will love.
Can I make these buns ahead of time?
Yes! You can prepare the dough ahead of time by allowing it to rise fully before refrigerating it overnight in an airtight container. When ready to bake, simply shape the dough into bunnies and allow them another short rise at room temperature before baking them fresh!
What if I don’t have fresh yeast?
If you don’t have fresh yeast available, you can substitute active dry yeast instead! Use about 25% less active dry yeast than fresh yeast called for in recipes since dry yeast is more concentrated as well as needing activation prior mixing into other ingredients.
Can I freeze leftover bunny buns?
Absolutely! Allow any leftover Easter Bunny Buns cool completely before wrapping them tightly in plastic wrap or aluminum foil followed by placing them into freezer-safe bags or containers—this keeps them fresh! Thaw at room temperature when ready to enjoy again!
What are some good filling options?
You can fill these delightful bunny-shaped treats with various options like chocolate chips, cinnamon sugar mixtures, fruit preserves (like raspberry), or even cream cheese filling! Get creative—there’s no limit on flavors when preparing these tasty creations!
How do I store my baked bunny buns?
To keep baked bunny buns fresh longer after cooling down completely; store them in an airtight container at room temperature for up two days maximum! Alternatively; refrigerate them up-to five days if you prefer longer shelf life without losing quality!
Summary
Making delicious Easter Bunny Buns requires attention to detail and practice but offers rewarding results when done correctly! Avoid common mistakes such as improper ingredient measurement or skipping essential rising times while utilizing helpful tips like brushing with milk wash or experimenting with fillings enhances both flavor profiles visually appealing treats too! Lastly; remember proper storage methods maintain freshness until you’re ready share these festive delights with family friends during holiday celebrations!


