
Quick Overview
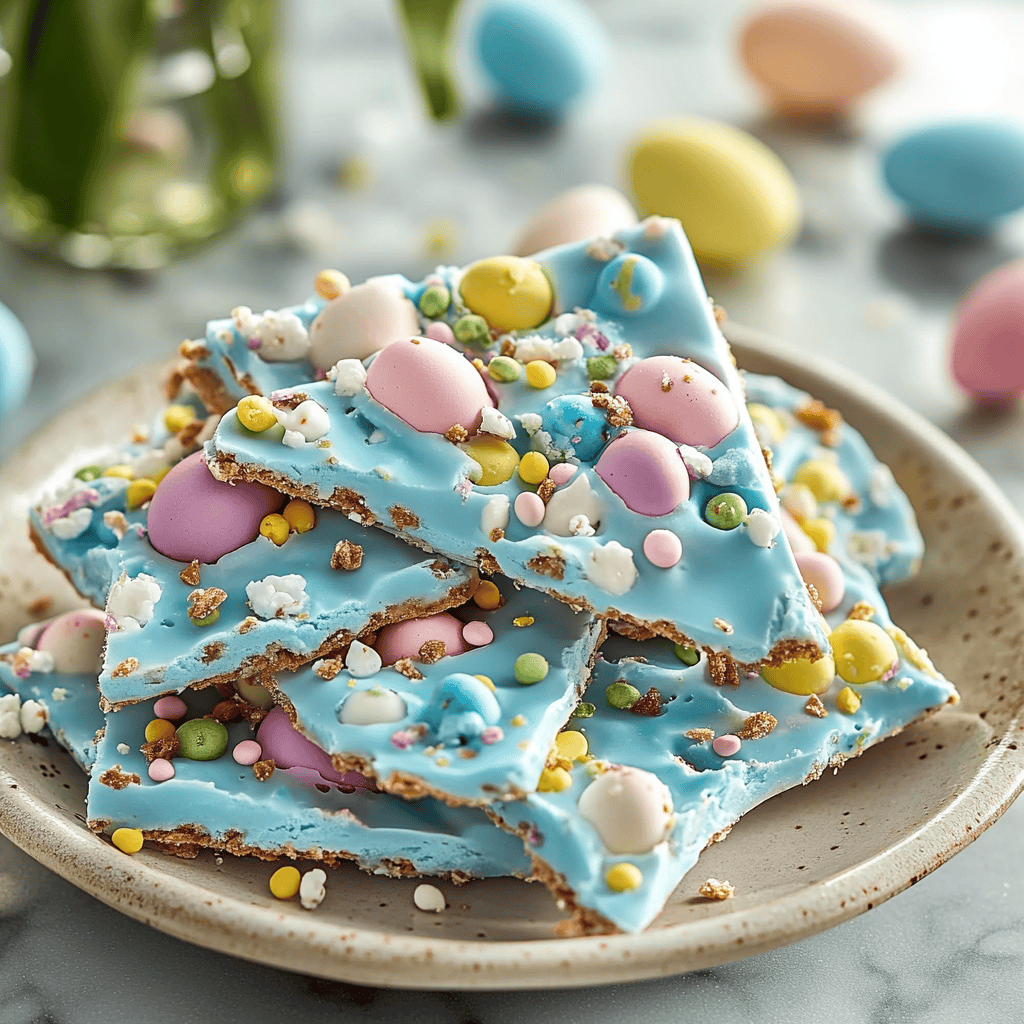
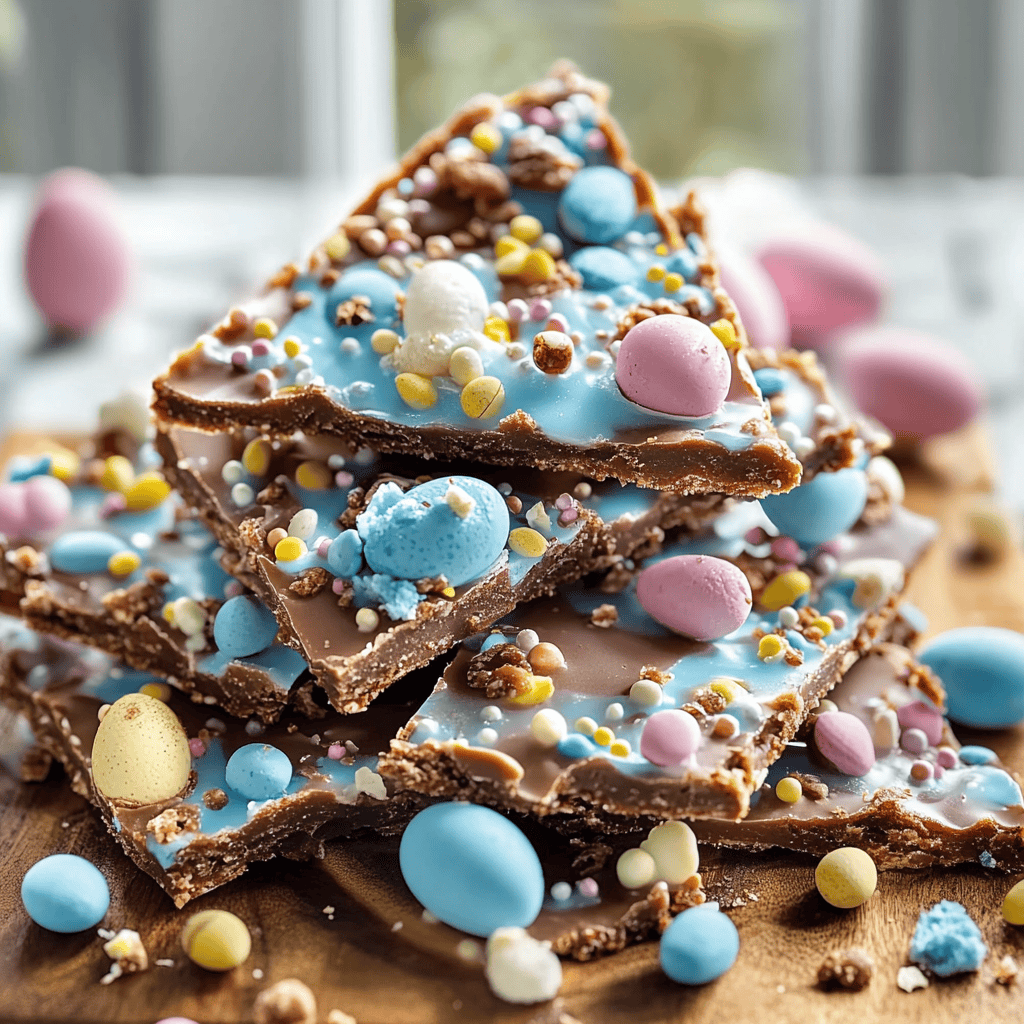
Are you ready to make a delightful treat that captures the essence of spring? This Robin Egg Easter Bark is a colorful creation that will brighten any celebration. Combining creamy chocolate with vibrant candy-coated eggs, this recipe is as fun to make as it is to eat. Whether you’re hosting an Easter gathering or simply looking for a sweet snack to enjoy at home, this bark is sure to impress everyone who tries it. With simple ingredients and easy steps, you can whip up this festive dessert in no time!
Ingredient Breakdown
Chocolate
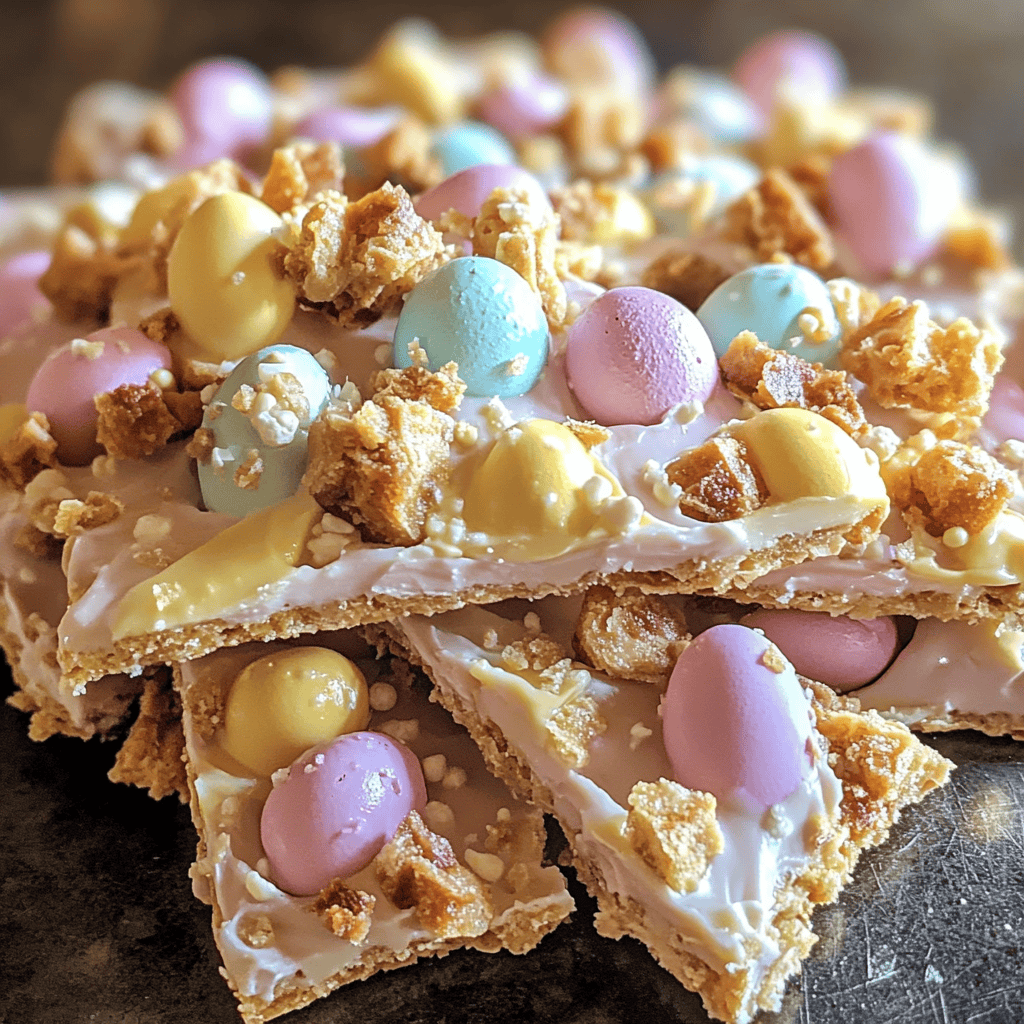
For this recipe, you will need 12 ounces of white chocolate chips. White chocolate creates a creamy base for your bark, allowing the colors of the toppings to shine.
Candy-Coated Eggs
You will need about 1 cup of candy-coated chocolate eggs (like Robin Eggs). These add color and a crunchy texture that contrasts beautifully with the smoothness of the chocolate.
Sprinkles
A half-cup of pastel sprinkles adds an extra layer of fun and festivity. They not only enhance the visual appeal but also provide a sweet crunch in every bite.
Optional Toppings
If desired, consider adding 1/2 cup of chopped nuts or dried fruit for additional flavor and texture. These optional ingredients can personalize your bark, making it unique to your taste.
Step By Step Recipe: Robin Egg Easter Bark
Prepare Your Workspace
Begin by lining a baking sheet with parchment paper. This step ensures that your bark does not stick and makes cleanup easier later. Make sure your workspace is clean and organized so you can easily access all your ingredients.
Melt the Chocolate
In a microwave-safe bowl, melt the white chocolate chips in 30-second intervals. Stir after each interval until smooth. Be careful not to overheat the chocolate; it should be creamy without any lumps or burn spots.
Pour Chocolate onto Baking Sheet
Once melted, pour the white chocolate onto the prepared baking sheet. Use a spatula to spread it evenly into a rectangle about 1/4 inch thick. This creates a nice surface for adding toppings later on.
Add Candy-Coated Eggs
While the melted chocolate is still warm, sprinkle the candy-coated eggs evenly over the surface. Gently press them down into the chocolate slightly so they adhere well once it cools.
Add Sprinkles
Next, add your pastel sprinkles generously over the top of the candy-coated eggs. The more sprinkles you use, the more festive your bark will look! Make sure they are evenly distributed for maximum visual appeal.
Chill Until Firm
Place the baking sheet in the refrigerator for about 30 minutes or until the chocolate hardens completely. This step is crucial as it allows all components to set properly before cutting.
Break Into Pieces
Once firm, remove from the refrigerator and let it sit at room temperature for about 5 minutes. Then break or cut into irregular pieces using your hands or a sharp knife. Enjoy seeing all those colorful layers!
Serving and Storing Tips
Serving Suggestions
Serve your Robin Egg Easter Bark on a festive platter during gatherings or as part of an Easter dessert table. It’s perfect for sharing with friends and family or can be individually wrapped as sweet treats for guests.
Storage Guidelines
Store any leftover bark in an airtight container at room temperature for up to one week. If it’s particularly warm in your area, consider refrigerating it to maintain freshness without affecting its texture too much.
This easy-to-make Robin Egg Easter Bark is sure to be a hit during any spring celebration! Enjoy crafting this colorful treat that brings both joy and sweetness to your festivities!
Mistakes to avoid
One common mistake when making Robin Egg Easter Bark is not tempering the chocolate correctly. If you skip this step, your bark may not set properly and could become overly soft. Tempering ensures that the chocolate has a nice sheen and a crisp texture. Always melt chocolate slowly over low heat and be sure to stir frequently for even melting.
Another mistake is using the wrong type of chocolate. While milk chocolate is popular, dark or white chocolate can also create delicious variations of Robin Egg Easter Bark. Choose high-quality chocolate that melts smoothly for the best results. Avoid using chocolate chips, as they do not melt as well and can lead to a grainy texture.
Not allowing enough cooling time is another error. After spreading your melted chocolate on a baking sheet, let it cool completely before adding toppings or breaking it into pieces. Rushing this process can result in a messy bark that doesn’t hold its shape well.
Failing to line your baking sheet with parchment paper is also an oversight. This simple step prevents the bark from sticking and makes it easier to lift off once it’s cooled. Without this, you’ll end up with broken pieces stuck to the pan, which defeats the purpose of beautiful presentation.
Finally, neglecting to add enough toppings can lead to a bland finished product. While Robin Egg candies are visually appealing, consider adding nuts, sprinkles, or dried fruits for extra flavor and texture. A well-balanced combination will make your bark more enjoyable.
Tips and tricks
To achieve the best results with your Robin Egg Easter Bark, start by preparing all your ingredients ahead of time. Gather your chocolates and toppings together so you can work quickly while the chocolate remains melted. This preparation will streamline your process and help you avoid any mishaps during assembly.
When melting chocolate, consider using a double boiler instead of a microwave. This method provides better temperature control and reduces the risk of scorching the chocolate. If you prefer microwaving, melt in short intervals of 20 seconds while stirring in between until smooth.
For perfect layering, pour one type of melted chocolate onto your lined baking sheet first, then drizzle another color on top before swirling gently with a skewer or toothpick. This technique creates beautiful marbling effects that enhance both appearance and taste in your Robin Egg Easter Bark.
After pouring out the melted mixture, sprinkle toppings evenly across the surface before it sets. This distribution ensures each piece has a delightful crunch from toppings like nuts or sprinkles, enhancing both flavor and texture.
Lastly, if you want to keep portions uniform for gifting or sharing at gatherings, use a sharp knife or pizza cutter to slice your bark into squares once it has fully cooled. This attention to detail adds professionalism to your homemade treat and makes it more attractive for presentation.
Suggestions for Robin Egg Easter Bark
Consider experimenting with flavors by adding extracts like vanilla or almond to your melted chocolate base for added depth in taste when making Robin Egg Easter Bark. Just a few drops can significantly elevate the overall profile without overpowering its inherent sweetness.
For those who enjoy a bit of crunchiness in their treats, incorporate crushed pretzels or graham crackers into your topping mix. These elements add contrasting textures that make each bite interesting while complementing the sweetness of the chocolates used in the bark.
If you’re preparing this treat for kids or family gatherings, consider personalizing each batch by using colored candy melts instead of traditional chocolates for an eye-catching twist on appearance. Vibrant colors will surely attract attention and delight young ones during festive occasions like Easter celebrations.
To make cleanup easier after preparing Robin Egg Easter Bark, use disposable gloves when handling melted chocolate or toppings. This simple tip saves time scrubbing sticky residues from hands and ensures you maintain cleanliness throughout your cooking process.
Lastly, store any leftover bark in an airtight container at room temperature for freshness. The ideal conditions prevent moisture from affecting its crispness while preserving flavors longer than if stored improperly.
FAQs
What is Robin Egg Easter Bark?
Robin Egg Easter Bark is a delightful treat made by melting various types of chocolate and mixing them with colorful candy-coated eggs known as Robin Eggs. It combines sweet flavors with vibrant colors, making it an ideal dessert for springtime celebrations such as Easter parties or family gatherings.
How long does it take to make Robin Egg Easter Bark?
Making Robin Egg Easter Bark typically takes around 30 minutes from start to finish, including preparation time for measuring ingredients and melting chocolates. Cooling may require additional time; let it set completely before slicing into pieces for serving.
Can I use different types of chocolates?
Absolutely! You can customize your Robin Egg Easter Bark by using milk chocolate, dark chocolate, white chocolate, or even flavored varieties like peanut butter chips or caramel-infused chocolates. Mixing different types creates visually stunning layers while providing diverse flavor profiles.
How should I store leftover bark?
Store any leftover Robin Egg Easter Bark in an airtight container at room temperature away from direct sunlight or heat sources. Proper storage will keep it fresh for about two weeks without compromising its texture or flavor quality over time.
Can I add other toppings besides Robin Eggs?
Yes! Feel free to get creative by adding nuts like almonds or walnuts, dried fruits like cranberries or apricots, or even crushed cookies for added crunchiness! These variations enhance both taste and visual appeal while giving each batch unique characteristics suited to personal preferences.
Is there an alternative for allergy-friendly versions?
For allergy-friendly options when making Robin Egg Easter Bark, consider using dairy-free chocolates that cater specifically towards those with lactose intolerance or gluten sensitivities if necessary! Additionally swapping traditional candies with allergen-free varieties ensures everyone can enjoy this festive treat.
Summary
In summary, making delicious Robin Egg Easter Bark requires careful attention to details such as proper tempering techniques and ingredient choices—avoiding common mistakes ensures optimal results every time! By following helpful tips like preparing ahead of time and experimenting with various toppings creatively enhances both flavor profiles and visual appeal too! Remember these guidelines when crafting this delightful treat during festive occasions—happy baking!


