
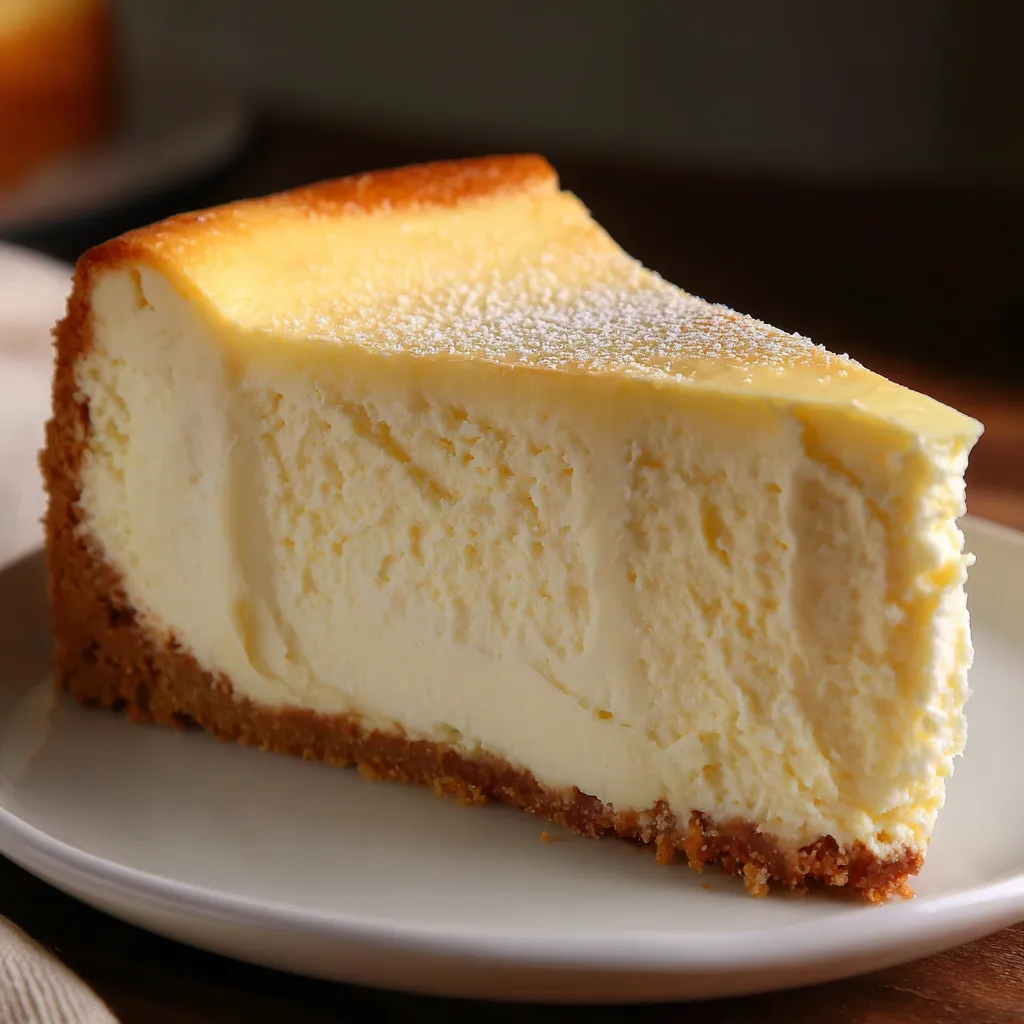
Okay, so this isn’t just “a” cheesecake recipe. This is THE cheesecake recipe—the one that makes people stop mid-bite and ask what sorcery you used, the one that gets requested for every birthday and holiday, the one that spoils you for life because regular cheesecake will never hit the same again. We’re talking tall, dense, impossibly creamy New York-style cheesecake with a buttery graham cracker crust and a texture so smooth it’s almost indecent. No cracks, no weird textures, no disappointment—just pure, unadulterated cheesecake perfection that’s somehow both light and decadent at the same time. I made this for Thanksgiving once and my aunt literally cried. Another time I brought it to a potluck and three different people offered to pay me to make them one. This cheesecake has LIFE-CHANGING CAPABILITIES.
Why You’ll Love This Recipe
Foolproof method. Follow these instructions and you WILL get a perfect cheesecake. No water bath drama, no guessing games.
That texture though. Creamy, dense, smooth, and silky. This is what cheesecake dreams are made of.
Tall and impressive. This baby stands TALL and proud. No sad, flat cheesecake here.
No cracks. The gradual cooling method prevents those surface cracks that plague most homemade cheesecakes.
Make-ahead essential. Cheesecake needs to chill overnight anyway, so you can prep a day or two ahead stress-free.
Customize it endlessly. This base recipe is your canvas. Top it with anything or keep it classic.
The Good Stuff You’ll Need
For the Graham Cracker Crust:
- 2 1/2 cups graham cracker crumbs (about 18-20 graham crackers)
- 1/3 cup granulated sugar
- 3/4 cup (1 1/2 sticks) unsalted butter, melted
- Pinch of salt
For the Cheesecake Filling:
- 32 oz (four 8-oz packages) cream cheese, softened to room temp (THIS IS NON-NEGOTIABLE)
- 1 1/4 cups granulated sugar
- 1/4 cup all-purpose flour (secret weapon for preventing cracks)
- 1 cup sour cream, room temperature
- 4 large eggs, room temperature
- 2 large egg yolks, room temperature (for extra richness and creaminess)
- 2 tsp vanilla extract
- 1 tsp lemon zest (optional but adds brightness)
- Pinch of salt
Optional Toppings:
- Fresh berries
- Fruit compote
- Chocolate ganache
- Caramel sauce
- Whipped cream
- Or keep it naked and simple
Equipment:
- 9-inch or 10-inch springform pan (MUST be springform)
- Food processor or zip-top bag for crushing crackers
- Hand mixer or stand mixer
- Rubber spatula
- Roasting pan (for water bath—optional but recommended)
- Aluminum foil
- Parchment paper
Let’s Do This
Step 1: Prep Your Pan
Preheat oven to 325°F (160°C).
Wrap the outside and bottom of a 9-inch springform pan with TWO layers of heavy-duty aluminum foil. This prevents water from seeping in if using a water bath.
Line the bottom of the pan with parchment paper (optional but makes removal easier).
Lightly grease the sides of the pan with butter or cooking spray.
Set aside while you make the crust.
Step 2: Make the Graham Cracker Crust
In a food processor, pulse graham crackers until they’re fine crumbs. Or put them in a zip-top bag and crush with a rolling pin until therapeutic stress relief is achieved.
In a medium bowl, mix graham cracker crumbs, sugar, melted butter, and salt until the mixture looks like wet sand and holds together when squeezed.
Press the mixture firmly and evenly into the bottom of the springform pan and about 2 inches up the sides. Really pack it down—use the bottom of a measuring cup or glass.
Make sure the crust is even throughout, especially in the corners where the bottom meets the sides.
Bake the crust for 10 minutes until lightly golden and fragrant.
Remove and let cool while you make the filling. Keep the oven on.
Step 3: Make the Cheesecake Filling (The Most Important Part)
Make ABSOLUTELY CERTAIN your cream cheese is at room temperature. I’m talking soft enough to easily spread but not melted or oily. This cannot be emphasized enough. Cold cream cheese = LUMPY DISASTER.
In a large bowl (or stand mixer with paddle attachment), beat cream cheese on medium speed for 3-4 minutes until completely smooth, fluffy, and no lumps remain. Scrape down the bowl frequently.
Add sugar and flour. Beat on medium speed for 2 minutes until well incorporated and fluffy.
Add sour cream, vanilla extract, lemon zest (if using), and salt. Beat on low-medium speed until just combined and smooth.
Add eggs and egg yolks ONE AT A TIME, mixing on LOW SPEED after each addition. Mix ONLY until just incorporated—about 10-15 seconds per egg. DO NOT OVERMIX after adding eggs. Overmixing incorporates too much air which causes cracks and texture issues.
Use a rubber spatula to scrape down the bowl and fold gently to ensure everything is incorporated.
The batter should be smooth, thick, creamy, and pale yellow. No lumps, no air bubbles.
Step 4: Pour and Prepare for Baking
Pour the cheesecake batter over the cooled crust in the prepared pan.
Smooth the top with a spatula.
Tap the pan firmly on the counter 10-15 times to release air bubbles. You’ll see them rise to the surface—this is good.
Water Bath Method (Recommended for Beginners): Place the wrapped springform pan in a large roasting pan. Fill the roasting pan with hot water until it comes about halfway up the sides of the springform pan. This creates a gentle, humid cooking environment that prevents cracks.
No Water Bath Method: Place a large baking pan filled with hot water on the bottom rack of the oven (below where the cheesecake will bake). This creates steam without the risk of water leaking into your pan.
Step 5: Bake Low and Slow
Bake at 325°F for 1 hour and 15 minutes to 1 hour and 30 minutes.
The cheesecake is done when the edges are set and puffed slightly, but the center 3-4 inches still jiggles like jello when you gently shake the pan.
It should NOT look liquid, but it should definitely jiggle. This is what you want. If the center looks solid, you’ve overbaked it.
The internal temperature should be about 150-155°F in the very center when you insert a thermometer.
DO NOT open the oven door during the first hour of baking. Drafts cause cracks.
Step 6: Cool Gradually (CRUCIAL STEP)
Turn off the oven and crack the door open about 4 inches.
Let the cheesecake cool in the oven with the door ajar for 1 HOUR. This gradual temperature change prevents cracks from thermal shock.
After 1 hour in the oven, remove the cheesecake and let it cool on the counter to room temperature—about 2 hours.
Don’t rush this. Sudden temperature changes = cracks.
Once at room temperature, run a thin knife around the edge of the pan to loosen the cheesecake from the sides. This prevents it from cracking as it contracts during chilling.
Step 7: Chill Overnight
Cover the cooled cheesecake (still in the pan) with plastic wrap. Don’t let the plastic touch the surface—tent it over or place parchment on top first.
Refrigerate for AT LEAST 8 hours, but preferably 12-24 hours.
Cheesecake NEEDS this time to fully set and for flavors to develop. This is not optional. Be patient.
The texture and flavor improve dramatically after 24 hours.
Step 8: Unmold and Serve
When ready to serve, carefully remove the sides of the springform pan.
Use a large offset spatula to slide the cheesecake off the base onto a serving plate (or just serve it on the base).
Let sit at cool room temperature for 20-30 minutes before slicing for best texture and flavor.
Use a large, sharp knife to slice. Wipe the knife clean and run it under hot water between each cut for perfect, clean slices.
Top with your chosen toppings or serve plain in all its glory.
Watch as people take their first bite and their eyes roll back in pleasure.
Serving Suggestions
This is perfect plain, but here are some classic topping ideas:
- Fresh strawberries, blueberries, or mixed berries
- Strawberry or raspberry sauce
- Chocolate ganache drizzle
- Salted caramel sauce
- Lemon curd
- Cherry pie filling (classic)
- Fresh whipped cream
- Dulce de leche
- Crushed Oreos or cookies
- Toasted nuts
Switch It Up
Chocolate Cheesecake: Add 8 oz melted and cooled semi-sweet chocolate to the filling.
Lemon Cheesecake: Add 2 tbsp lemon zest and 3 tbsp lemon juice to the filling.
Pumpkin Cheesecake: Add 1 cup pumpkin puree and 2 tsp pumpkin pie spice.
Oreo Cheesecake: Use Oreo crust, fold 1 cup crushed Oreos into filling.
Turtle Cheesecake: Top with caramel, chocolate, and pecans.
Salted Caramel: Swirl caramel into the batter and top with sea salt.
Raspberry Swirl: Swirl raspberry puree through the batter before baking.
Chocolate Chip: Fold 1 cup mini chocolate chips into the filling.
New York Style: Use all cream cheese, no sour cream, for ultra-dense texture.
Storage and Make-Ahead Tips
Cheesecake is the ULTIMATE make-ahead dessert.
Refrigerate: Store covered for up to 7 days. It actually gets better after 2-3 days.
Freeze: Wrap tightly in plastic wrap then foil. Freeze for up to 3 months. Thaw overnight in the fridge.
Make-ahead timeline:
- 3 days ahead: Make and bake cheesecake, chill
- Day of serving: Add toppings and serve
Freeze individual slices: Wrap and freeze individual slices for grab-and-go dessert.
Don’t add fresh fruit toppings until serving as they can make the top soggy over time.
Slice cold but serve cool: Slice when very cold for clean cuts, but let slices sit for 20 minutes before eating for best flavor and texture.
Why This Works So Damn Well
This cheesecake is basically engineered for perfection.
Room temperature ingredients blend smoothly without overmixing, which prevents air incorporation that causes cracks.
Flour in the filling provides structure and helps prevent cracks by stabilizing the proteins.
Extra egg yolks create that signature dense, creamy, rich texture without making it heavy.
Mixing eggs on low speed prevents incorporating too much air which causes rising and falling (and cracking).
Low oven temperature cooks the cheesecake gently and evenly without causing rapid expansion.
Slight underbaking in the center accounts for carryover cooking—it continues to set as it cools.
Gradual cooling prevents thermal shock cracks from sudden temperature changes.
The water bath or steam creates a humid environment that prevents the surface from drying out and cracking.
Overnight chilling allows the cheesecake to fully set and flavors to meld and intensify.
When to Make This
Thanksgiving/Christmas: The ULTIMATE holiday dessert that never disappoints.
Birthday Cake Alternative: For people who prefer cheesecake to cake (the superior choice).
Special Celebrations: Anniversaries, graduations, promotions—anything worth celebrating.
Dinner Parties: Make ahead and wow your guests with minimal day-of stress.
Just Because: You don’t need a reason to make perfect cheesecake. Make it whenever you want joy.
Valentine’s Day: Top with strawberries and chocolate for romantic vibes.
Easter Dessert: Light enough for spring, impressive enough for a holiday table.
Questions People Actually Ask
Q: My cheesecake cracked. What did I do wrong? A: You overmixed after adding eggs, baked at too high temp, didn’t cool gradually, overbaked it, or opened the oven door too early. Follow the method exactly.
Q: The center is jiggly. Is it done? A: YES. It should jiggle like jello in the center. It sets completely during cooling and chilling. Don’t overbake.
Q: My filling has lumps. Help! A: Your cream cheese wasn’t at room temperature. There’s no fixing lumps once they’re there. Next time, be patient and let ingredients soften properly.
Q: The crust is soggy. What happened? A: You didn’t pre-bake it, or water leaked into the pan. Always pre-bake and wrap the pan well if using a water bath.
Q: Can I skip the water bath? A: Yes, but use the steam method (pan of water on lower rack) or you risk cracks. The water bath is insurance.
Q: My cheesecake sank in the middle. A: You overbaked it or overmixed the batter. The center should still jiggle when you remove it from the oven.
Q: How do I know when it’s done? A: The edges should be set and slightly puffed, the center should jiggle like jello (not liquid), and internal temp should be 150-155°F.
Q: Can I use low-fat cream cheese? A: Technically yes, but the texture won’t be as rich and creamy. Full-fat is worth it.
Q: Why does the recipe have flour? A: Flour adds structure and helps prevent cracks. It doesn’t make the cheesecake taste floury—you won’t notice it.
Print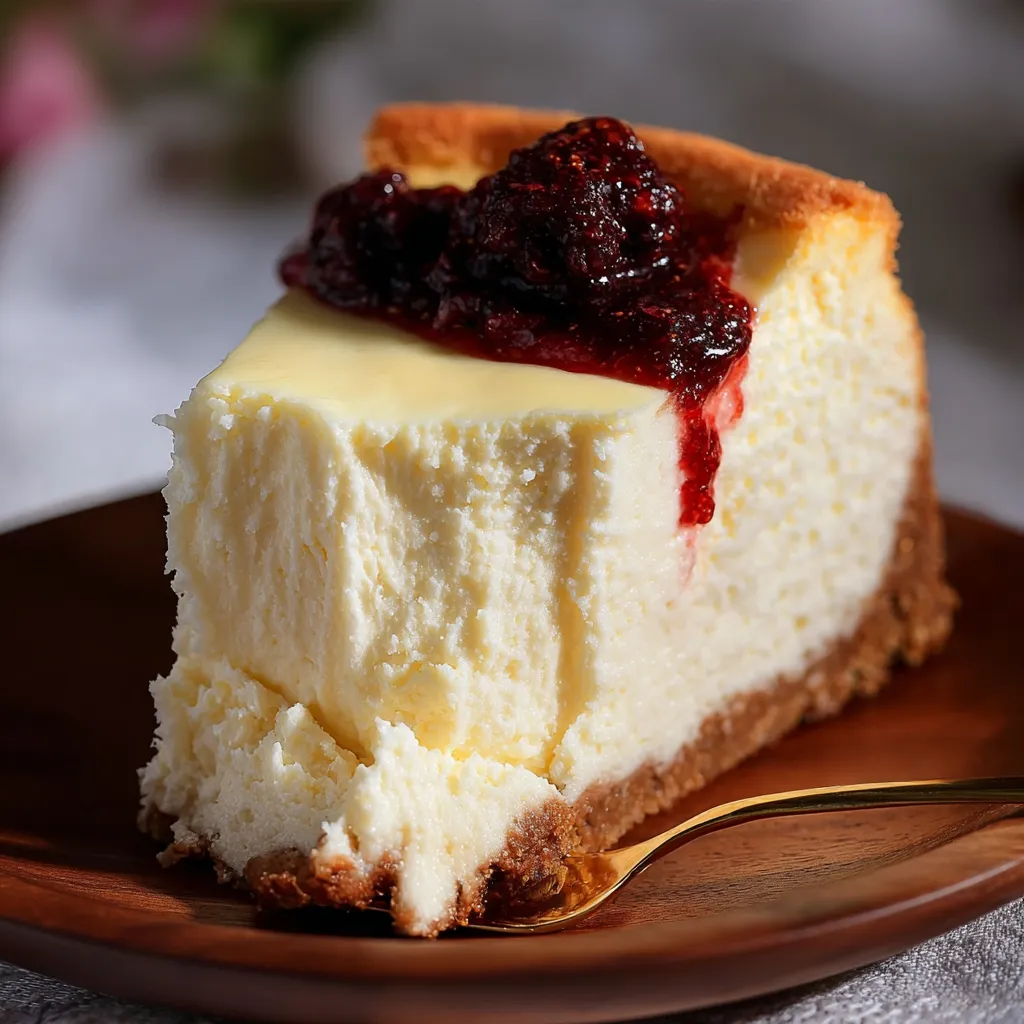
The Best Cheesecake Recipe
- Total Time: 2 hours
- Yield: 12–16 slices 1x
Description
Okay, so this isn’t just “a” cheesecake recipe. This is THE cheesecake recipe—the one that makes people stop mid-bite and ask what sorcery you used, the one that gets requested for every birthday and holiday, the one that spoils you for life because regular cheesecake will never hit the same again. We’re talking tall, dense, impossibly creamy New York-style cheesecake with a buttery graham cracker crust and a texture so smooth it’s almost indecent. No cracks, no weird textures, no disappointment—just pure, unadulterated cheesecake perfection that’s somehow both light and decadent at the same time. I made this for Thanksgiving once and my aunt literally cried. Another time I brought it to a potluck and three different people offered to pay me to make them one. This cheesecake has LIFE-CHANGING CAPABILITIES.
Ingredients
For the Graham Cracker Crust:
- 2 1/2 cups graham cracker crumbs (about 18–20 graham crackers)
- 1/3 cup granulated sugar
- 3/4 cup (1 1/2 sticks) unsalted butter, melted
- Pinch of salt
For the Cheesecake Filling:
- 32 oz (four 8-oz packages) cream cheese, softened to room temp (THIS IS NON-NEGOTIABLE)
- 1 1/4 cups granulated sugar
- 1/4 cup all-purpose flour (secret weapon for preventing cracks)
- 1 cup sour cream, room temperature
- 4 large eggs, room temperature
- 2 large egg yolks, room temperature (for extra richness and creaminess)
- 2 tsp vanilla extract
- 1 tsp lemon zest (optional but adds brightness)
- Pinch of salt
Optional Toppings:
- Fresh berries
- Fruit compote
- Chocolate ganache
- Caramel sauce
- Whipped cream
- Or keep it naked and simple
Equipment:
- 9-inch or 10-inch springform pan (MUST be springform)
- Food processor or zip-top bag for crushing crackers
- Hand mixer or stand mixer
- Rubber spatula
- Roasting pan (for water bath—optional but recommended)
- Aluminum foil
- Parchment paper
Instructions
Step 1: Prep Your Pan
Preheat oven to 325°F (160°C).
Wrap the outside and bottom of a 9-inch springform pan with TWO layers of heavy-duty aluminum foil. This prevents water from seeping in if using a water bath.
Line the bottom of the pan with parchment paper (optional but makes removal easier).
Lightly grease the sides of the pan with butter or cooking spray.
Set aside while you make the crust.
Step 2: Make the Graham Cracker Crust
In a food processor, pulse graham crackers until they’re fine crumbs. Or put them in a zip-top bag and crush with a rolling pin until therapeutic stress relief is achieved.
In a medium bowl, mix graham cracker crumbs, sugar, melted butter, and salt until the mixture looks like wet sand and holds together when squeezed.
Press the mixture firmly and evenly into the bottom of the springform pan and about 2 inches up the sides. Really pack it down—use the bottom of a measuring cup or glass.
Make sure the crust is even throughout, especially in the corners where the bottom meets the sides.
Bake the crust for 10 minutes until lightly golden and fragrant.
Remove and let cool while you make the filling. Keep the oven on.
Step 3: Make the Cheesecake Filling (The Most Important Part)
Make ABSOLUTELY CERTAIN your cream cheese is at room temperature. I’m talking soft enough to easily spread but not melted or oily. This cannot be emphasized enough. Cold cream cheese = LUMPY DISASTER.
In a large bowl (or stand mixer with paddle attachment), beat cream cheese on medium speed for 3-4 minutes until completely smooth, fluffy, and no lumps remain. Scrape down the bowl frequently.
Add sugar and flour. Beat on medium speed for 2 minutes until well incorporated and fluffy.
Add sour cream, vanilla extract, lemon zest (if using), and salt. Beat on low-medium speed until just combined and smooth.
Add eggs and egg yolks ONE AT A TIME, mixing on LOW SPEED after each addition. Mix ONLY until just incorporated—about 10-15 seconds per egg. DO NOT OVERMIX after adding eggs. Overmixing incorporates too much air which causes cracks and texture issues.
Use a rubber spatula to scrape down the bowl and fold gently to ensure everything is incorporated.
The batter should be smooth, thick, creamy, and pale yellow. No lumps, no air bubbles.
Step 4: Pour and Prepare for Baking
Pour the cheesecake batter over the cooled crust in the prepared pan.
Smooth the top with a spatula.
Tap the pan firmly on the counter 10-15 times to release air bubbles. You’ll see them rise to the surface—this is good.
Water Bath Method (Recommended for Beginners):
Place the wrapped springform pan in a large roasting pan. Fill the roasting pan with hot water until it comes about halfway up the sides of the springform pan. This creates a gentle, humid cooking environment that prevents cracks.
No Water Bath Method:
Place a large baking pan filled with hot water on the bottom rack of the oven (below where the cheesecake will bake). This creates steam without the risk of water leaking into your pan.
Step 5: Bake Low and Slow
Bake at 325°F for 1 hour and 15 minutes to 1 hour and 30 minutes.
The cheesecake is done when the edges are set and puffed slightly, but the center 3-4 inches still jiggles like jello when you gently shake the pan.
It should NOT look liquid, but it should definitely jiggle. This is what you want. If the center looks solid, you’ve overbaked it.
The internal temperature should be about 150-155°F in the very center when you insert a thermometer.
DO NOT open the oven door during the first hour of baking. Drafts cause cracks.
Step 6: Cool Gradually (CRUCIAL STEP)
Turn off the oven and crack the door open about 4 inches.
Let the cheesecake cool in the oven with the door ajar for 1 HOUR. This gradual temperature change prevents cracks from thermal shock.
After 1 hour in the oven, remove the cheesecake and let it cool on the counter to room temperature—about 2 hours.
Don’t rush this. Sudden temperature changes = cracks.
Once at room temperature, run a thin knife around the edge of the pan to loosen the cheesecake from the sides. This prevents it from cracking as it contracts during chilling.
Step 7: Chill Overnight
Cover the cooled cheesecake (still in the pan) with plastic wrap. Don’t let the plastic touch the surface—tent it over or place parchment on top first.
Refrigerate for AT LEAST 8 hours, but preferably 12-24 hours.
Cheesecake NEEDS this time to fully set and for flavors to develop. This is not optional. Be patient.
The texture and flavor improve dramatically after 24 hours.
Step 8: Unmold and Serve
When ready to serve, carefully remove the sides of the springform pan.
Use a large offset spatula to slide the cheesecake off the base onto a serving plate (or just serve it on the base).
Let sit at cool room temperature for 20-30 minutes before slicing for best texture and flavor.
Use a large, sharp knife to slice. Wipe the knife clean and run it under hot water between each cut for perfect, clean slices.
Top with your chosen toppings or serve plain in all its glory.
Watch as people take their first bite and their eyes roll back in pleasure.
Notes
This is perfect plain, but here are some classic topping ideas:
- Fresh strawberries, blueberries, or mixed berries
- Strawberry or raspberry sauce
- Chocolate ganache drizzle
- Salted caramel sauce
- Lemon curd
- Cherry pie filling (classic)
- Fresh whipped cream
- Dulce de leche
- Crushed Oreos or cookies
- Toasted nuts
- Prep Time: 30 minutes
- Cook Time: 1 hour 30 minutes
Nutrition
- Calories: ~450 kcal
- Sugar: ~28g
- Sodium: ~310mg
- Fat: ~30g
- Carbohydrates: ~38g
- Protein: ~8g


