

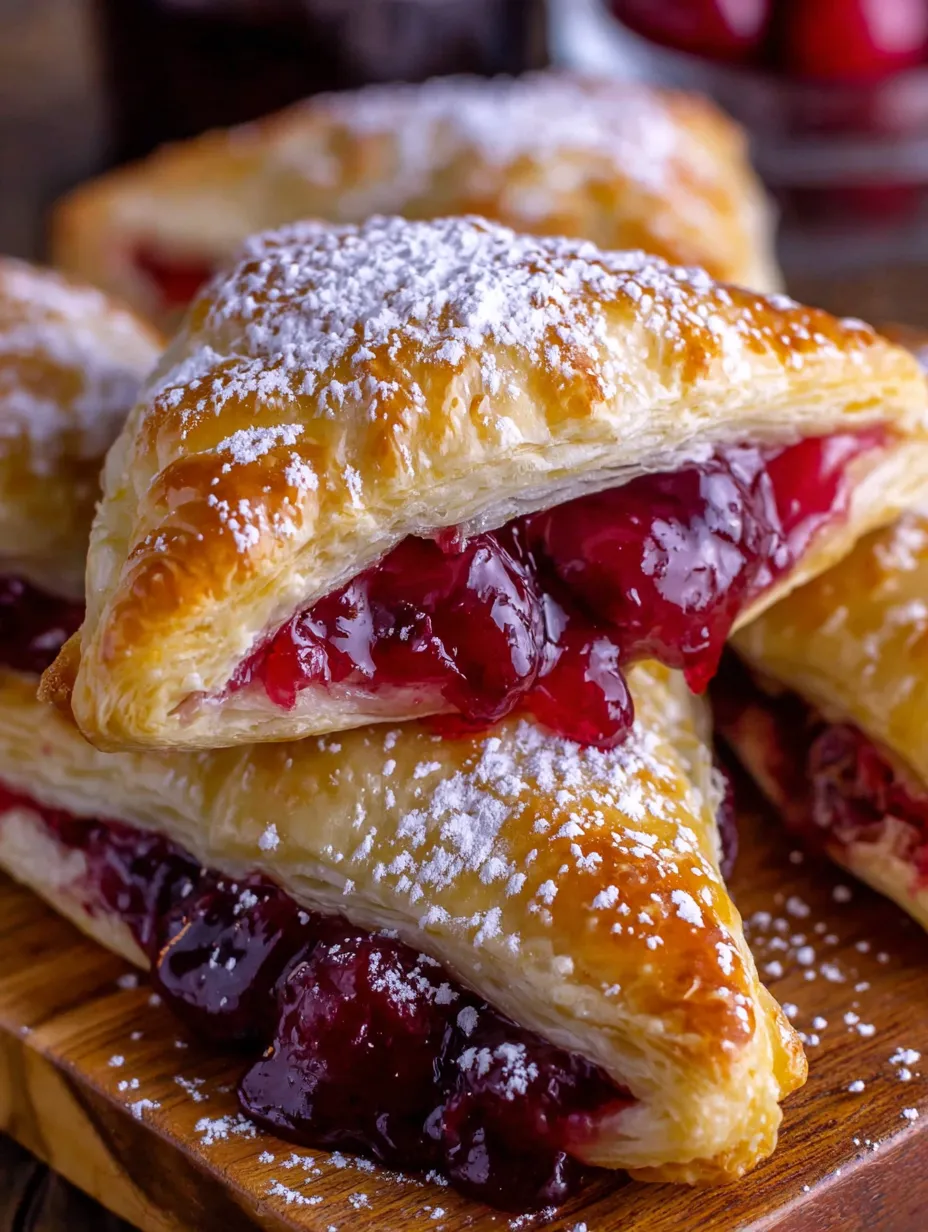
Okay, so imagine if you walked into a fancy French bakery, pointed at those gorgeous golden pastries in the window, and then realized you could make basically the same thing at home in your pajamas using store-bought puff pastry and a can of cherry pie filling. That’s the magic happening here. Homemade Cherry Puff Turnovers are basically flaky, buttery puff pastry folded around sweet-tart cherry filling, baked until golden and crispy, then dusted with powdered sugar like they just came from a Parisian patisserie. They’re crispy on the outside, jammy on the inside, and so impressive-looking that people will assume you have culinary training when really you just folded some dough and set a timer. I made these for brunch once and someone asked what bakery I ordered them from. I said “my kitchen” and their brain short-circuited. Another time I brought them to a potluck and they were gone before I even got a second one. These turnovers inspire THEFT.
Why You’ll Love This Recipe
Bakery vibes, zero stress. These look like you spent hours on them. Actually takes 30 minutes.
Store-bought puff pastry saves your life. No need to make it from scratch. Let the professionals handle the lamination.
Cherry pie filling is genius. Pre-made filling means no pitting cherries or making compote. Work smarter, not harder.
Golden, flaky perfection. That buttery, crispy puff pastry is basically edible art when it comes out of the oven.
Breakfast or dessert. These work any time of day. Morning pastry? Yes. After-dinner treat? Also yes.
Freezer-friendly. Make a batch, freeze them, bake whenever you need fresh pastries. Future You is grateful.
The Good Stuff You’ll Need
For the Turnovers:
- 1 package (2 sheets) frozen puff pastry, thawed (about 17 oz total)
- Pepperidge Farm is the gold standard
- Thaw in the fridge overnight or on the counter for 30-40 minutes
- 1 1/2 cups cherry pie filling
- Use canned (easiest) or homemade if you’re feeling ambitious
- 1 egg, beaten (for egg wash)
- 1 tbsp water or milk (mixed with the egg)
For the Filling Enhancement (Optional but Recommended):
- 1 tsp vanilla extract
- 1/4 tsp almond extract (this is THE secret ingredient)
- 1 tbsp cornstarch (if your filling is too runny)
- Pinch of cinnamon
For Finishing:
- Powdered sugar for dusting
- Optional: simple glaze (1 cup powdered sugar + 2-3 tbsp milk + 1/2 tsp vanilla)
- Optional: coarse sugar for sprinkling before baking
Equipment:
- Baking sheet
- Parchment paper or silicone mat
- Rolling pin (optional, for evening out the pastry)
- Pastry brush
- Sharp knife or pizza cutter
- Fork for sealing edges
Let’s Do This
Step 1: Prep Your Filling
If using canned cherry pie filling straight from the can, taste it. If it’s good as-is, you’re done. If it’s too sweet or bland, doctor it up.
In a small bowl, mix the cherry pie filling with vanilla extract and almond extract (trust me on the almond—it makes it taste homemade).
If your filling is really runny, stir in 1 tbsp cornstarch to thicken it slightly. You don’t want it leaking everywhere.
Optional: Add a pinch of cinnamon for warmth and depth.
If using whole cherries in the filling, roughly chop some of them so they’re easier to eat and distribute evenly.
Set aside while you prep the pastry.
Step 2: Prepare the Puff Pastry
Make sure your puff pastry is thawed but still cold. If it gets too warm, it won’t puff properly and will be a nightmare to work with.
Preheat oven to 400°F (200°C). Line a baking sheet with parchment paper.
Unfold one sheet of puff pastry on a lightly floured surface. If there are cracks, gently press them together.
If needed, lightly roll the pastry to smooth it out and make it slightly thinner—but don’t go crazy. You want it about 1/8-inch thick.
Using a sharp knife or pizza cutter, cut the sheet into 4 equal squares (or 6 rectangles if you want smaller turnovers).
Repeat with the second sheet of pastry.
Step 3: Fill and Fold
In a small bowl, whisk together the egg and 1 tbsp water to make your egg wash.
Place about 2-3 tablespoons of cherry filling in the center of each pastry square, leaving about 1/2-inch border around the edges.
Don’t overfill or they’ll explode in the oven and you’ll have cherry lava all over your baking sheet. Less is more here.
Brush the edges of the pastry with egg wash—this helps seal them.
Fold one corner over diagonally to meet the opposite corner, creating a triangle shape.
Press the edges firmly together with your fingers, then crimp with a fork to seal completely. Really press—you’re creating a barrier against filling escape.
Step 4: Vent and Glaze
Place the sealed turnovers on your prepared baking sheet, leaving about 2 inches between each one.
Use a sharp knife to cut 2-3 small slits in the top of each turnover. These vents allow steam to escape and prevent explosions.
Brush the tops of each turnover generously with egg wash. This creates that beautiful golden, shiny finish.
Optional: Sprinkle with coarse sugar for extra sparkle and crunch.
Step 5: Bake to Golden Perfection
Bake for 18-22 minutes until puffed, golden brown, and crispy.
The pastry should look deeply golden—not pale yellow. Pale = underbaked = soggy bottom.
If the bottoms are browning too fast but the tops aren’t golden yet, move the pan to a higher oven rack.
Let cool on the baking sheet for 5 minutes—the filling is MOLTEN lava straight out of the oven.
Transfer to a wire rack to cool for at least 10 more minutes before eating or they’ll burn your entire mouth.
Step 6: Finish and Serve
Once cooled to warm (not hot), dust generously with powdered sugar using a fine-mesh strainer.
OR make a simple glaze: whisk together 1 cup powdered sugar, 2-3 tbsp milk, and 1/2 tsp vanilla until smooth. Drizzle over the turnovers.
Serve warm or at room temperature.
Try not to eat them all in one sitting. This is genuinely the hardest part of the entire recipe.
Serving Suggestions
These are perfect as-is, but here are some ways to make them even MORE special:
- Serve warm with a scoop of vanilla ice cream
- Pair with whipped cream for an elegant dessert
- Serve alongside coffee or tea for breakfast/brunch
- Drizzle with extra cherry sauce for maximum cherry flavor
- Top with a dollop of mascarpone or cream cheese
- Serve with fresh whipped cream and fresh cherries
- Arrange on a tiered stand for a fancy brunch spread
Switch It Up
Apple Turnovers: Use apple pie filling instead of cherry. Add extra cinnamon and a pinch of nutmeg.
Blueberry Turnovers: Swap in blueberry pie filling for a different berry vibe.
Strawberry Cream Cheese: Mix 4 oz softened cream cheese with 1/4 cup sugar, then add strawberry jam on top before folding.
Nutella Banana: Spread Nutella inside and add banana slices for a decadent treat.
Peach Turnovers: Use peach pie filling and add a tiny pinch of cardamom for sophistication.
Chocolate Cherry: Add a square of dark chocolate alongside the cherry filling before folding.
Lemon Cream: Fill with lemon curd mixed with mascarpone for a tangy twist.
Savory Versions: Try spinach and feta, ham and cheese, or mushroom and gruyere for non-dessert turnovers.
Storage and Make-Ahead Tips
These are amazing fresh but also store and reheat beautifully.
Room temperature: Store in an airtight container for up to 2 days. They’ll soften slightly but are still delicious.
Refrigerate: Keep for up to 4 days. Reheat in a 350°F oven for 5-7 minutes to restore crispiness.
Freeze unbaked: Assemble completely, place on a baking sheet, freeze until solid, then transfer to freezer bags. Freeze for up to 3 months. Bake from frozen, adding 5-7 extra minutes.
Freeze baked: Cool completely, wrap individually, freeze for up to 2 months. Reheat from frozen in a 350°F oven for 10-12 minutes.
Don’t microwave: Microwaving makes puff pastry soggy and sad. Always reheat in the oven or toaster oven.
Don’t add glaze/powdered sugar until serving if storing or freezing—add fresh right before eating.
Why This Works So Damn Well
These turnovers are basically foolproof when you understand the science.
Store-bought puff pastry is a miracle. It’s already laminated (layered with butter) which creates those flaky, crispy layers when baked. Don’t make it from scratch unless you hate yourself.
Cold pastry is ESSENTIAL. Warm pastry = melted butter = no puff, just greasy flatness. Work quickly and keep it cold.
Egg wash creates that golden, shiny finish and helps seal the edges. It’s not just for looks—it’s functional.
Venting prevents explosions. Steam needs somewhere to go or it’ll burst through your carefully sealed edges.
High oven temp (400°F) creates maximum puff. The heat turns the butter layers into steam instantly, creating lift and flakiness.
Not overfilling is crucial. Too much filling = leaks and soggy bottoms. It’s better to under-fill slightly.
Fork crimping creates a tight seal and also looks pretty. It’s both functional and decorative.
Almond extract elevates the cherry flavor and makes it taste homemade and sophisticated instead of obviously canned.
When to Make These
Weekend Brunch: Impress your guests with fresh-baked pastries that look professional.
Holiday Breakfast: Christmas morning, Easter brunch—these feel special and festive.
Bake Sale Champion: These sell out immediately because they look expensive and taste amazing.
Mother’s Day Breakfast: Serve these in bed and you’re officially the favorite child.
Afternoon Tea: Pair with tea or coffee for an elegant afternoon treat.
Dessert Night: Serve warm with ice cream for a simple but impressive dessert.
Meal Prep: Make a batch, freeze them, and have bakery pastries on demand whenever you want.
Questions People Actually Ask
Q: My pastry didn’t puff. What happened? A: Either your pastry was too warm when it went in the oven, or your oven temp was too low. Keep pastry cold and preheat your oven properly.
Q: The filling leaked everywhere. Why? A: You overfilled them, didn’t seal the edges well enough, or forgot to vent them. Use less filling and seal better next time.
Q: The bottom is soggy. How do I fix this? A: Bake on a lower oven rack next time for more bottom heat. Or use a preheated baking sheet (carefully).
Q: Can I use homemade cherry filling? A: Absolutely! Just make sure it’s thick enough that it won’t run everywhere. Add cornstarch if needed.
Q: My egg wash is pooling in spots. A: You used too much. Apply a thin, even coat with a pastry brush. Don’t drown them.
Q: Can I make these without eggs for the wash? A: Yes! Use milk or cream instead. You won’t get quite as golden and shiny, but they’ll still be good.
Q: The pastry is tough and dense, not flaky. A: You either overmixed/overworked the dough, or it got too warm. Handle minimally and keep cold.
Q: Can I use phyllo dough instead? A: Totally different product and technique. Phyllo is thinner and crispier. You CAN use it, but it won’t be the same texture at all.
Q: How do I know when they’re done? A: They should be deeply golden brown (not pale), puffed up significantly, and crispy when you tap them. If they’re pale, they need more time.
PrintHomemade Cherry Puff Turnovers
- Total Time: 35 minutes
- Yield: 8 turnovers 1x
Description
Okay, so imagine if you walked into a fancy French bakery, pointed at those gorgeous golden pastries in the window, and then realized you could make basically the same thing at home in your pajamas using store-bought puff pastry and a can of cherry pie filling. That’s the magic happening here. Homemade Cherry Puff Turnovers are basically flaky, buttery puff pastry folded around sweet-tart cherry filling, baked until golden and crispy, then dusted with powdered sugar like they just came from a Parisian patisserie. They’re crispy on the outside, jammy on the inside, and so impressive-looking that people will assume you have culinary training when really you just folded some dough and set a timer. I made these for brunch once and someone asked what bakery I ordered them from. I said “my kitchen” and their brain short-circuited. Another time I brought them to a potluck and they were gone before I even got a second one. These turnovers inspire THEFT.
Ingredients
For the Turnovers:
- 1 package (2 sheets) frozen puff pastry, thawed (about 17 oz total)
- Pepperidge Farm is the gold standard
- Thaw in the fridge overnight or on the counter for 30-40 minutes
- 1 1/2 cups cherry pie filling
- Use canned (easiest) or homemade if you’re feeling ambitious
- 1 egg, beaten (for egg wash)
- 1 tbsp water or milk (mixed with the egg)
For the Filling Enhancement (Optional but Recommended):
- 1 tsp vanilla extract
- 1/4 tsp almond extract (this is THE secret ingredient)
- 1 tbsp cornstarch (if your filling is too runny)
- Pinch of cinnamon
For Finishing:
- Powdered sugar for dusting
- Optional: simple glaze (1 cup powdered sugar + 2-3 tbsp milk + 1/2 tsp vanilla)
- Optional: coarse sugar for sprinkling before baking
Equipment:
- Baking sheet
- Parchment paper or silicone mat
- Rolling pin (optional, for evening out the pastry)
- Pastry brush
- Sharp knife or pizza cutter
- Fork for sealing edges
Instructions
If using canned cherry pie filling straight from the can, taste it. If it’s good as-is, you’re done. If it’s too sweet or bland, doctor it up.
In a small bowl, mix the cherry pie filling with vanilla extract and almond extract (trust me on the almond—it makes it taste homemade).
If your filling is really runny, stir in 1 tbsp cornstarch to thicken it slightly. You don’t want it leaking everywhere.
Optional: Add a pinch of cinnamon for warmth and depth.
If using whole cherries in the filling, roughly chop some of them so they’re easier to eat and distribute evenly.
Set aside while you prep the pastry.
Make sure your puff pastry is thawed but still cold. If it gets too warm, it won’t puff properly and will be a nightmare to work with.
Preheat oven to 400°F (200°C). Line a baking sheet with parchment paper.
Unfold one sheet of puff pastry on a lightly floured surface. If there are cracks, gently press them together.
If needed, lightly roll the pastry to smooth it out and make it slightly thinner—but don’t go crazy. You want it about 1/8-inch thick.
Using a sharp knife or pizza cutter, cut the sheet into 4 equal squares (or 6 rectangles if you want smaller turnovers).
Repeat with the second sheet of pastry.
In a small bowl, whisk together the egg and 1 tbsp water to make your egg wash.
Place about 2-3 tablespoons of cherry filling in the center of each pastry square, leaving about 1/2-inch border around the edges.
Don’t overfill or they’ll explode in the oven and you’ll have cherry lava all over your baking sheet. Less is more here.
Brush the edges of the pastry with egg wash—this helps seal them.
Fold one corner over diagonally to meet the opposite corner, creating a triangle shape.
Press the edges firmly together with your fingers, then crimp with a fork to seal completely. Really press—you’re creating a barrier against filling escape.
Place the sealed turnovers on your prepared baking sheet, leaving about 2 inches between each one.
Use a sharp knife to cut 2-3 small slits in the top of each turnover. These vents allow steam to escape and prevent explosions.
Brush the tops of each turnover generously with egg wash. This creates that beautiful golden, shiny finish.
Optional: Sprinkle with coarse sugar for extra sparkle and crunch.
Bake for 18-22 minutes until puffed, golden brown, and crispy.
The pastry should look deeply golden—not pale yellow. Pale = underbaked = soggy bottom.
If the bottoms are browning too fast but the tops aren’t golden yet, move the pan to a higher oven rack.
Let cool on the baking sheet for 5 minutes—the filling is MOLTEN lava straight out of the oven.
Transfer to a wire rack to cool for at least 10 more minutes before eating or they’ll burn your entire mouth.
Once cooled to warm (not hot), dust generously with powdered sugar using a fine-mesh strainer.
OR make a simple glaze: whisk together 1 cup powdered sugar, 2-3 tbsp milk, and 1/2 tsp vanilla until smooth. Drizzle over the turnovers.
Serve warm or at room temperature.
Try not to eat them all in one sitting. This is genuinely the hardest part of the entire recipe.
Notes
These are perfect as-is, but here are some ways to make them even MORE special:
- Serve warm with a scoop of vanilla ice cream
- Pair with whipped cream for an elegant dessert
- Serve alongside coffee or tea for breakfast/brunch
- Drizzle with extra cherry sauce for maximum cherry flavor
- Top with a dollop of mascarpone or cream cheese
- Serve with fresh whipped cream and fresh cherries
- Arrange on a tiered stand for a fancy brunch spread
- Prep Time: 15 minutes
- Cook Time: 20 minutes
Nutrition
- Calories: ~280 kcal
- Sugar: ~16g
- Sodium: ~210mg
- Fat: ~13g
- Carbohydrates: ~38g
- Protein: ~4g


