
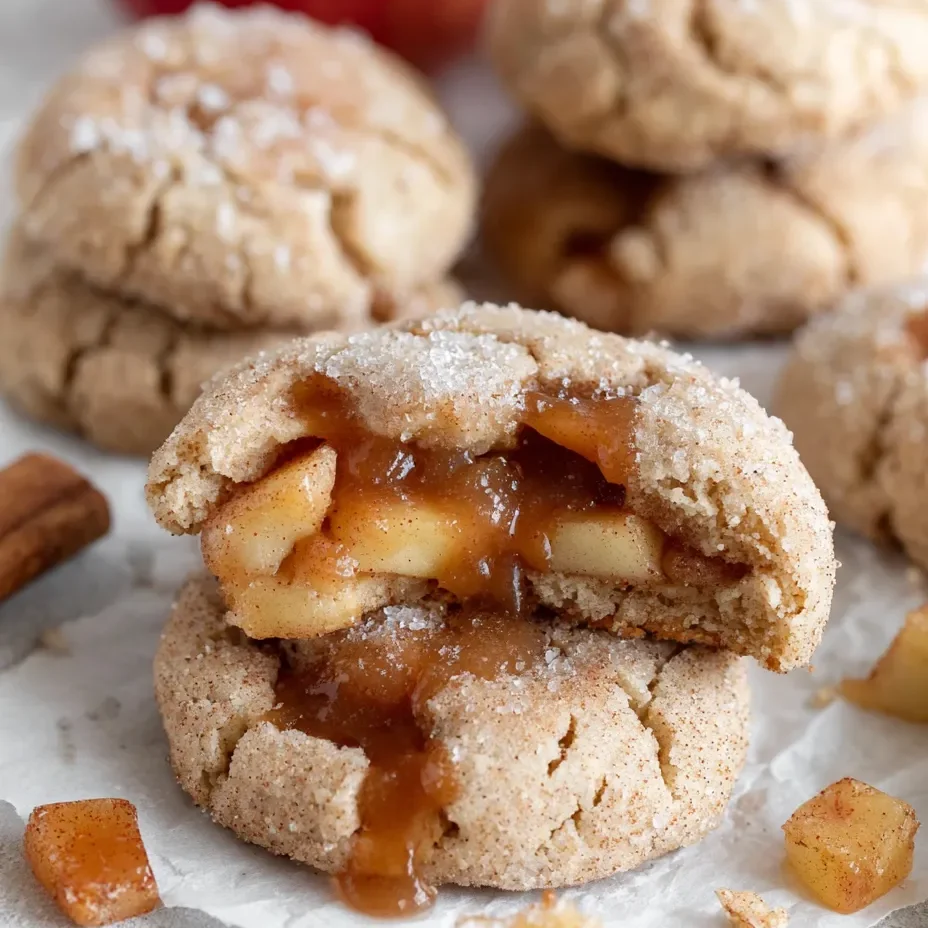
Picture this: all the cozy, cinnamon-spiced glory of your grandma’s apple pie, but in handheld cookie form that you can eat without a fork, plate, or any semblance of table manners. Apple Pie Cookies are soft, pillowy sugar cookies stuffed with actual spiced apple pie filling, then topped with a cinnamon glaze that makes them look like they came from a fancy bakery. They’re like eating a slice of apple pie and a snickerdoodle had a love child. The cookies are tender, the filling is sweet and cinnamony with real chunks of apple, and that glaze? Chef’s kiss. I brought these to Thanksgiving once and my aunt literally asked if I’d been taking secret baking classes. Another relative tried to hide a stash in her purse. These cookies turn people into dessert criminals.
Why You’ll Love This Recipe
Fall in a cookie. Apple, cinnamon, brown sugar—it’s basically autumn wrapped in dough.
That filling though. Real cooked apples with spices, not some sad canned situation. We’re going FRESH.
Soft and pillowy. These are tender, cake-like cookies that practically melt in your mouth.
Impressive but easy. They look like you slaved away, but the process is actually pretty straightforward.
Perfect for pie haters. Know someone who doesn’t like pie crust? This is their gateway drug.
Year-round appeal. Sure, they scream fall, but honestly? Apple pie is never wrong.
The Good Stuff You’ll Need
For the Apple Filling:
- 2 medium apples (Granny Smith or Honeycrisp work great), peeled and diced small
- 2 tbsp unsalted butter
- 3 tbsp brown sugar
- 1 tsp ground cinnamon
- 1/4 tsp ground nutmeg
- Pinch of salt
- 1 tbsp all-purpose flour (to thicken)
- 1/2 tsp vanilla extract
For the Cookie Dough:
- 2 3/4 cups all-purpose flour
- 1 tsp baking powder
- 1/2 tsp baking soda
- 1/2 tsp salt
- 1 tsp ground cinnamon
- 1/2 cup (1 stick) unsalted butter, softened
- 1/2 cup granulated sugar
- 1/2 cup brown sugar, packed
- 1 large egg
- 1 large egg yolk
- 2 tsp vanilla extract
- 1/3 cup sour cream (secret weapon for tenderness)
For the Cinnamon Glaze:
- 1 1/2 cups powdered sugar
- 3-4 tbsp milk or heavy cream
- 1/2 tsp vanilla extract
- 1/2 tsp ground cinnamon
- Pinch of salt
Equipment:
- Medium saucepan
- Mixing bowls
- Cookie scoop or spoon
- Baking sheets with parchment paper
- Wire rack
Let’s Do This
Step 1: Make That Filling
Start here because the filling needs to cool completely before you use it. In a medium saucepan over medium heat, melt the butter.
Add the diced apples, brown sugar, cinnamon, nutmeg, and salt. Cook, stirring occasionally, for 6-8 minutes until the apples are tender but still have a little bite. You don’t want mush.
Sprinkle the flour over the apples and stir for another minute. This thickens everything up so your filling isn’t a soggy mess.
Remove from heat and stir in vanilla extract. Transfer to a bowl and let it cool completely—like, actually cool. Stick it in the fridge if you’re impatient. Warm filling = melted cookie dough = sad baker.
Step 2: Make the Cookie Dough
In a medium bowl, whisk together flour, baking powder, baking soda, salt, and cinnamon. Set this aside and forget about it for now.
In a large bowl (or stand mixer with paddle attachment), beat the softened butter with both sugars on medium-high speed for 3-4 minutes until light and fluffy. This step matters—don’t rush it.
Add the egg and egg yolk, one at a time, beating well after each. Mix in vanilla extract.
Add the sour cream and mix until just combined. This is what makes these cookies ridiculously tender.
With the mixer on low, gradually add the flour mixture. Mix until just combined—don’t overwork it or your cookies will be tough and you’ll be sad.
The dough will be soft. If it’s too sticky to work with, cover and refrigerate for 30 minutes. You want it pliable but not melting all over your hands.
Step 3: Assemble These Bad Boys
Preheat your oven to 350°F (175°C). Line two baking sheets with parchment paper.
Scoop about 1 1/2 tablespoons of dough and flatten it slightly in your palm. It should be about 2-3 inches wide.
Place about 1 teaspoon of cooled apple filling in the center. Don’t overfill—trust me, I learned this the hard way when filling oozed everywhere.
Scoop another 1 1/2 tablespoons of dough, flatten it, and place it on top of the filling. Pinch and seal the edges together, then gently roll into a ball. Make sure it’s sealed well or the filling will escape during baking like a prison break.
Place sealed cookies on the prepared baking sheet about 2 inches apart. They spread a little but not much.
Gently flatten each cookie slightly with your palm or the bottom of a glass. They should be about 3/4 inch thick.
Step 4: Bake
Bake for 12-15 minutes, until the edges are just set and the tops look dry but are still pale. DO NOT overbake. These should stay soft and tender.
They’ll look slightly underdone, and that’s perfect. They continue to set as they cool.
Let them cool on the baking sheet for 5 minutes, then transfer to a wire rack to cool completely before glazing. If you glaze them warm, the glaze will just melt off and it’ll be a whole situation.
Step 5: Make the Glaze and Get Fancy
In a medium bowl, whisk together powdered sugar, 3 tablespoons milk, vanilla, cinnamon, and salt. You want it thick but pourable—add more milk if needed, a little at a time.
Once cookies are completely cool, drizzle or spread the glaze over the tops. You can dip the tops in the glaze for full coverage, or drizzle it artistically with a spoon for that rustic bakery look.
Let the glaze set for about 15-20 minutes before serving or stacking.
Step 6: Try Not to Eat Them All
Arrange on a pretty plate. Take photos for Instagram. Pretend you’re not going to eat four in one sitting.
Pair with coffee, tea, or a glass of cold milk. Or just eat them standing over the sink like an adult with priorities.
Serving Suggestions
These are already perfect, but here’s how to make them even more extra:
- Warm them for 10 seconds in the microwave and serve with vanilla ice cream
- Dust with powdered sugar for a snowy effect
- Serve alongside hot apple cider or coffee
- Pack in boxes with tissue paper for the perfect fall gift
- Make mini versions using 1 tablespoon of dough per cookie
- Drizzle with caramel sauce in addition to the glaze (go big or go home)
Switch It Up
Caramel Apple: Add caramel bits to the apple filling and drizzle caramel on top.
Cranberry Apple: Add dried cranberries to the filling for a tart twist.
Pecan Praline: Add chopped pecans to the filling and sprinkle chopped pecans on the wet glaze.
Maple Glaze: Replace cinnamon glaze with maple glaze (powdered sugar + maple syrup + milk).
Apple Pie Spice: Use apple pie spice blend instead of just cinnamon for more complex flavor.
Cream Cheese Frosting: Replace the glaze with cream cheese frosting for a more indulgent topping.
Stuffed with Caramel: Add a small caramel square with the apple filling for gooey centers.
Storage and Make-Ahead Tips
These keep beautifully and are perfect for advance baking.
Room temperature: Store in an airtight container for up to 4 days. They stay soft and delicious.
Refrigerate: They’ll last up to a week in the fridge. Bring to room temp before serving for best texture.
Freeze the filling: Make the filling ahead and freeze for up to 2 months. Thaw before using.
Freeze assembled, unbaked cookies: Place sealed cookies on a baking sheet and freeze solid, then transfer to freezer bags. Bake from frozen, adding 2-3 minutes to bake time.
Freeze baked cookies: Store unglazed baked cookies in freezer bags for up to 2 months. Thaw and glaze before serving.
Glaze tip: Don’t glaze cookies until the day you’re serving them. The glaze can get absorbed or sticky over time.
Why This Works So Damn Well
The magic of Apple Pie Cookies is all about balancing textures and not overcomplicating things. The sour cream in the dough is the MVP—it adds moisture and tenderness while keeping the cookies soft for days. Without it, these would be basic sugar cookies. With it, they’re pillowy clouds of deliciousness.
Cooking the apple filling first is crucial. Raw apples release moisture during baking and would turn your cookies into soggy disasters. By pre-cooking them, you control the moisture level and concentrate the flavors. Adding flour to the filling creates a thick, pie-filling texture that stays put instead of leaking everywhere.
The two-piece dough method (bottom and top) ensures the filling is fully enclosed. This prevents leaking and creates that perfect cookie sandwich effect. If you tried to just dollop filling on top, it would burn and make a mess. Sealing it inside keeps everything neat and delicious.
The slight underbaking is intentional. Cookies continue to bake on the hot pan after you remove them from the oven. If you wait until they look “done,” they’ll be overdone once cooled. Pulling them while they still look slightly underbaked gives you that perfect soft, tender texture.
The glaze adds sweetness and that professional bakery finish, plus it seals in moisture. The cinnamon in the glaze reinforces the apple pie flavor without overwhelming it.
When to Make These
Fall gatherings: These are peak autumn vibes. Bring them to any September-November party.
Thanksgiving dessert table: Perfect alongside pumpkin pie and other classics.
Back to school treats: Teachers love these. Parents bringing these are automatically favorites.
Apple picking aftermath: Got a bag of fresh apples? This is what you do with them.
Weekend baking projects: These are fun to make and your house will smell incredible.
Holiday cookie boxes: Include these in your Christmas cookie lineup for variety.
Any damn time: Honestly, apple pie is always in season. Make them whenever.
Questions People Actually Ask
Q: Can I use canned apple pie filling? A: You could, but it won’t be as good. Canned filling is usually too liquidy and overly sweet. Making fresh filling takes 10 minutes and is so worth it.
Q: My filling leaked out during baking. What happened? A: You either overfilled them or didn’t seal the edges well enough. Use less filling and really pinch those edges together. Also make sure the filling is completely cool.
Q: The cookies are dry and crumbly. Help! A: You overbaked them. These need to come out looking slightly underdone. Also, don’t skip the sour cream—it’s essential for moisture.
Q: Can I make these without sour cream? A: You can substitute plain Greek yogurt in the same amount. Don’t use milk or water—you need the fat and tang from dairy.
Q: The glaze is too thick/thin. How do I fix it? A: Too thick? Add milk a teaspoon at a time. Too thin? Add more powdered sugar a tablespoon at a time. It should be thick but pourable.
Q: What apples work best? A: Granny Smith (tart), Honeycrisp (sweet and crisp), or Fuji (sweet) all work great. Avoid Red Delicious—they get mushy and have no flavor.
Q: Can I skip the glaze? A: Sure, but why would you do that to yourself? The glaze makes them look professional and adds sweetness. But yes, they’re still good without it.
Q: How do I keep them from getting soggy? A: Make sure the filling is completely cool before assembling, cook the filling until thick, and store cookies in an airtight container with parchment between layers.
Print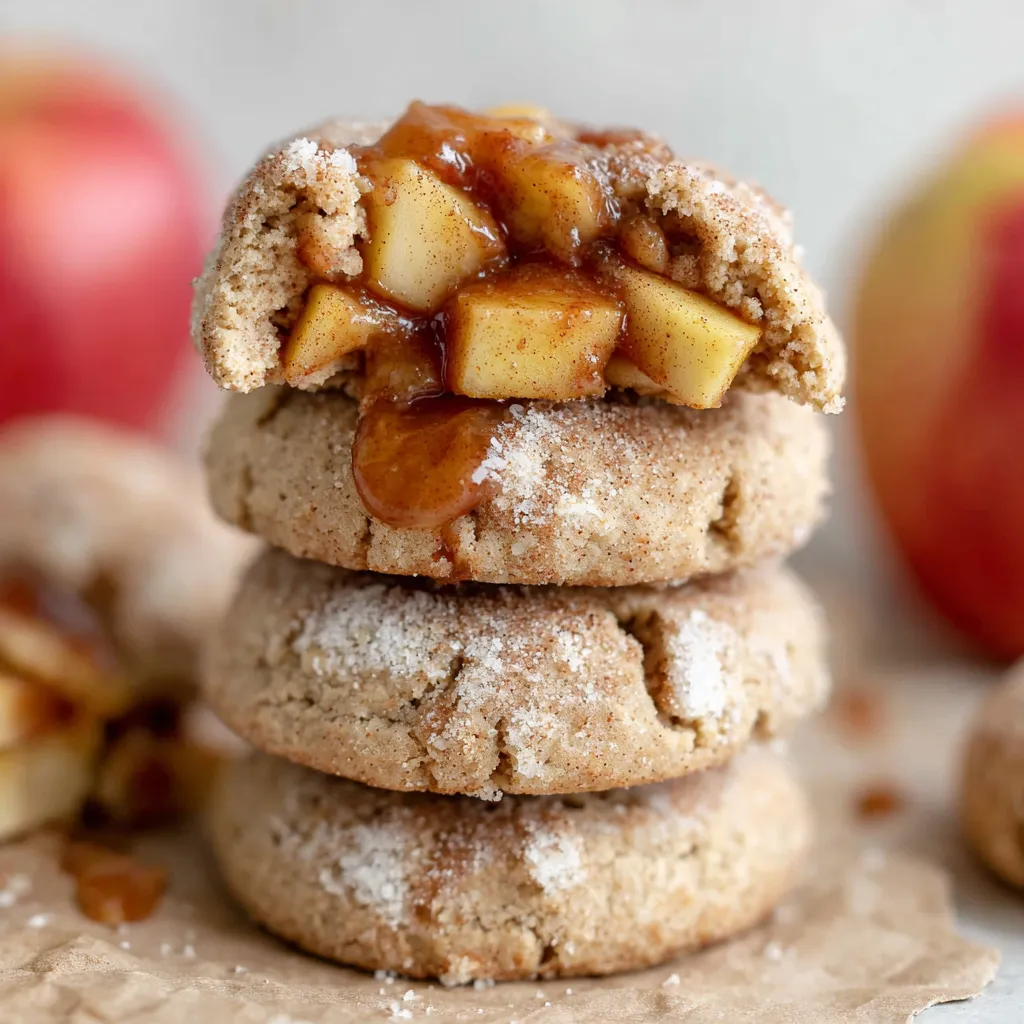
Apple Pie Cookies
- Total Time: 1 hour 15 minutes
- Yield: 18–20 cookies 1x
- Diet: Gluten Free
Description
Picture this: all the cozy, cinnamon-spiced glory of your grandma’s apple pie, but in handheld cookie form that you can eat without a fork, plate, or any semblance of table manners. Apple Pie Cookies are soft, pillowy sugar cookies stuffed with actual spiced apple pie filling, then topped with a cinnamon glaze that makes them look like they came from a fancy bakery. They’re like eating a slice of apple pie and a snickerdoodle had a love child. The cookies are tender, the filling is sweet and cinnamony with real chunks of apple, and that glaze? Chef’s kiss. I brought these to Thanksgiving once and my aunt literally asked if I’d been taking secret baking classes. Another relative tried to hide a stash in her purse. These cookies turn people into dessert criminals.
Ingredients
For the Apple Filling:
- 2 medium apples (Granny Smith or Honeycrisp work great), peeled and diced small
- 2 tbsp unsalted butter
- 3 tbsp brown sugar
- 1 tsp ground cinnamon
- 1/4 tsp ground nutmeg
- Pinch of salt
- 1 tbsp all-purpose flour (to thicken)
- 1/2 tsp vanilla extract
For the Cookie Dough:
- 2 3/4 cups all-purpose flour
- 1 tsp baking powder
- 1/2 tsp baking soda
- 1/2 tsp salt
- 1 tsp ground cinnamon
- 1/2 cup (1 stick) unsalted butter, softened
- 1/2 cup granulated sugar
- 1/2 cup brown sugar, packed
- 1 large egg
- 1 large egg yolk
- 2 tsp vanilla extract
- 1/3 cup sour cream (secret weapon for tenderness)
For the Cinnamon Glaze:
- 1 1/2 cups powdered sugar
- 3–4 tbsp milk or heavy cream
- 1/2 tsp vanilla extract
- 1/2 tsp ground cinnamon
- Pinch of salt
Equipment:
- Medium saucepan
- Mixing bowls
- Cookie scoop or spoon
- Baking sheets with parchment paper
- Wire rack
Instructions
Start here because the filling needs to cool completely before you use it. In a medium saucepan over medium heat, melt the butter.
Add the diced apples, brown sugar, cinnamon, nutmeg, and salt. Cook, stirring occasionally, for 6-8 minutes until the apples are tender but still have a little bite. You don’t want mush.
Sprinkle the flour over the apples and stir for another minute. This thickens everything up so your filling isn’t a soggy mess.
Remove from heat and stir in vanilla extract. Transfer to a bowl and let it cool completely—like, actually cool. Stick it in the fridge if you’re impatient. Warm filling = melted cookie dough = sad baker.
In a medium bowl, whisk together flour, baking powder, baking soda, salt, and cinnamon. Set this aside and forget about it for now.
In a large bowl (or stand mixer with paddle attachment), beat the softened butter with both sugars on medium-high speed for 3-4 minutes until light and fluffy. This step matters—don’t rush it.
Add the egg and egg yolk, one at a time, beating well after each. Mix in vanilla extract.
Add the sour cream and mix until just combined. This is what makes these cookies ridiculously tender.
With the mixer on low, gradually add the flour mixture. Mix until just combined—don’t overwork it or your cookies will be tough and you’ll be sad.
The dough will be soft. If it’s too sticky to work with, cover and refrigerate for 30 minutes. You want it pliable but not melting all over your hands.
Preheat your oven to 350°F (175°C). Line two baking sheets with parchment paper.
Scoop about 1 1/2 tablespoons of dough and flatten it slightly in your palm. It should be about 2-3 inches wide.
Place about 1 teaspoon of cooled apple filling in the center. Don’t overfill—trust me, I learned this the hard way when filling oozed everywhere.
Scoop another 1 1/2 tablespoons of dough, flatten it, and place it on top of the filling. Pinch and seal the edges together, then gently roll into a ball. Make sure it’s sealed well or the filling will escape during baking like a prison break.
Place sealed cookies on the prepared baking sheet about 2 inches apart. They spread a little but not much.
Gently flatten each cookie slightly with your palm or the bottom of a glass. They should be about 3/4 inch thick.
Bake for 12-15 minutes, until the edges are just set and the tops look dry but are still pale. DO NOT overbake. These should stay soft and tender.
They’ll look slightly underdone, and that’s perfect. They continue to set as they cool.
Let them cool on the baking sheet for 5 minutes, then transfer to a wire rack to cool completely before glazing. If you glaze them warm, the glaze will just melt off and it’ll be a whole situation.
In a medium bowl, whisk together powdered sugar, 3 tablespoons milk, vanilla, cinnamon, and salt. You want it thick but pourable—add more milk if needed, a little at a time.
Once cookies are completely cool, drizzle or spread the glaze over the tops. You can dip the tops in the glaze for full coverage, or drizzle it artistically with a spoon for that rustic bakery look.
Let the glaze set for about 15-20 minutes before serving or stacking.
Arrange on a pretty plate. Take photos for Instagram. Pretend you’re not going to eat four in one sitting.
Pair with coffee, tea, or a glass of cold milk. Or just eat them standing over the sink like an adult with priorities.
Notes
These are already perfect, but here’s how to make them even more extra:
- Warm them for 10 seconds in the microwave and serve with vanilla ice cream
- Dust with powdered sugar for a snowy effect
- Serve alongside hot apple cider or coffee
- Pack in boxes with tissue paper for the perfect fall gift
- Make mini versions using 1 tablespoon of dough per cookie
- Drizzle with caramel sauce in addition to the glaze (go big or go home)
- Prep Time: 30 minutes
- Cook Time: 15 minutes per batch
- Cuisine: American
Nutrition
- Calories: ~180 kcal
- Sugar: ~15g
- Sodium: ~120mg
- Fat: ~7g
- Carbohydrates: ~28g
- Protein: ~2g


