

Alright, so imagine if a classic chocolate chip cookie went to a holiday party, got absolutely decked out in festive gear, and came back looking like it raided Santa’s candy stash. That’s what we’re dealing with here. Winter Wonderland Chocolate Chip Cookies are thick, chewy, buttery cookies loaded with chocolate chips, white chocolate chunks, peppermint pieces, and those adorable red and green holiday M&Ms that make everything look instantly Christmassy. They’re like regular chocolate chip cookies that decided to put on their holiday best and show up looking absolutely spectacular. I made these for a neighborhood cookie swap and someone literally asked if I’d ordered them from a bakery because “normal people don’t make cookies that look this good.” Reader, I am very normal, and these cookies are just THAT photogenic. Another person ate three and then asked if they could have the rest to take home. I said no. These cookies inspire greed.
Why You’ll Love This Recipe
Christmas in cookie form. Those red and green candies aren’t just decoration—they’re a festive statement.
Thick and chewy perfection. None of that thin, crispy nonsense. These are SUBSTANTIAL cookies.
Three kinds of chocolate. Regular chocolate chips, white chocolate chunks, AND candy-coated chocolate. That’s called commitment.
No chill time required. Scoop and bake immediately. Instant gratification is the best gratification.
Looks bakery-fancy. The mix of colors and textures makes these look professional without any extra effort.
Uses up holiday candy. Got leftover candy canes or holiday M&Ms? This is their destiny.
The Good Stuff You’ll Need
For the Cookies:
- 2 1/4 cups all-purpose flour
- 1 tsp baking soda
- 1 tsp salt
- 1 cup (2 sticks) unsalted butter, softened (not melted, not cold—SOFTENED)
- 3/4 cup granulated sugar
- 3/4 cup packed brown sugar (light or dark, you choose)
- 2 large eggs, room temperature
- 2 tsp vanilla extract
- 1/4 tsp peppermint extract (optional but festive)
For the Mix-Ins:
- 1 cup semi-sweet chocolate chips
- 1 cup white chocolate chips or chunks
- 1/2 cup holiday M&Ms (the red and green ones)
- 1/2 cup crushed candy canes or peppermint pieces (optional but highly recommended)
- Extra M&Ms and chocolate chips for pressing into the tops
Let’s Do This
Step 1: Prep Your Situation
Preheat oven to 375°F (190°C). Line two baking sheets with parchment paper or silicone mats.
Take your eggs out of the fridge if you haven’t already. Room temp eggs mix better and create a better texture.
Crush your candy canes if using. Put them in a ziplock bag and smash with a rolling pin or meat mallet. Aim for small pieces, not dust.
Step 2: Mix the Dry Stuff
In a medium bowl, whisk together flour, baking soda, and salt.
Make sure there are no clumps. Nobody wants a mouthful of straight baking soda. Well, maybe some people do, but not in cookies.
Set this aside. It’s waiting patiently.
Step 3: Cream That Butter and Sugar
In a large bowl (or stand mixer), beat softened butter with both sugars on medium-high speed for 3-4 minutes until light, fluffy, and pale.
This step is CRUCIAL. Don’t rush it. This is what creates that chewy texture. The mixture should almost double in volume and look creamy, not grainy.
Scrape down the sides of the bowl because butter likes to hide.
Step 4: Add the Wet Ingredients
Add eggs one at a time, beating well after each addition. The mixture might look slightly curdled—that’s fine.
Add vanilla and peppermint extract (if using). Mix until combined.
The batter should look smooth and glossy now. This is your base. Show it some respect.
Step 5: Combine Everything
Add the flour mixture to the wet ingredients and mix on low speed until JUST combined. Don’t overmix or your cookies will be tough. As soon as you don’t see dry flour, STOP.
Fold in chocolate chips, white chocolate chips/chunks, M&Ms, and crushed candy canes using a spatula or wooden spoon.
Make sure everything is evenly distributed. Nobody wants the cookie that got all the chocolate or the one that got none.
Step 6: Scoop and Decorate
Use a large cookie scoop (about 3 tablespoons) to portion out the dough onto your prepared baking sheets.
Leave about 2-3 inches between cookies—they spread a bit.
Here’s the secret to bakery-pretty cookies: Press extra chocolate chips, white chocolate chunks, and M&Ms into the TOP of each dough ball. Make them pretty. This is your moment.
If the dough balls are super tall, you can gently flatten them slightly (but not too much—we want thick cookies).
Step 7: Bake to Perfection
Bake for 10-12 minutes. The edges should be golden brown and set, but the centers should still look slightly underdone and soft.
DO NOT OVERBAKE. Seriously, set a timer. These go from perfect to dry in about 90 seconds.
Let them cool on the baking sheet for 5 minutes. They’ll continue cooking and firming up during this time.
Transfer to a wire rack to cool completely. Or eat them warm. I’m not your boss.
Step 8: Optional Final Touch
If you want extra festive vibes, sprinkle a tiny bit of crushed candy cane on top while they’re still warm so it sticks.
Dust with powdered sugar for a snowy effect right before serving.
Store extras (if there are any) in an airtight container.
Serving Suggestions
These are basically perfect as-is, but if you want to go full dessert mode:
- Serve warm with vanilla ice cream sandwiched between two cookies
- Pair with hot chocolate or peppermint mochas
- Crumble over ice cream for the world’s best topping
- Package in clear bags with ribbon for holiday gifts
- Serve on a festive platter with other Christmas cookies
- Dunk in cold milk (obviously)
Switch It Up
All Chocolate: Use dark chocolate, milk chocolate, and white chocolate chips for a triple chocolate situation without the peppermint.
Nuts Added: Fold in 1 cup of chopped pecans or walnuts for extra crunch and richness.
Peppermint Lovers: Double the crushed candy canes and add an extra 1/4 tsp peppermint extract.
Brown Butter Version: Brown the butter before using for a nutty, caramelized flavor. Let it cool to room temp first.
Sea Salt Finish: Sprinkle flaky sea salt on top right after baking for that sweet-salty combo.
Different Candies: Use Hershey’s Kisses, Rolos, or chopped peanut butter cups instead of M&Ms.
Stuffed Cookies: Press a caramel or Rolo into the center of each dough ball before baking for a gooey center.
Storage and Make-Ahead Tips
These cookies are great fresh but also store beautifully.
Store in an airtight container at room temperature for up to 5 days. Put parchment between layers if stacking.
The dough can be refrigerated for up to 3 days before baking. Let it come to room temp for 10 minutes before scooping.
Freeze cookie dough balls on a baking sheet, then transfer to a freezer bag for up to 3 months. Bake from frozen, adding 1-2 extra minutes.
Baked cookies freeze well for up to 2 months. Thaw at room temperature or microwave for 10-15 seconds.
For the best texture, slightly underbake if you’re planning to freeze and reheat later.
Why This Works So Damn Well
These cookies work because they’re built on the foundation of a classic chocolate chip cookie recipe that’s been optimized for thickness and chewiness. The combination of granulated and brown sugar creates both crispy edges (white sugar) and chewy centers (brown sugar). The ratio of butter to flour is perfect for creating structure without making them cakey.
Using softened butter (not melted) and creaming it thoroughly with the sugar incorporates air, which helps create that thick, bakery-style texture. Room temperature eggs emulsify better, creating a smoother dough. Not overmixing the flour preserves tenderness.
The multiple types of chocolate and candy create textural variety—you get melty chocolate chips, creamy white chocolate, crunchy candy shells, and those little bursts of peppermint. Every bite is different but cohesive. The festive colors make them feel special without any extra work.
Slightly underbaking is key. The cookies finish cooking on the pan after you pull them from the oven, so taking them out when they look barely done ensures they stay soft and chewy rather than turning into crispy discs.
When to Make These
Christmas Cookie Platters: These are the showstoppers that make your cookie tray look professional.
Holiday Parties: Bring these and you’ll be invited back next year. Guaranteed.
Cookie Exchange Champion: These will be the first ones to disappear. Make extra.
Santa’s Cookies: Upgrade from basic sugar cookies. Santa deserves chocolate chip luxury.
Winter Gatherings: Any cold-weather party needs cookies that scream “festive.” These deliver.
Gift Giving: Package in cute tins or boxes. People will think you’re a professional baker.
Questions People Actually Ask
Q: Can I skip the peppermint? A: Absolutely! Just use all vanilla extract and skip the crushed candy canes. You’ll have regular (but still amazing) loaded chocolate chip cookies.
Q: My cookies spread too much. What happened? A: Your butter was too soft/melted, or your oven temp is too low. Make sure butter is softened but still holds its shape, and check your oven temp with a thermometer.
Q: Can I use all one type of chocolate? A: Yes, but the variety is what makes these special. If you only have one type, use 2 1/2 cups total of whatever chocolate you have.
Q: The M&Ms melted and the colors bled. Help! A: This happens if the oven is too hot or they’re overbaked. Bake at the correct temp and pull them when they’re still slightly underdone.
Q: Can I make these gluten-free? A: Yes! Use a 1:1 gluten-free flour blend. The texture will be slightly different but still delicious.
Q: My cookies are too flat. What did I do wrong? A: You either overmixed the dough, used melted butter instead of softened, or your baking soda is old. Try chilling the dough for 30 minutes before baking next time.
Q: Can I leave out the candy canes? A: Yes! They’re optional. The cookies will still be festive thanks to the holiday M&Ms.
Print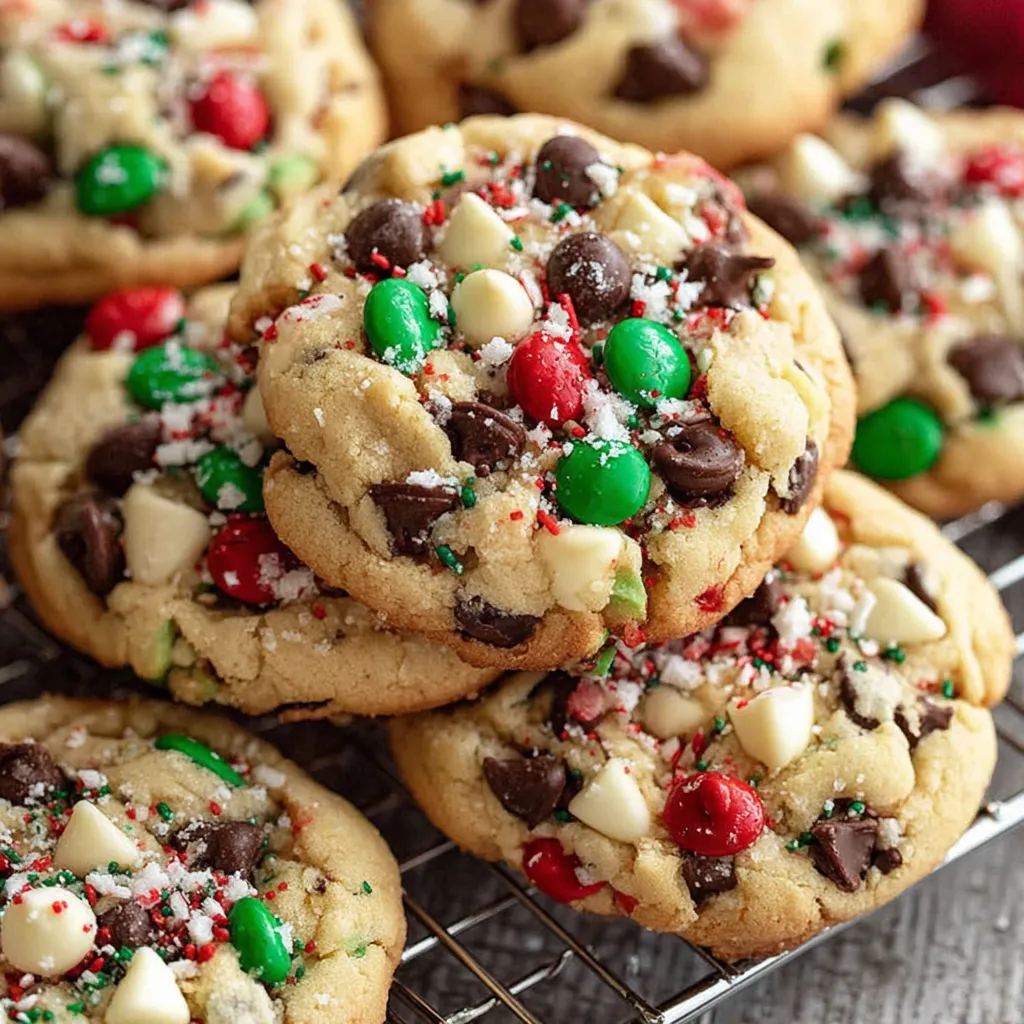
Winter Wonderland Chocolate Chip Cookies
- Total Time: 27 minutes
- Yield: 36 cookies 1x
Description
Alright, so imagine if a classic chocolate chip cookie went to a holiday party, got absolutely decked out in festive gear, and came back looking like it raided Santa’s candy stash. That’s what we’re dealing with here. Winter Wonderland Chocolate Chip Cookies are thick, chewy, buttery cookies loaded with chocolate chips, white chocolate chunks, peppermint pieces, and those adorable red and green holiday M&Ms that make everything look instantly Christmassy. They’re like regular chocolate chip cookies that decided to put on their holiday best and show up looking absolutely spectacular. I made these for a neighborhood cookie swap and someone literally asked if I’d ordered them from a bakery because “normal people don’t make cookies that look this good.” Reader, I am very normal, and these cookies are just THAT photogenic. Another person ate three and then asked if they could have the rest to take home. I said no. These cookies inspire greed.
Ingredients
For the Cookies:
- 2 1/4 cups all-purpose flour
- 1 tsp baking soda
- 1 tsp salt
- 1 cup (2 sticks) unsalted butter, softened (not melted, not cold—SOFTENED)
- 3/4 cup granulated sugar
- 3/4 cup packed brown sugar (light or dark, you choose)
- 2 large eggs, room temperature
- 2 tsp vanilla extract
- 1/4 tsp peppermint extract (optional but festive)
For the Mix-Ins:
- 1 cup semi-sweet chocolate chips
- 1 cup white chocolate chips or chunks
- 1/2 cup holiday M&Ms (the red and green ones)
- 1/2 cup crushed candy canes or peppermint pieces (optional but highly recommended)
- Extra M&Ms and chocolate chips for pressing into the tops
Instructions
Step 1: Prep Your Situation
Preheat oven to 375°F (190°C). Line two baking sheets with parchment paper or silicone mats.
Take your eggs out of the fridge if you haven’t already. Room temp eggs mix better and create a better texture.
Crush your candy canes if using. Put them in a ziplock bag and smash with a rolling pin or meat mallet. Aim for small pieces, not dust.
Step 2: Mix the Dry Stuff
In a medium bowl, whisk together flour, baking soda, and salt.
Make sure there are no clumps. Nobody wants a mouthful of straight baking soda. Well, maybe some people do, but not in cookies.
Set this aside. It’s waiting patiently.
Step 3: Cream That Butter and Sugar
In a large bowl (or stand mixer), beat softened butter with both sugars on medium-high speed for 3-4 minutes until light, fluffy, and pale.
This step is CRUCIAL. Don’t rush it. This is what creates that chewy texture. The mixture should almost double in volume and look creamy, not grainy.
Scrape down the sides of the bowl because butter likes to hide.
Step 4: Add the Wet Ingredients
Add eggs one at a time, beating well after each addition. The mixture might look slightly curdled—that’s fine.
Add vanilla and peppermint extract (if using). Mix until combined.
The batter should look smooth and glossy now. This is your base. Show it some respect.
Step 5: Combine Everything
Add the flour mixture to the wet ingredients and mix on low speed until JUST combined. Don’t overmix or your cookies will be tough. As soon as you don’t see dry flour, STOP.
Fold in chocolate chips, white chocolate chips/chunks, M&Ms, and crushed candy canes using a spatula or wooden spoon.
Make sure everything is evenly distributed. Nobody wants the cookie that got all the chocolate or the one that got none.
Step 6: Scoop and Decorate
Use a large cookie scoop (about 3 tablespoons) to portion out the dough onto your prepared baking sheets.
Leave about 2-3 inches between cookies—they spread a bit.
Here’s the secret to bakery-pretty cookies: Press extra chocolate chips, white chocolate chunks, and M&Ms into the TOP of each dough ball. Make them pretty. This is your moment.
If the dough balls are super tall, you can gently flatten them slightly (but not too much—we want thick cookies).
Step 7: Bake to Perfection
Bake for 10-12 minutes. The edges should be golden brown and set, but the centers should still look slightly underdone and soft.
DO NOT OVERBAKE. Seriously, set a timer. These go from perfect to dry in about 90 seconds.
Let them cool on the baking sheet for 5 minutes. They’ll continue cooking and firming up during this time.
Transfer to a wire rack to cool completely. Or eat them warm. I’m not your boss.
Step 8: Optional Final Touch
If you want extra festive vibes, sprinkle a tiny bit of crushed candy cane on top while they’re still warm so it sticks.
Dust with powdered sugar for a snowy effect right before serving.
Store extras (if there are any) in an airtight container.
Notes
These are basically perfect as-is, but if you want to go full dessert mode:
- Serve warm with vanilla ice cream sandwiched between two cookies
- Pair with hot chocolate or peppermint mochas
- Crumble over ice cream for the world’s best topping
- Package in clear bags with ribbon for holiday gifts
- Serve on a festive platter with other Christmas cookies
- Dunk in cold milk (obviously)
- Prep Time: 15 minutes
- Cook Time: 12 minutes
Nutrition
- Calories: ~165 kcal
- Fat: ~8g
- Carbohydrates: ~22g
- Protein: ~2g


