
Okay, so imagine if a Russian Tea Cake, a thumbprint cookie, and a winter wonderland had a three-way and produced the most adorable, melt-in-your-mouth offspring imaginable. That’s what we’re dealing with here. Cherry Snowball Cookies are basically buttery, nutty shortbread balls stuffed with a jammy cherry center, then rolled in a blizzard of powdered sugar until they look like actual snowballs. They’re tender, crumbly, not-too-sweet, with that surprise burst of tart cherry in the middle that makes you go “oh THAT’S why these are special.” I made these for a holiday cookie exchange once and people literally gasped when they bit into them and found the cherry center. Someone called them “the cookies that lied to me in the best way.” Another person ate seven and said they had no regrets. These cookies create feelings.
Why You’ll Love This Recipe
Hidden surprise inside. Everyone thinks they’re regular snowball cookies until they bite in and discover the cherry. It’s like a magic trick you can eat.
Melt-in-your-mouth tender. These are so buttery and delicate, they practically dissolve on your tongue.
Not crazy sweet. The cookie itself is only lightly sweet, which makes the cherry center pop and keeps them from being cloying.
Looks like actual snow. That powdered sugar coating is THICK. These look like they fell from the sky in cookie form.
Make-ahead champions. Actually taste better the next day. The flavors meld and the texture gets even better.
Holiday perfect. These scream Christmas, but honestly work for any winter gathering or just because you need cookies.
The Good Stuff You’ll Need
For the Cookies:
- 1 cup (2 sticks) unsalted butter, softened (don’t even think about using cold butter)
- 1/2 cup powdered sugar, plus 1-2 cups more for rolling
- 1 tsp vanilla extract
- 1/4 tsp almond extract (optional but highly recommended)
- 2 cups all-purpose flour
- 1/4 tsp salt
- 1 cup finely chopped pecans or walnuts (or almond flour if you want them extra tender)
For the Filling:
- 24-30 maraschino cherries, well-drained and patted dry
- OR cherry preserves/jam (about 1/2 cup)
- OR dried cherries that have been soaked in hot water and chopped
For Rolling:
- 2 cups powdered sugar (at minimum—you might need more)
Let’s Do This
Step 1: Prep Your Cherries
If using maraschino cherries, drain them and pat EXTREMELY dry with paper towels. Wet cherries = sad, spreading cookies.
Let them sit on paper towels while you make the dough. They need to be as dry as possible.
If using cherry preserves, have a small spoon ready for filling.
If using dried cherries, soak them in hot water for 10 minutes, drain well, pat dry, and chop finely.
Step 2: Make the Cookie Dough
In a large bowl (or stand mixer), beat softened butter on medium-high speed for 2-3 minutes until light and fluffy. This is important—don’t rush it.
Add 1/2 cup powdered sugar and beat for another 2-3 minutes until pale and creamy. It should almost double in volume.
Mix in vanilla and almond extract if using.
In a separate bowl, whisk together flour, salt, and chopped nuts.
Add the flour mixture to the butter mixture and mix on low speed until just combined. The dough will be soft and slightly crumbly but should hold together when pressed.
If the dough is too crumbly, add 1-2 tablespoons of milk. If it’s too sticky, add a bit more flour.
Cover and refrigerate for at least 30 minutes. This makes the dough easier to work with.
Step 3: Stuff and Shape
Preheat oven to 350°F (175°C). Line two baking sheets with parchment paper.
Scoop about 1 tablespoon of dough and flatten it in your palm.
Place a dried cherry in the center (or a small spoonful of preserves, or a whole maraschino cherry).
Wrap the dough around the filling completely, making sure it’s fully sealed with no gaps. Roll it into a smooth ball.
Place on prepared baking sheet about 2 inches apart. They don’t spread much.
Repeat with remaining dough and cherries.
Step 4: Bake to Perfection
Bake for 12-15 minutes. The cookies should be SET but NOT browned. They should still look pale—that’s correct.
The bottoms might be lightly golden, but the tops should stay light colored.
Let them cool on the baking sheet for 5 minutes. They’re very delicate right out of the oven.
Step 5: The Powdered Sugar Blizzard
While cookies are still warm (but not hot), roll them in powdered sugar. Put about 1/2 cup of powdered sugar in a bowl and roll each cookie until completely coated.
Place on a wire rack to cool completely.
Once cooled, roll them in powdered sugar AGAIN. This second coat is what creates that thick, snowball effect.
You can even do a third roll if you want maximum snow coverage. More is more.
Step 6: Store and Serve
Store in an airtight container for up to a week (they actually get better after a day or two).
Right before serving, you can give them one more dusting of powdered sugar for freshness.
Serve on a platter and watch people’s faces when they discover the cherry surprise inside.
Serving Suggestions
These are perfect on their own, but here are some ideas:
- Arrange on a platter with other holiday cookies for a cookie exchange
- Serve with hot cocoa or coffee for dunking
- Package in decorative tins for holiday gifts
- Pair with vanilla ice cream for a fancy dessert
- Serve alongside other Christmas cookies like gingerbread and sugar cookies
- Dust with extra powdered sugar right before serving for that fresh-snow effect
Switch It Up
Chocolate Cherry: Add 2 tablespoons of cocoa powder to the dough for chocolate snowballs with cherry centers.
Raspberry Instead: Use raspberry preserves or fresh raspberries for a different berry flavor.
Nutella Center: Freeze small balls of Nutella and stuff those inside for chocolate-hazelnut snowballs.
Lemon Version: Add lemon zest to the dough and use lemon curd as the filling. Roll in powdered sugar mixed with lemon zest.
Mexican Wedding Cake Style: Add a pinch of cinnamon to the dough and skip the cherry filling for traditional snowballs.
Peppermint Twist: Add crushed peppermint candies to the dough and skip the cherry for peppermint snowballs.
Cranberry Option: Use dried cranberries instead of cherries for a more tart filling.
Make-Ahead Tips
These are PERFECT for making ahead—they actually improve with age (up to a point).
Make the dough up to 2 days ahead. Store covered in the refrigerator, or freeze for up to 3 months.
Bake the cookies up to a week ahead. Store in an airtight container at room temperature.
Roll in powdered sugar right before serving for the freshest look. The sugar can absorb moisture over time.
Freeze baked (uncoated) cookies for up to 2 months. Thaw, then roll in powdered sugar before serving.
The filled, unbaked cookie balls can be frozen on a baking sheet, then transferred to a freezer bag. Bake from frozen, adding 2-3 extra minutes.
Why This Works So Damn Well
Cherry Snowball Cookies work because they’re basically a shortbread cookie that’s been turbocharged with butter and nuts, creating that tender, melt-in-your-mouth texture. The high butter-to-flour ratio makes them incredibly rich and crumbly. The finely chopped nuts add flavor and structure without making them crunchy—they just create tenderness.
The cherry in the center is genius. It provides moisture (preventing them from being too dry), tartness (balancing the buttery richness), and surprise (because who doesn’t love a hidden center?). The cherry also helps keep the cookies soft longer—the moisture migrates into the cookie over time, making them even better the next day.
The powdered sugar coating isn’t just decorative. It adds sweetness exactly where you need it (on the outside) while keeping the cookie itself from being too sweet. Rolling them while still warm helps the first coat adhere, and the second coat after cooling creates that thick, snow-like effect.
The key is not overbaking. These need to stay pale and tender. Any browning means they’ll be too crisp instead of that signature melt-in-your-mouth texture. They finish cooking on the pan after you pull them from the oven.
When to Make These
Christmas Cookie Platters: These are THE Christmas cookie. They look like little snowballs and scream holiday.
Cookie Exchange MVP: Bring these and you’ll be the star. Everyone will ask for the recipe.
Winter Gatherings: Any cold-weather party needs cookies that look like snow. It’s basically required.
Holiday Gifts: Package in festive tins with tissue paper. People will think you’re a professional baker.
Tea Party Cookies: These pair perfectly with tea or coffee. Very sophisticated.
Just Because: Sometimes you need buttery cookies with a surprise cherry center and that’s valid.
Questions People Actually Ask
Q: Can I skip the nuts? A: Yes, but replace them with an equal amount of flour. The cookies will be slightly less tender but still delicious.
Q: My cookies spread too much. What happened? A: Your butter was too soft, or you didn’t chill the dough long enough. Make sure to refrigerate the dough for at least 30 minutes.
Q: The cherry leaked out during baking. Help! A: You didn’t seal the dough completely around the cherry, or the cherry was too wet. Make sure cherries are DRY and the dough completely covers them.
Q: Can I use margarine instead of butter? A: Please don’t. Butter is crucial for that tender, melt-in-your-mouth texture. Margarine will make them greasy and weird.
Q: The powdered sugar coating disappeared. Where did it go? A: The cookies absorbed it over time (moisture does this). Just roll them in fresh powdered sugar before serving.
Q: Can I make these nut-free for allergies? A: Yes! Replace the nuts with an equal amount of flour, or use coconut flour for a similar texture. They’ll be slightly different but still great.
Q: Why are they called snowballs if they have cherries inside? A: It’s a surprise snowball! The classic version has no filling, but this cherry version is a delicious upgrade.
Print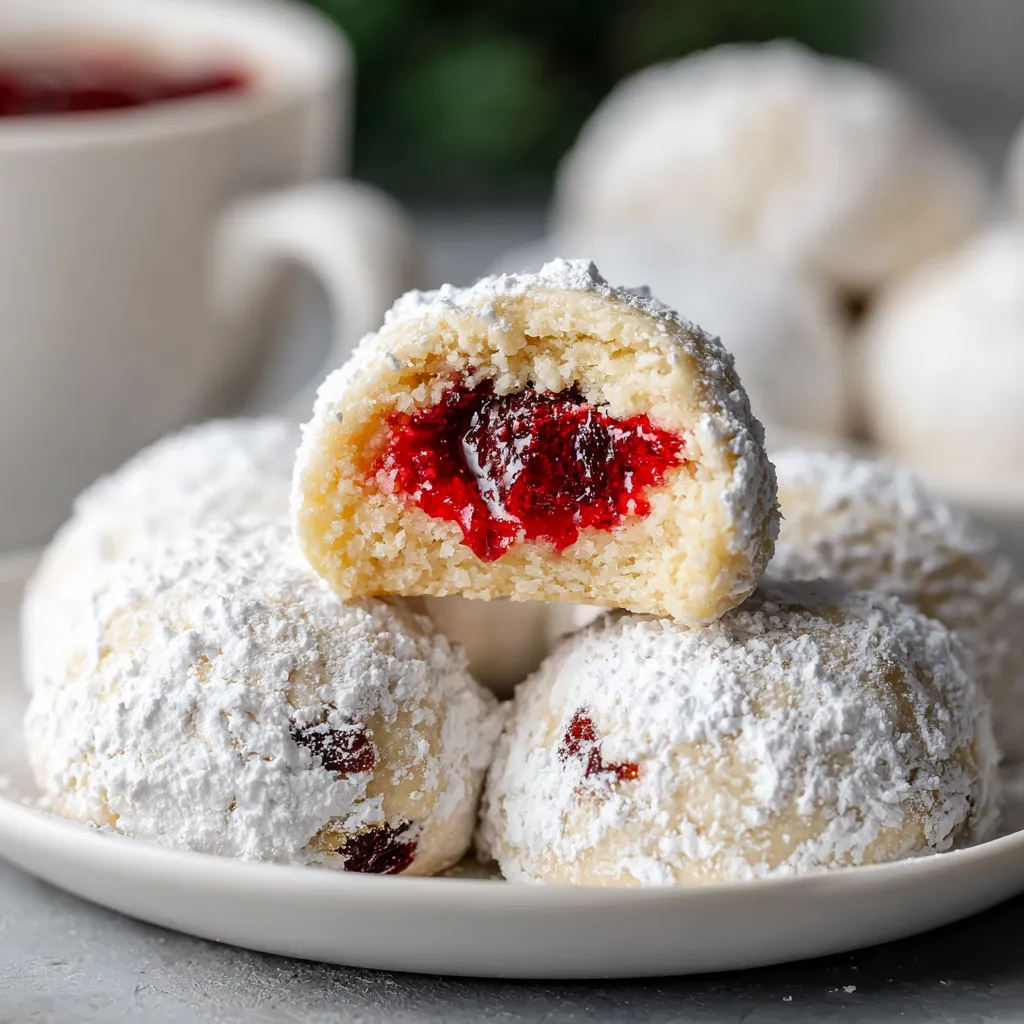
Cherry Snowball Cookies
- Total Time: 45 minutes
- Yield: 24–30 cookies 1x
Description
Okay, so imagine if a Russian Tea Cake, a thumbprint cookie, and a winter wonderland had a three-way and produced the most adorable, melt-in-your-mouth offspring imaginable. That’s what we’re dealing with here. Cherry Snowball Cookies are basically buttery, nutty shortbread balls stuffed with a jammy cherry center, then rolled in a blizzard of powdered sugar until they look like actual snowballs. They’re tender, crumbly, not-too-sweet, with that surprise burst of tart cherry in the middle that makes you go “oh THAT’S why these are special.” I made these for a holiday cookie exchange once and people literally gasped when they bit into them and found the cherry center. Someone called them “the cookies that lied to me in the best way.” Another person ate seven and said they had no regrets. These cookies create feelings.
Ingredients
For the Cookies:
- 1 cup (2 sticks) unsalted butter, softened (don’t even think about using cold butter)
- 1/2 cup powdered sugar, plus 1-2 cups more for rolling
- 1 tsp vanilla extract
- 1/4 tsp almond extract (optional but highly recommended)
- 2 cups all-purpose flour
- 1/4 tsp salt
- 1 cup finely chopped pecans or walnuts (or almond flour if you want them extra tender)
For the Filling:
- 24–30 maraschino cherries, well-drained and patted dry
- OR cherry preserves/jam (about 1/2 cup)
- OR dried cherries that have been soaked in hot water and chopped
For Rolling:
- 2 cups powdered sugar (at minimum—you might need more)
Instructions
Step 1: Prep Your Cherries
If using maraschino cherries, drain them and pat EXTREMELY dry with paper towels. Wet cherries = sad, spreading cookies.
Let them sit on paper towels while you make the dough. They need to be as dry as possible.
If using cherry preserves, have a small spoon ready for filling.
If using dried cherries, soak them in hot water for 10 minutes, drain well, pat dry, and chop finely.
Step 2: Make the Cookie Dough
In a large bowl (or stand mixer), beat softened butter on medium-high speed for 2-3 minutes until light and fluffy. This is important—don’t rush it.
Add 1/2 cup powdered sugar and beat for another 2-3 minutes until pale and creamy. It should almost double in volume.
Mix in vanilla and almond extract if using.
In a separate bowl, whisk together flour, salt, and chopped nuts.
Add the flour mixture to the butter mixture and mix on low speed until just combined. The dough will be soft and slightly crumbly but should hold together when pressed.
If the dough is too crumbly, add 1-2 tablespoons of milk. If it’s too sticky, add a bit more flour.
Cover and refrigerate for at least 30 minutes. This makes the dough easier to work with.
Step 3: Stuff and Shape
Preheat oven to 350°F (175°C). Line two baking sheets with parchment paper.
Scoop about 1 tablespoon of dough and flatten it in your palm.
Place a dried cherry in the center (or a small spoonful of preserves, or a whole maraschino cherry).
Wrap the dough around the filling completely, making sure it’s fully sealed with no gaps. Roll it into a smooth ball.
Place on prepared baking sheet about 2 inches apart. They don’t spread much.
Repeat with remaining dough and cherries.
Step 4: Bake to Perfection
Bake for 12-15 minutes. The cookies should be SET but NOT browned. They should still look pale—that’s correct.
The bottoms might be lightly golden, but the tops should stay light colored.
Let them cool on the baking sheet for 5 minutes. They’re very delicate right out of the oven.
Step 5: The Powdered Sugar Blizzard
While cookies are still warm (but not hot), roll them in powdered sugar. Put about 1/2 cup of powdered sugar in a bowl and roll each cookie until completely coated.
Place on a wire rack to cool completely.
Once cooled, roll them in powdered sugar AGAIN. This second coat is what creates that thick, snowball effect.
You can even do a third roll if you want maximum snow coverage. More is more.
Step 6: Store and Serve
Store in an airtight container for up to a week (they actually get better after a day or two).
Right before serving, you can give them one more dusting of powdered sugar for freshness.
Serve on a platter and watch people’s faces when they discover the cherry surprise inside.
Notes
These are perfect on their own, but here are some ideas:
- Arrange on a platter with other holiday cookies for a cookie exchange
- Serve with hot cocoa or coffee for dunking
- Package in decorative tins for holiday gifts
- Pair with vanilla ice cream for a fancy dessert
- Serve alongside other Christmas cookies like gingerbread and sugar cookies
- Dust with extra powdered sugar right before serving for that fresh-snow effect
- Prep Time: 30 minutes
- Cook Time: 15 minutes
Nutrition
- Calories: ~125 kcal
- Fat: ~8g
- Carbohydrates: ~12g
- Protein: ~2g


